Tutorials, Wood Working
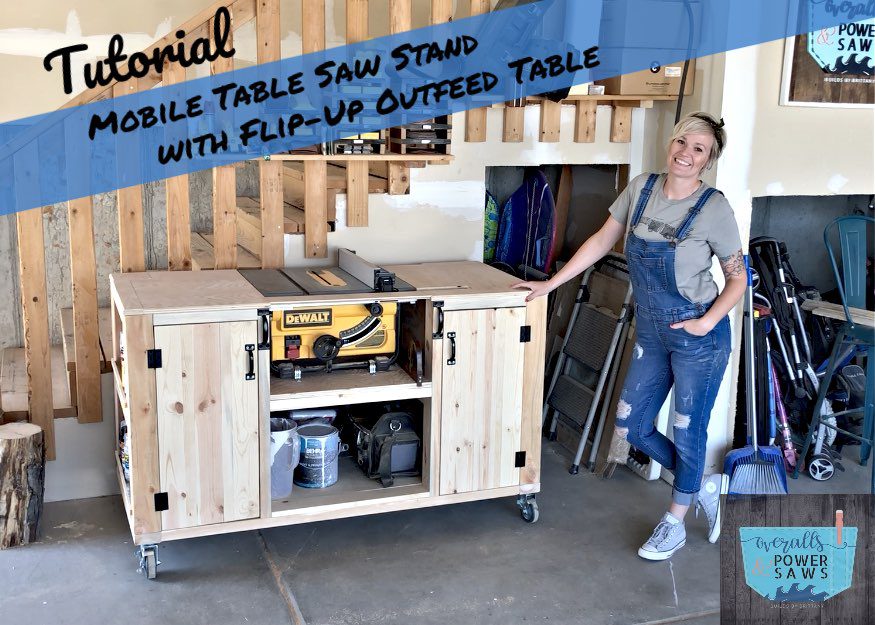
Table Saw Stand

with flip-up out feed table!
Hey guys! HAPPY Wednesdaaayyyy!
You’re probably reading this on a Monday,
or Thursday, or Saturday.
But, for me, right now, this day is Wednesday.
and it is a HAPPY one indeed!
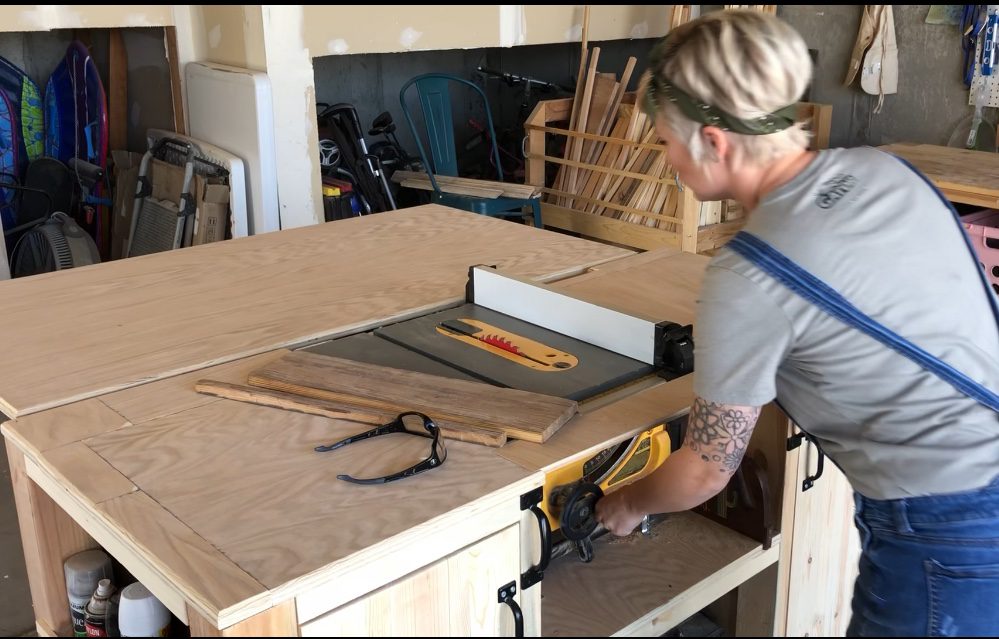
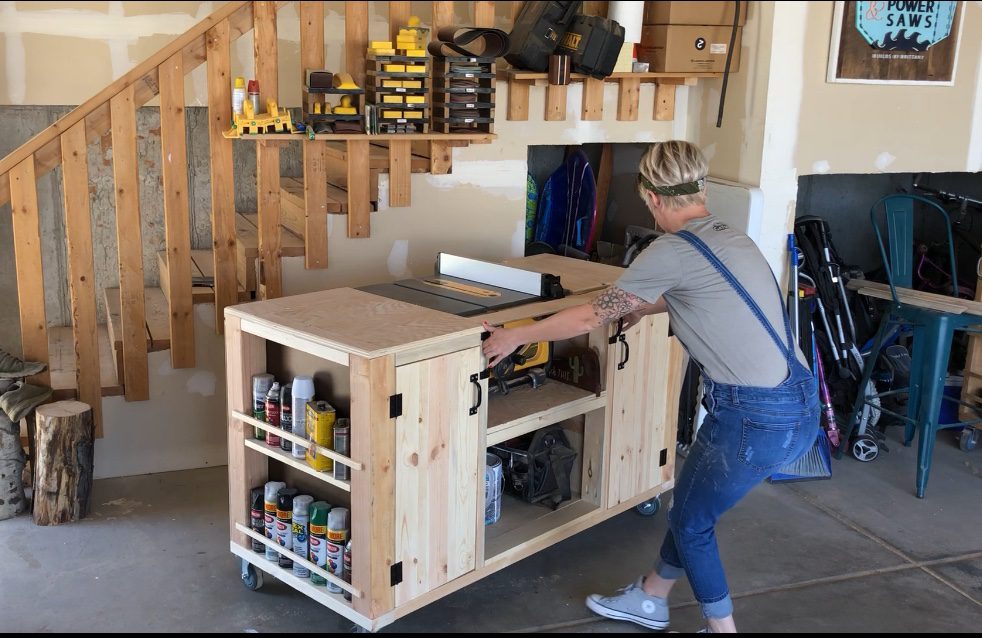
I have finally completed my DeWalt job site table saw stand
with flip-up out feed table and get this – the whole thing is on casters so I can wheel it away when I don’t need it!!
There’s a couple reasons I’m super happy
about this build.
One – for 7 months I used this table saw on the
floor of my garage. The FLOOR. On my knees.
Making cuts. Not only is that unsafe
but totally bad for my back!
Two – I used 70% scrap wood for this project.
You’ll notice as the tutorial goes on that there are
several parts that are “quilted” together.
Mostly with Gorilla glue and Starbond Adhesive.
A few parts are brad nailed.
But I love every single bit of it.
My good friend Lia even deemed
the stand Frankenstein (or Frank 😉 )
because of all of its carefully
crafted bits “sewn” together.
(BTW.. check out Lia on insta.
She’s a boss. @parkerplacewoodwork)
Now, before we go diving into the tutorial, here are a few disclaimers.
My table saw is a DeWalt 7480. This stand was built
specifically for this saw. However, that doesn’t mean
that you can’t change it up a bit to fit your brand.
Secondly, I am a short girl. I’m 5’4 at best
(5’3 and 3/4 if I’m being honest)
and I built this stand to be comfortable at
my height. So if you are a guy, or a tall girl, you will
want to adjust the height of the stand
to fit your level of comfort.
YAY! Now that all that’s out of the way, let’s get started!!
I did mention that most of this was scrap wood,
however, for your sake I have gone through and
totaled up all of the wood needed if you were to buy
all of the wood brand new. The materials list and cut list
won’t necessarily match the pictures you are seeing.
But I will go into detail as much as I can to make
it as simple as possible!
Enjoy!
Table Saw Stand
with flip-up out feed table
Dimensions: 37″ tall x 60″ long x 27″ wide
Materials:
- 4x4x10 – 1
- 2x4x8 – 6
- 1x4x6 – 6
- 1x6x8 – 2
- 1x8x8 – 3
- 2x2x8 – 1
- 3/4 birch plywood – 4×8 sheet
- 3/4″ plywood – 4×4 sheet
- 1/2 plywood – 4×8 sheet
- 1/4″ plywood – 4×8 sheet (or if it’s cheaper you can get a 4×4 sheet and a 2×4 sheet)
- 1/8″ hardboard (optional)
- drawer slides – 6
- door handles – 4
- 2″ hinges – 4
- 12″ hinge – 2
- 6″ gate hinges – 2
- 4″ casters – 2
- 4″ locking casters – 2
- magnetic door closures
- 1 1/2″ conduit straps
- countersink bits
- 3″ Spax screws
- 2″ Spax screws
- 1 1/4″ Spax screws
- 1/4″ washers
- 3/4″ screws
- 2 1/2″ pocket hole screws
- pocket hole plugs
- jig saw
Cut List:
- 2x4x20″ – 3 (base)
- 2x4x53″ – 2 (base)
- 2x4x27″ – 2 (base)
- 4x4x29 3/4″ – 4
- 2x4x29 3/4″ – 4
- 2x4x13 1/4″ – 4 (cross supports)
- 2x4x23 1/2″ – 2 (cross supports)
- 2x4x20″ – 4 (cross supports)
- 1x4x23 1/2″ – 2 (bottom shelf)
- 1x4x26 3/8″ – 5 (bottom shelf)
- 1x4x26 3/8″ – 1 ripped to 2 1/2″ (bottom shelf)
- 3/4″ plywood – 26 x 27″ (middle shelf)
- 1/2″ plywood – 28 1/8 x 22 1/4″ – 4 (insides)
- 1x4x20″ – 3 (outside shelves)
- Scrap 3/4″ strips x 24″ – 6 (outside shelves)
- 3/4″ birch plywood – 27 x 18 1/2″ (top left)
- 3/4″ birch plywood – 27 x 18 3/4″ (top right)
- 1x6x23 – 4 (5 1/2″ drawer)
- 1x6x9 5/8″ – 4 (5 1/2″ drawer)
- 1x8x23 – 4 ripped to 6″ (6″ drawer)
- 1x8x9 5/8″ – 4 ripped to 6″ (6″ drawer)
- 1x8x23 – 4 ripped to 7″ (7″ drawer)
- 1x8x9 5/8″ – 4 ripped to 7″ (7″ drawer)
- 1/4″ plywood – 23 1/2 x 10 1/8″ – 12 (drawer bottoms)
- 1x4x20″ – 6 (doors)
- 1x4x20″ – 2 ripped to 2 1/2″ (doors)
- 1/2″ plywood – 3″x24″ (front piece)
- 1/2″ plywood – 19 x 19 triangles (outfield supports)
- 3/4″ birch plywood – 55×31″ (out feed table) – that’s how big I made mine but you can make yours whatever size works for you!
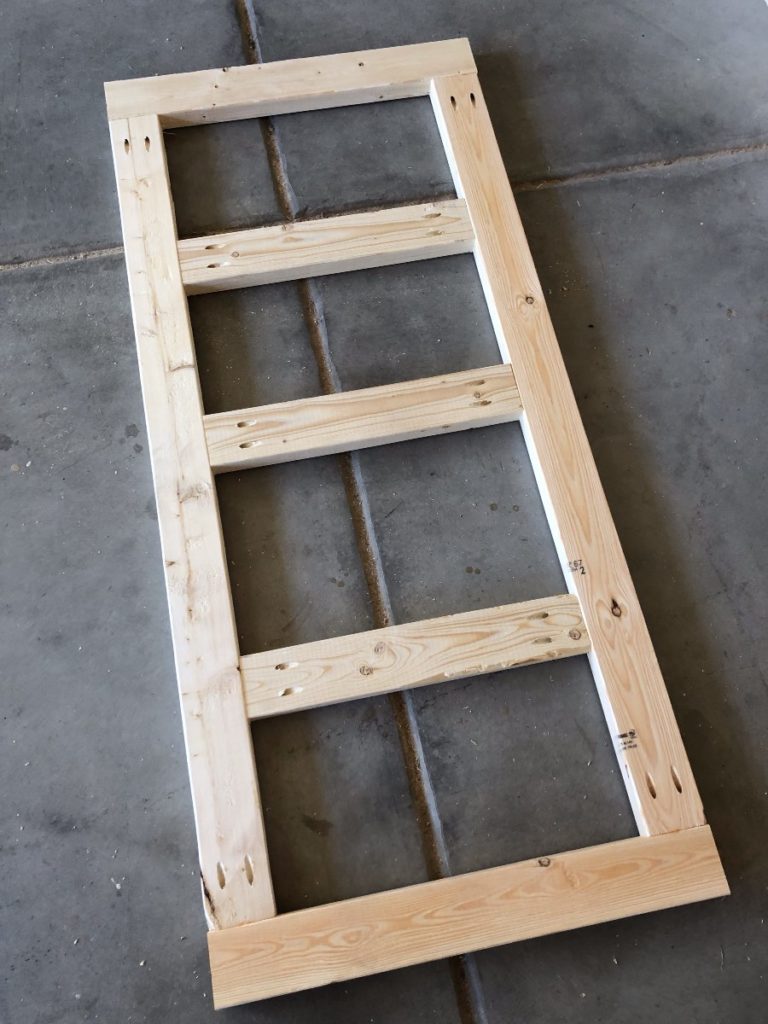
Step 1
We’re starting with the 2×4 base. Cut your BASE pieces. Add pocket holes to the ends of the 53″ pieces, and three of the 20″ pieces. Lay them all out as shown below and attach them with 2 1/2″ pocket hole screws.
Step 2
Cut your 4×4 pieces, spread them out to each corner, and set the base on top of them. Using countersink screws, drill down through the base into the 4×4 posts and attach them together using the 3″ screws.
Step 3
Flip back over and cut your 2x4x29 3/4″ pieces. Add pocket holes to one end of each of the boards and add them at 18 1/4″ from the left and right in the front and back.
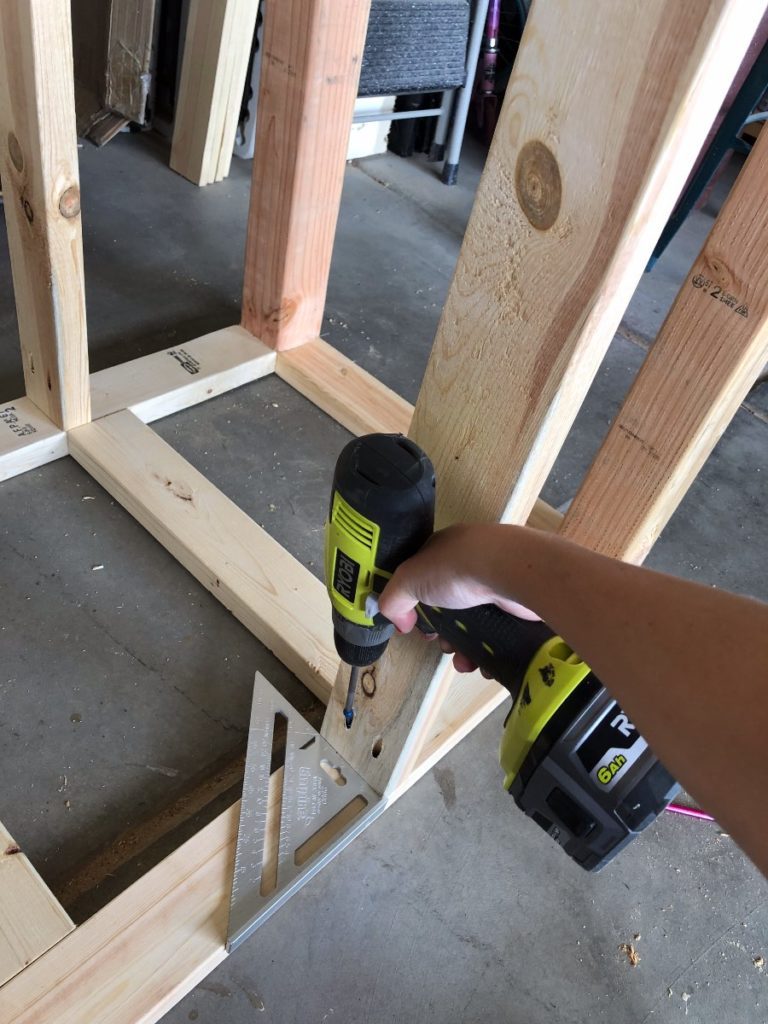
There should be a 23 1/3″ gap between the middle boards.
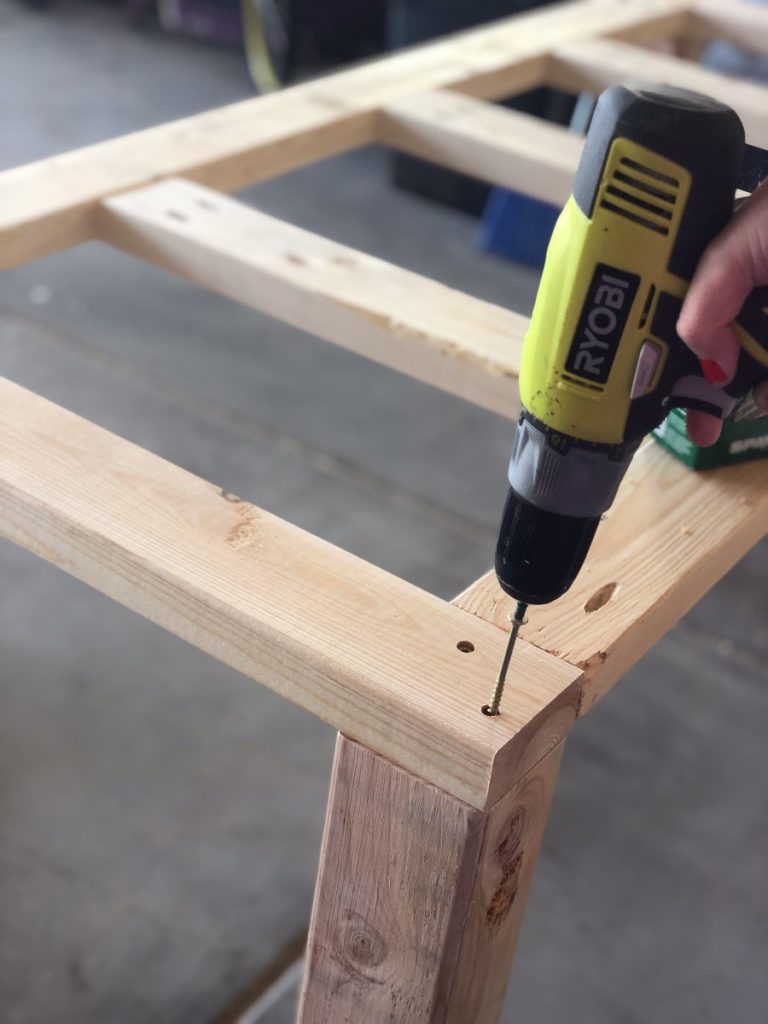
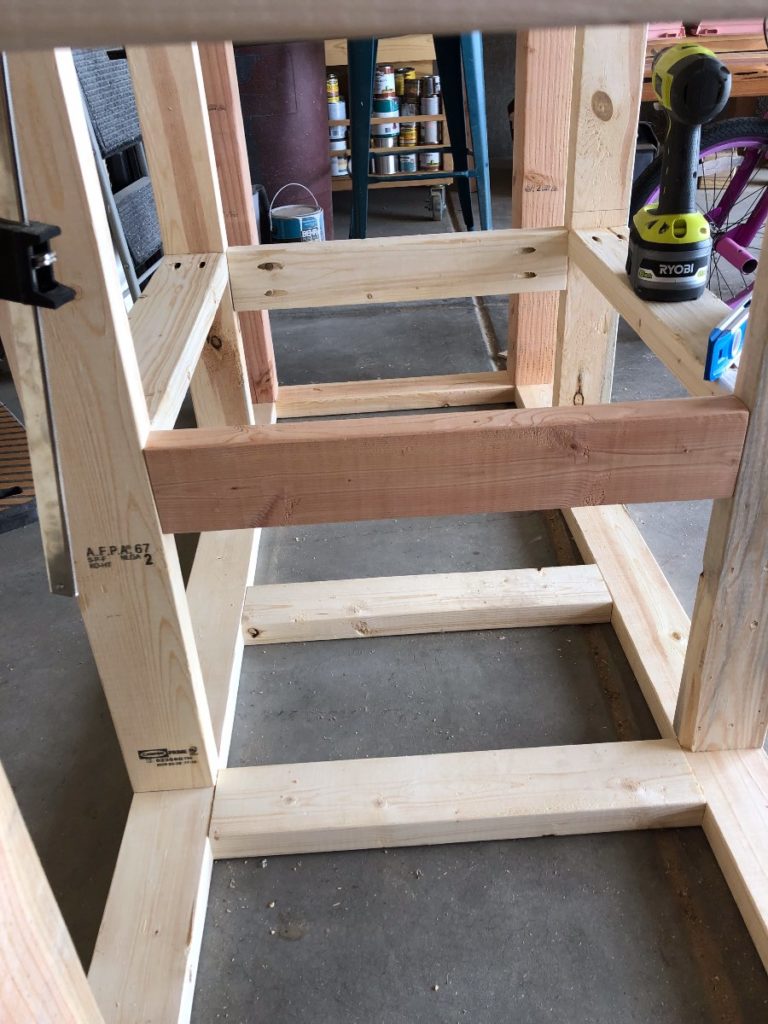
Step 4
Grab all of your CROSS SUPPORT pieces. We’re going to start with the top 4. they are your 13 1/4″ pieces. You will need to Kreg both ends and then attach on all four corners as shown below.
Now we’re moving on to the middle section. Grab your 23 1/2″ pieces. These will sit exactly 12 7/8″ down. The height of my saw is 12 7/8″, and it will sit on 3/4″ ply but there will also be 3/4″ ply at the top.
This confused the heck out of me for a long time. But I promise, just put these at 12 7/8″ and it will all work out nicely.
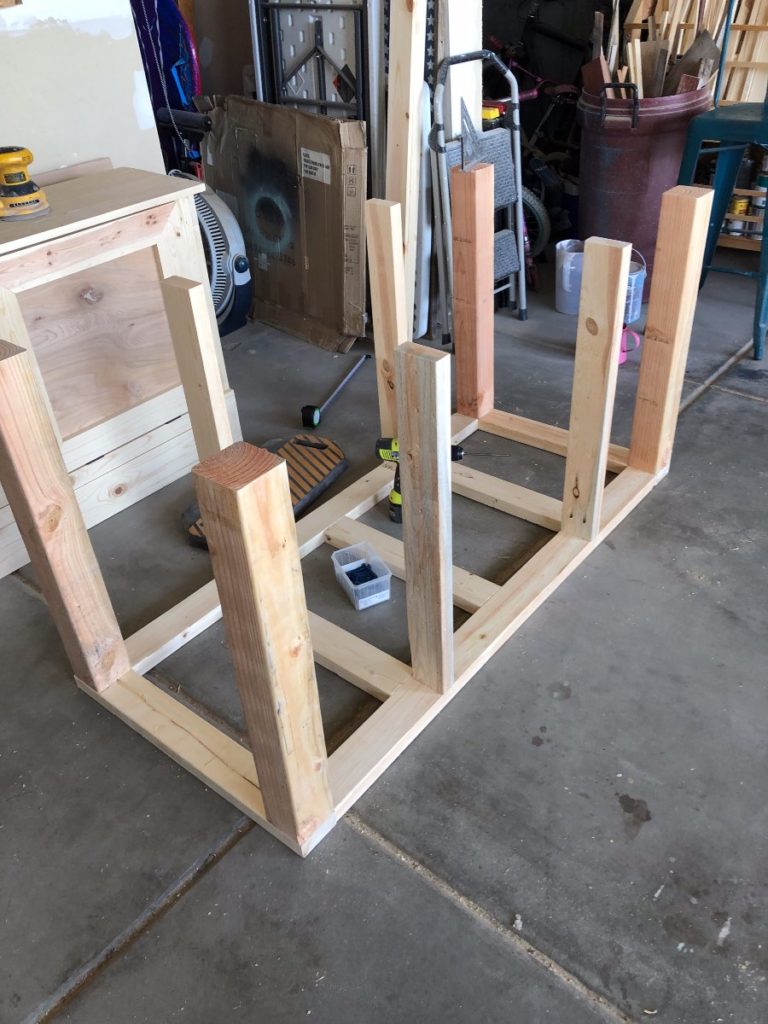
Last cross support pieces are the four 20″ pieces.
The first two will go on the left and right at the top of the stand.
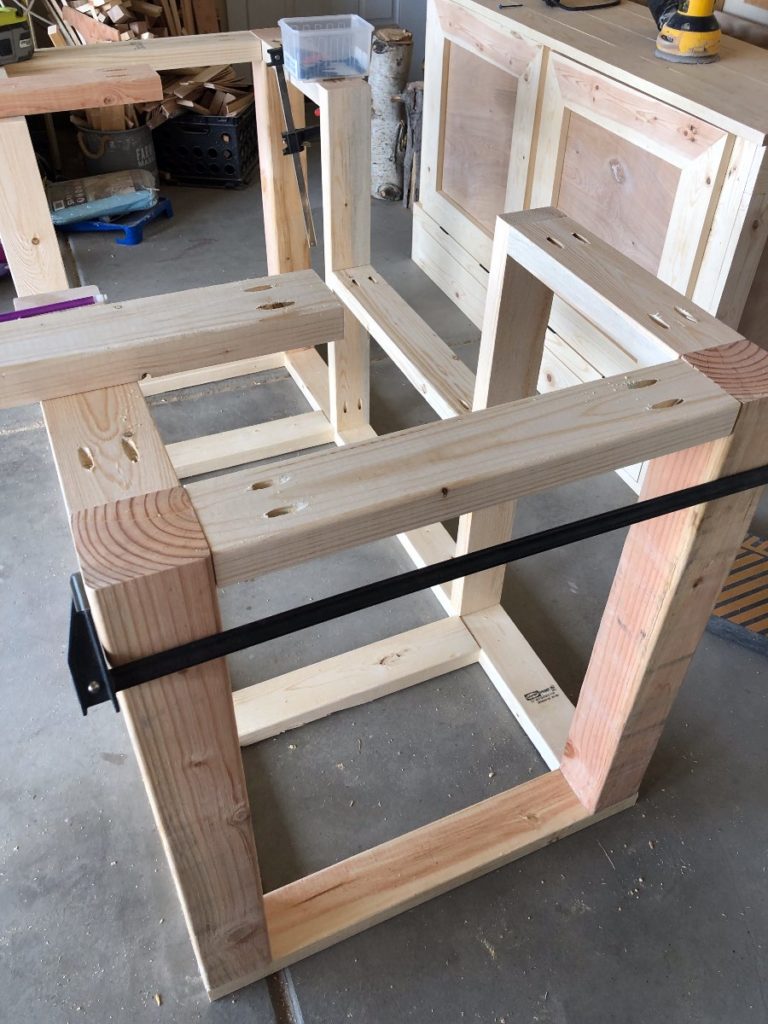
Move to the middle section again and add the second two 20″ pieces to the left and right of your middle shelf.
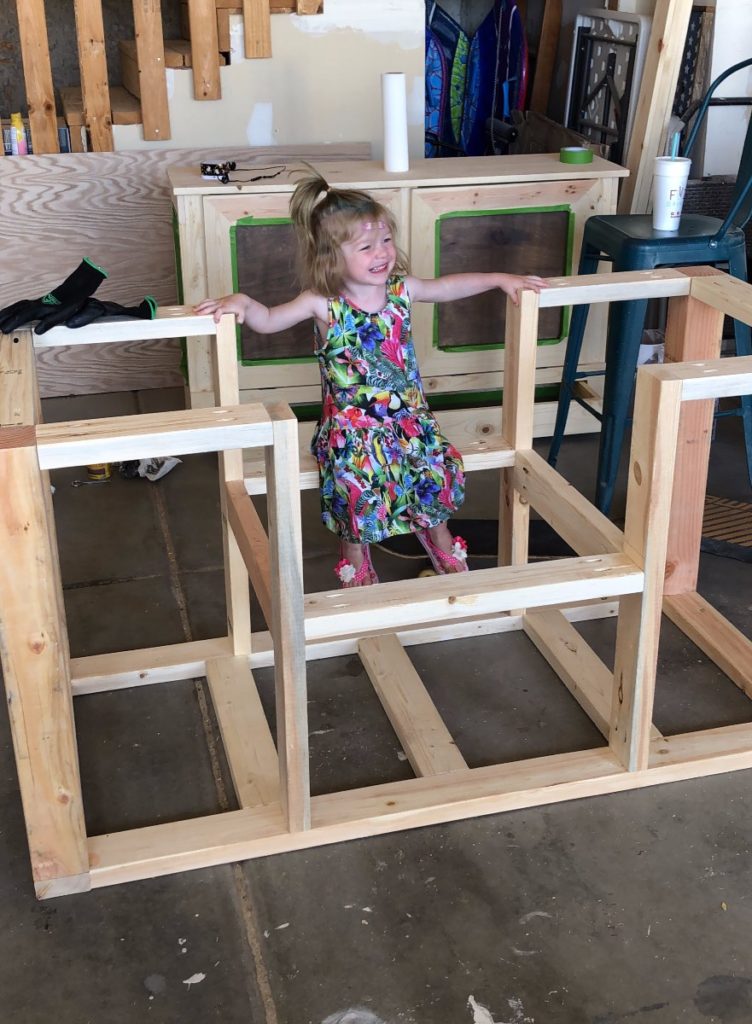
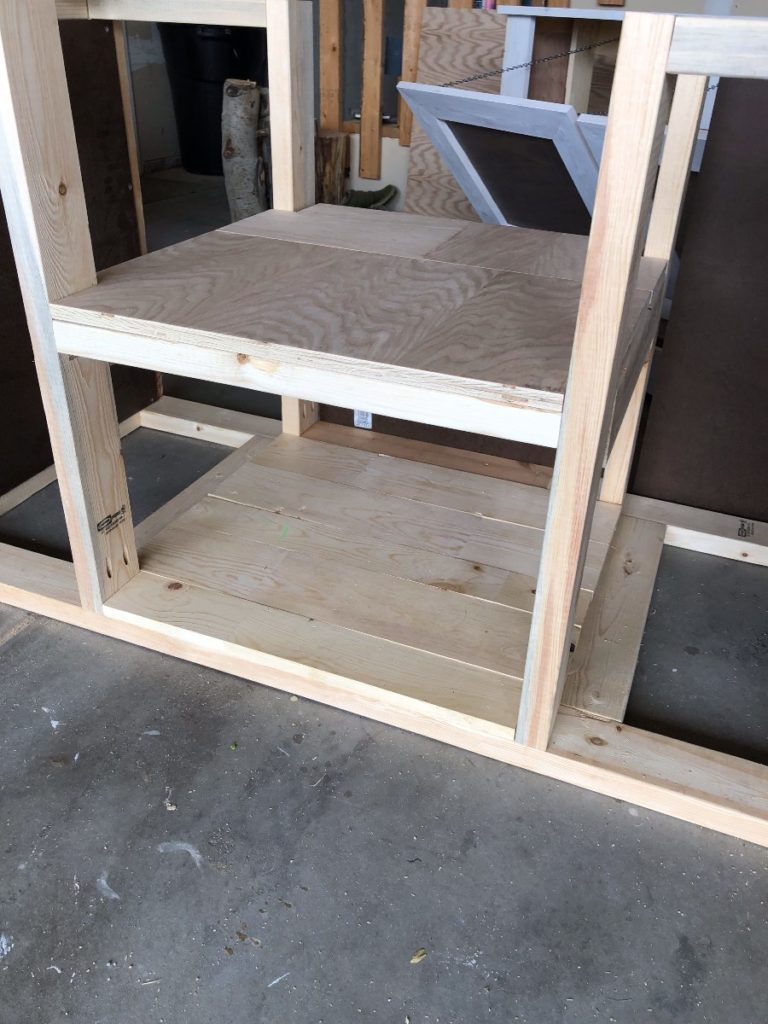
Here’s what your progress should look like so far..
pretty basic.
*adorable child not included
Step 5
Middle shelves!! The above photo is the ONLY new wood I purchased for this build. Everything from here on out is scrap wood. Which I highly recommend! But if you need to buy new wood, make sure you read the steps, not just look at the pictures because the pictures won’t necessarily match exactly what I’m saying.
Let’s start with the bottom shelf. You’re going to cut and pocket hole all of the BOTTOM SHELF pieces together and then lay it into place.
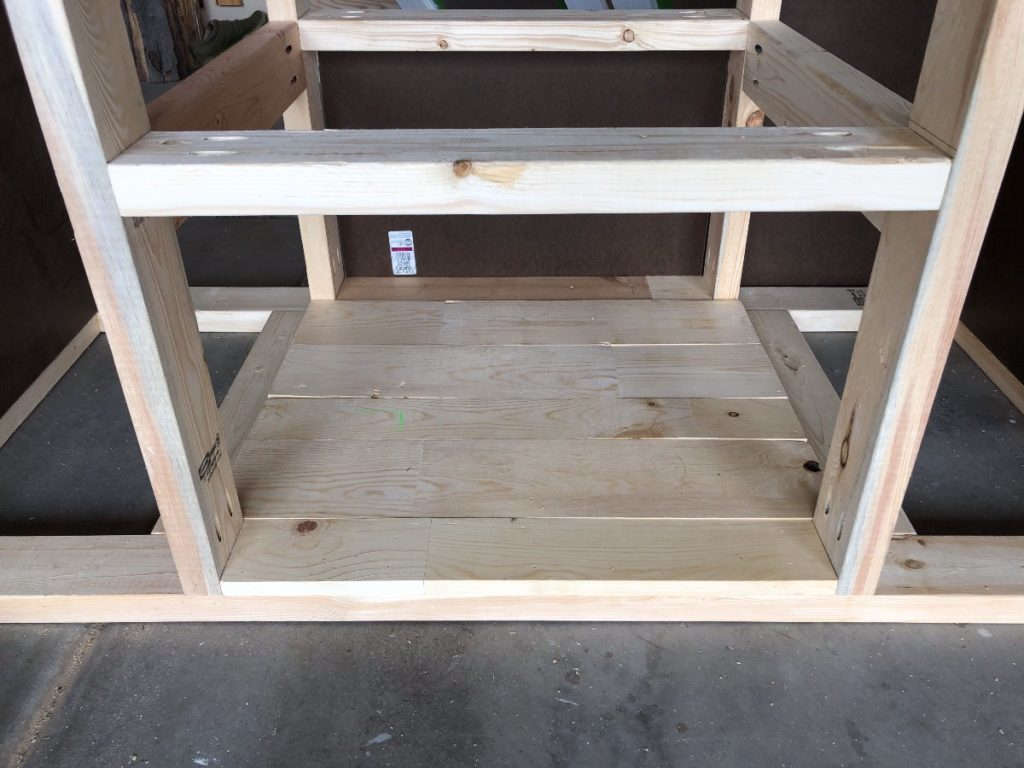
You can see in the back of this picture that I’ve covered that lower section with hardboard. This is optional. If you do decide to do this, wait to do the backs of the left and right sections until the end.
The next shelf is 3/4″ plywood. This is not the birch plywood. You’re going to save that for the top pieces and the out feed table. This can be cheaper plywood since your table saw is just going to sit on it.
This will be your 26 x 27″ piece. 26 is your width. 27 is front to back. You’re going to cut 1 1/2″ x 3 1/3″ grooves out of each corner so that it can sit into the shelf, like the picture below.
I pieced mine together with a few different pieces of 3/4 ply so its not one solid piece like yours will be.
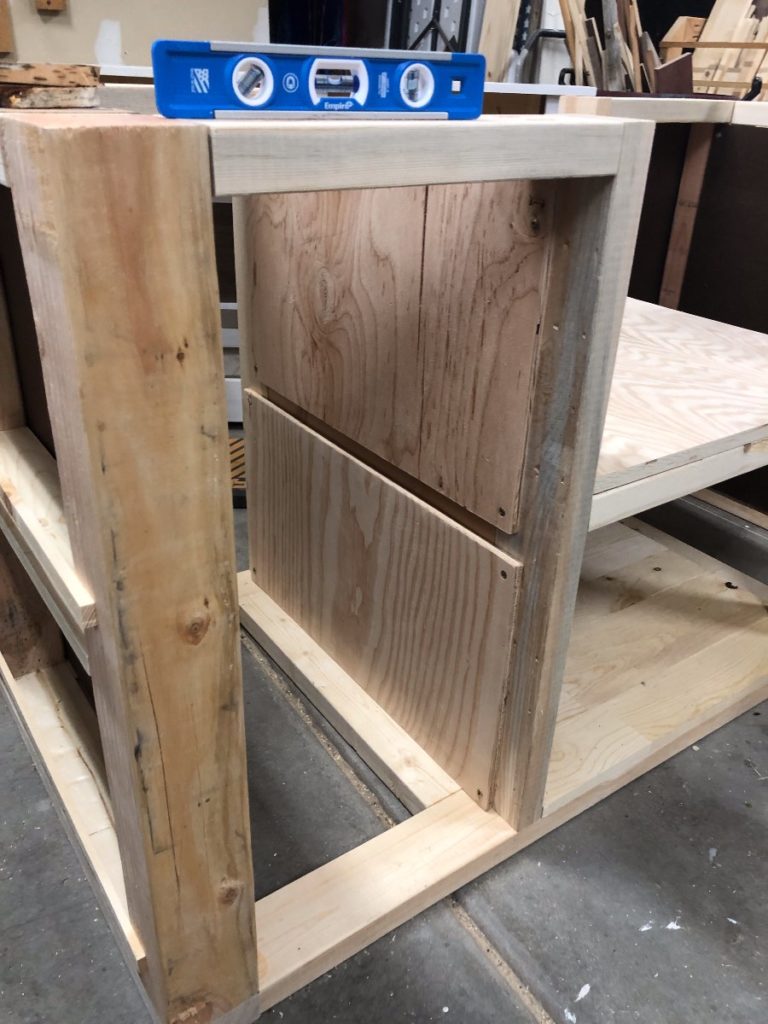
Step 6
The next step is covered the insides with 1/2″ ply. I didn’t have enough so I used the hardboard to cover the sides and then used strips of 1/2″ ply to attach the drawers to. However, yours will just be solid plywood on all sides.
This will be the four 28 1/8 x 22 1/4 INSIDES pieces.

Using 1 1/4″ screws, attach the plywood to the
insides of the drawer sections.
Step 7
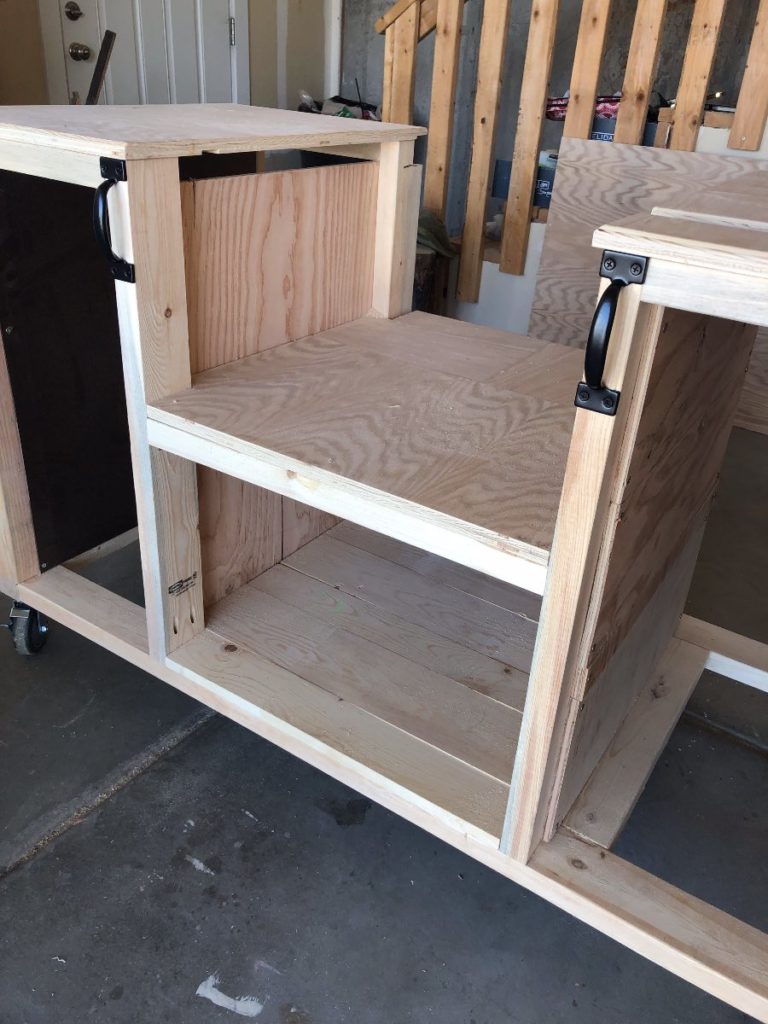
Outside Shelves! This is exciting because these shelves are the whole reason I used 4×4’s as the posts to this build – I wanted stain and spray paint shelves on either side for extra storage!!
There are three 20″ pieces with pocket holes on either end to make one shelf on the left side, and two shelves on the right side.
I also used 3/4″ strips that were 24″ long to keep the cans in place.
Use 1″ brad nails to attach them.
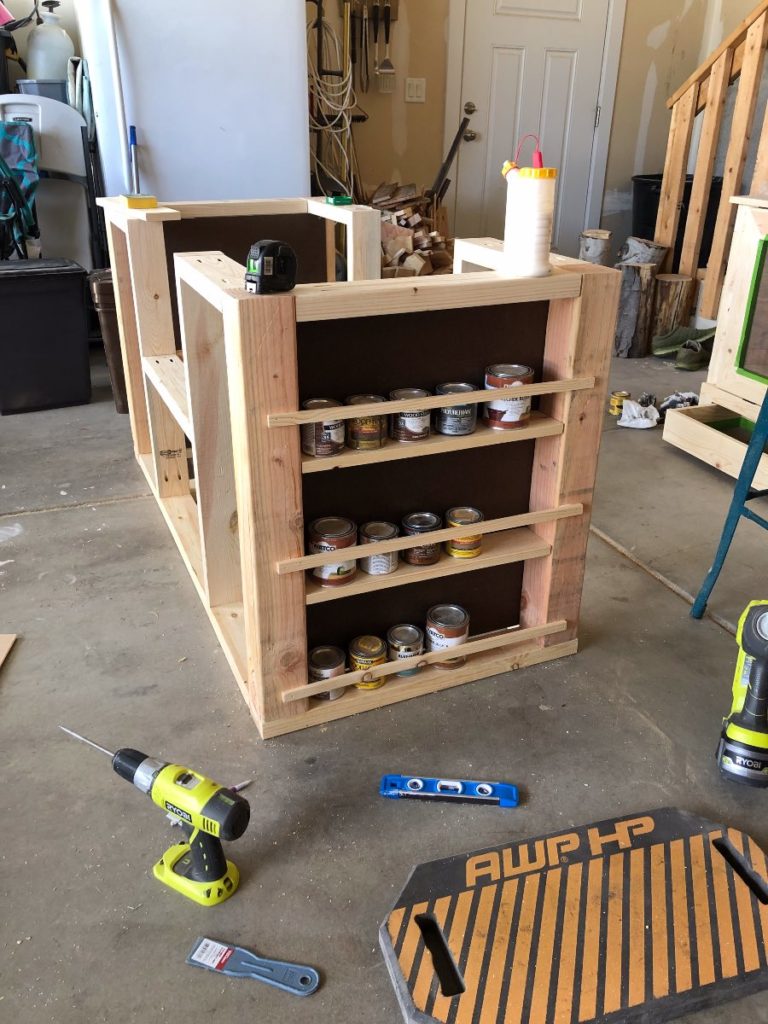
This is the right side. I centered the
shelf on the left side so I could fit spray paint cans.
Step 8
At this point I went ahead and moved the saw into place
so I could work on the placement of the grooves for the fence.
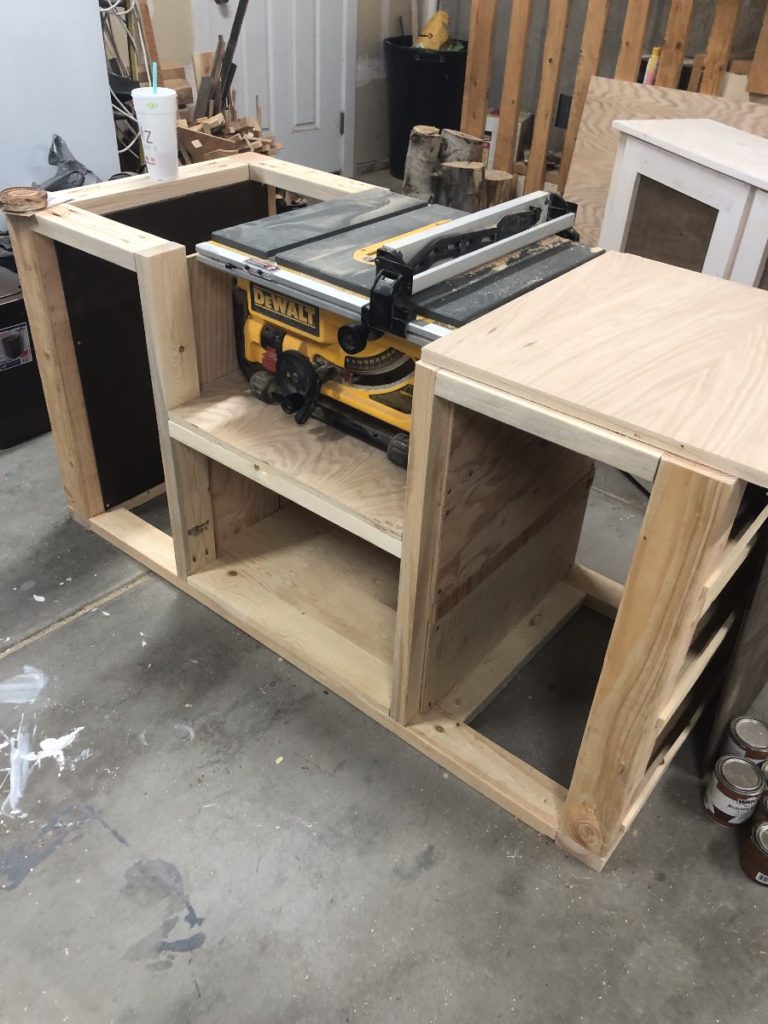
This is where things got a smidge tricky for me.
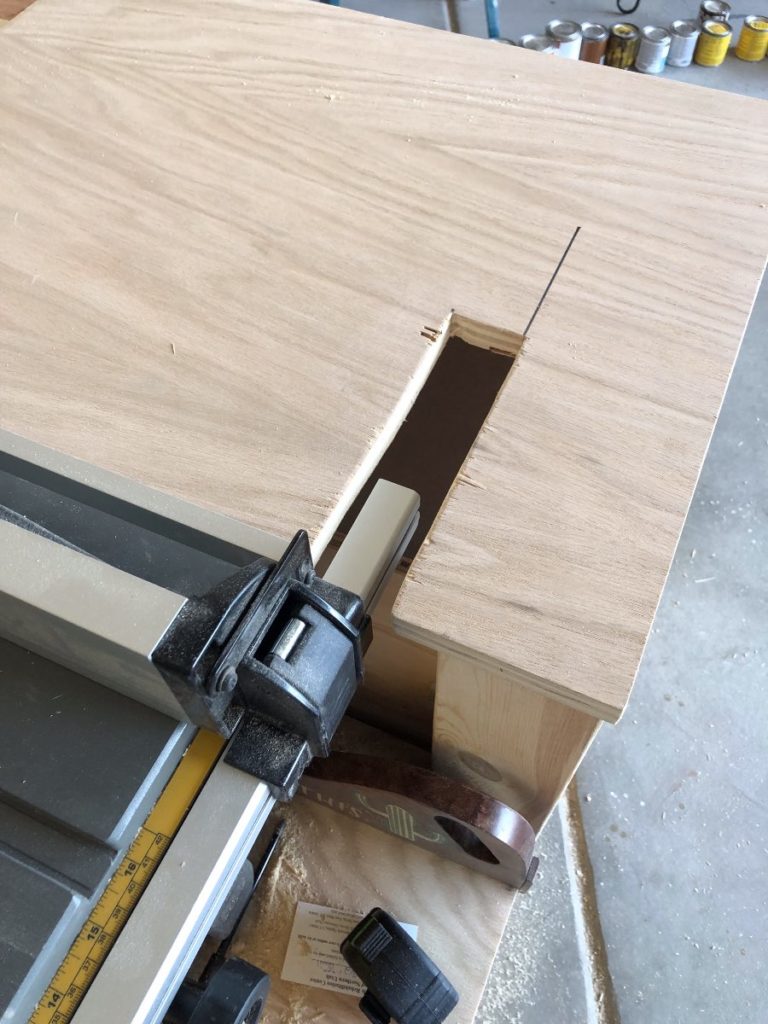
And you’re going to want to grab your jigsaw!!
I pushed my saw back to sit flush against the back of the stand
and once I did that I realized that the 2×4’s in the back would be
in the way of my fence. So what I did is I took my jigsaw, and cut
just enough of it out to where my fence would clear it.
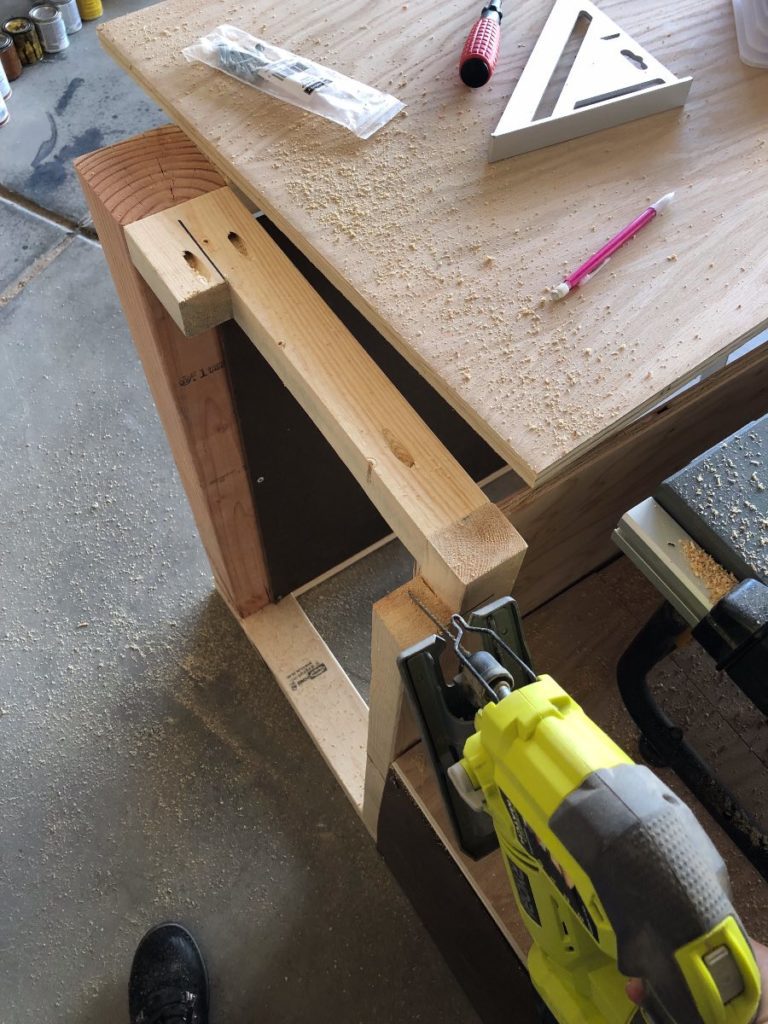
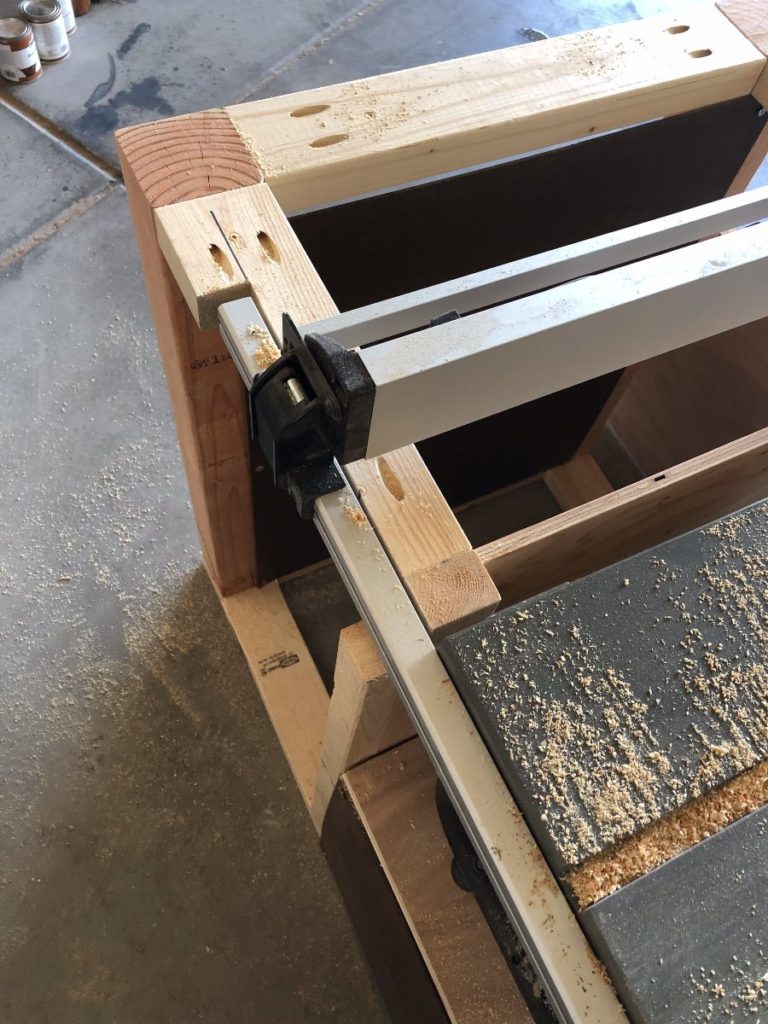
See? Now it fits nicely 😀
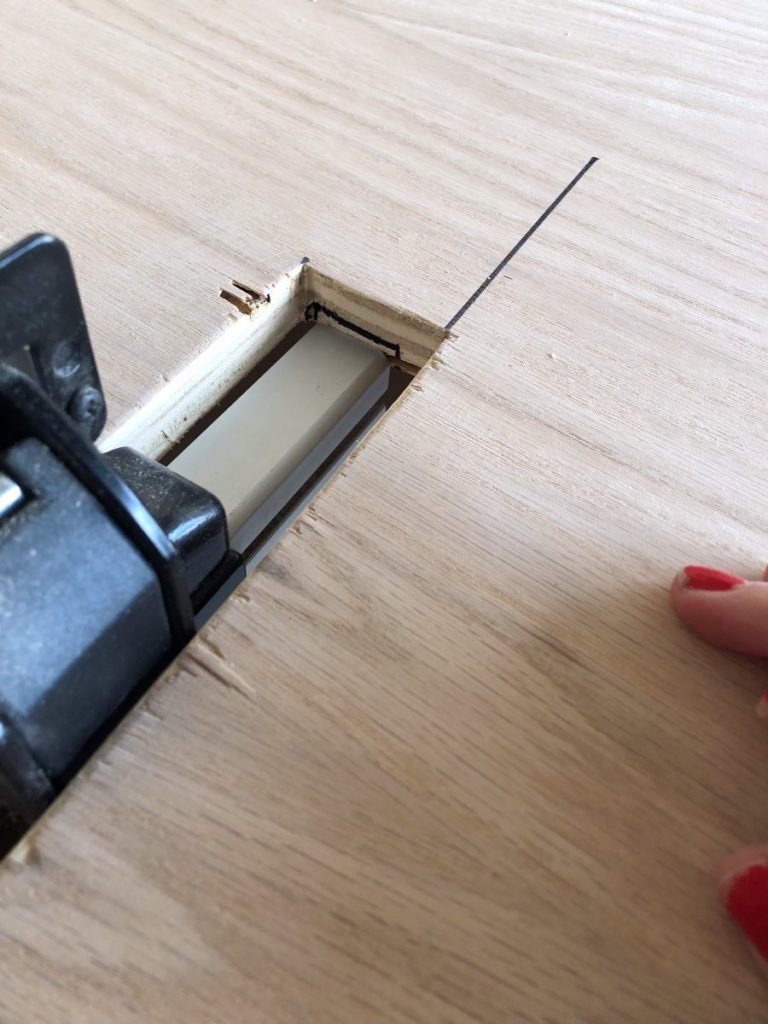
Then you’re going to need to do the same thing on the other side.
Since the fence doesn’t go as far the other direction you won’t
have to cut as much out.
Step 9
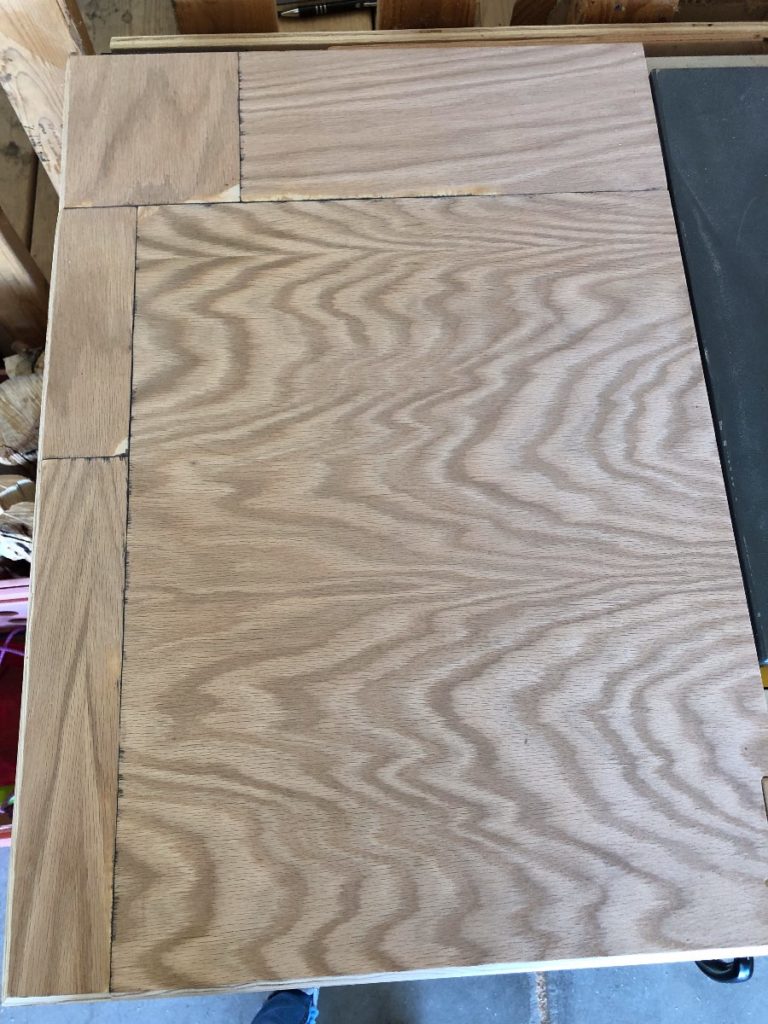
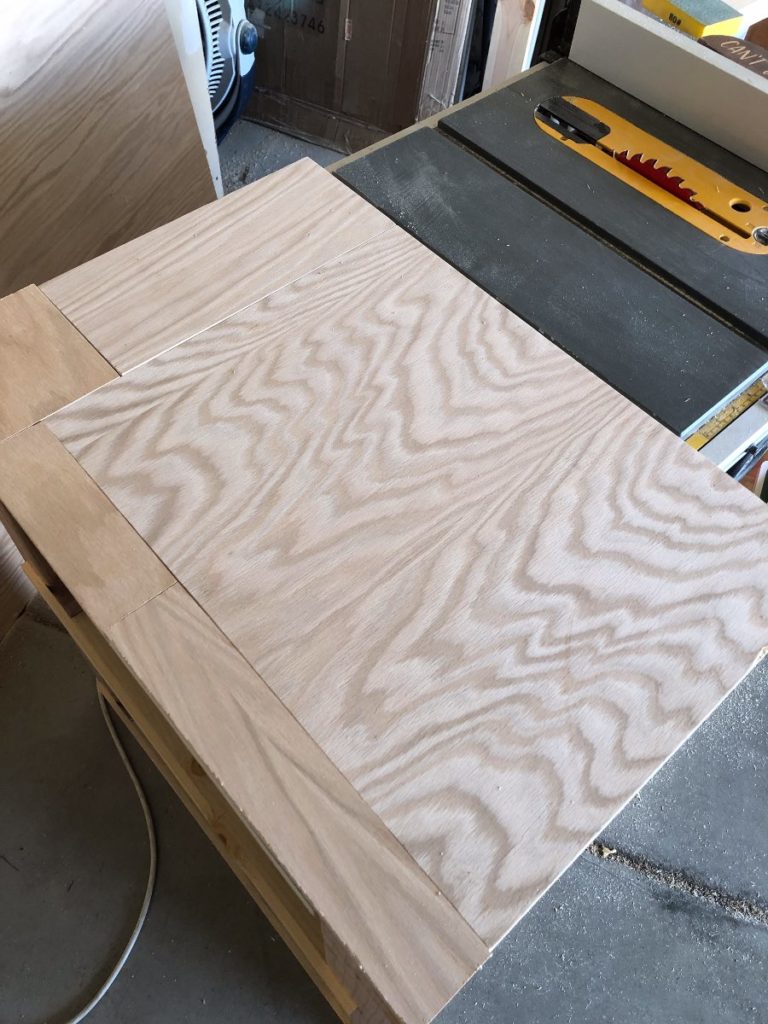
Ok, once you’ve got those cut, we can move on to the tops!
When looking at the front of the stand, the left side of the stand
will have the 27 x 18 1/2″ piece.
The right side will be the 17 x 18 3/4″ piece.
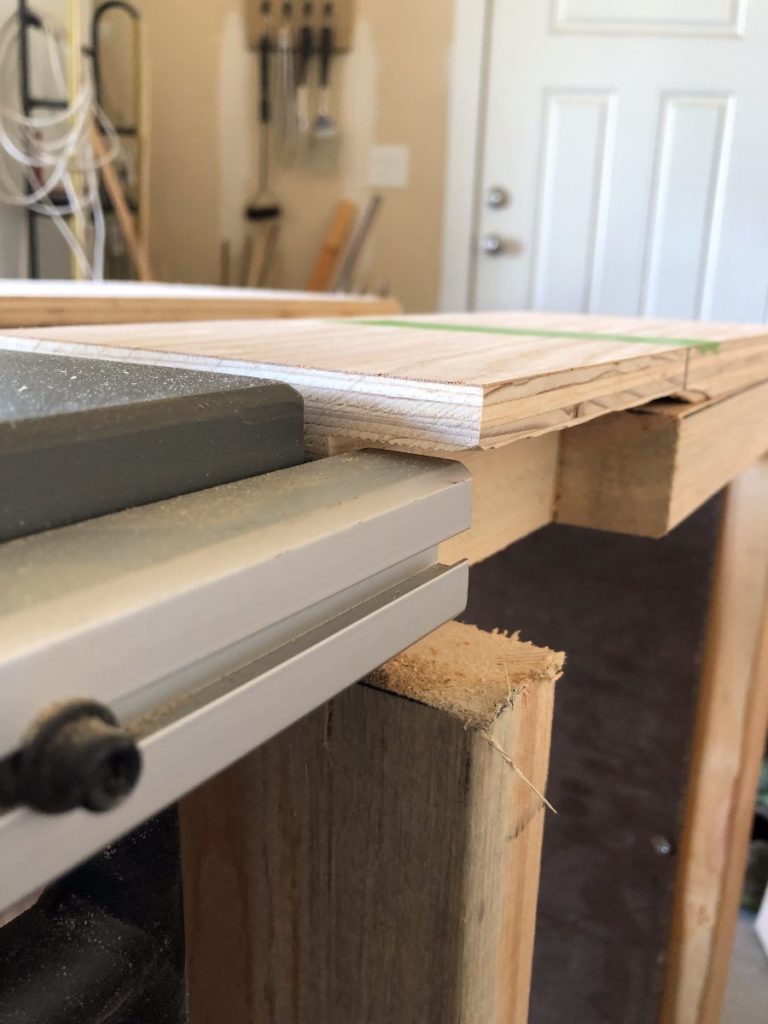
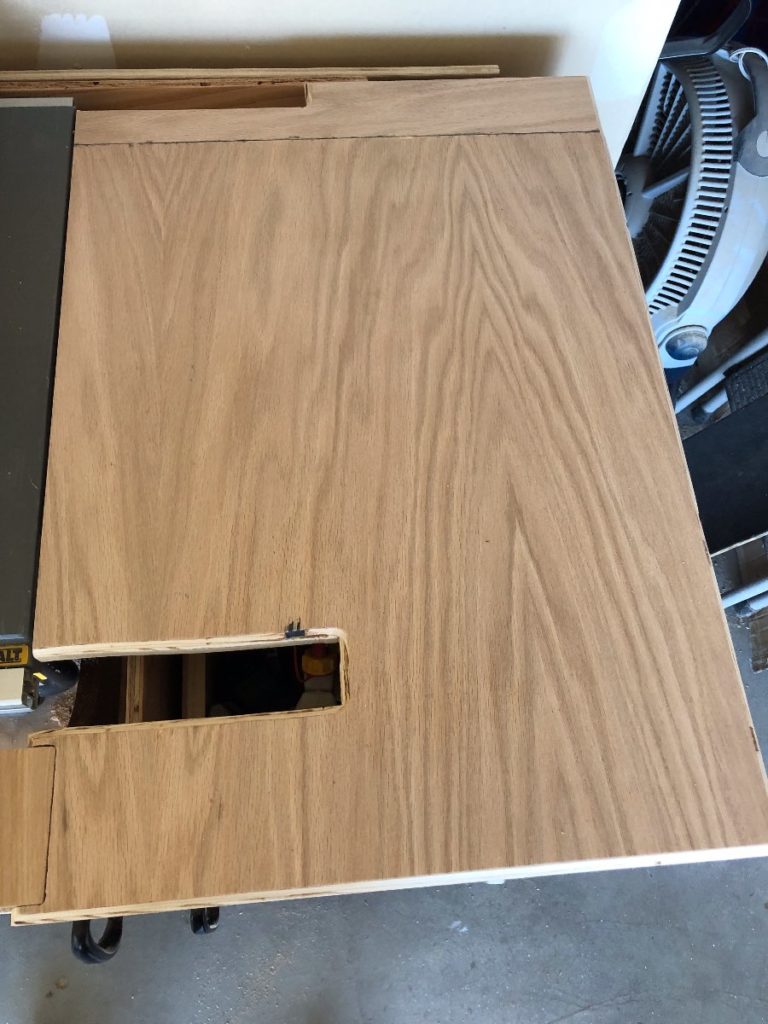
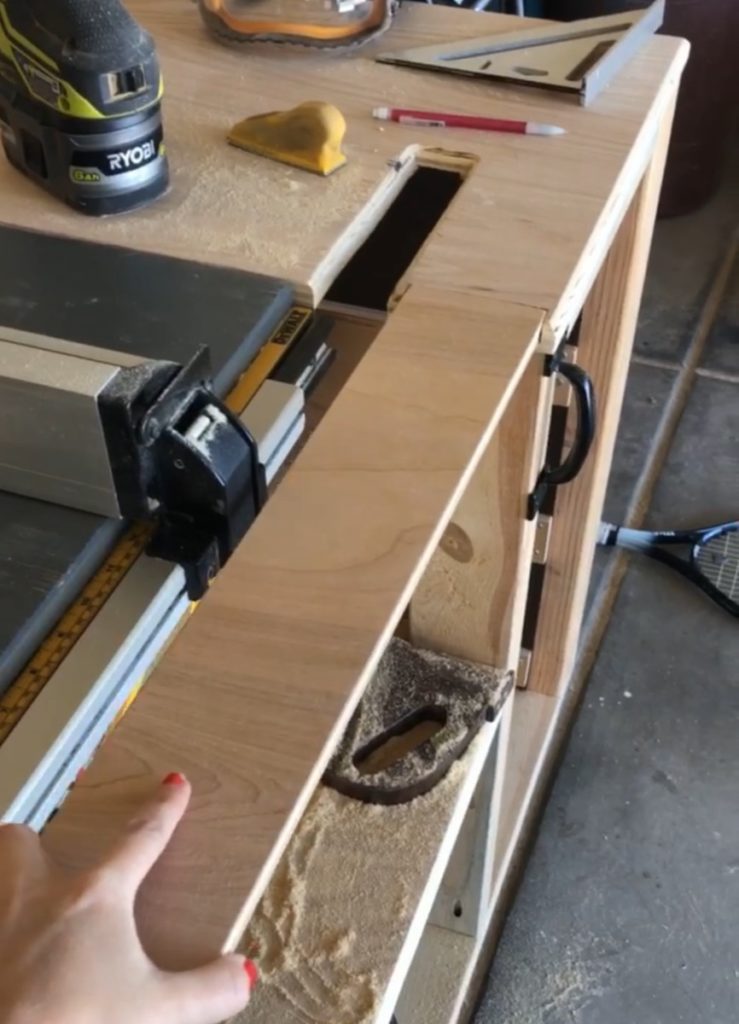
You’re going to need to groove out the underside of the left
top for the fence as well.
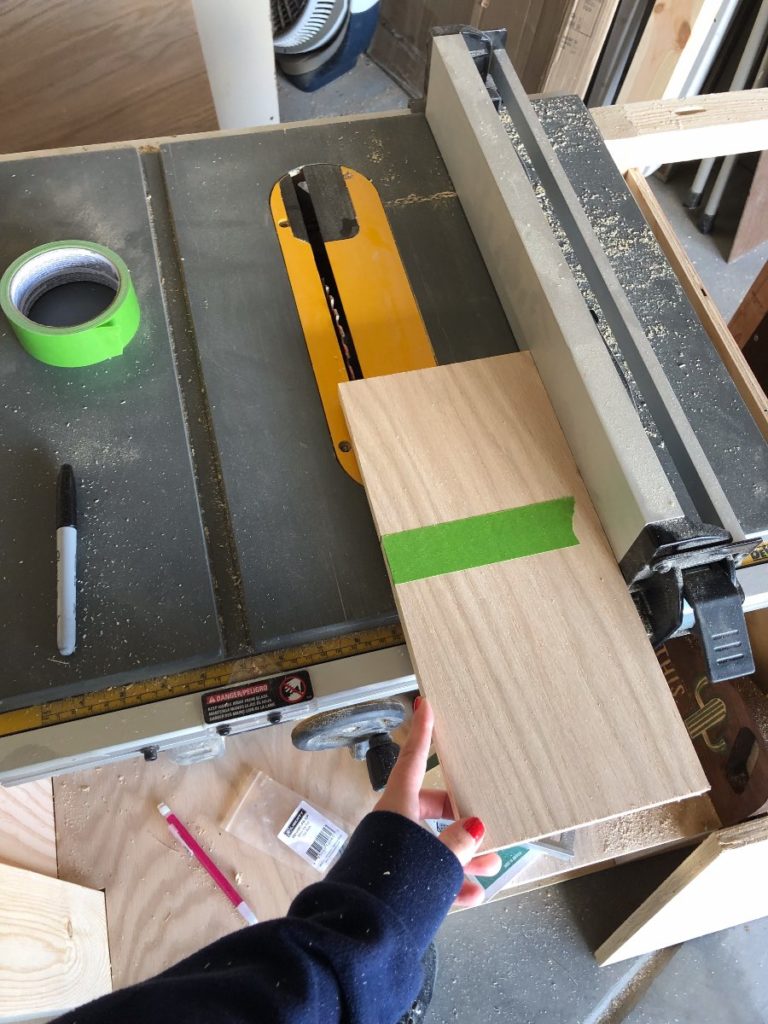
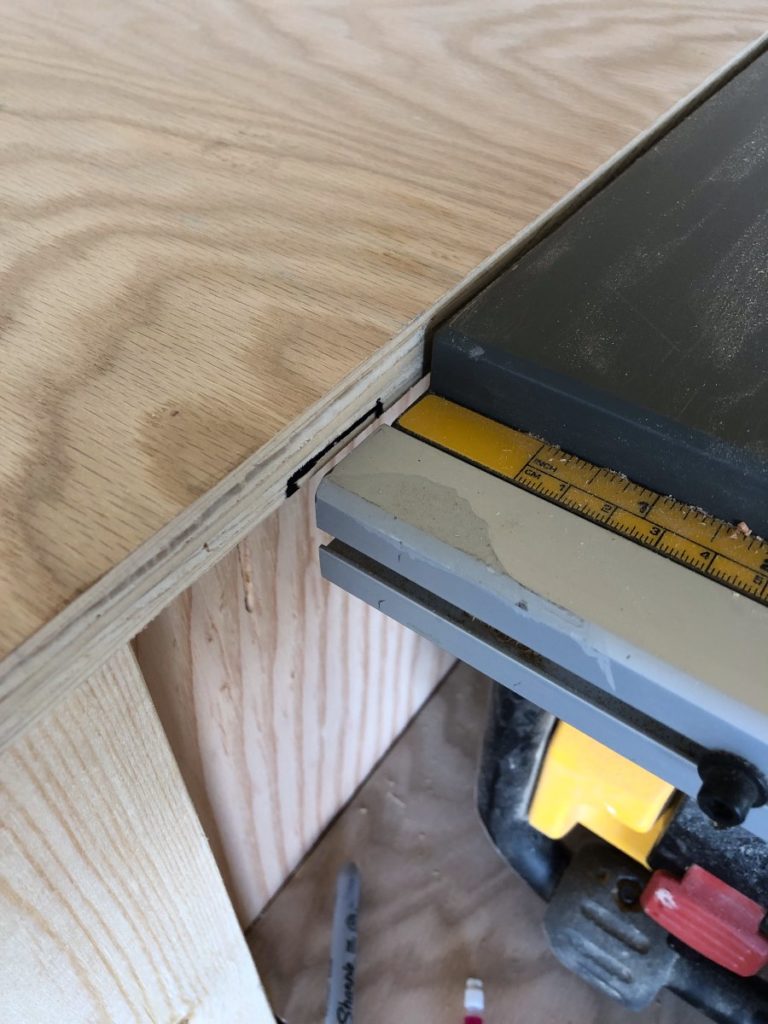
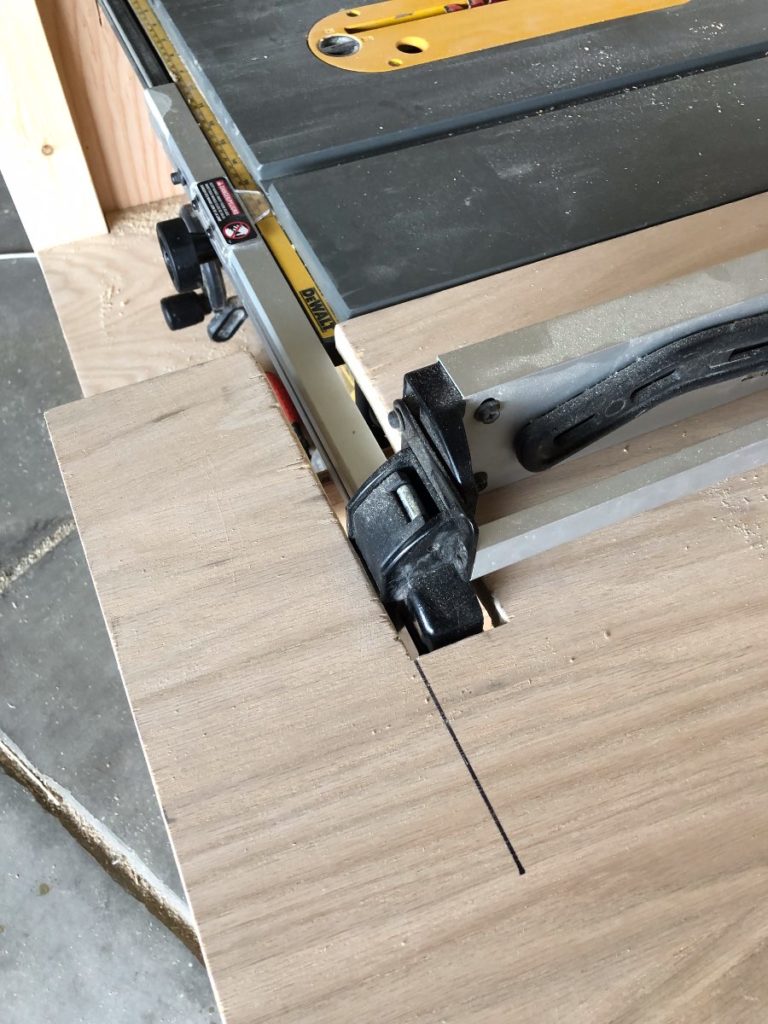
I lined up the plywood on to the top of the bench and then butted up the fence to it and marked around it so I would now how deep and how wide to cut the groove.
This is my table top that is the most “quilted” together. I used pocket holes and Starbond to attach all of the pieces together. But before I attached them, I cut the back groove.
Mark your cut, then use the table saw to cut the grooves.
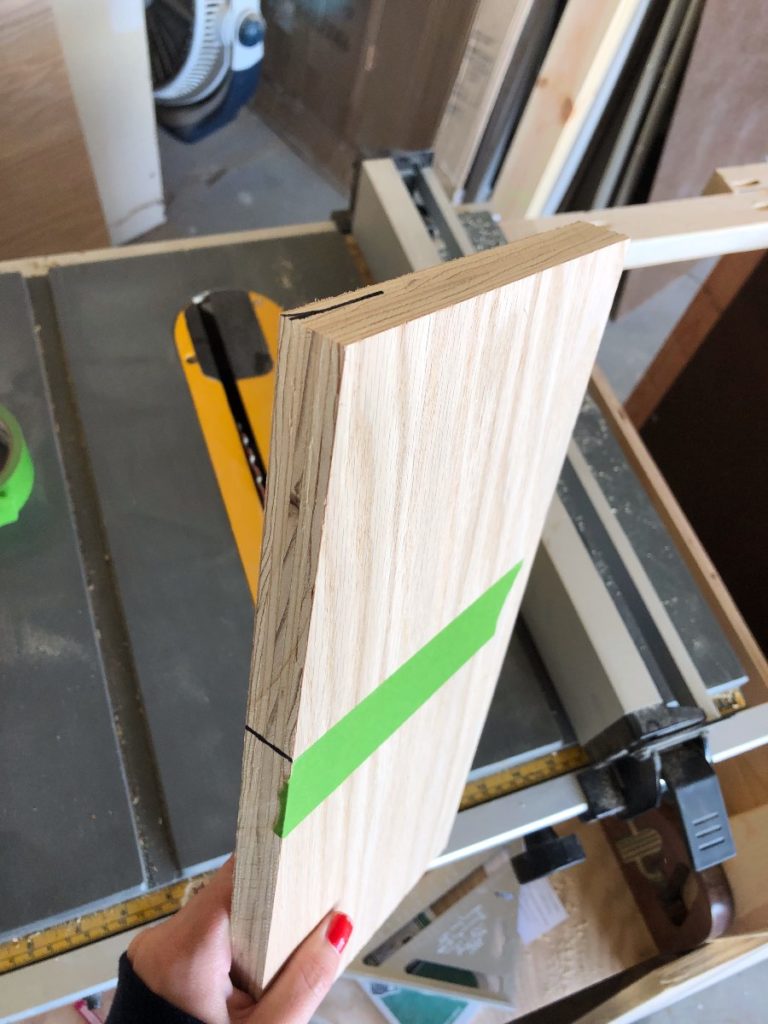
I used painters tape to mark how far I would need to groove it.
Once you get the grooves cut it will look like this. It’s not super cute, but it will be underneath so you will never see it, and it works beautifully!
Line it up and test it out!
Then do the same thing with the front.
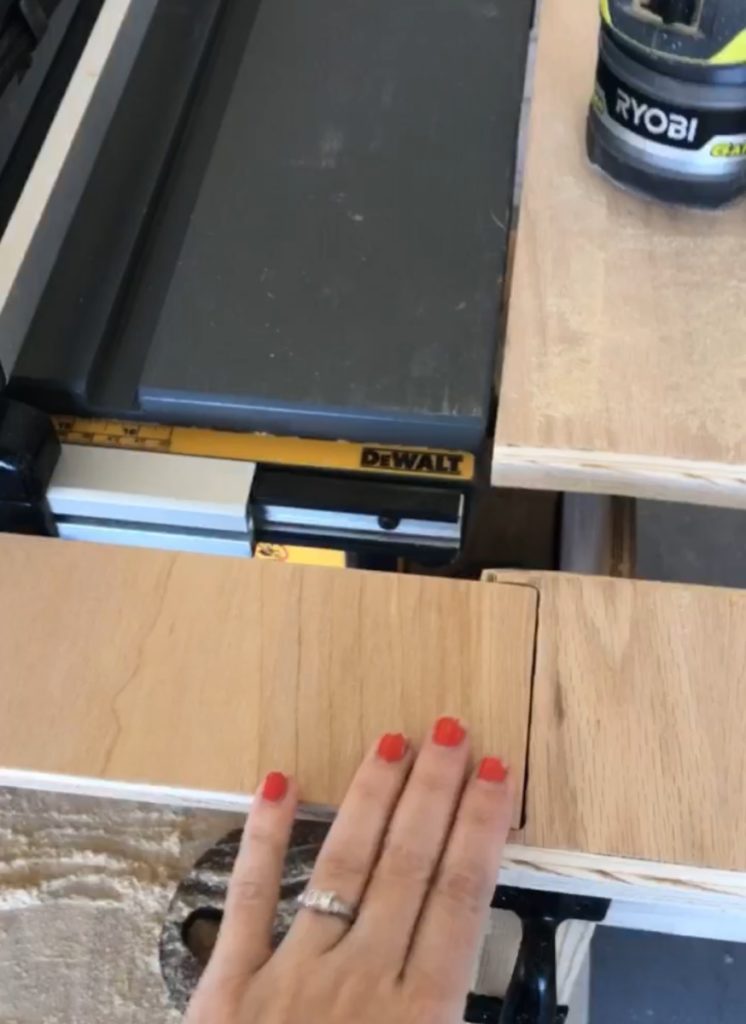
Step 10
The other side is a little difference. Since the fence is on the other side, you can’t just cut little tracks underneath. They’re full on grooves to fit the fence as wide as it will go. In my case, the fence will go as far as 16″.
Cut the 27 x 18 3/4″ piece of 3/4″ birch for the right side of the stand.
Line it up like you did the left side.
Measure out the groove in the back first.
Then cut it. It will be about the same size as
the groove you previously cut in the 2×4.
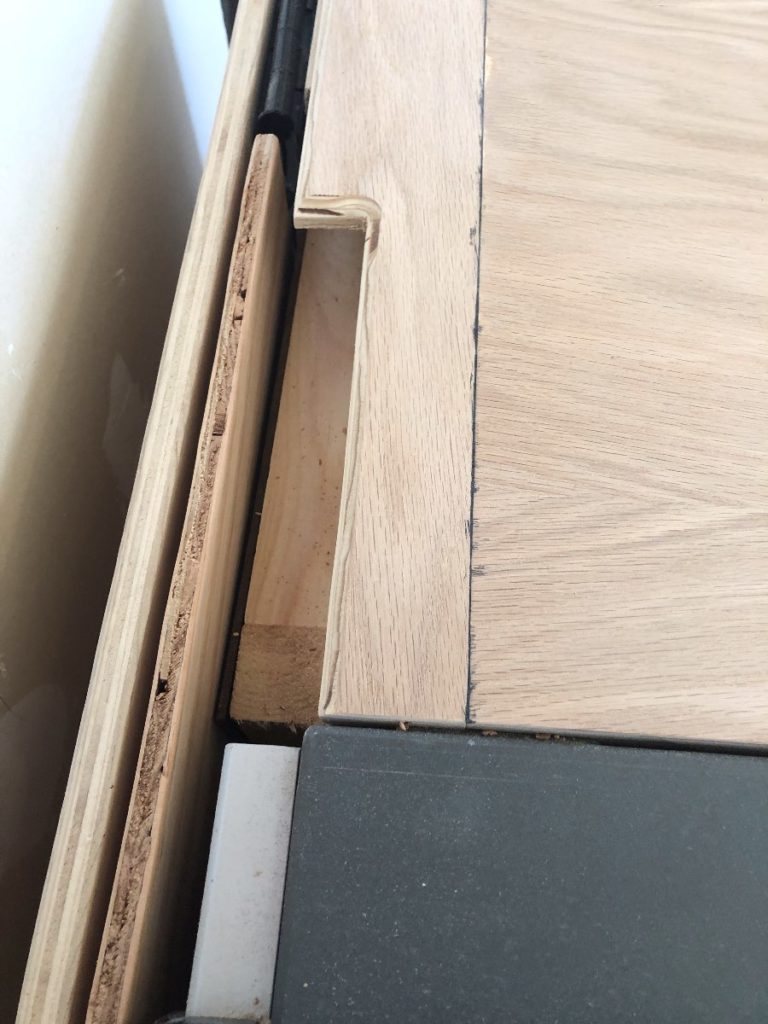
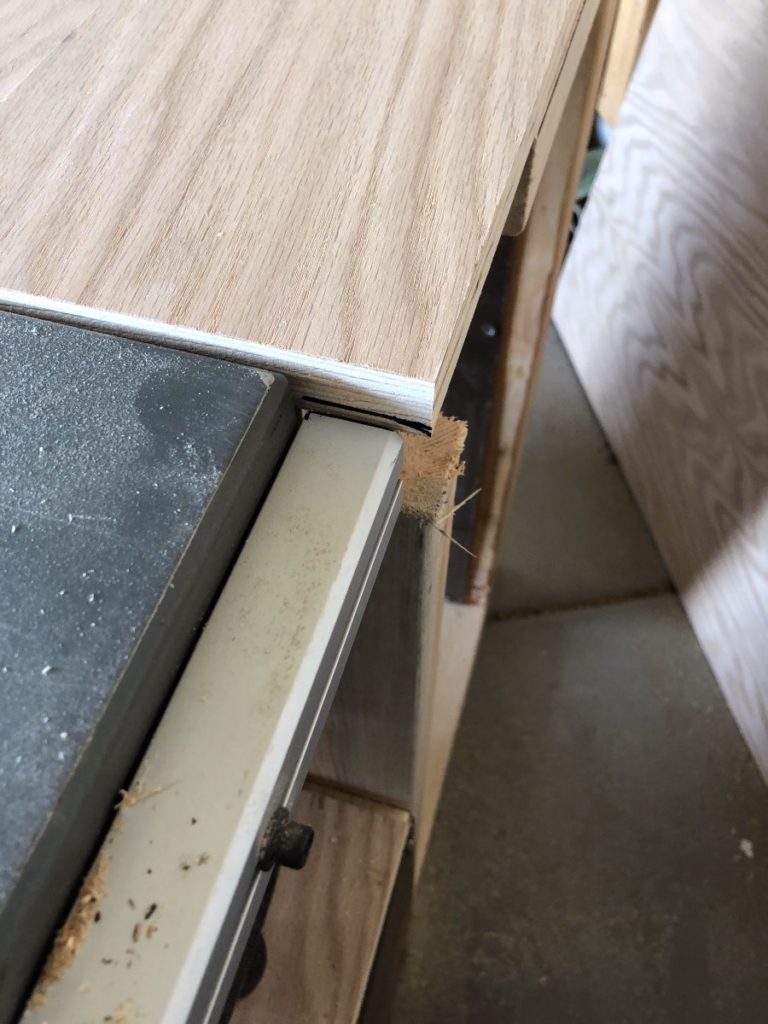
Then front is a little different.
Measure out how far the big part of the fence goes and cut that groove.
Then make your mark for the under-groove
for the smaller part of the fence.
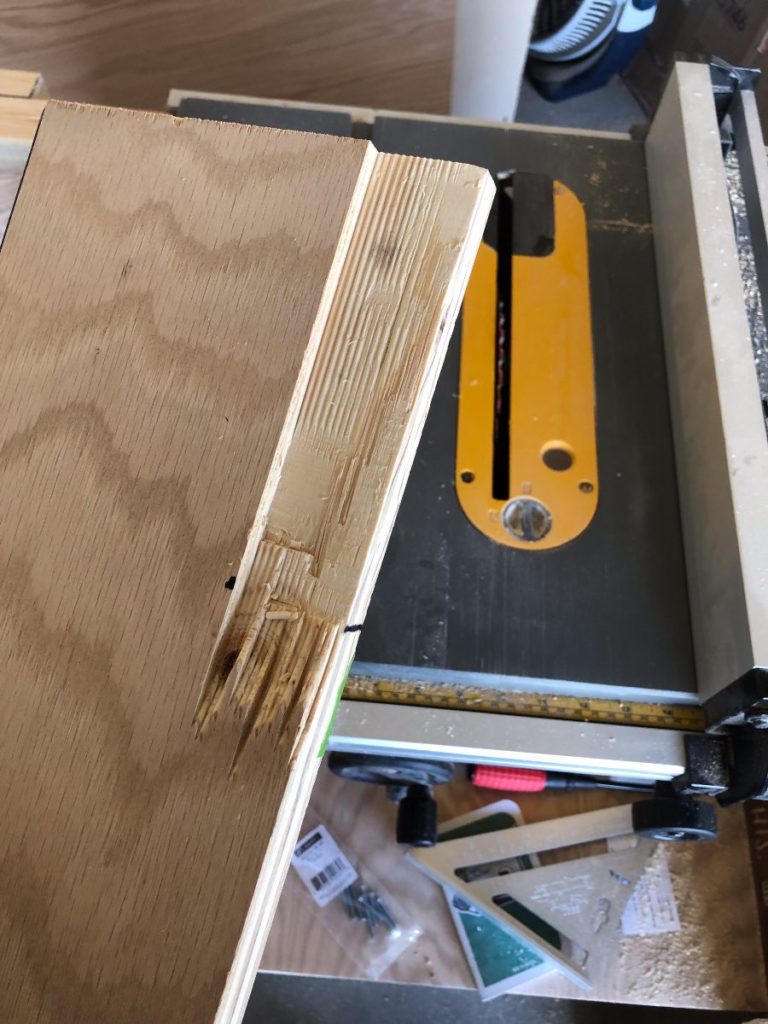
Those two little chunks that came out make me sad 🙁
Sometimes working with plywood is tricky since there
are random pockets of space!
But don’t you worry, I filled it with Starbond 😉
Ok, cut the groove under that side for the smaller part
of the fence the same way you did on the left side.
Now it fits perfectly!
Step 10
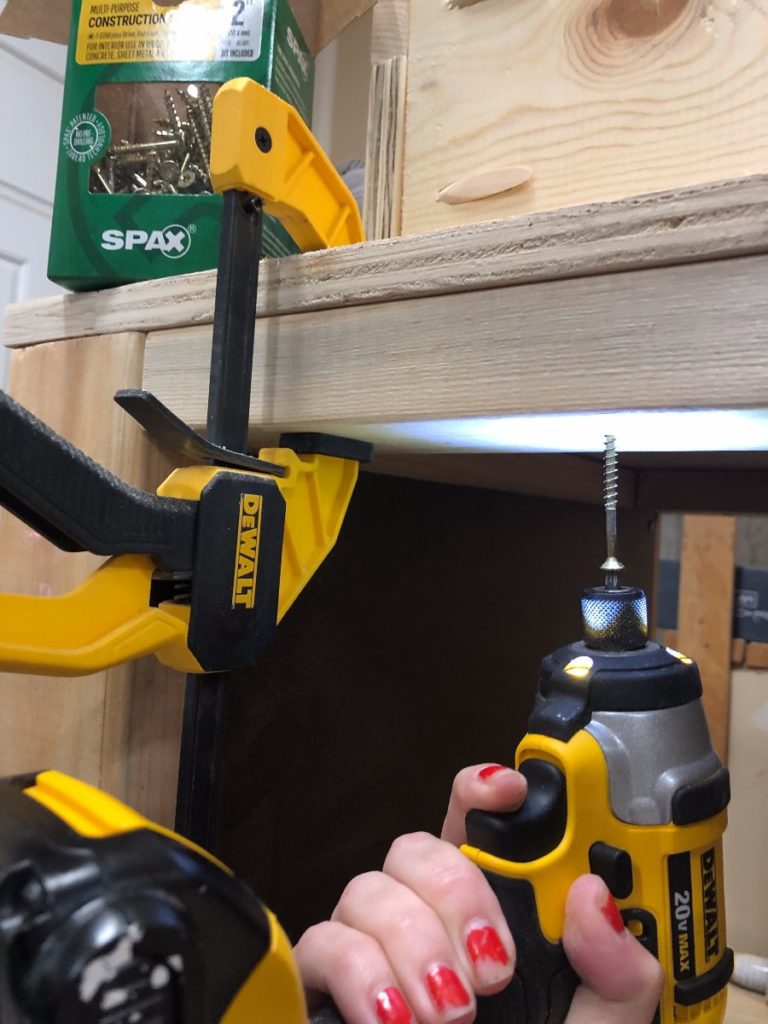
And now that you have your table tops exactly where you need them, you’re going to drill up underneath them with a counter sink bit, and use
2″ screws to attach them to the base.
Step 11
What’s next? Drawers!
I love drawers.
They hold all your things.
And make all of my
organizing dreams come true 😀
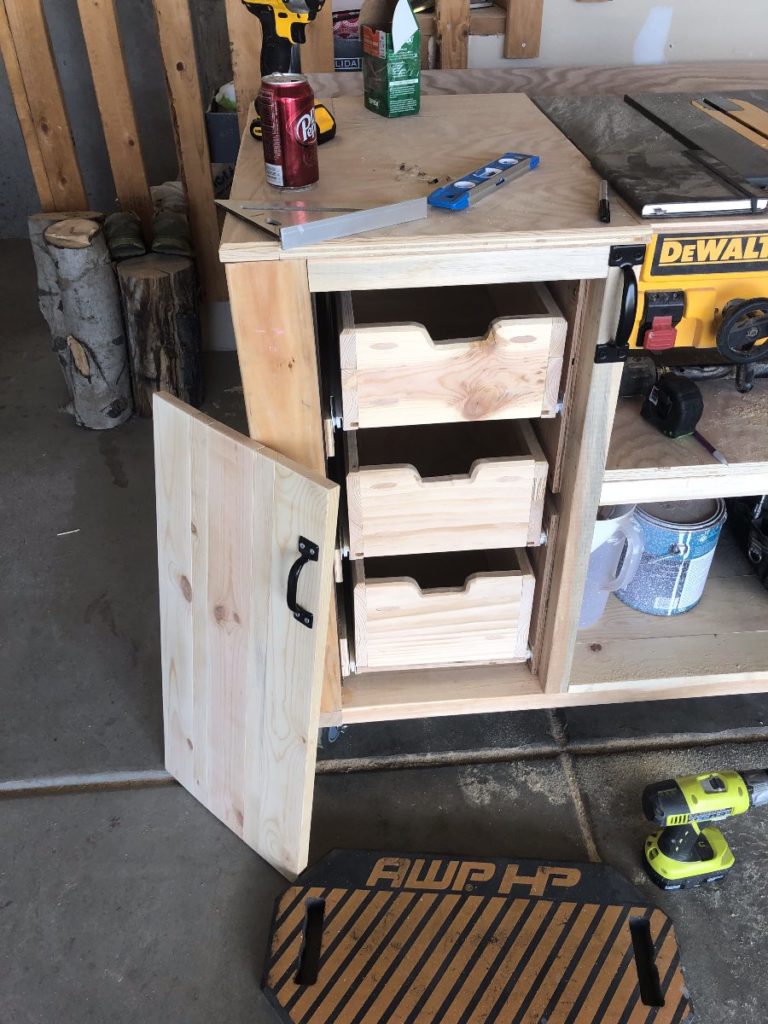
I made 3 different sized drawers.
The top is 5 1/2″, middle is 6″ and the bottom drawer is 7″.
For each drawer, I used pocket holes on either end of the 9 5/8″ pieces, and before attaching them I cut 1/4″ grooves into the bottoms of the pieces to inset the plywood bases.
Line up all of your drawer bottoms and sides into their “drawer” shape and attach the fronts and backs using 1 1/4″ pocket hole screws.
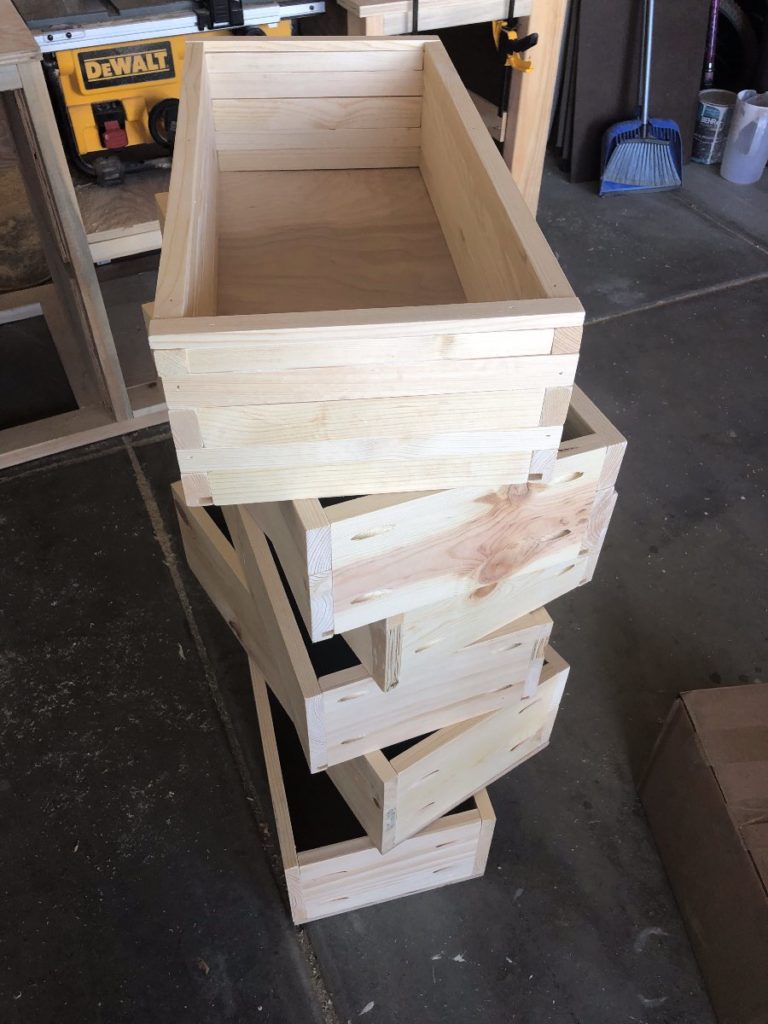
That top one is clearly the last of my scrap wood 🙂
Once they’re all assembled, use your jigsaw to
cut grooves into the fronts of them for handles,
and then I took my router and chamfered the whole
edge just to give it a finished look.
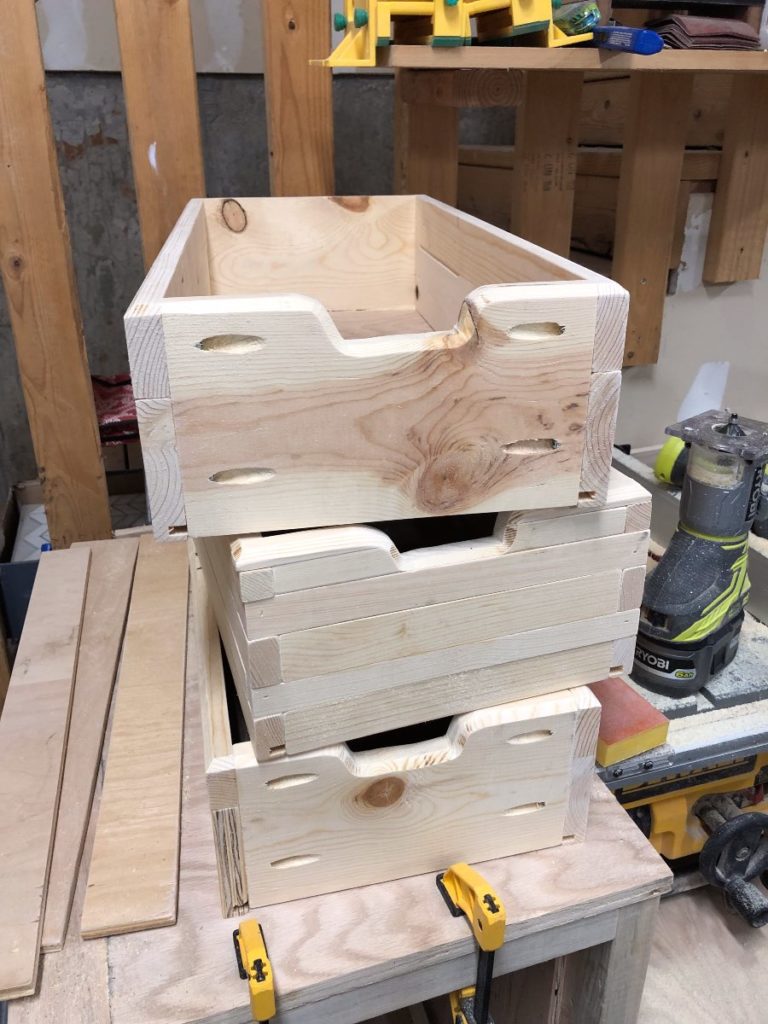
After this picture was taken, I used pocket hole plugs
to fill all the pocket holes.
I also took my router and added a chamfer to the tops
of my stand to give them a cleaner look.
Step 12
For this next step you’re going to want to take the table saw out of the stand first, and then tilt it over onto its side to add the casters.
Two locking in the front and the two free moving in the back.
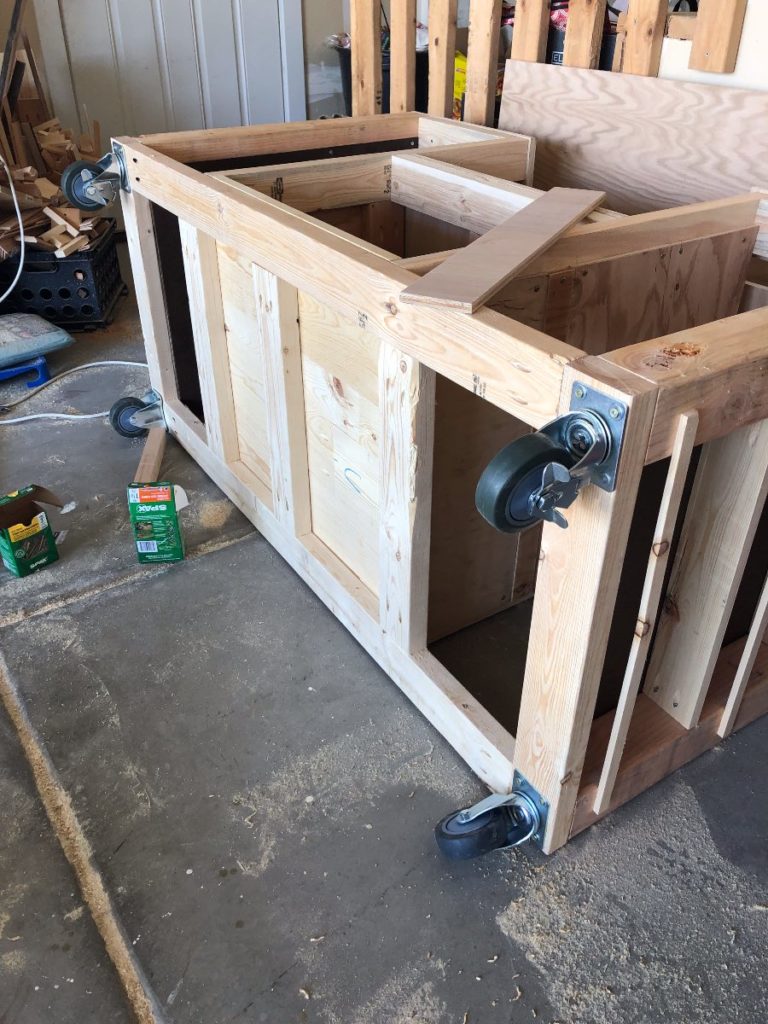
Flip it back up onto the casters and lock them into place
so it doesn’t roll around on you while you work on the drawers.
Add two of your door pulls to either side of the opening
for the table saw. This will allow you to push and pull
the cart with ease.
Step 13
Time to install drawers. Add the drawer slides to each of your drawers.
Then start adding their counterparts to the insides of the bench.
The 7″ drawer will be on the bottom, 6″ drawer in the middle, and 5 1/2″ drawer at the top. I started by putting the
7″ drawer one inch from the bottom.
Then there is a 2 1/4″ gap between each of the drawers.
Look at that! It’s really taking shape!
We are getting so close to finishing up
this beast of a stand!
Step 14
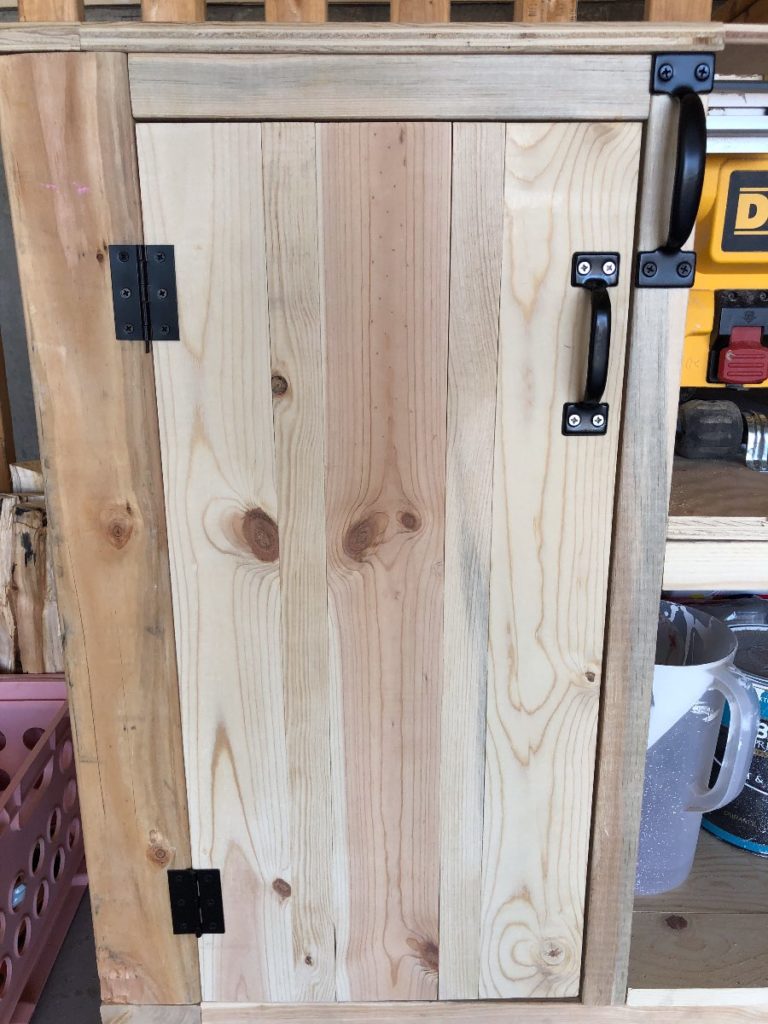
Doors are next! This is the remainder of your 1×4 wood.
You will use 3 of the 1x4x20 boards + one of the ripped 20″ boards
to complete the 13″ wide doors. I used pocket holes
to attach all of the boards.
You’ll then use 2″ hinges set 3″ from the top and 3″ from the bottom to attach the doors to the base.
Step 15
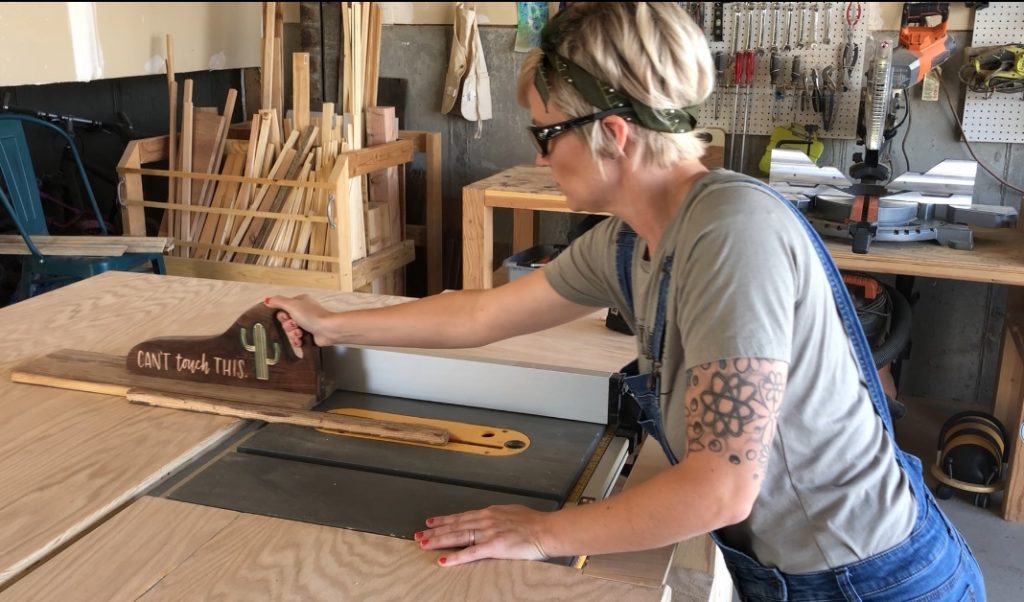
This next part is just a fun little extra that I added
because I feel like the distance between the front
of the saw and the blade is too short. If I’m trying to
cut a longer piece, it can move or catch the blade
and I can get kickback. Which is super scary!
So at the front of the saw, on the left and right I used my
router to route out little grooves just big enough
for a 3″x24″ piece of 1/2″ plywood to fit
down into. This gives me added support
in the front of the saw…
and can easily be removed if the saw
needs to be taken out of the stand.
Step 16
We are definitely in the home stretch now! Once we get the outfeed
table attached you are good to go!
So let’s do it!
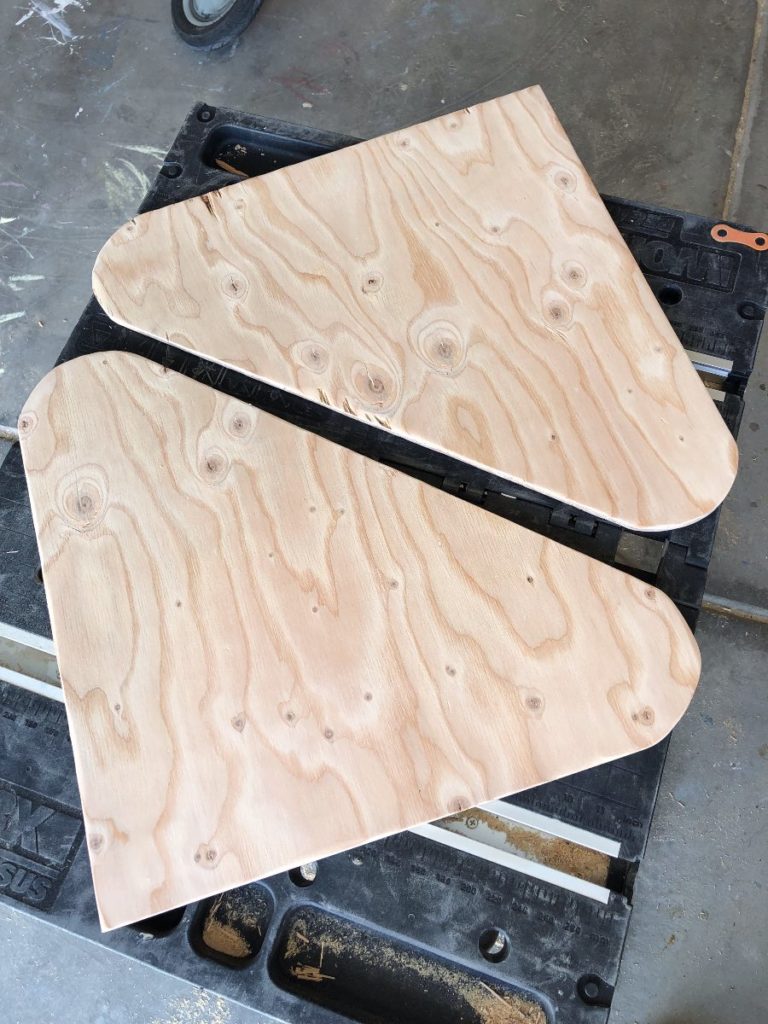
First cut out the supports for the out feed.
These are your 19x 19″ triangles. I gave them rounded corners
just to make them a little more decorative.
Before you can hang these, you will need to cut your
2×2 pieces, add pocket holes to either end,
and attach them to the backs of your drawer compartments.
Since the left side has such a big piece of
the 2×4 missing, I used a scrap board across
the top to attach the 2×2 to.
Also I am so sorry but I didn’t write down the height of the 2×2’s
and I have already covered them with hardboard. You will
just have to measure exactly how tall you need them to be.
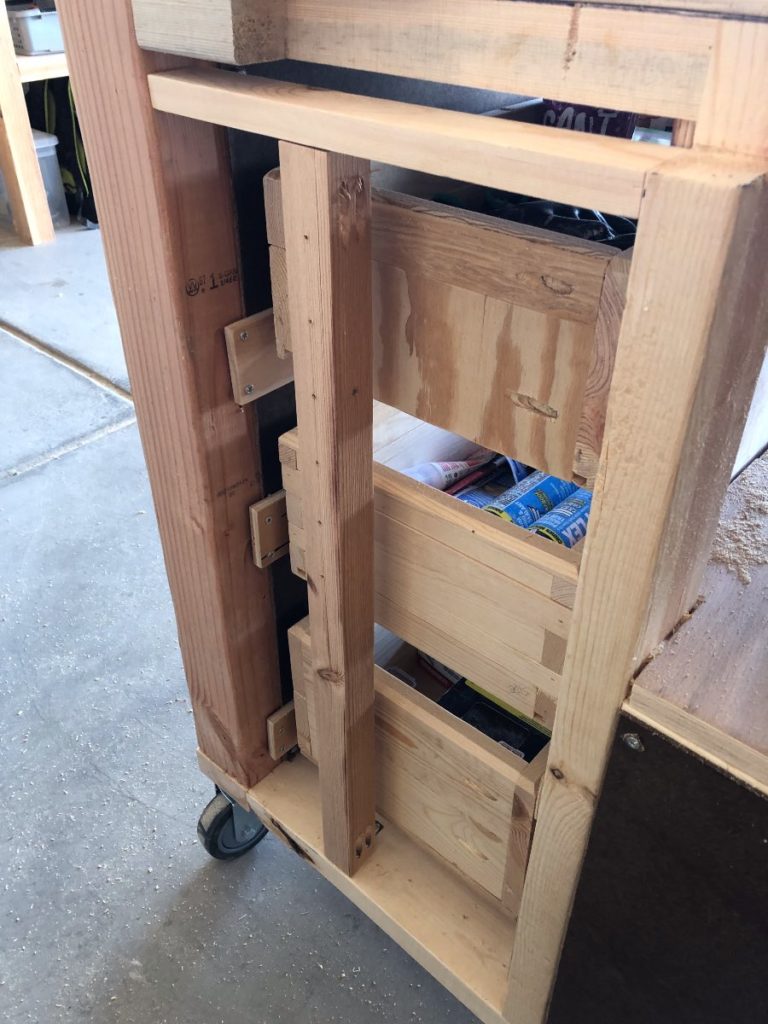
Add a 2×2 to the right as well. There is enough of your
2×4 left on this side to attach it directly.

Then I covered both with hardboard, and attached the
12″ hinges to the 2×2’s. Then using painters tape,
I lined up the out feed supports exactly 3/4″ down from the top
and screwed them into the 12″ hinges.
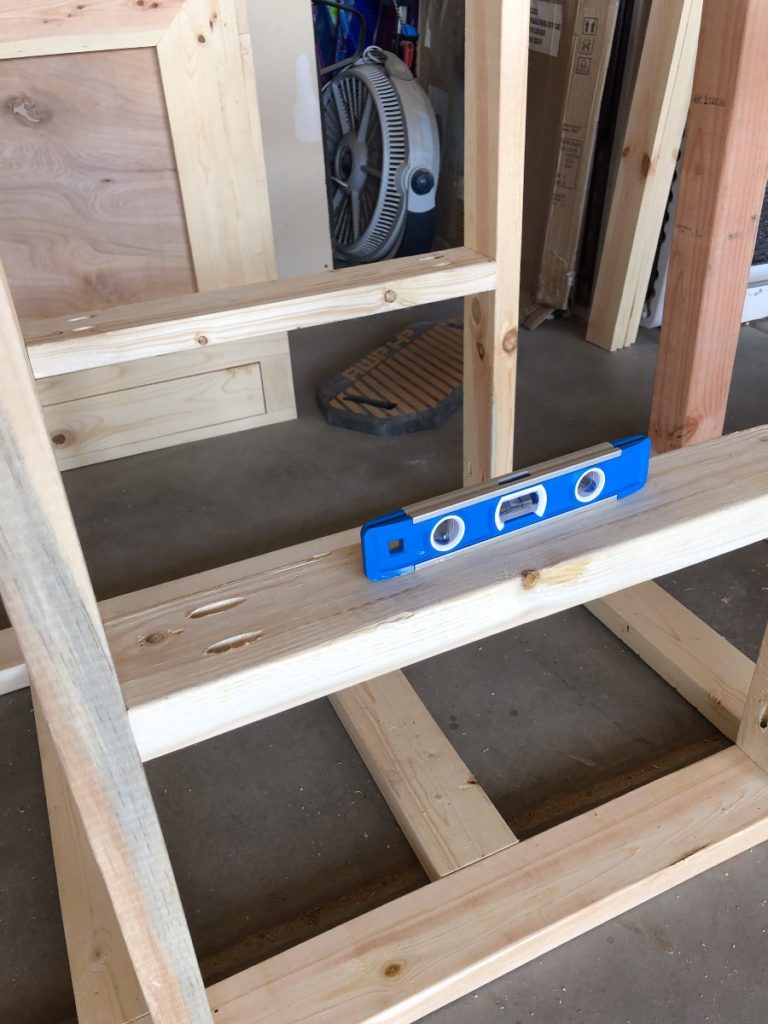
Be sure they are perfectly level. These are what will hold up your
out feed and you don’t want it to angle up or down.
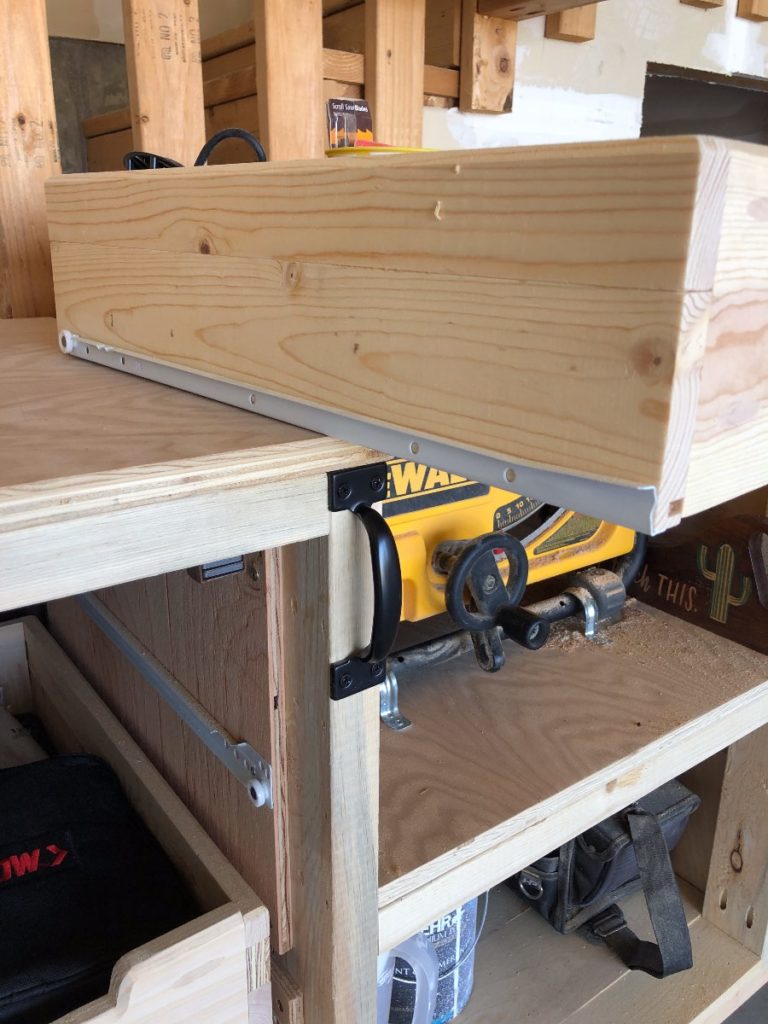
Step 17
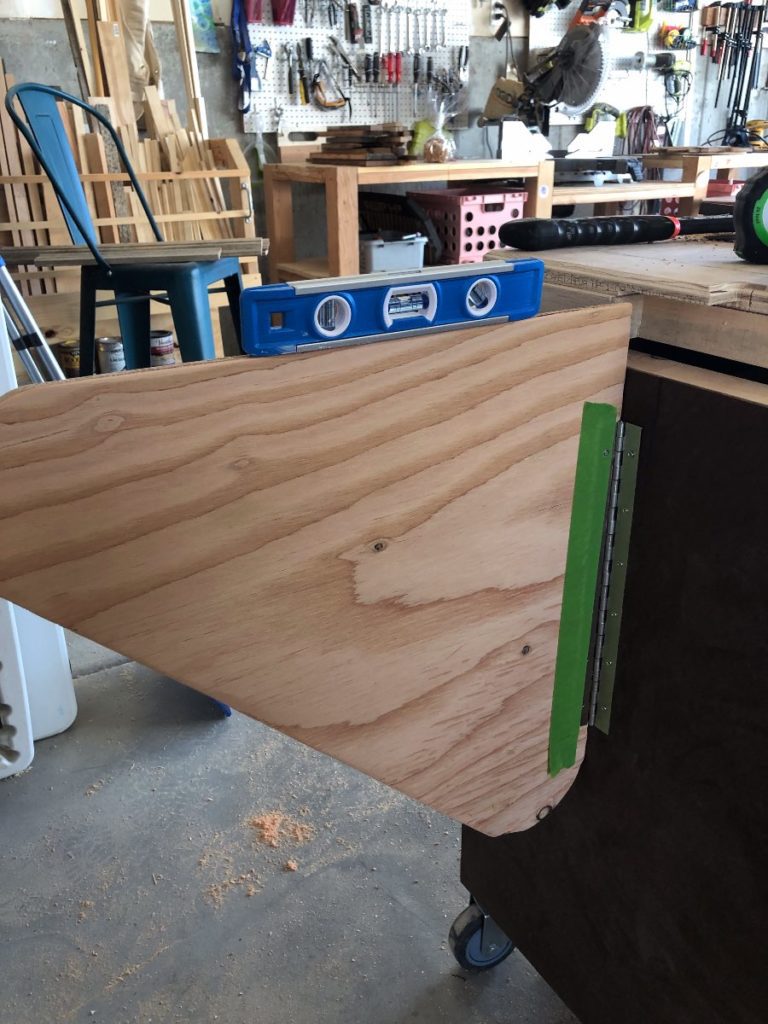
The out feed table can actually be any size you prefer it to be. Mine ended up being 55 x 31″ because that was the size of the 3/4″ birch I had left over. I love how huge it is though.
So at this point I sanded both sides and then added a round over to the edge that would be butting up against the back of the saw, and a chamfer to the other 3 sides.
Then I swung both supports out and set the out feed table on top of them.
Then made sure it was level, and centered it exactly where I wanted it
and attached the gate hinges to the base using 1/4″ washers with 1 1/4″ screws.
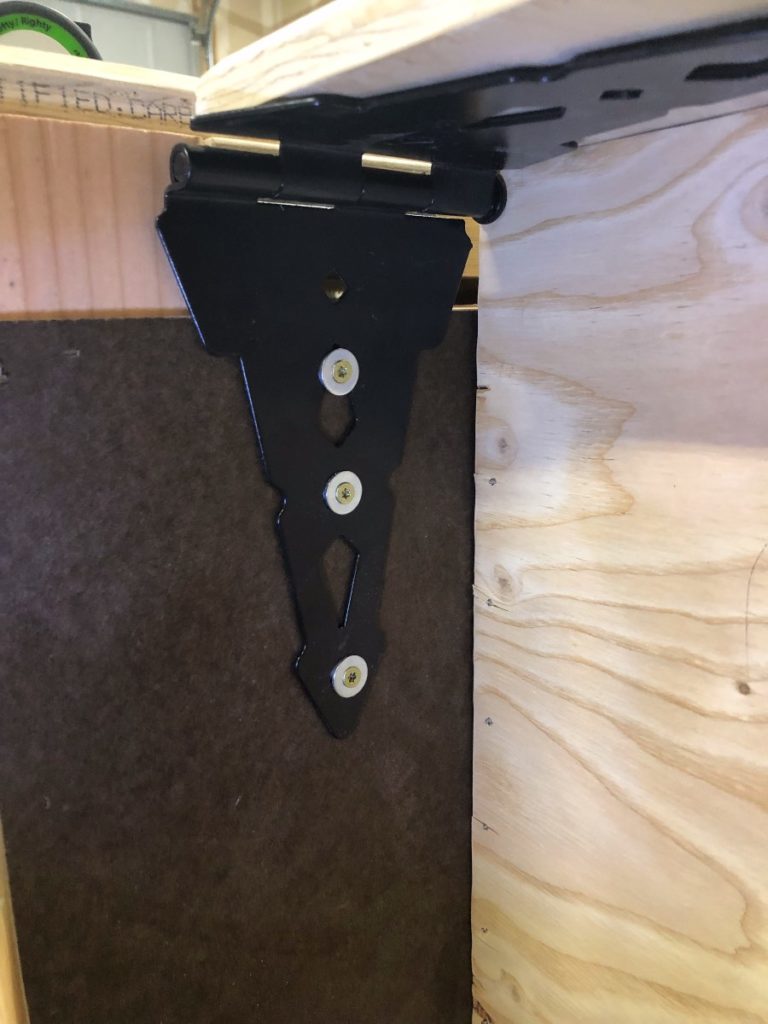
Then, again using washers, I attached the gate hinge to
the out feed table using 3/4″ screws.
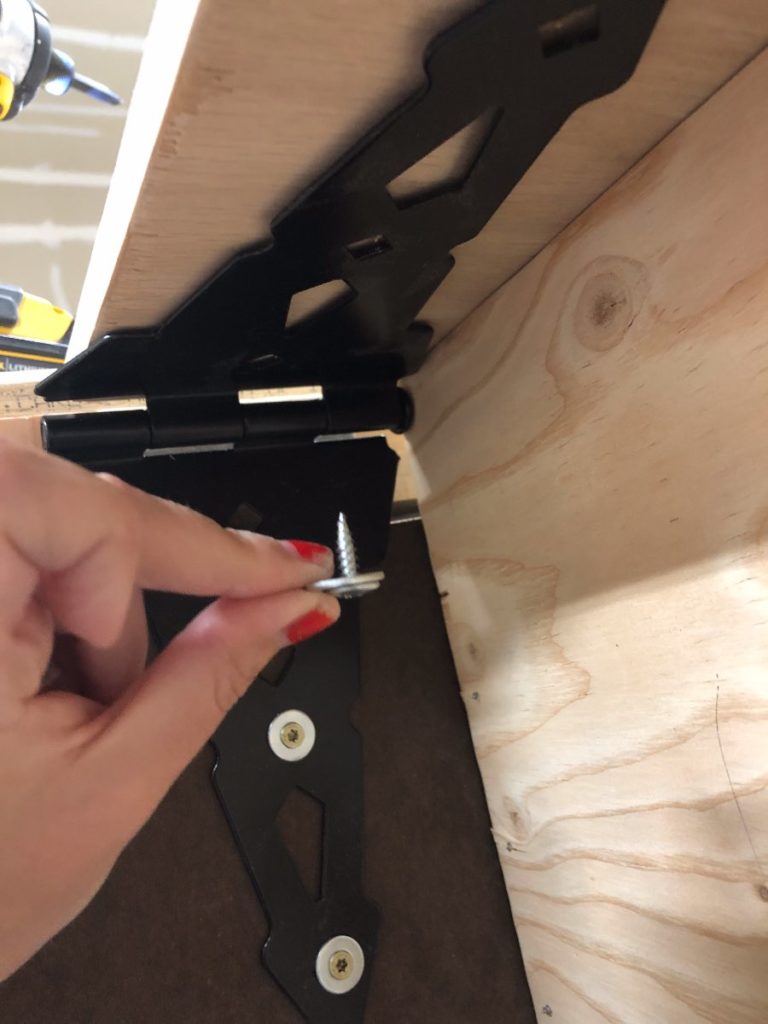
Do this for both sides.
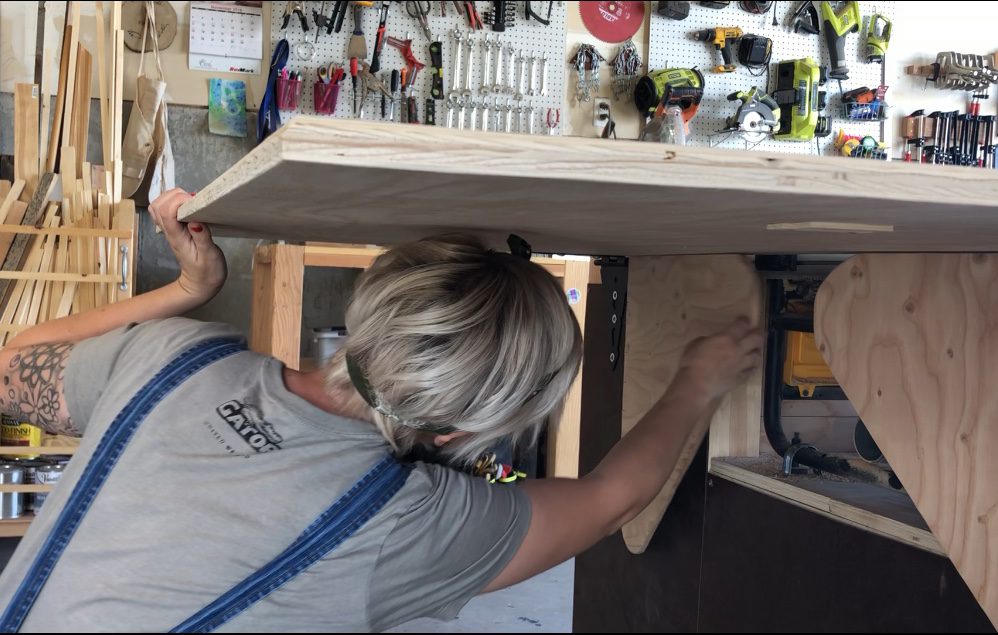
Then, making sure the swing-out supports are
square to the base, use two small pieces of scrap
cutoff to stabilize them.
I did this by placing one on either side
and gluing and stapling it to the out feed table.
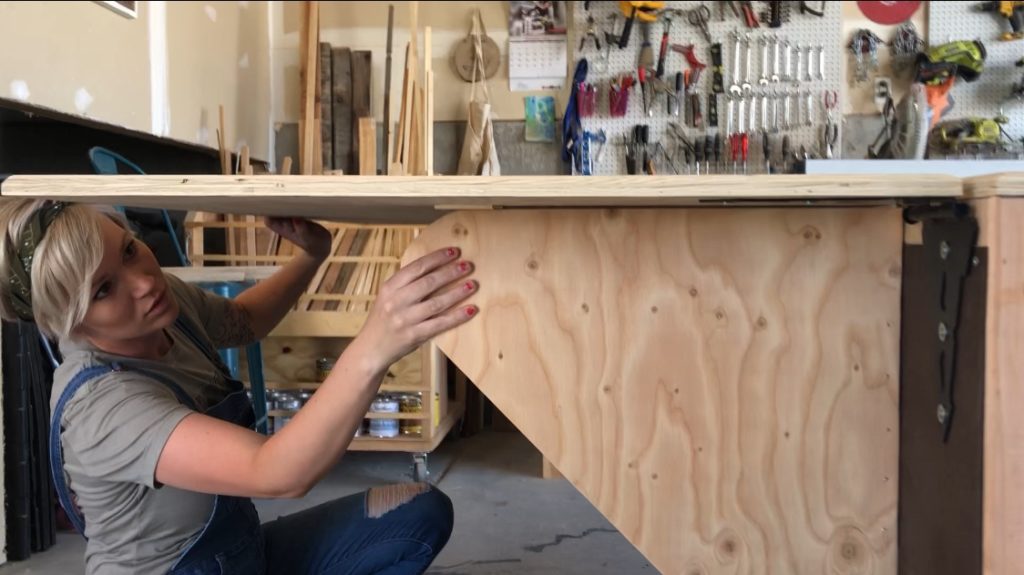
Once everything is secure, fold the supports
in toward the bench and let your out feed table hang.

Step 18
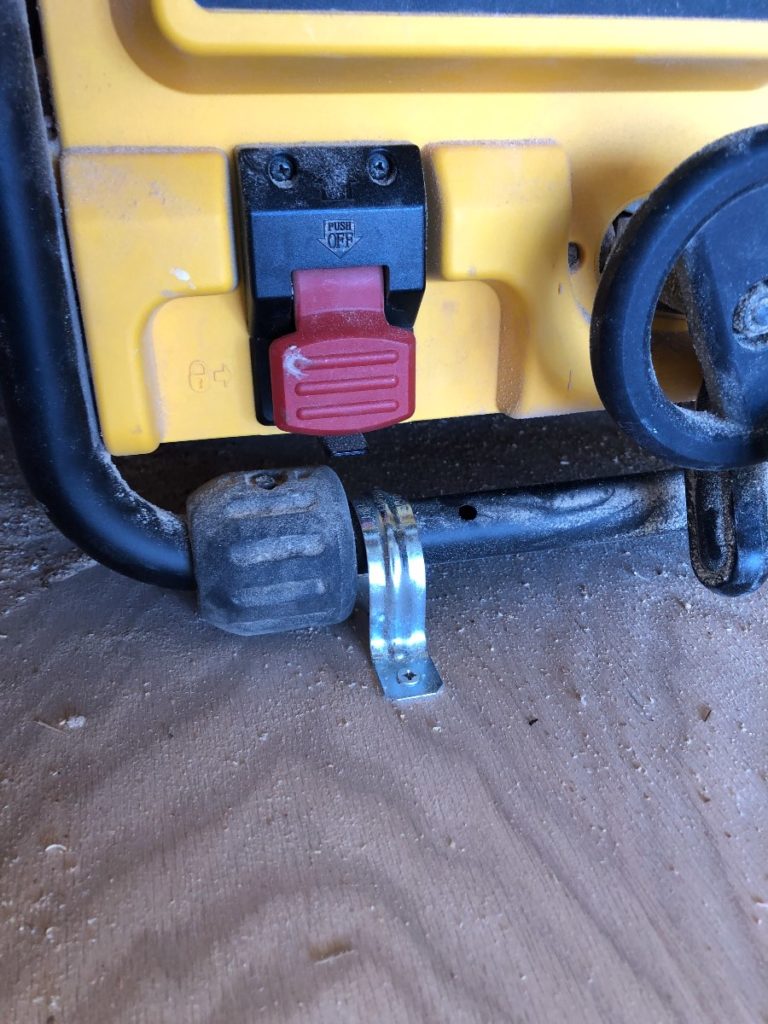
Just one last little thing.
I used these 1 1/2″ conduit straps
to screw down and secure the
legs of the table saw to the stand
so it won’t shift, causing it to be out
of place of the grooves.
It’s probably overkill. But I love tiny details.
THAT’S IT. YOU’RE DONE. Step back and admire a job well done.
Because, let’s face it, that was a beast.
And you deserve a Dr. Pepper 😉
Thanks so much for following along.
I hope everything made sense and if you have
any questions you can always shoot me a DM,
email me, or leave a comment on the post!
Don’t forget to post your pics, PIN this project, and
tell your friends!!
Absolutely love the project! Great detail and i am sure you have inspired many to make their own version.