Home Decor, Tutorials
Pet Food Container Buffet
Hey friends! Over the past few weeks a dear lifelong
friend of mine, and I, worked together to build a cuter
and more functional storage space for her dog food bins
and leashes, toys, bowls, etc.
We really struggled for a while with the name. The “dog food storage bin holder thing with a drawer” didn’t exactly have the best flow to it, but I think we landed on something a little simpler and better.
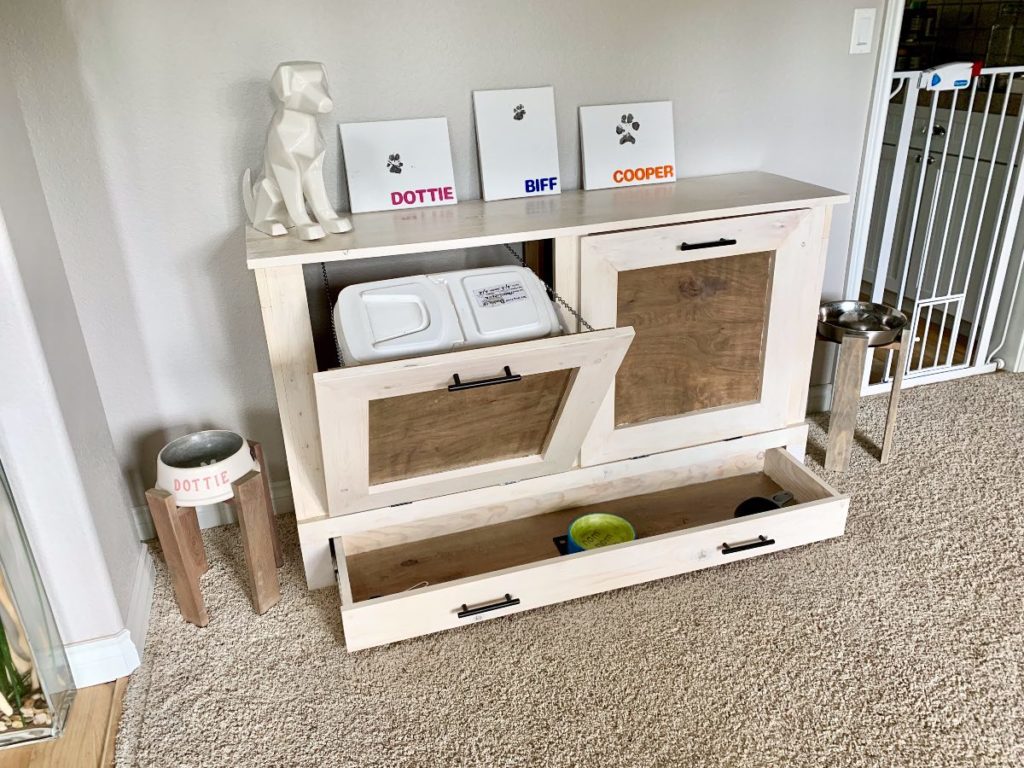
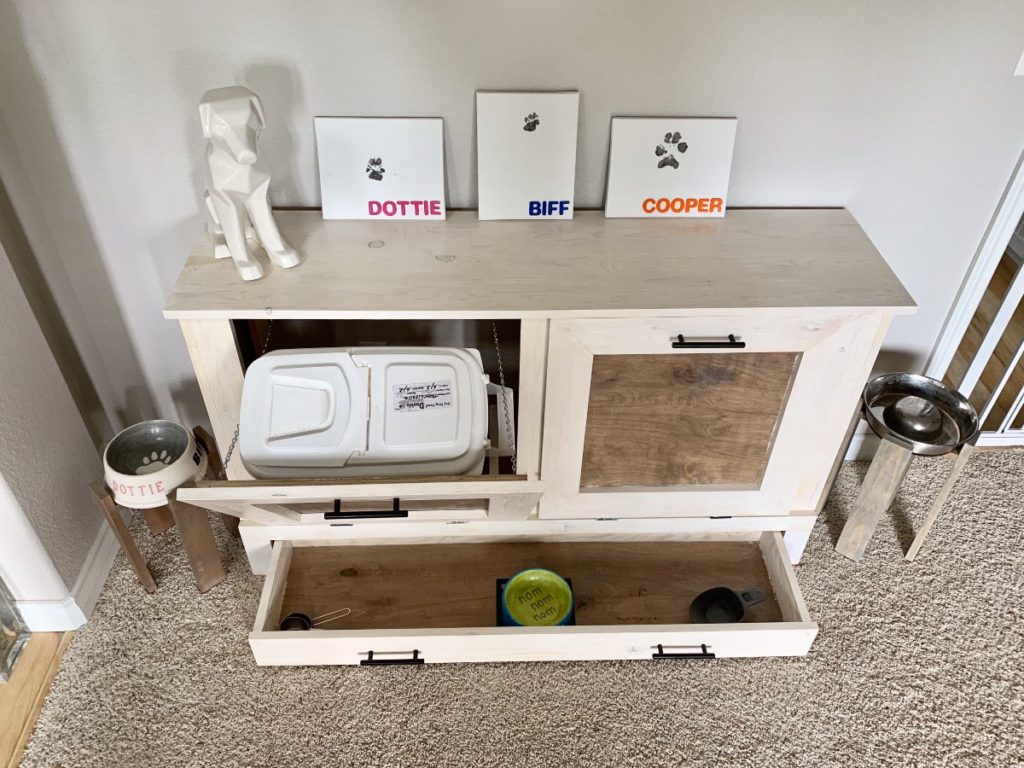
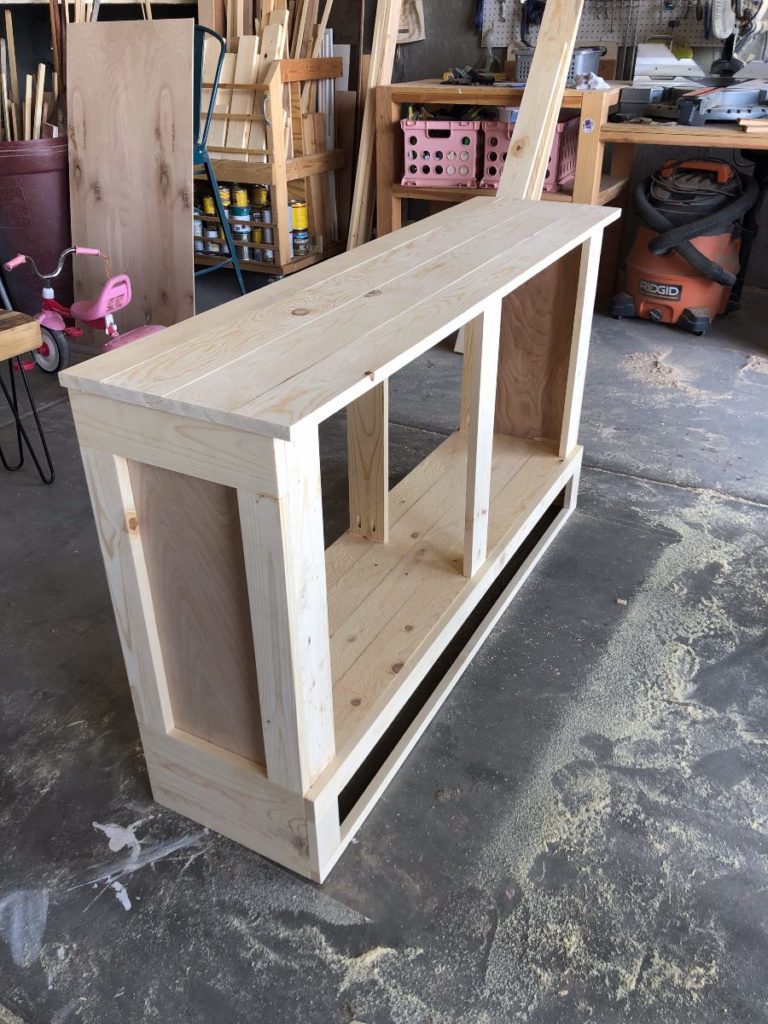
The pet food container buffet, which actually could also be used to store garbage cans or small laundry baskets, holds two 25 lb. pet food containers, in this case dog food, and has a long drawer at the bottom for all your pet’s accessories!
This sleek simple design will stylishly conceal all of your pets needs while keeping them organized and convenient for your constant use.
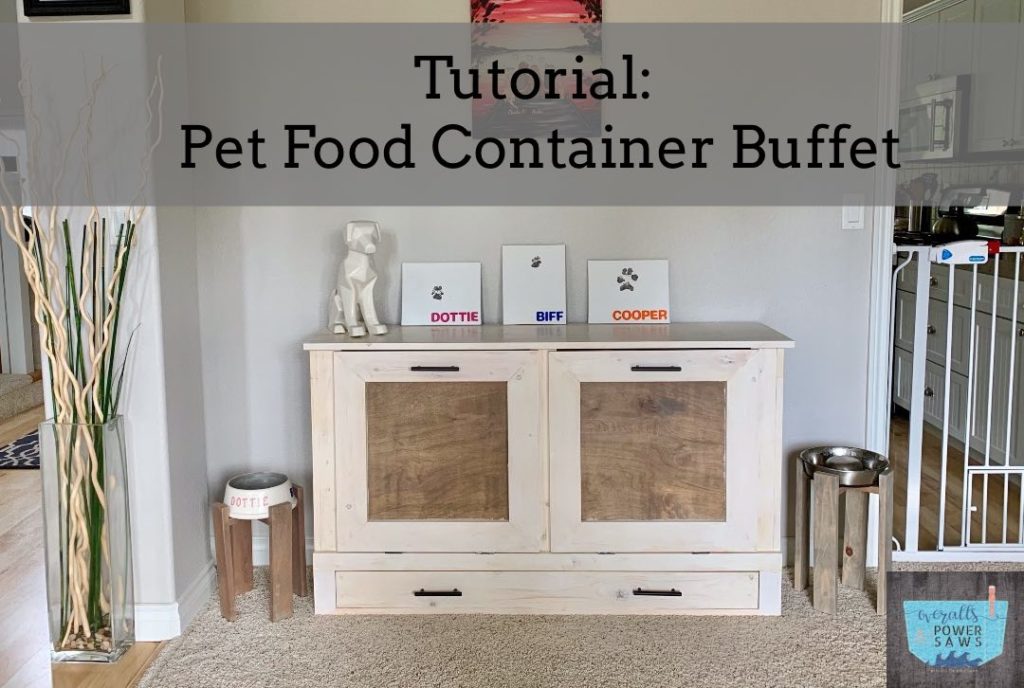
Pet Food Container Buffet
Dimensions: 53″ long x 31 1/2″ tall x 16″ wide
Materials:
- 1x4x6 – 15 *You can buy longer boards to save a little money, but I always find that the shorter the board, the less warp or cupping I’m having to deal with*
- 1x6x6 – 6
- 1x10x6 – 1
- 1/4″ birch ply – 4×8 sheet
- 1/2″ birch ply – 4×4 sheet
- 1 1/4″ pocket hole screws
- 1″ pocket hole screws
- 3/4″ brad nails
- 1″ brad nails
- 18 gauge brad nailer
- 8 eyelet screws
- small chain ( see step 17 )
- drawer pulls – 4
- 2″ decorative hinges – 4
- 12″ drawer slides
Cut List:
- 1x6x54 – 4 ripped to 4″ (top)
- 1x4x20 – 4 ripped to 2 1/2″ (sides)
- 1x4x13 1/2″ – 2 (sides)
- 1x10x13 1/2″ – 2 ripped to 7 1/2″ (sides)
- 1/4″ ply – cut two 12 1/4 x 27″ pieces from the 4×8 sheet (sides)
- 1x4x51″ – 3 ripped to 3 1/4″ (base)
- 1x4x51″ – 1 ripped to 3″ (base)
- 1x4x51″ – 2 (back)
- 1x4x53″ – rip a 2″ strip and a 1″ strip from this board (front frame)
- 4 1/2″ x 2 1/2″ pieces (front frame) you should have enough cutoffs from another board to make these two little pieces
- 1x4x23 1/2″ – 3 (inside supports)
- 1x4x23 1/2″ – 2 ripped to 2 1/2″ (inside supports)
- 1x4x23 1/2″ – 1 ripped to 3″ (inside support)
- 1/2″ ply – 21×22″ – 2 (doors)
- 1/2″ ply – 17 x 10″ – 2 (doors)
- 1x4x14 1/2″ – 4 with perpendicular miters (doors)
- 1x4x23 – 8 with perpendicular miters (door frame)
- 1x10x12 3/4″ – 2 ripped to 6″ (drawer supports)
- 1x6x47 1/8″ – 1 ripped to 4 1/4″ (drawer back)
- 1x6x11 1/2″ – 2 ripped to 4 1/4″ (drawer sides)
- 1/4″ plywood – 46 3/8 x 12″ (drawer bottom)
- 1x6x47 3/8″ – 1 ripped to 4 1/4″ (drawer front)
*remember it’s always best to wait and make your cuts as you go. Make your top cuts first, then assemble the top, then come back and make your side cuts and assemble your sides, and so on.
Step 1
Add pocket holes to the lengths of three of the
top boards and attach all four together.
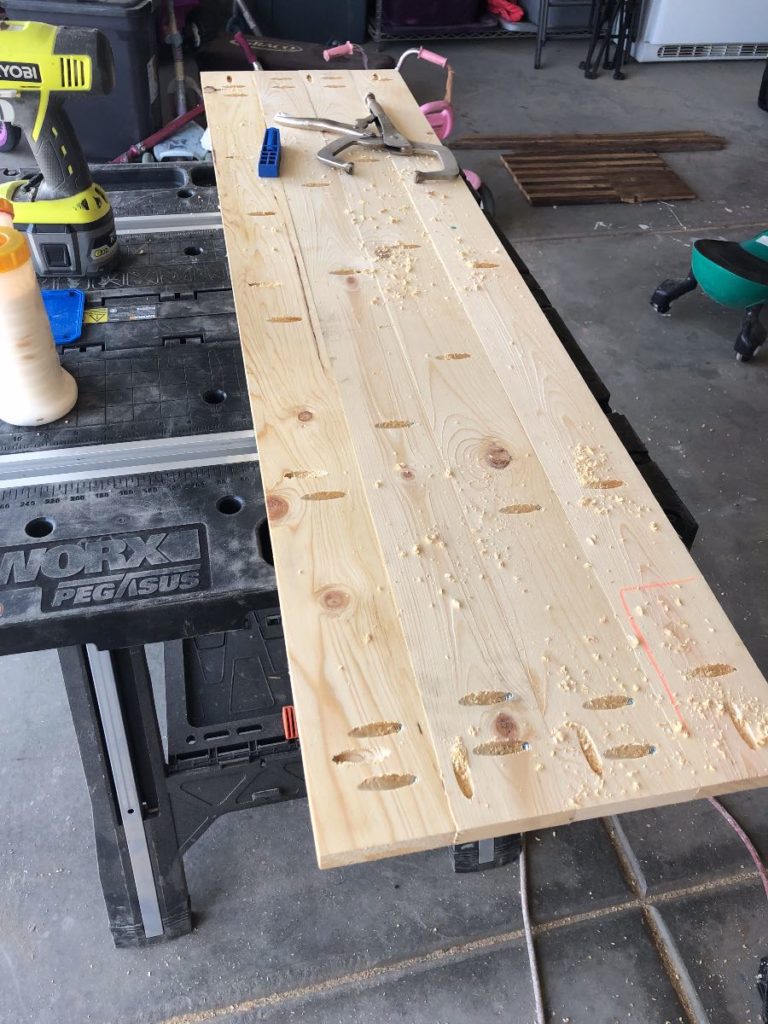
Really, that was just to get those boards out of the
way so you didn’t mistake them for something else.
Set aside the top and cut the boards labeled (sides).
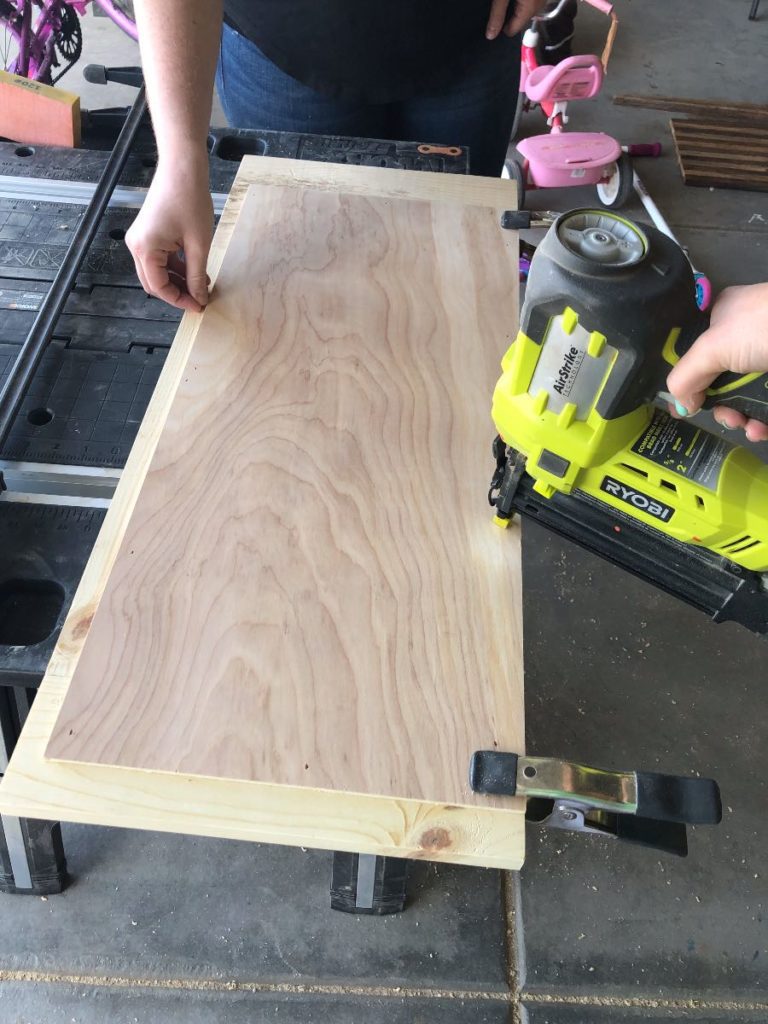
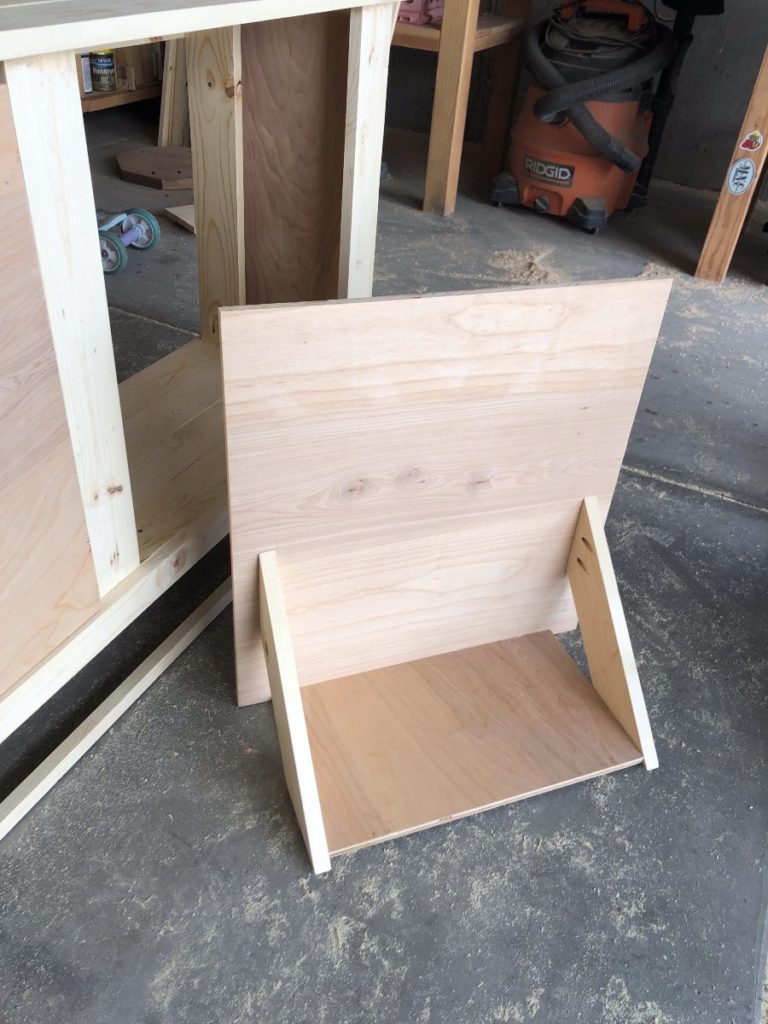
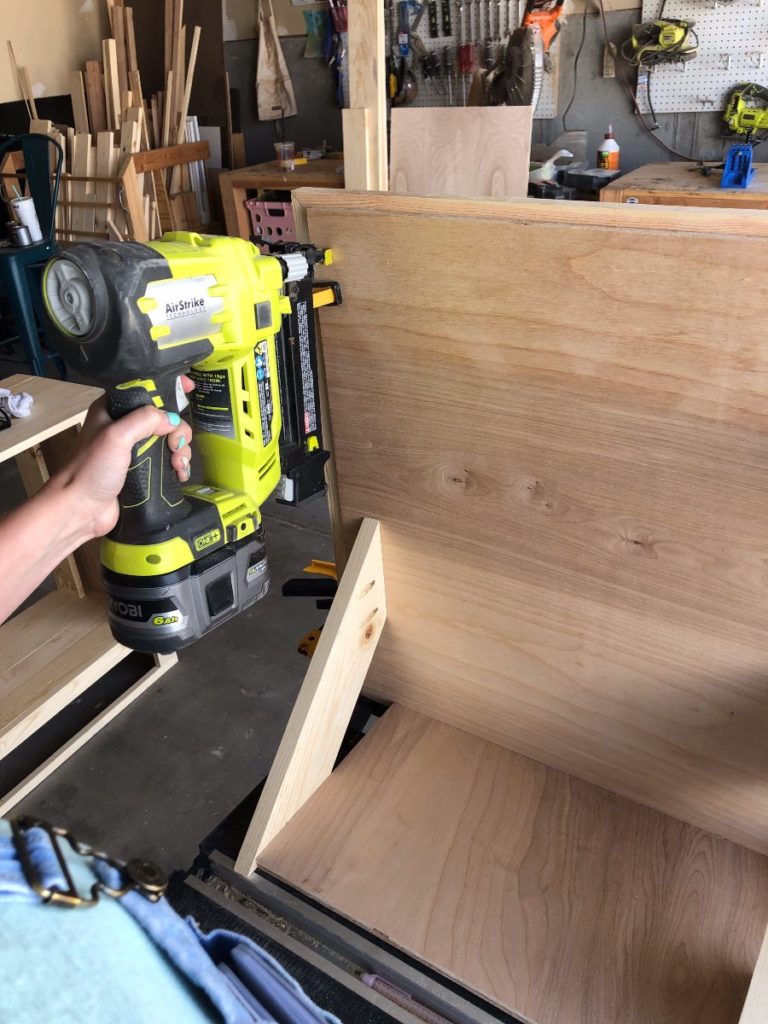
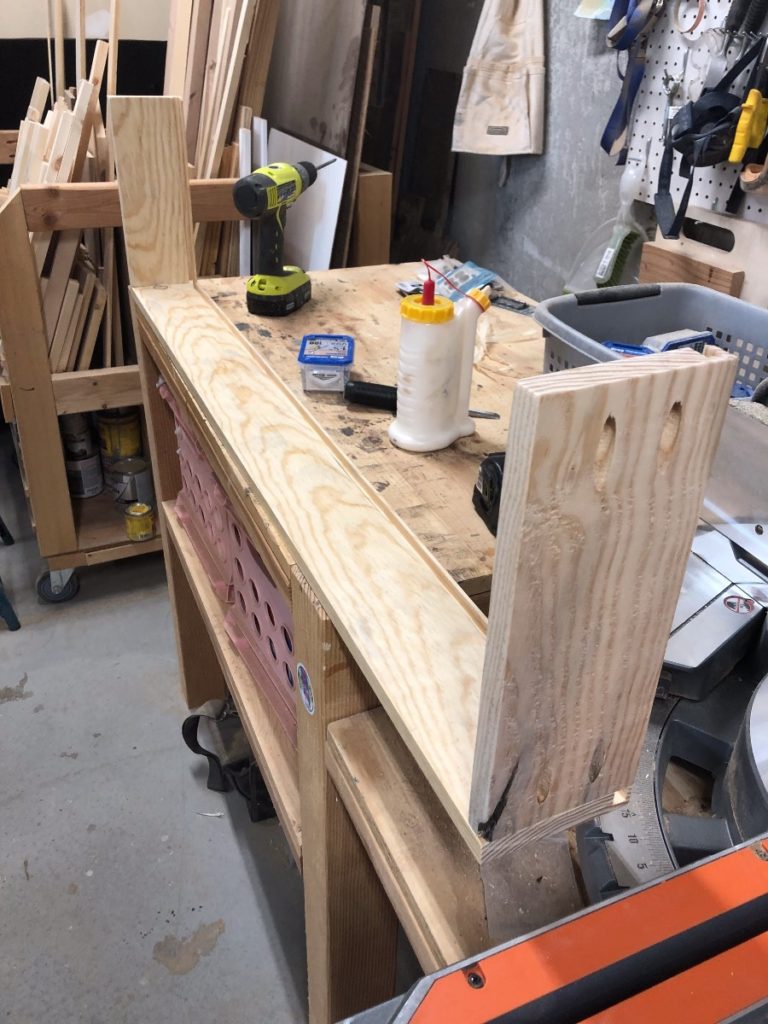
Step 2
Begin assembling the frames of the sides as shown below.
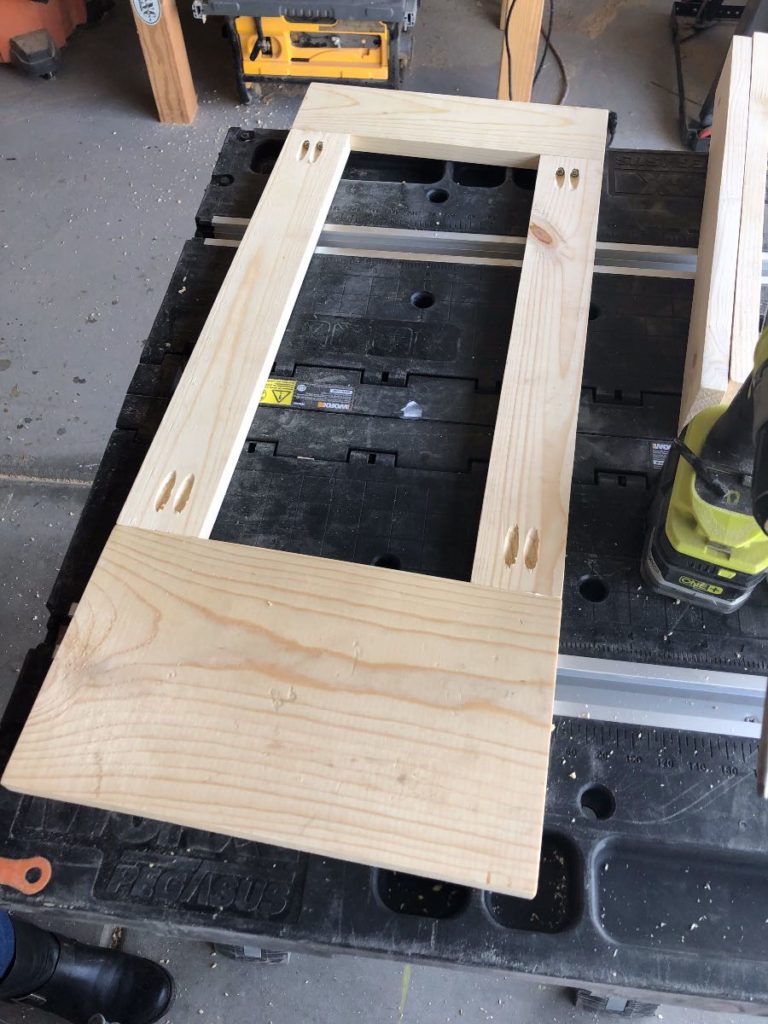
Attach the 1/4″ plywood pieces with glue and 3/4″ brad nails.
There should be a 3/4″ gap at the front of the side. This is to allow the front supports to sit flush with the sides so you won’t have
a strip of plywood showing.
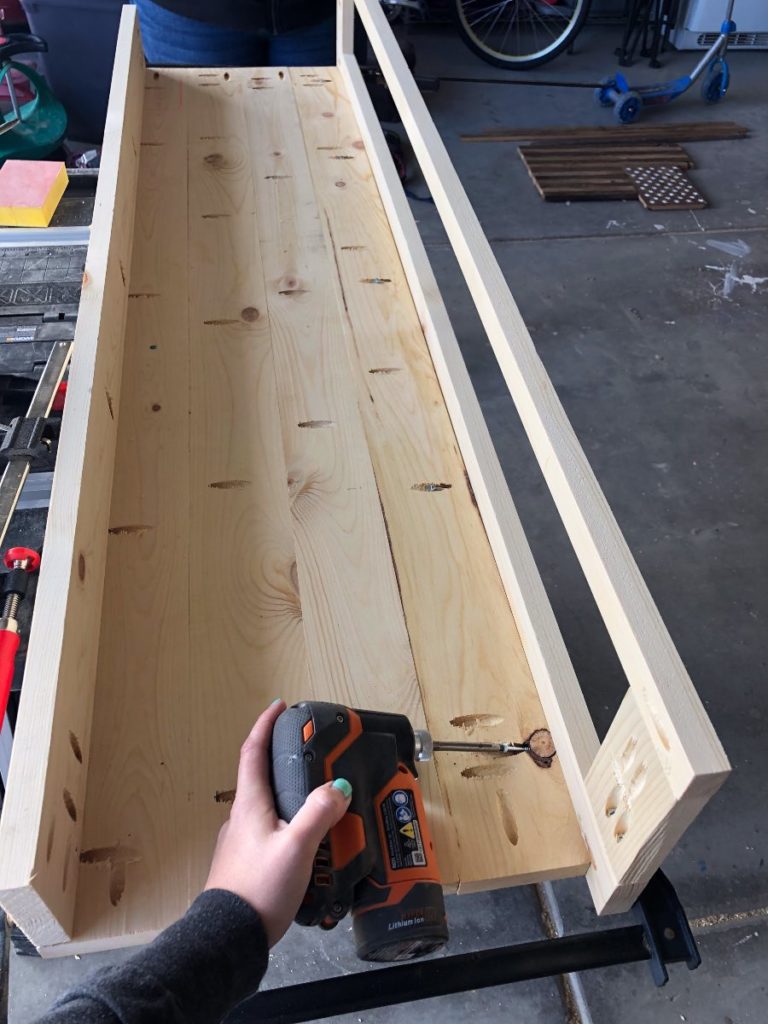
Step 3
Cut the boards labeled (base), add pocket holes along the lengths of all four of the boards with pocket holes going the opposite direction on the first board, and one on each end of each board, and attach them together, similarly to the top.
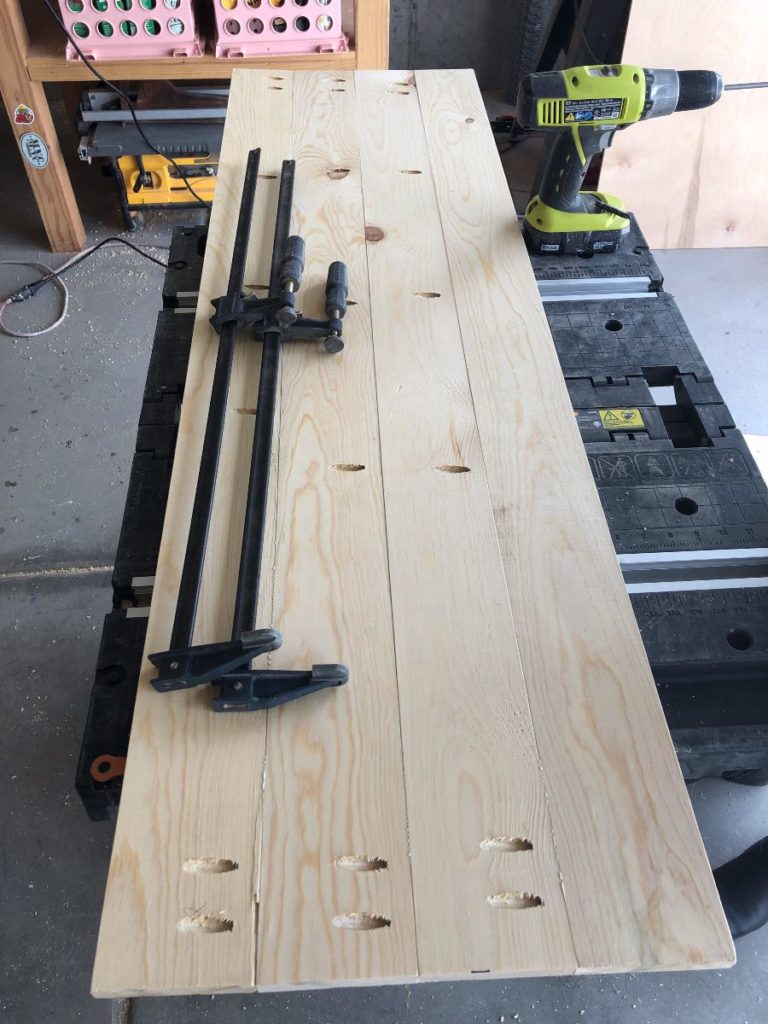
I did the pocket holes on the fourth board, ends, and the opposite direction on the first board after the photo, so don’t let that throw you.
Reference Step 4’s photo.
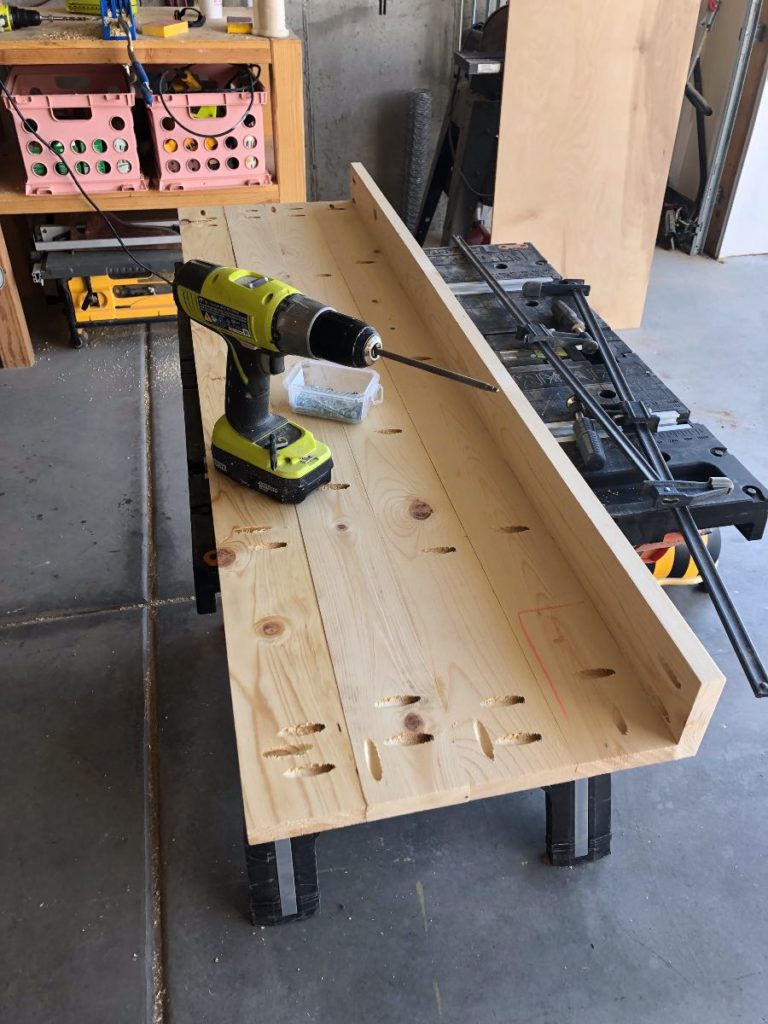
Step 4
Oh hey, there’s those missing pocket holes 😉
You’re going to cut and attach one of the 51″ (back) boards,
but first you will need to add pocket holes to either end of that board.
Step 5
Cut and assemble the frame of the front of the base.

To make up for the missing pocket holes on the base, I went pocket hole crazy on the frame. You don’t need the three pocket holes on either end. They’re unnecessary.
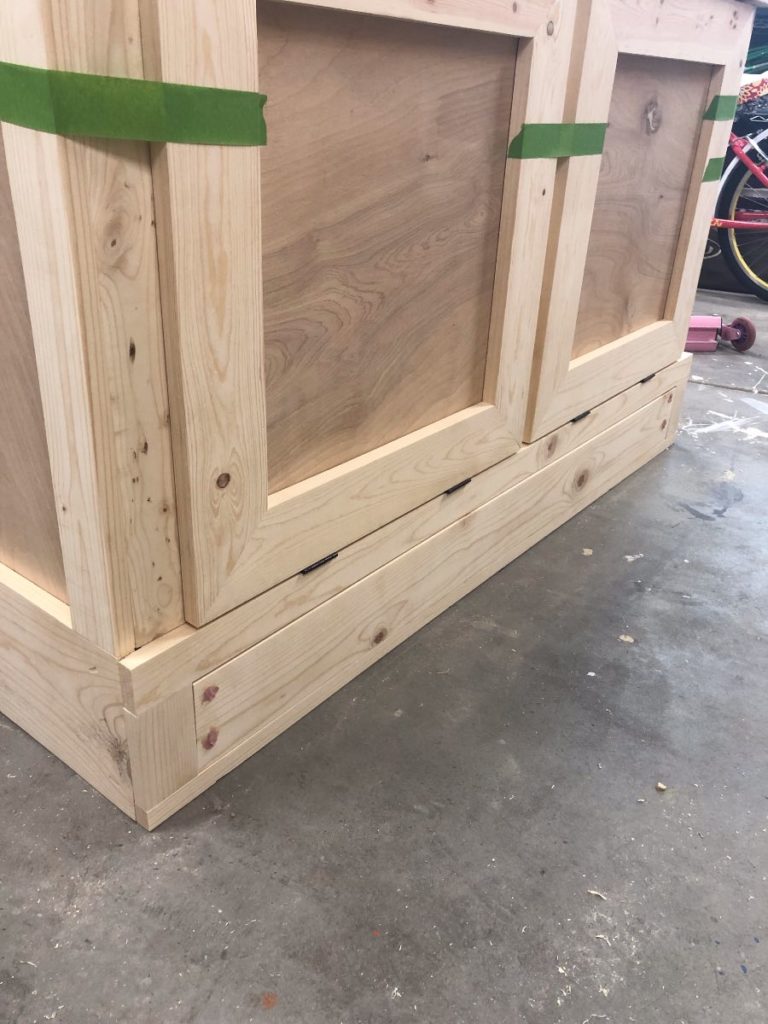
With the 2″ side down, attach the frame to the base
with a 1″ hangover on either side.
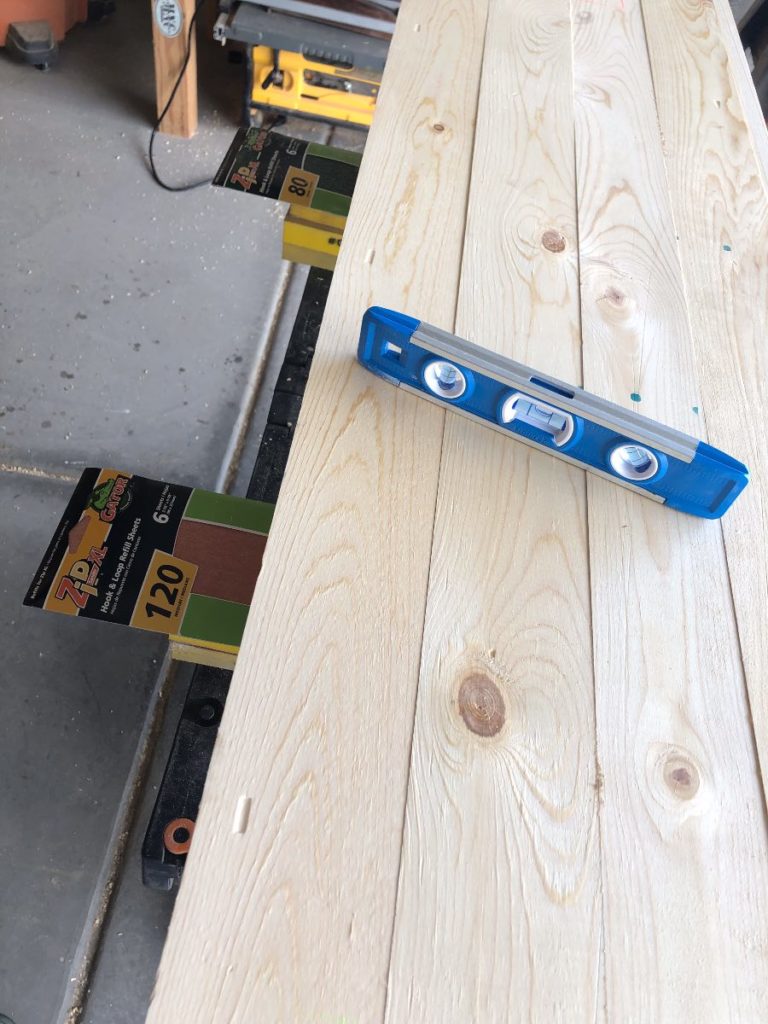
Step 6
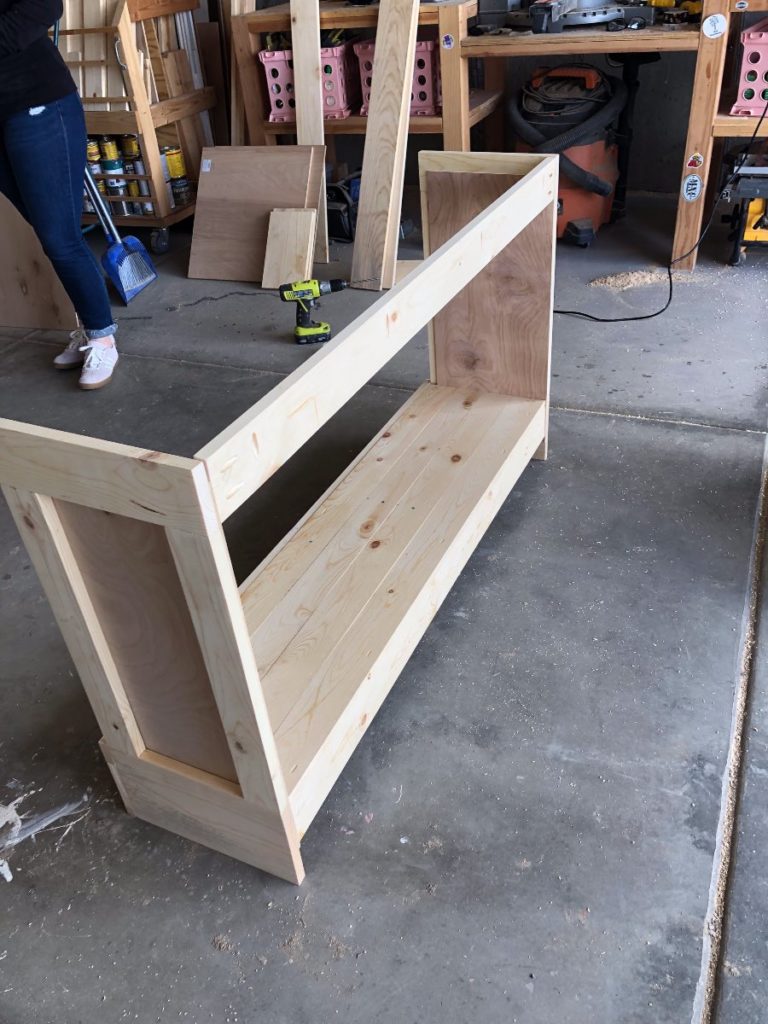
Flip the base over, and prop up the shorter side until the base is level.
I used sanding sponges and sandpaper stacked up until the level
showed that it was even.
Attach the sides to the base. They should sit flush with the front frame. You will need to access the pocket holes from the front where the drawer gap is.
*IMPORTANT: be sure the 3/4″ gap in the plywood is facing the front. Reference step 8 to see why*

Clamps help 🙂
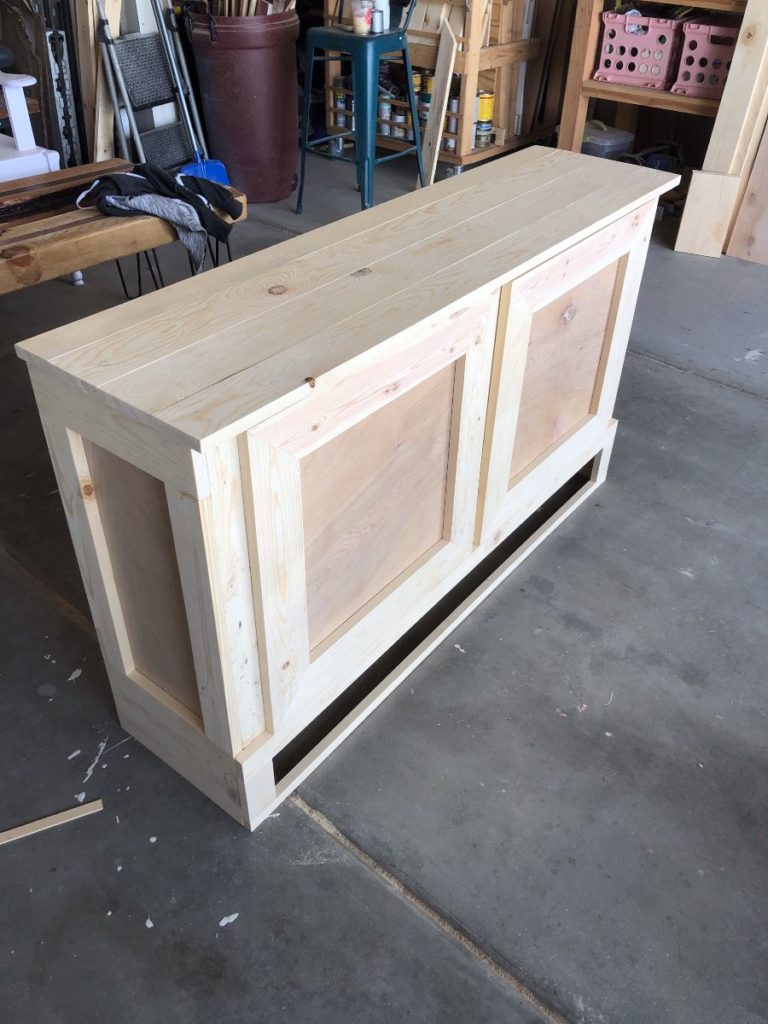
Once the sides are attached, you should be able
to stand it up and see it starting to take shape!
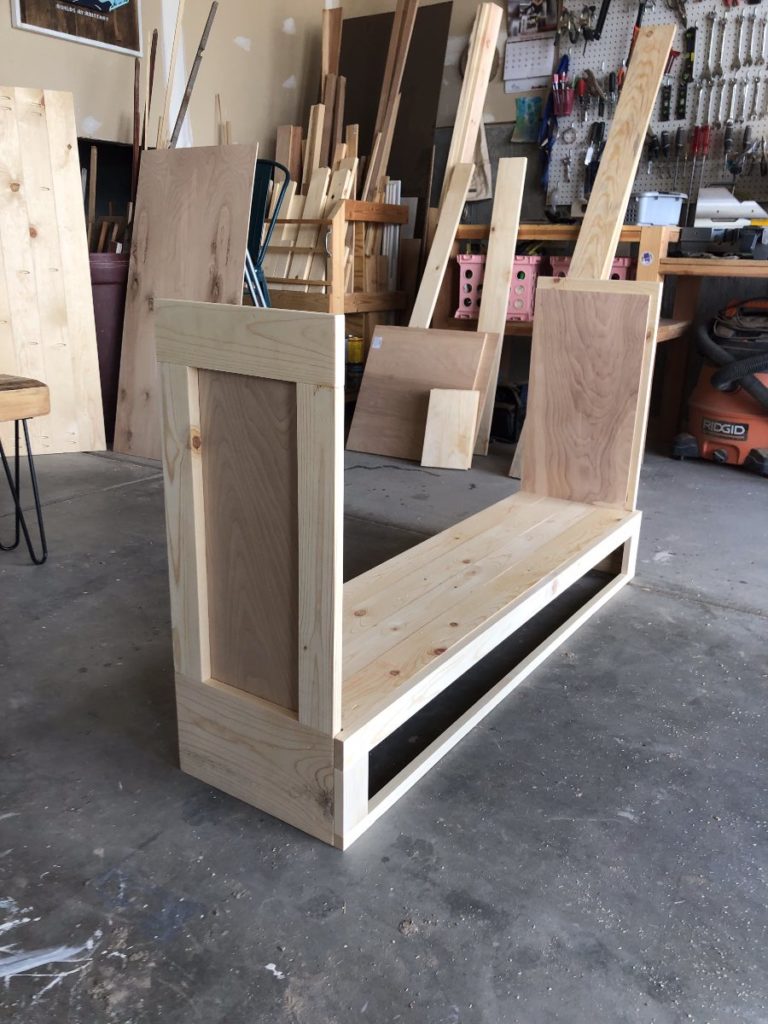
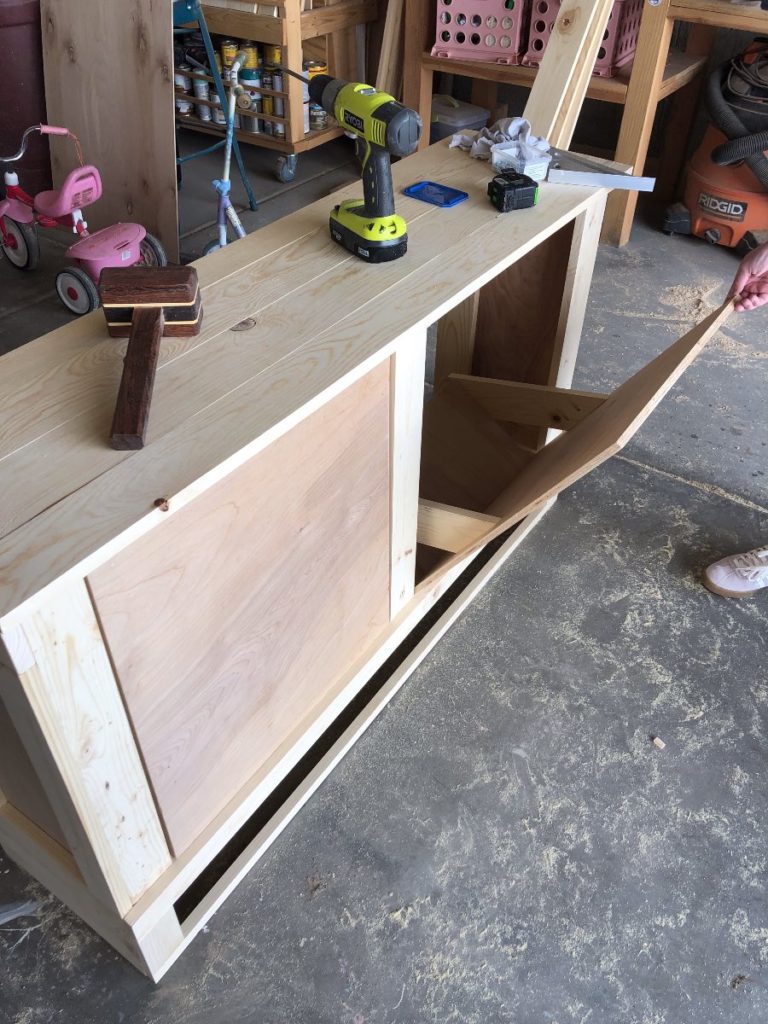
Step 7
Add the second 51″ (back) board to the top of the sides using pocket holes.
Step 8
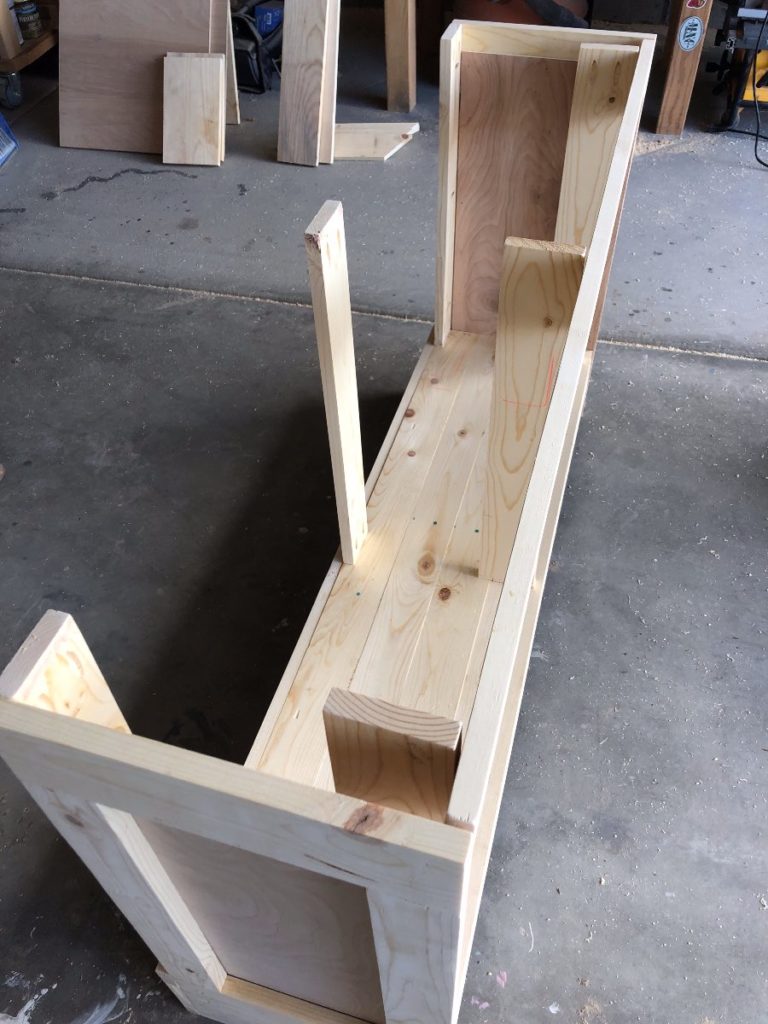
Cut your (inside supports) and
add pocket holes to either end of each board.
You will need to add 3 additional pocket holes down the
length of the two 2 1/2″ boards.
Attach the three same sized boards in the back.
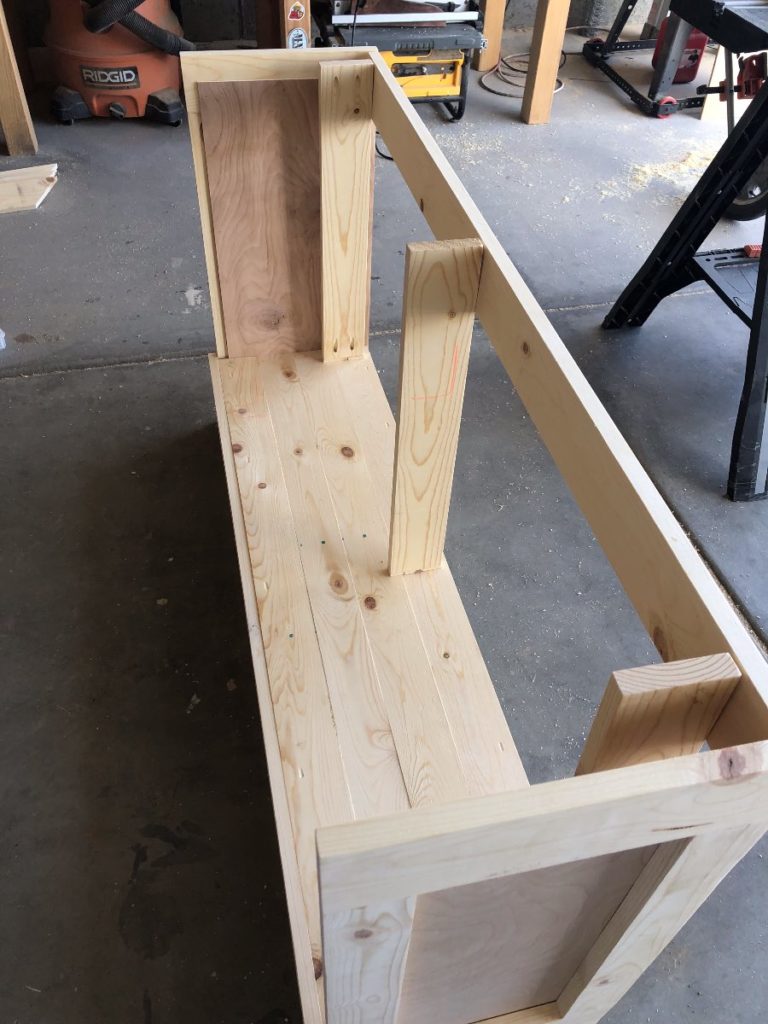
And the three inch board in the front in the center,
and the 2 1/2″ boards on the left and right of the front.
You should attach the extra pocket holes
of the 2 1/2″ boards to the sides to create a tight seam.
This is the point where it’s really important that the 3/4″ gap in the plywood on the sides was towards the front, so this board will join seamlessly with the side board. aka.. no plywood strip will be visible.
Step 9
Center and attach the top using the pocket holes on the inside supports.
Step 10
Let’s start building some doors, eh?!
Cut your 1/2″ ply and add pocket holes to the
two smaller pieces that look like these…
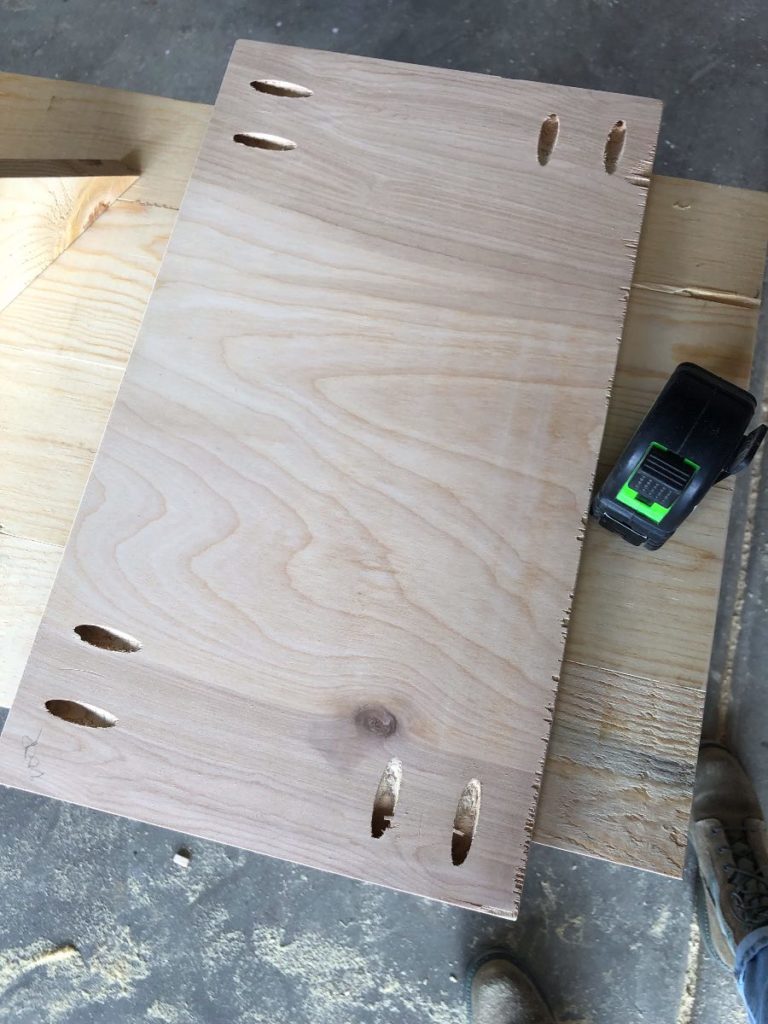
Attach the smaller piece to the bigger piece using the pocket holes.
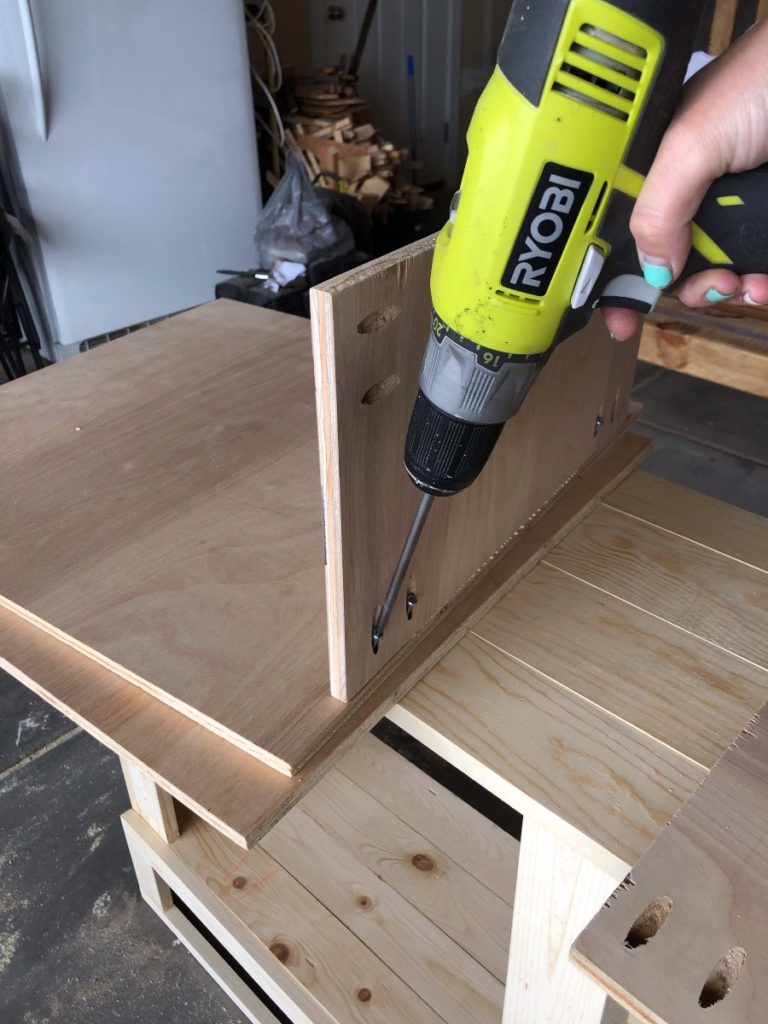
Cut your mitered pieces and add pocket holes to one end of each of the boards. Attach them to the big board using 1″ pocket screws and attach the smaller board using 1 1/4″ like usual.
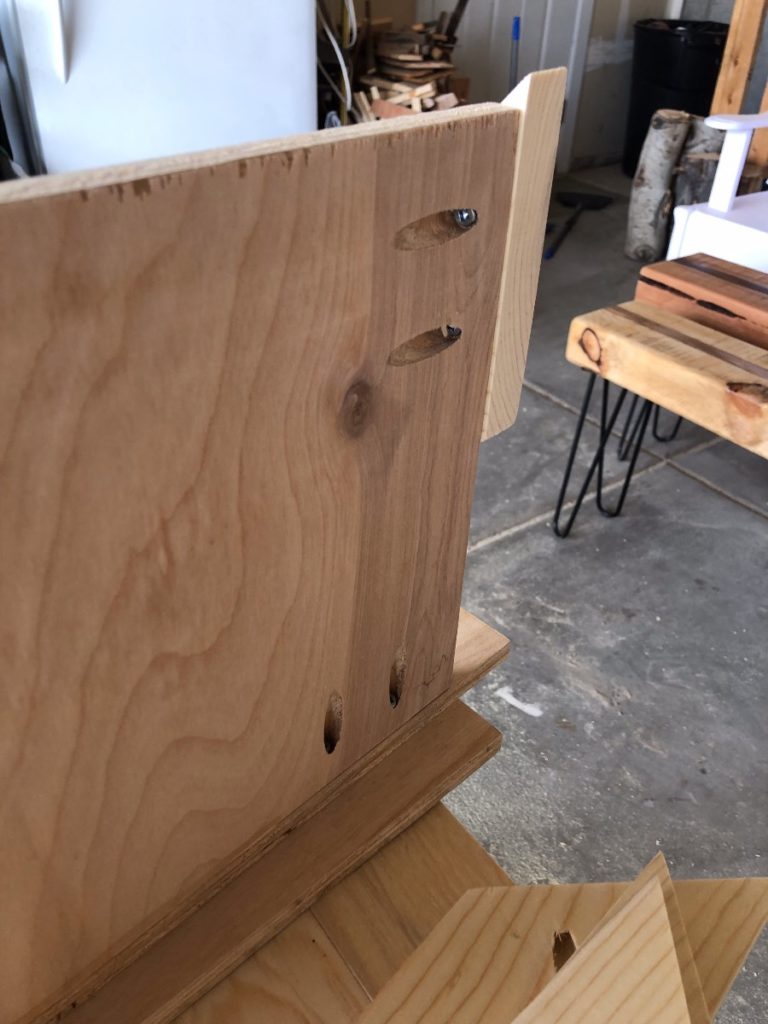
They should look like this when finished.
Do a dry fit just to double triple check that they fit. There should be a gap at the top, don’t panic. You will need space at the bottom for the hinges and the frame will take up some space as well.
Step 11
Take the doors back out and cut your mitered frame pieces. Use pocket holes to attach the frames together. You can use a band clamp, but I just had my friend hold them for me.
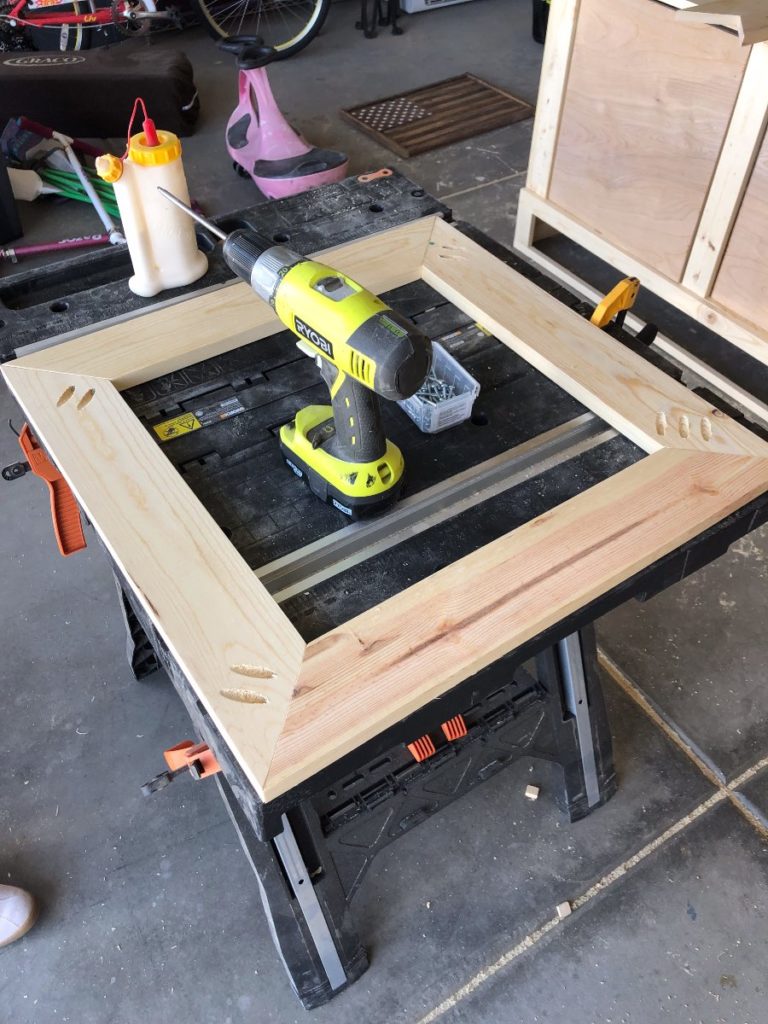
Glue and clamp the frame to the front of the door. The bottom of the frame will be flush with the bottom of the plywood.
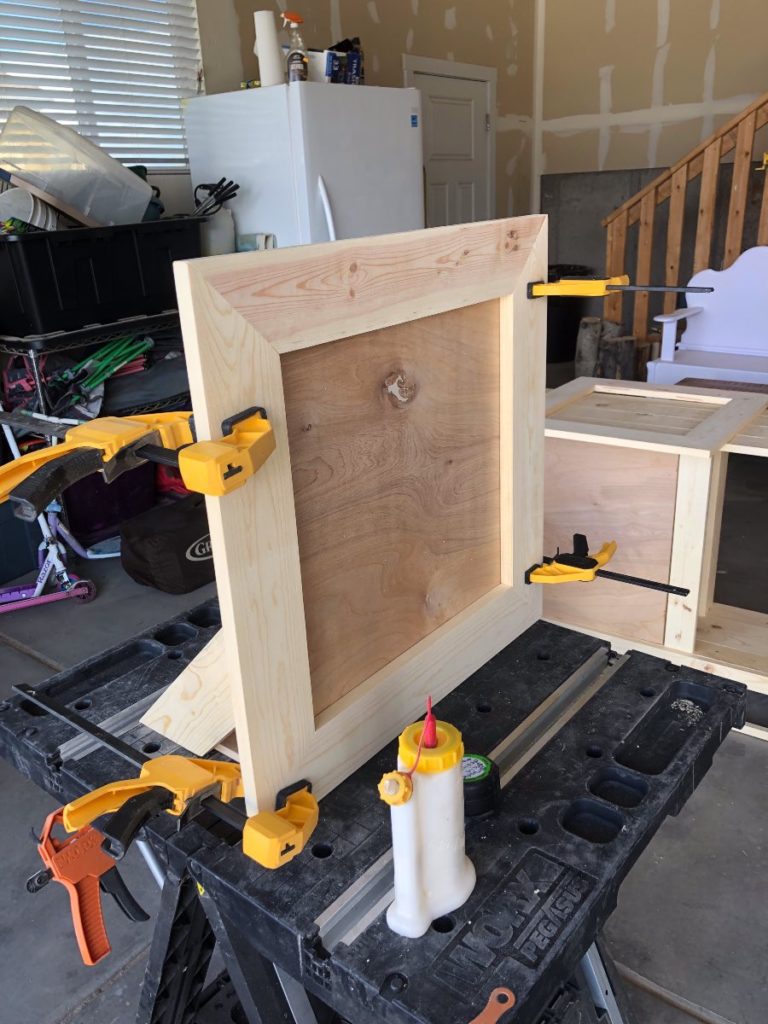
Use 1″ brad nails to nail into the frame from behind.
We’re so close now I can feel it!
But buckle up for a bit longer.. we still have a drawer to assemble.
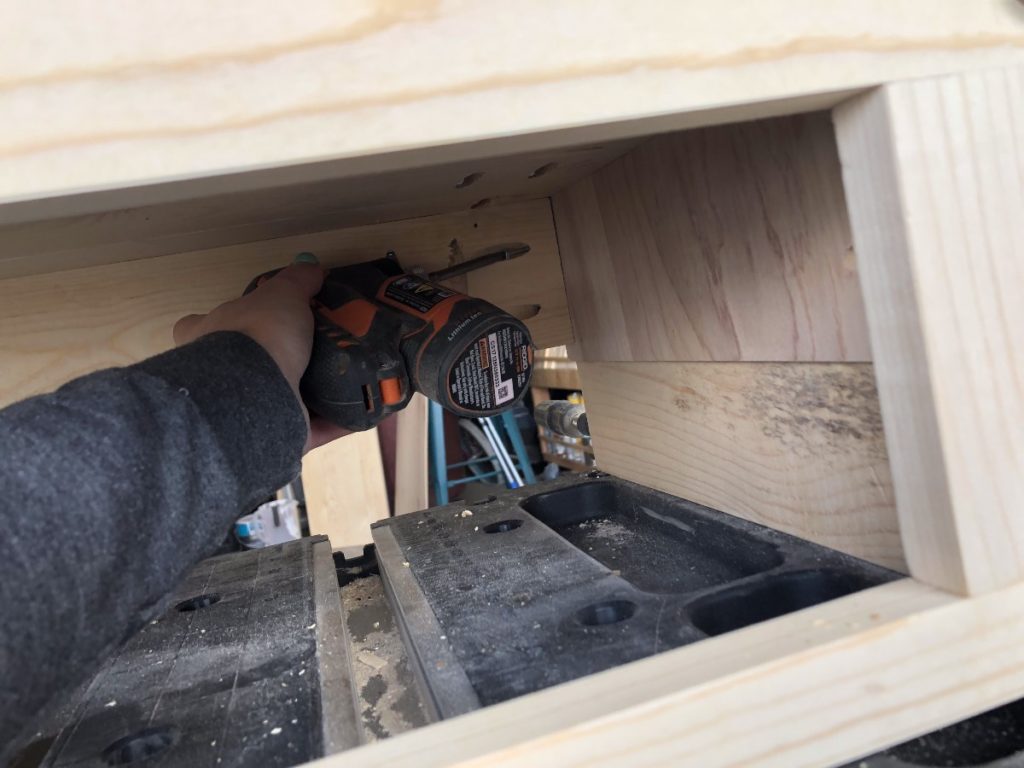
Step 12
Ready for the drawer?! Yeah, I wasn’t either. I didn’t leave a whole ton of wiggle room with the dimensions so the measurements have to be absolutely perfect or it won’t function. If you’re a newish wood worker, I would suggest making the height of the drawer and drawer front smaller so you have more wiggle room for error.
Alright, enough talk. Let’s get to it. First thing’s first, we need to add a couple drawer supports to the inside of the base to attach your drawer slides to. Cut two pieces at 12 3/4″ x 6″.
Add pocket holes to either end.
Flip the buffet over onto its top and add the drawer
supports so they are flush with the opening of the base.
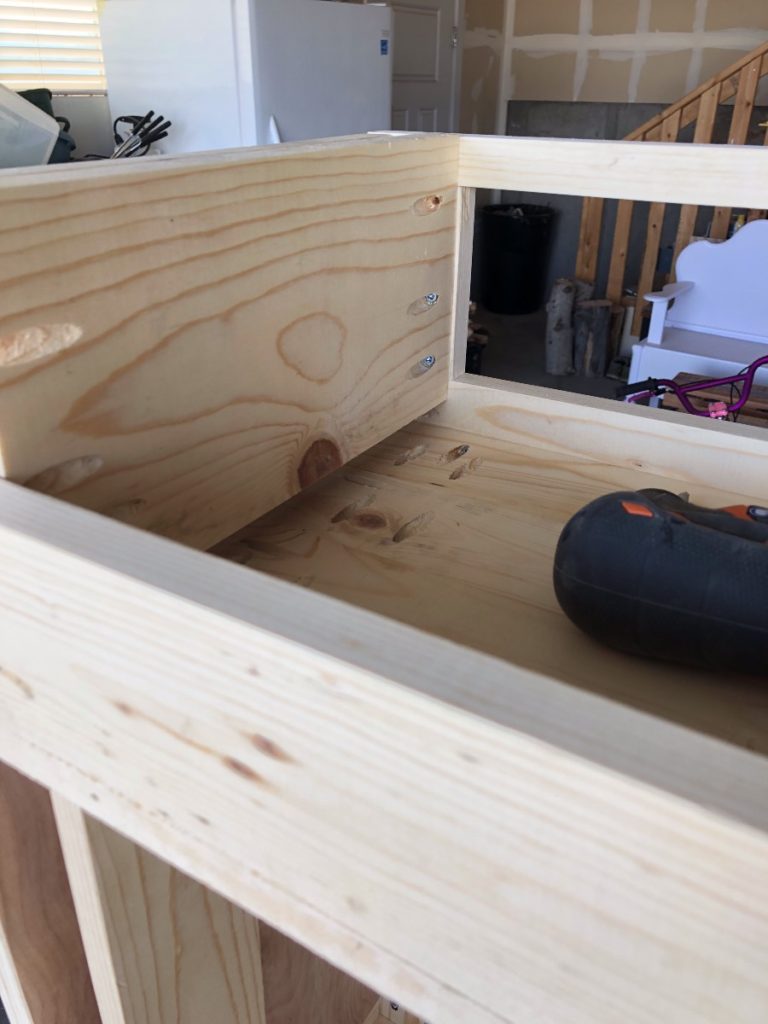
The key here to having a functioning drawer on the first shot, is to double check that the distance between the two supports is the exact same from front to back.
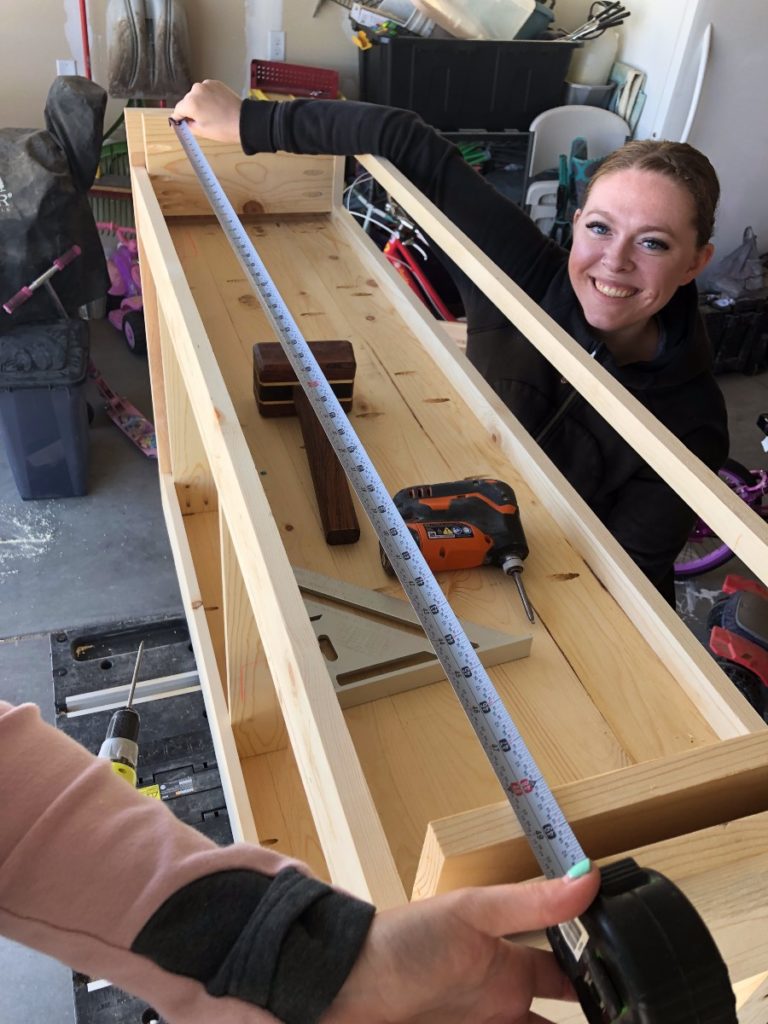
If you have tiny arms like me you may need a friend to help.
Oh hey there’s Ainslee. Everyone say Hi Ainslee!
My distance between the supports was exactly 48 1/8″ front to back. If yours is not exactly 48 1/8″ you will need to adjust the size of your drawer to match. Drawer slides are 1/2″ wide each so your drawer will be exact 1″ shorter than the width between the supports.
I want to be thorough so for example: my drawer supports length was 48 1/8″ so my drawer width is 47 1/8″. Make sense?
This is also why it’s important to make cuts AS YOU GO so that you can adjust measurements if needed.
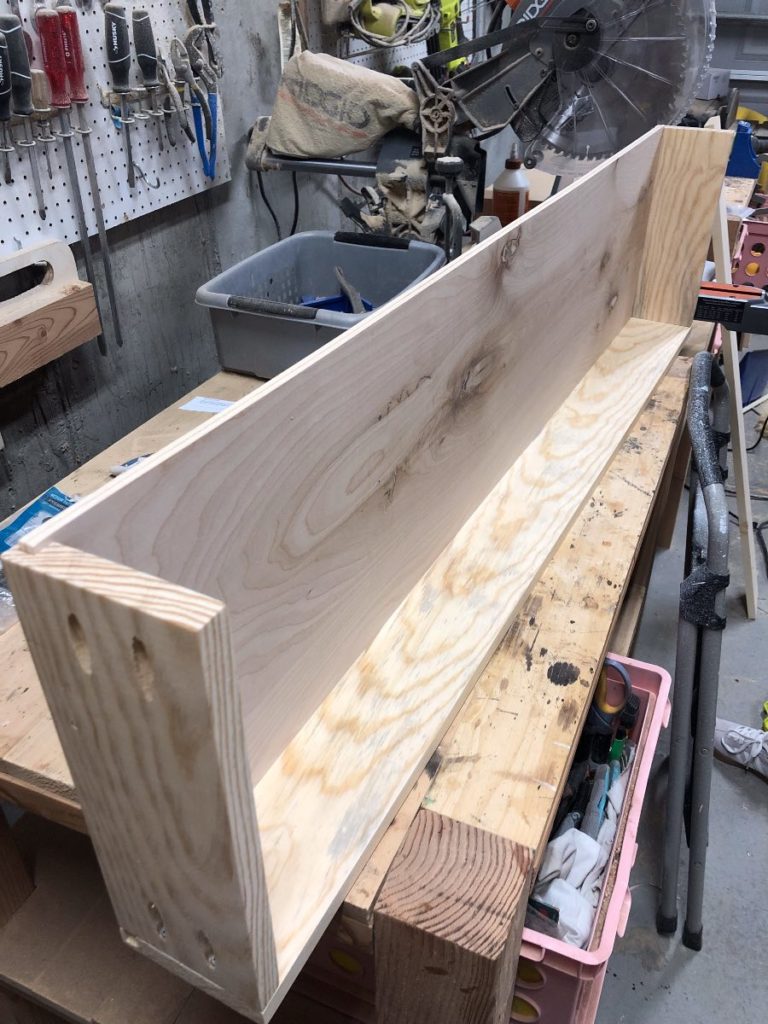
Step 13
Let’s build a drawer! Ainslee wanted as much depth in her drawer as possible so the sides are the same height as the drawer front.
Cut your sides and back of your drawer. I used my table saw to create 1/4″ grooves for the 1/4″ ply to slide into, then attached them with pocket holes.
Cut your remaining 1/4″ ply to 46 3/8″ x 12″ and slide it into place.
Step 14
Install your drawer slides on the insides of the buffet. It’s important that they are level, and that they sit at the exact same height.
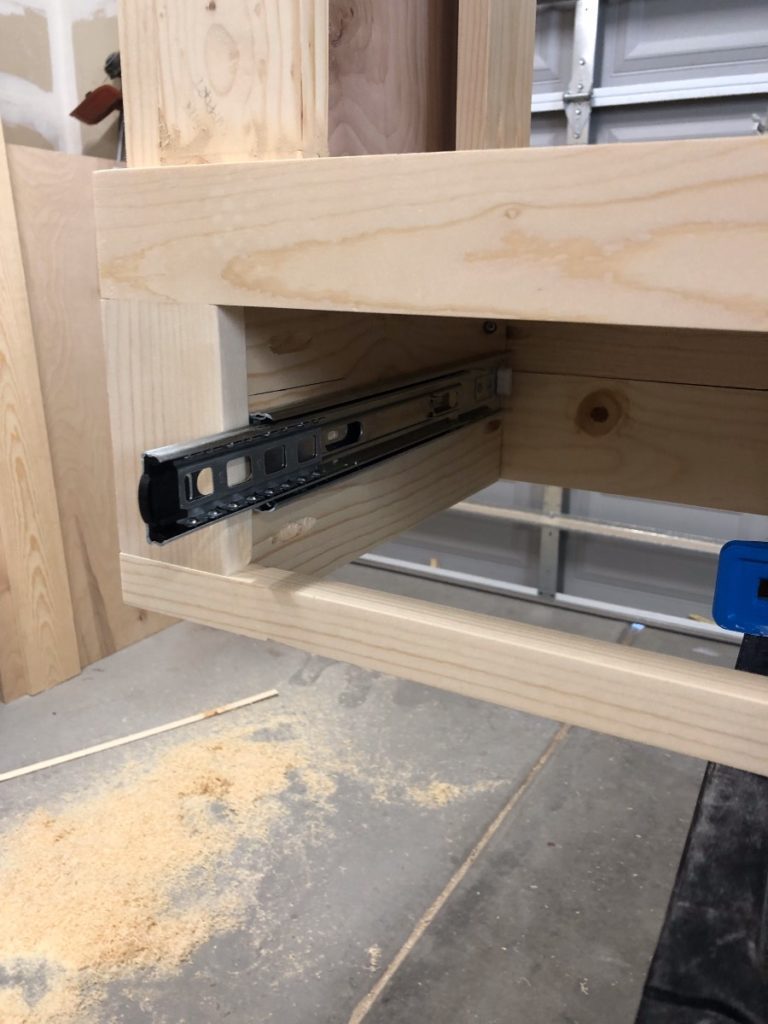
Your drawer will need to sit 1/8″ up from the bottom of the opening so measure up to the slide, and subtract 1/8″ from that number. Then measure from the bottom of the drawer up to that and that’s where your drawer slide should be. In all of my total stressed out craziness that drawers cause me, I skipped photographing this step. Many, many apologies!!
Here the drawer is in place.
It should sit centered an 1/8″ from the top and an 1/8″ from the bottom.
Step 15
Make your final cut – the drawer front. It should be 4 1/4″ x 47 3/4″. It should fit into the drawer opening with just a little bit more than 1/8″ clearance on either side.
Cut a 1/4″ groove along the bottom of the drawer at the same height you cut the sides and back then slip it onto the plywood and into place. I used countersink bits to drill the drawer front into the sides, screwed it on, then filled the holes with tiny dowels.
Again, in all the crazy stressedness that drawers bring me, I forgot to photograph this as well. I hope I described it well enough for you.
Please email or comment with ANY questions!
I am happy to answer as best I can!
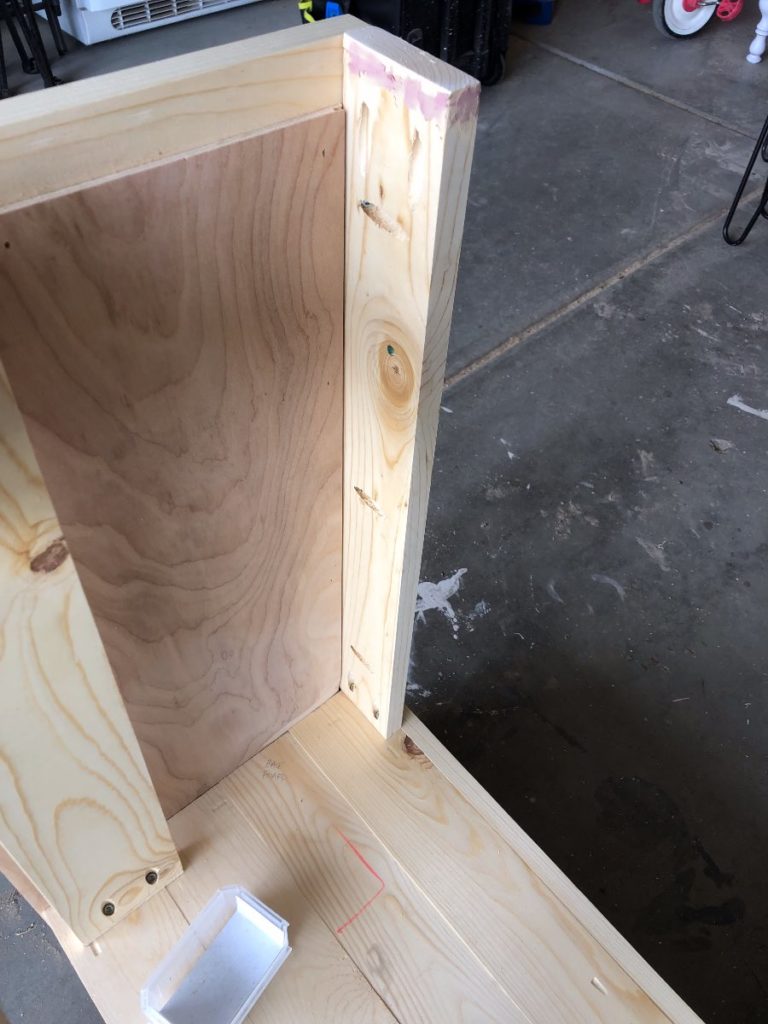
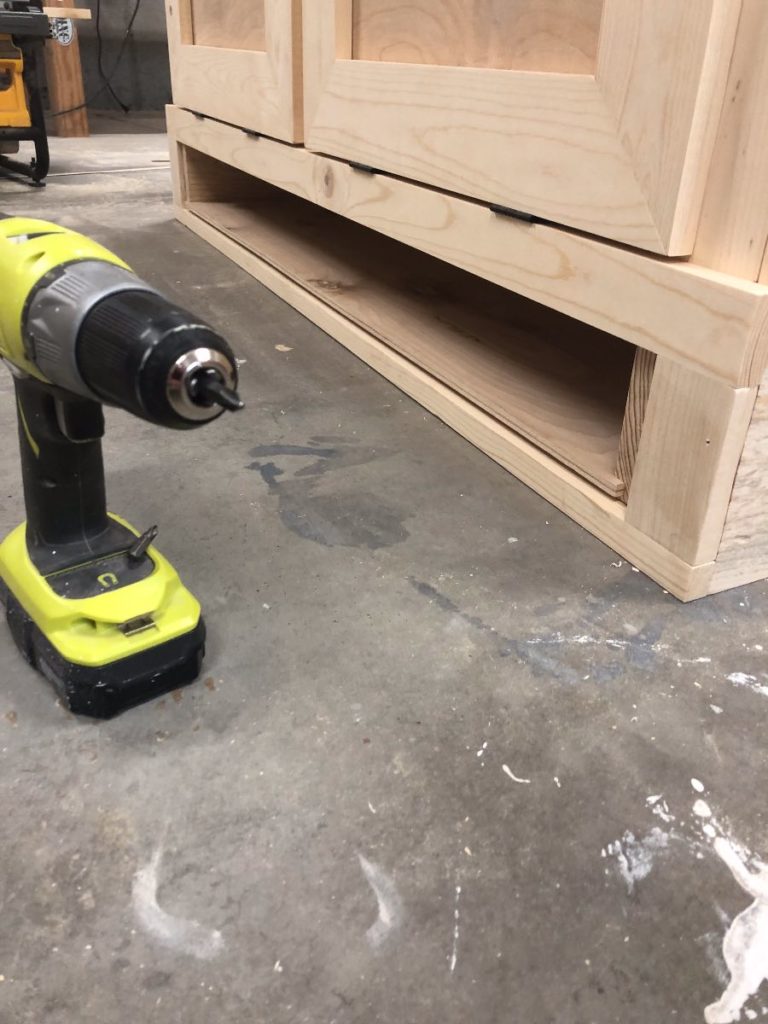
Should look like this once in place.
There’s a little wood putty around where I placed the dowels in the countersink holes so you should be able to tell from this picture where I drilled them.
At this point I had already attached the doors, but I’m going to show you how to do that now.
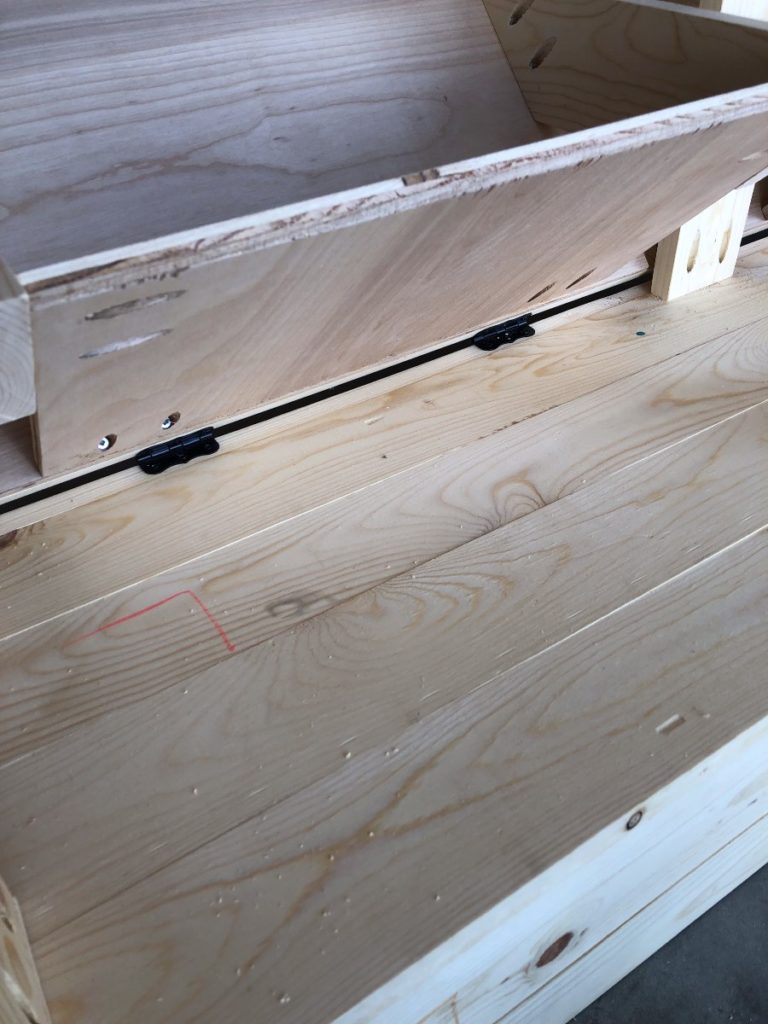
Step 16
Attach the hinges to the bottoms of the doors,
then while leaning them up against the base, attach the hinges to the inside of the front frame. You may need
a friend to help you hold them steady while
you drill them on.
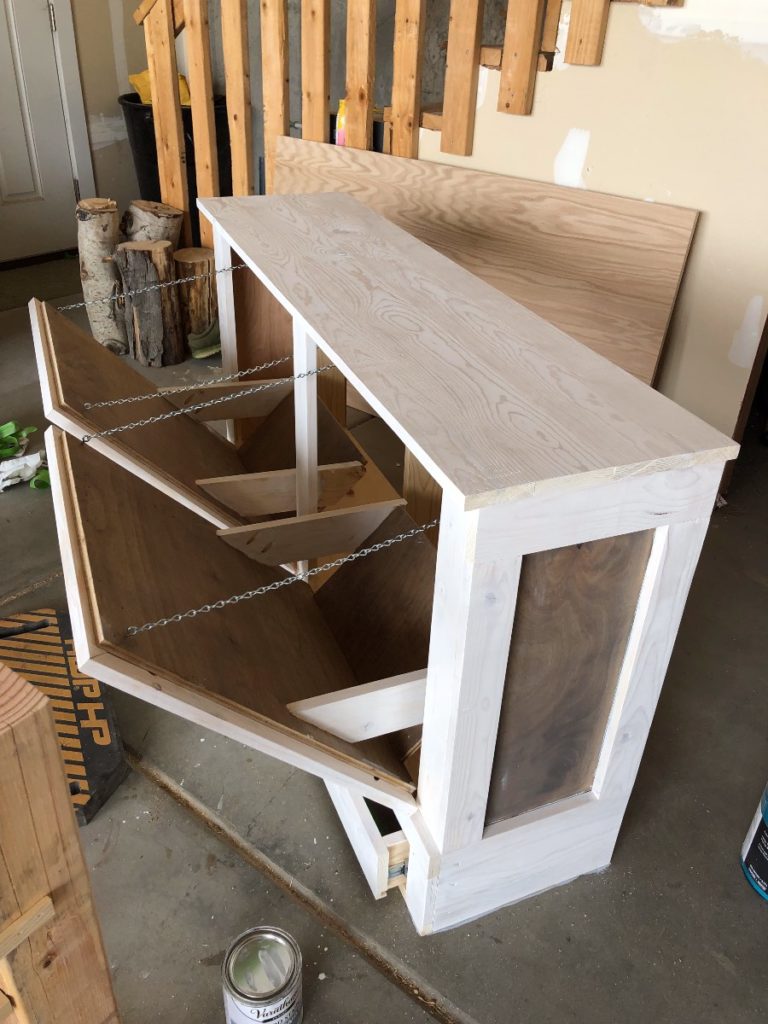
Step 17
I used eyelet screws and chains to attach the doors to the
inside of the buffet to give the doors stability when you open them.
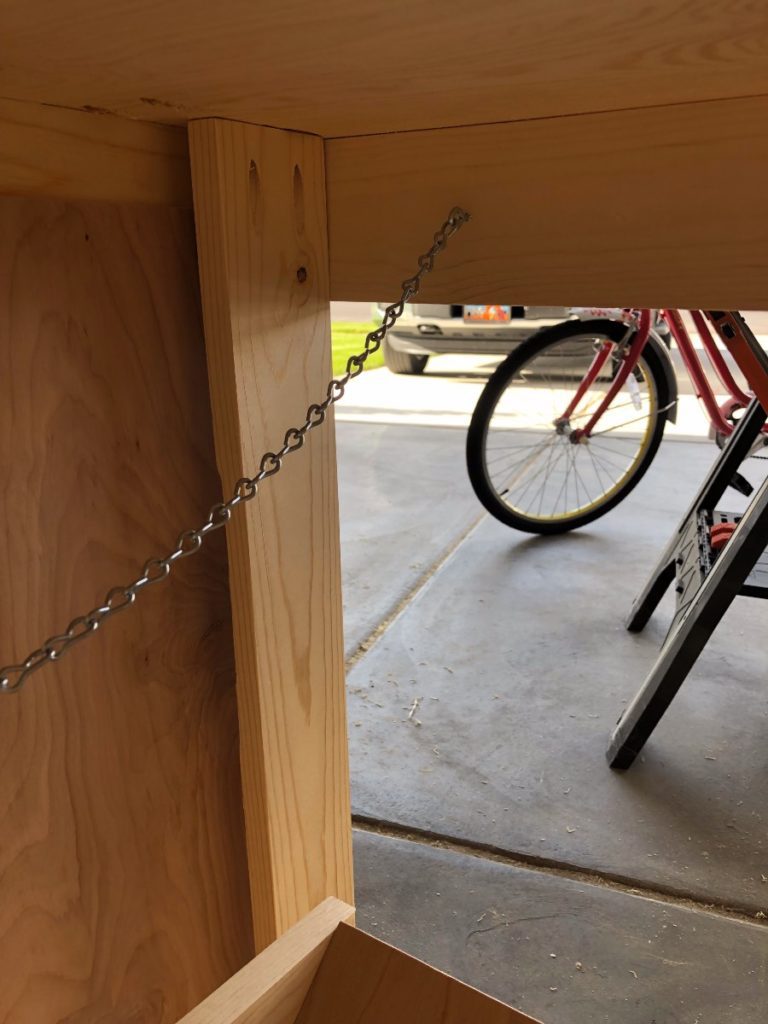
I drilled the eyelet into the back runner and then attached the chain to it.

To measure how long I needed the chain, I put the dog food bin into the door, pulled it to where it was open enough for the lid of the bin to clear the top, and cut the chain to that length.
Step 18
All that’s left is drawer pulls!!
First I stained each panel in a Classic Grey
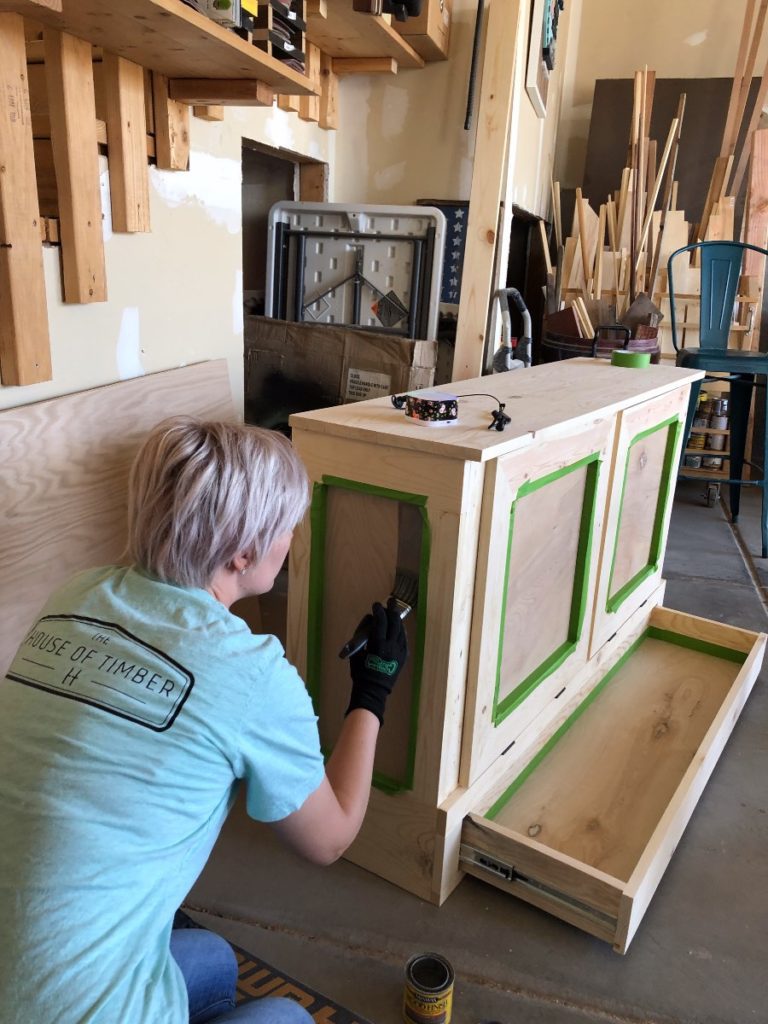
and then stained the rest of the buffet in a
white wash.
Then finally attached the drawer pulls.
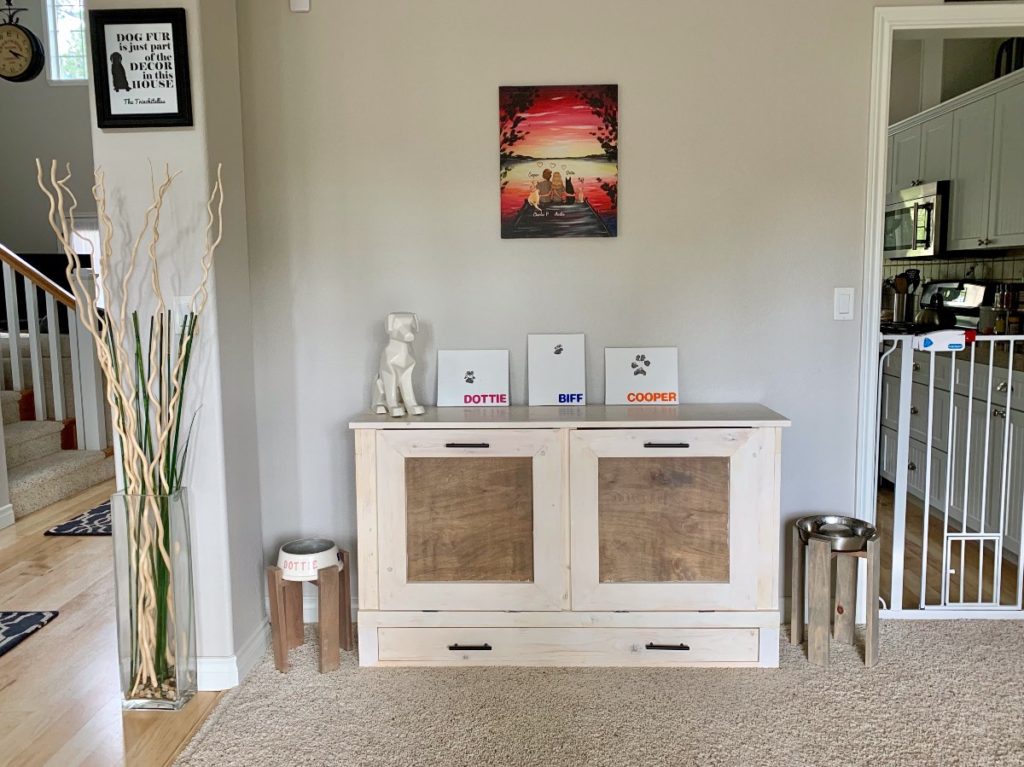
Whew! Done! And how perfect is this setup??
Tutorial for the dog bowl stands can be found here.
Thanks so much for following along and I hope you enjoy your build!
As always, don’t forget to post your pics, tell your friends, and PIN this project!