Home Decor, Tutorials
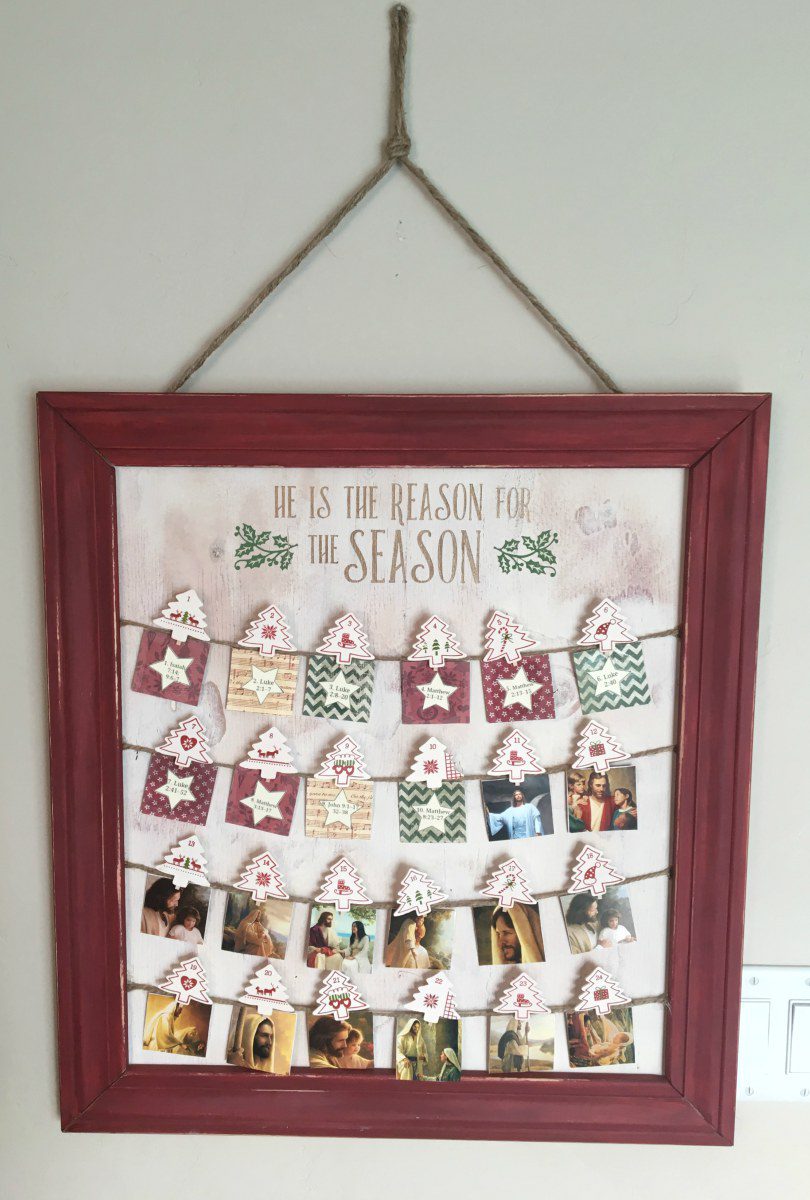
Christmas Advent Calendar
Don’t forget to stay updated by following Overalls & Power Saws on Instagram and Pinterest!
I am so excited to share this Christmas Advent Calendar with you!
First of all, I love EVERYTHING Christmas!
Don’t you??
Secondly, in my home, we do our best to keep it a Christ-centered Christmas,
and this advent is just one of the ways we do that!
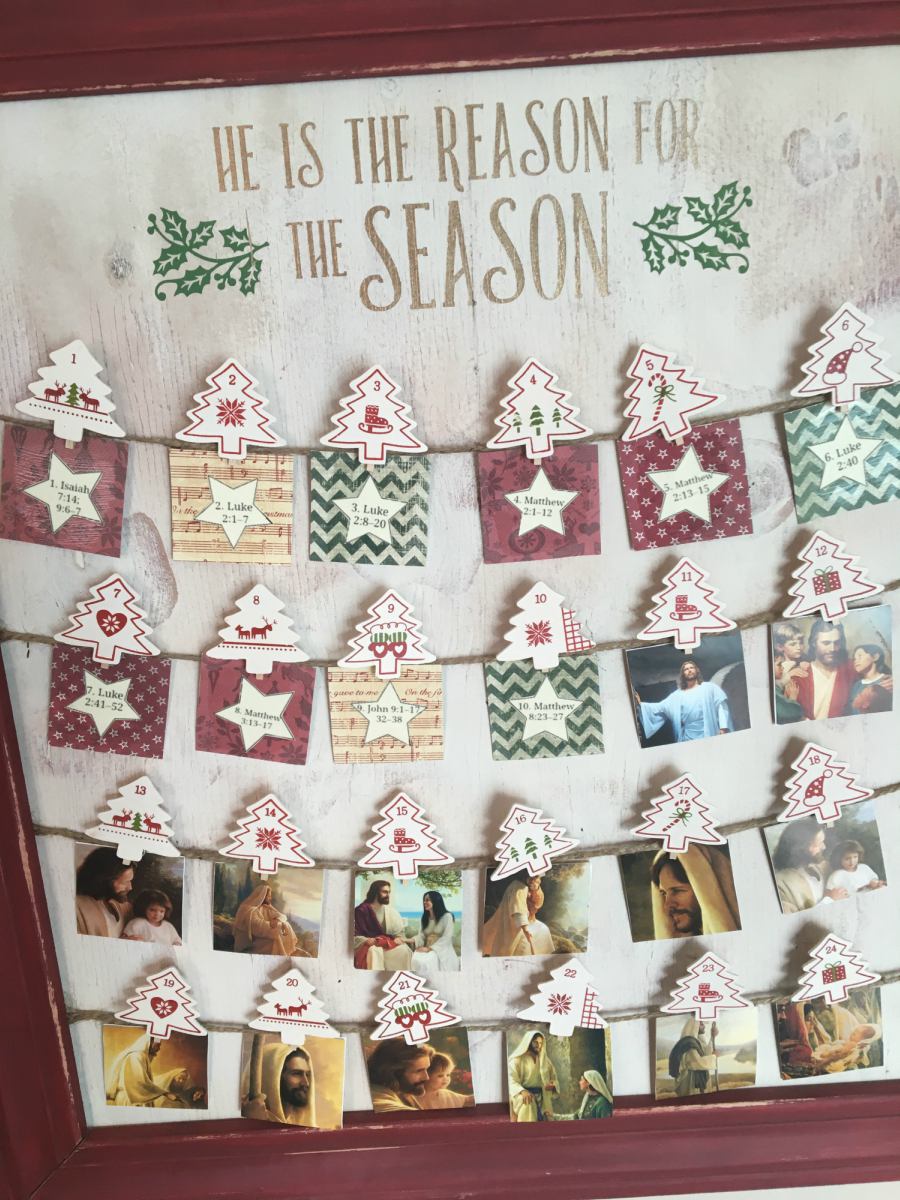
Each night starting December first, you can turn around a picture of Christ
and read the scripture on the back! I got the scriptures from Pinterest
(of course – our source for ALL things)
and it follows the life of Christ.
There are 25 total scriptures so you even get to read one with the fam
on Christmas morning!
Christmas Advent Calendar
Dimensions: 21 1/2 x 23
Materials:
- 2’x2′ – 1/4″ or 1/2″ plywood – either will do
- 6′ trim – any style you like! I got mine at Lowe’s
- Off-white paint – I used FolkArt Chalk Paint in Sheepskin
- Red, Green, and Gold paint – I used Americana acrylic in burgundy and evergreen, and Martha Stewart Metallic in Brushed Bronze
- twine
- tiny clothespins – which you can find on Amazon
- Christmas scrapbook paper
- Christ pictures – you can find them here and here or at Deseret Book – you’ll need to buy both packs in order to have enough for all 25 days
Cut List:
- 17 1/2″ x 20 1/2″ – 1/2″ or 1/4″ plywood
- 21 1/4″ trim – 2 – these are mitered cuts so the length is from long tip to long tip
- 23″ trim – 2
Step 1
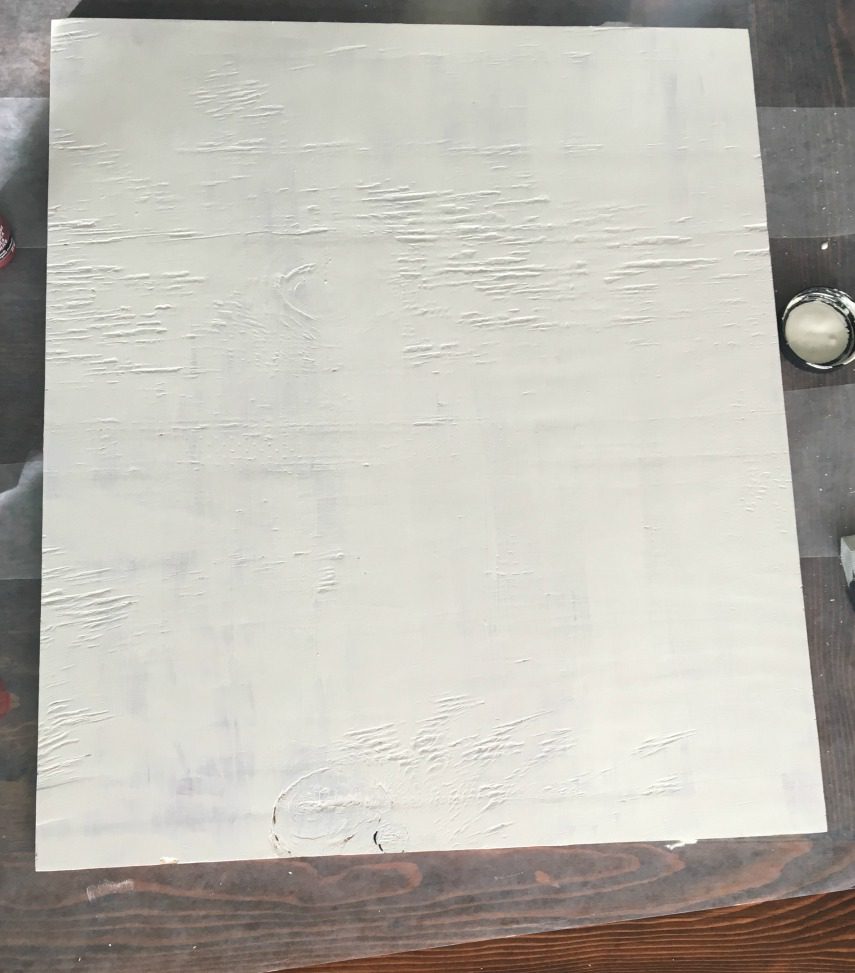
Cut your plywood down to size. Sand the face of the plywood smooth.
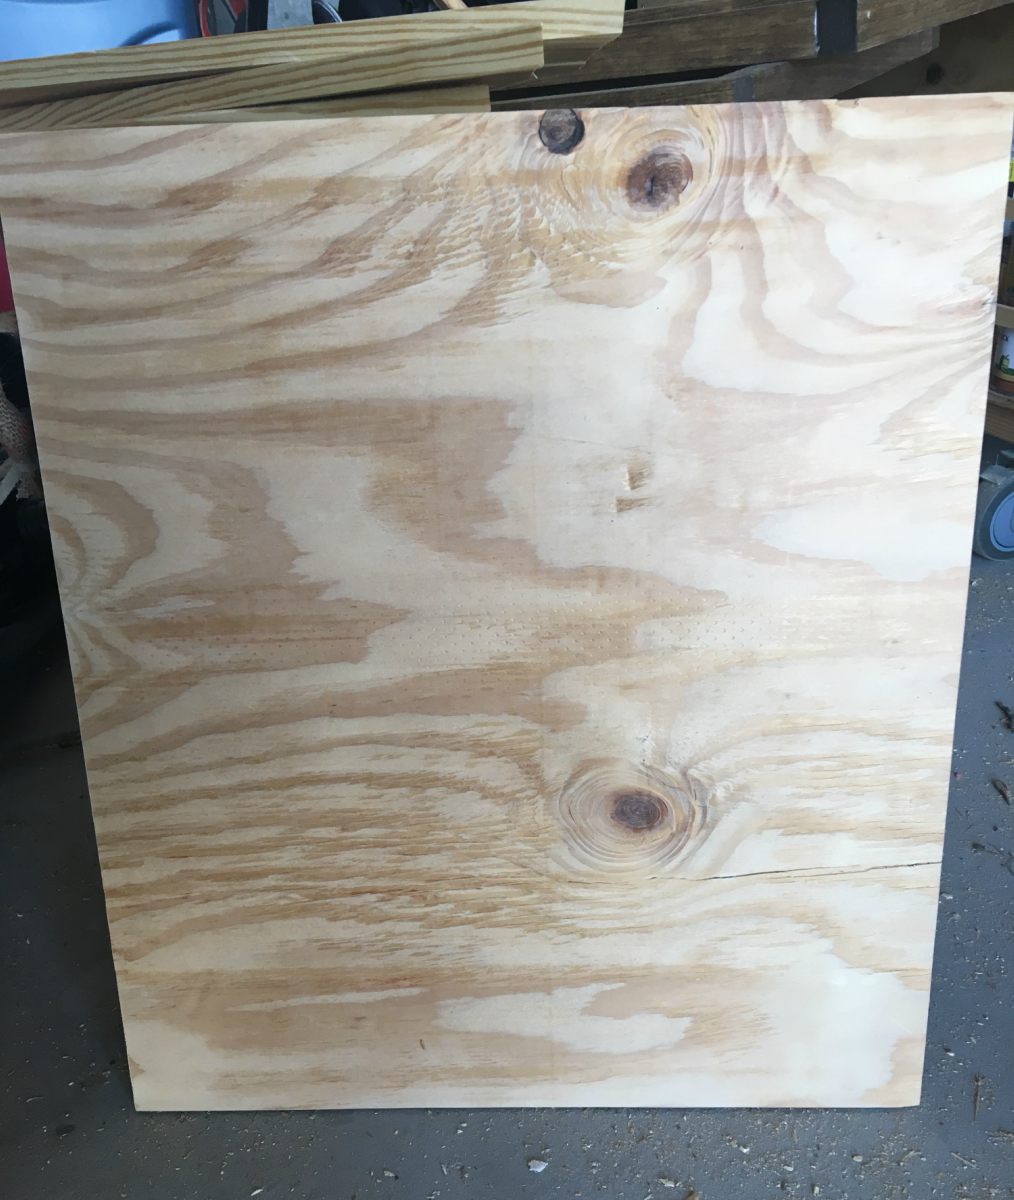
I used scrap plywood, so it’s not the prettiest, but I covered it in paint, so it doesn’t really matter.
Step 2
The way I painted it is totally optional. You’re free to paint it however you like.
But this is what I did.
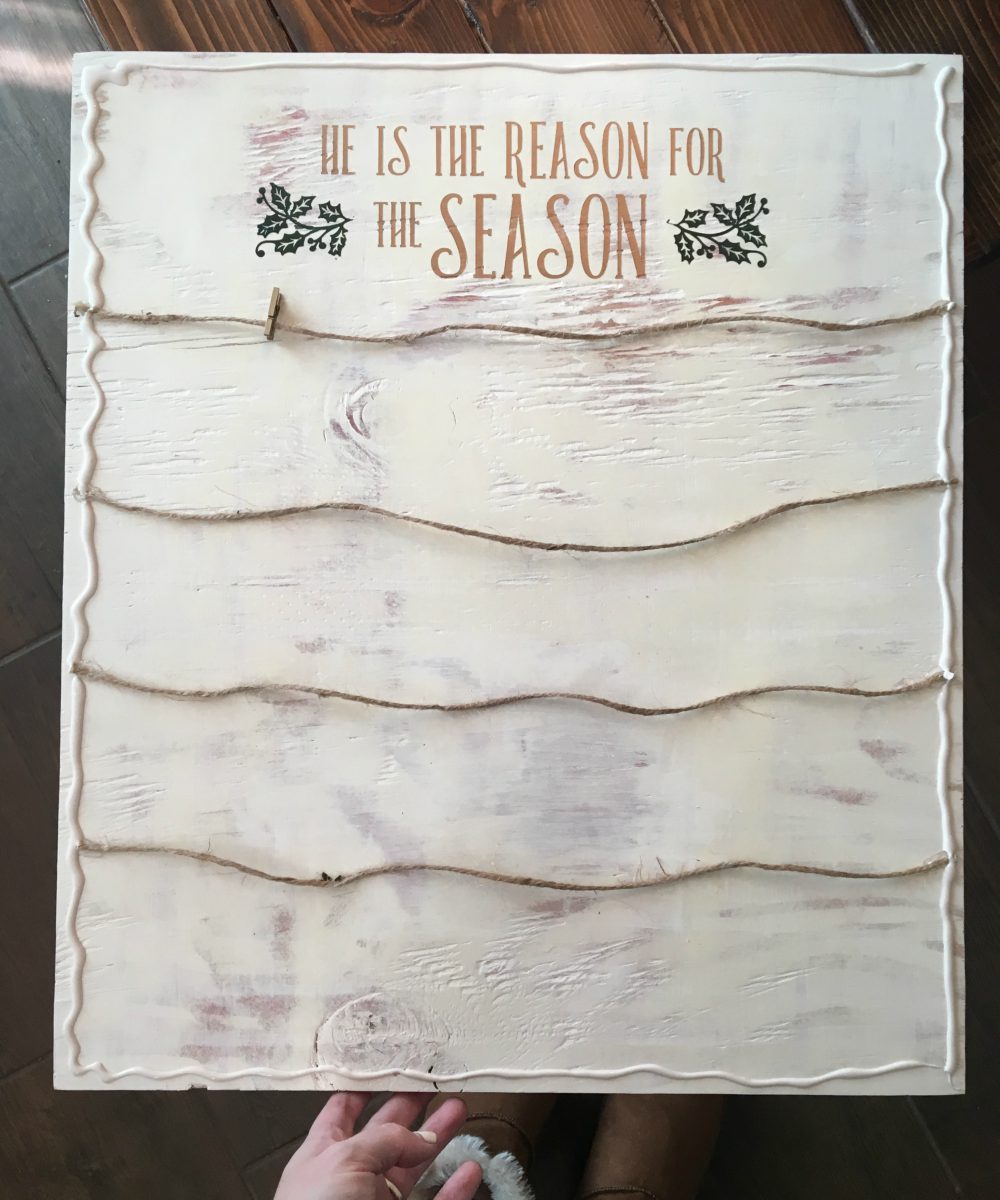
Paint a little bit of splotchy red onto the plywood.
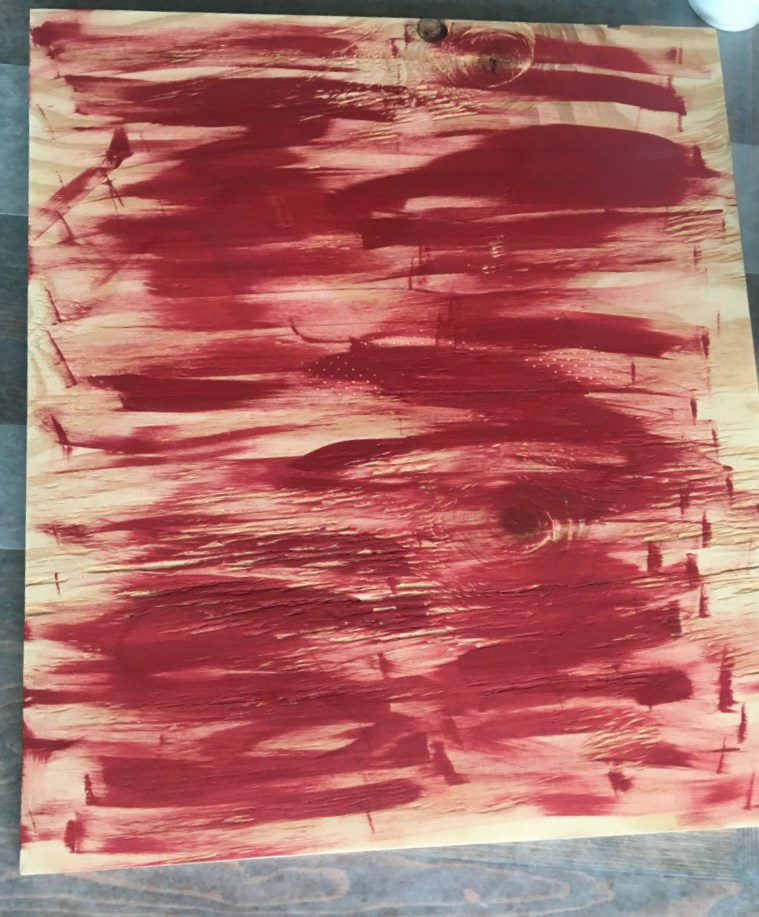
Once that’s dry, sand it down.
And apply two coats of the Sheepskin Chalk Paint.
Sand that just enough to where the red starts to show through again.
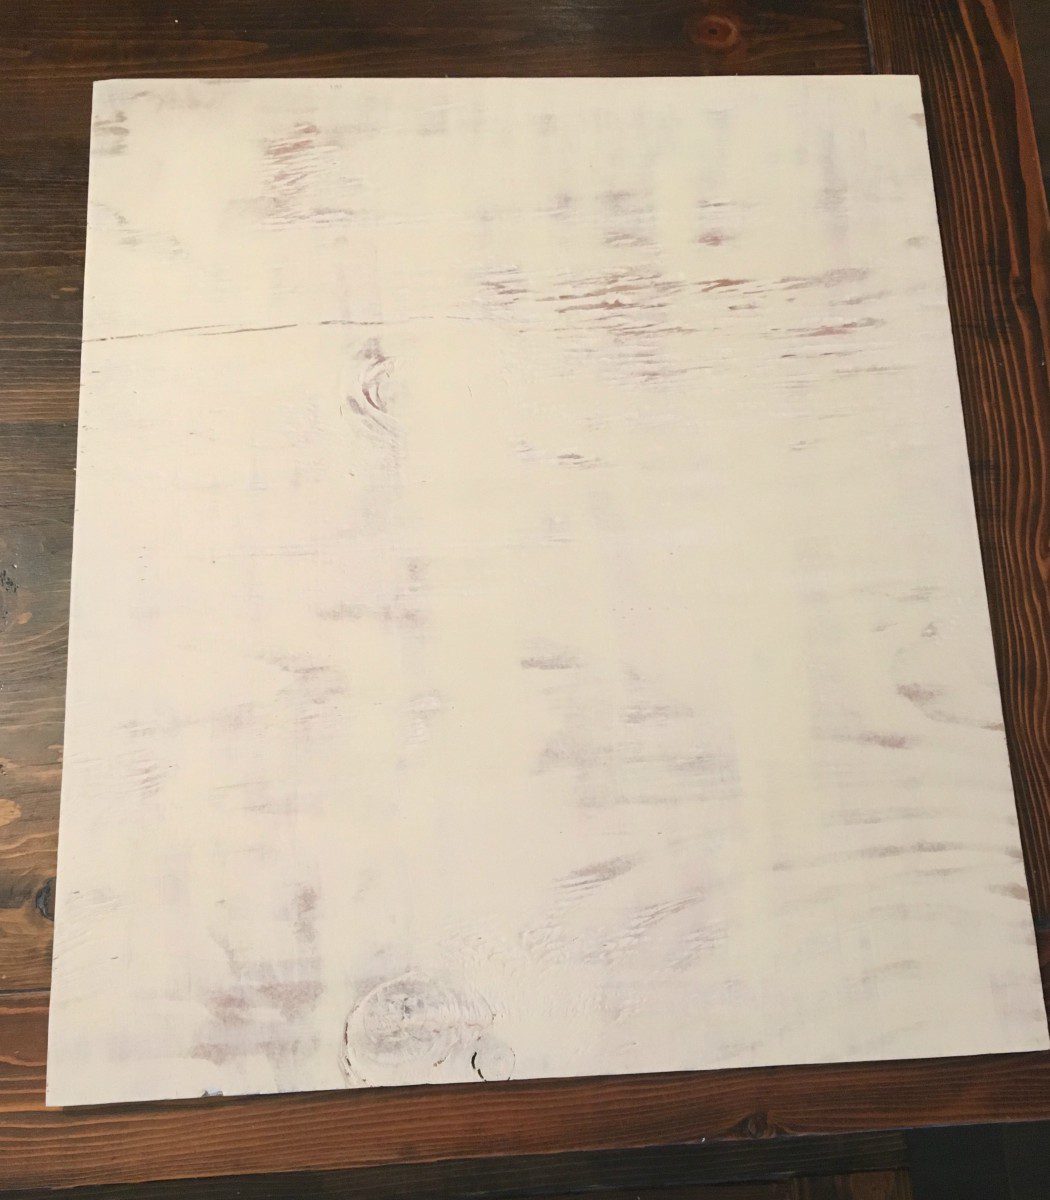
I like this kind of a distressed look but, again, do what you want!
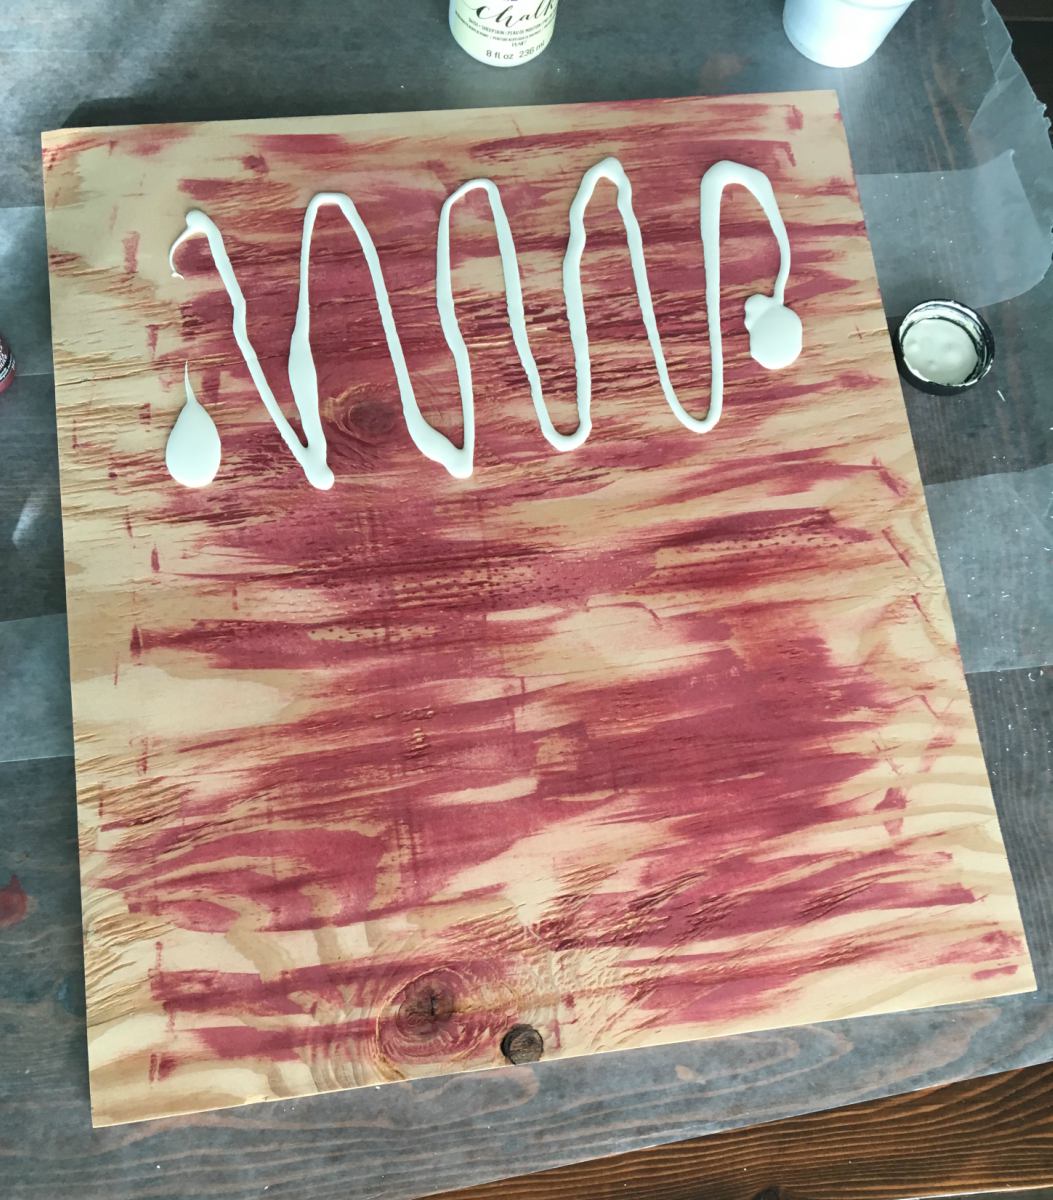
Step 3
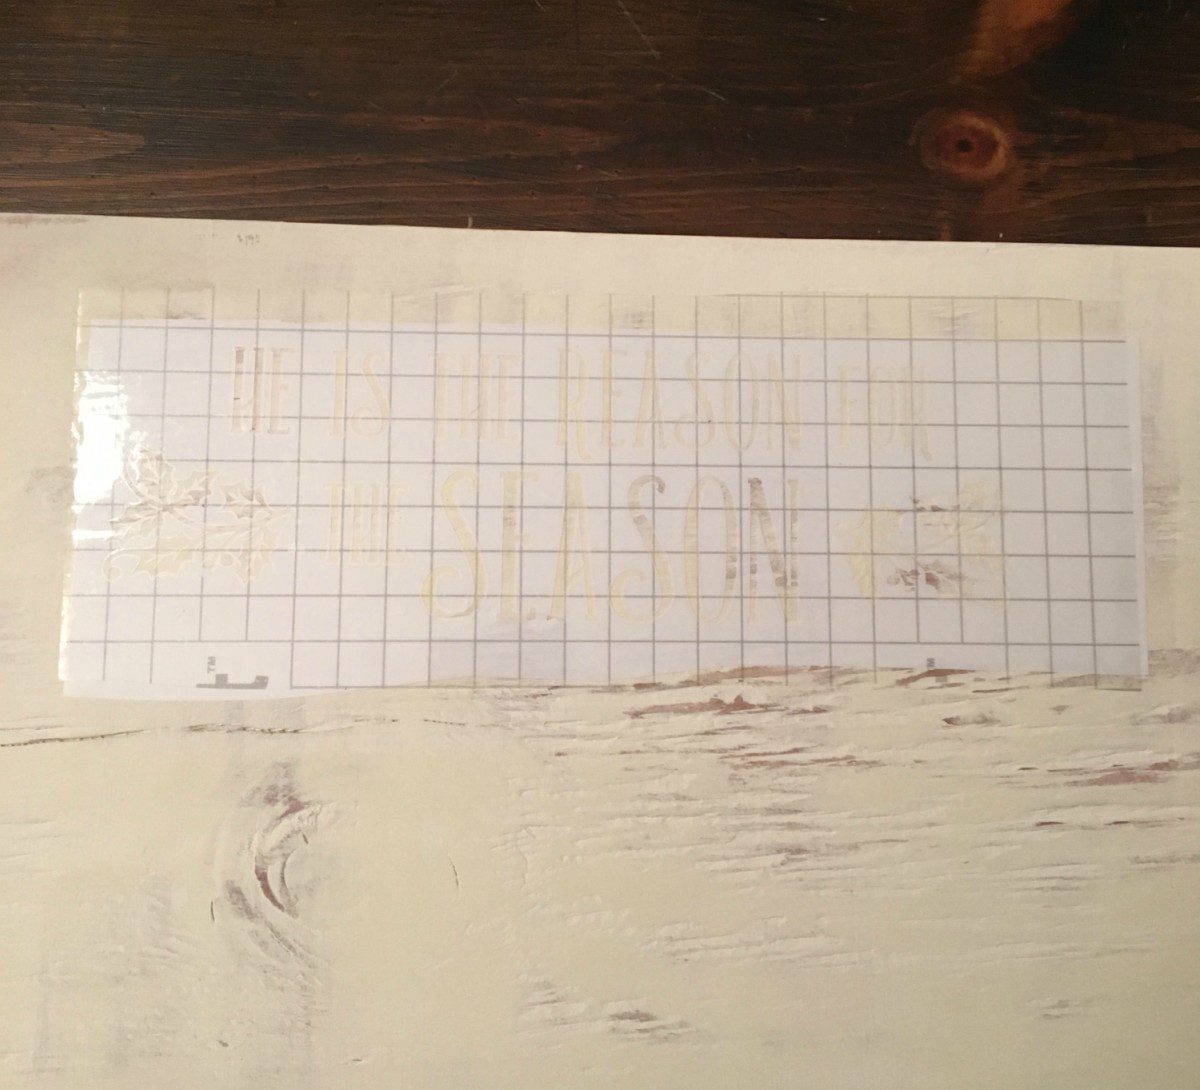
This is where you’re going to add the heading.
Mine says “He is the Reason for the Season”
and I used my Cricut Explore Air to cut vinyl as a stencil.
Yours can say whatever you want,
or I’ve added the image below so you can save it and cut it out.

Using transfer tape, apply the stencil to the plywood, peel off slowly, and paint the letters gold and the holly green.
Step 4
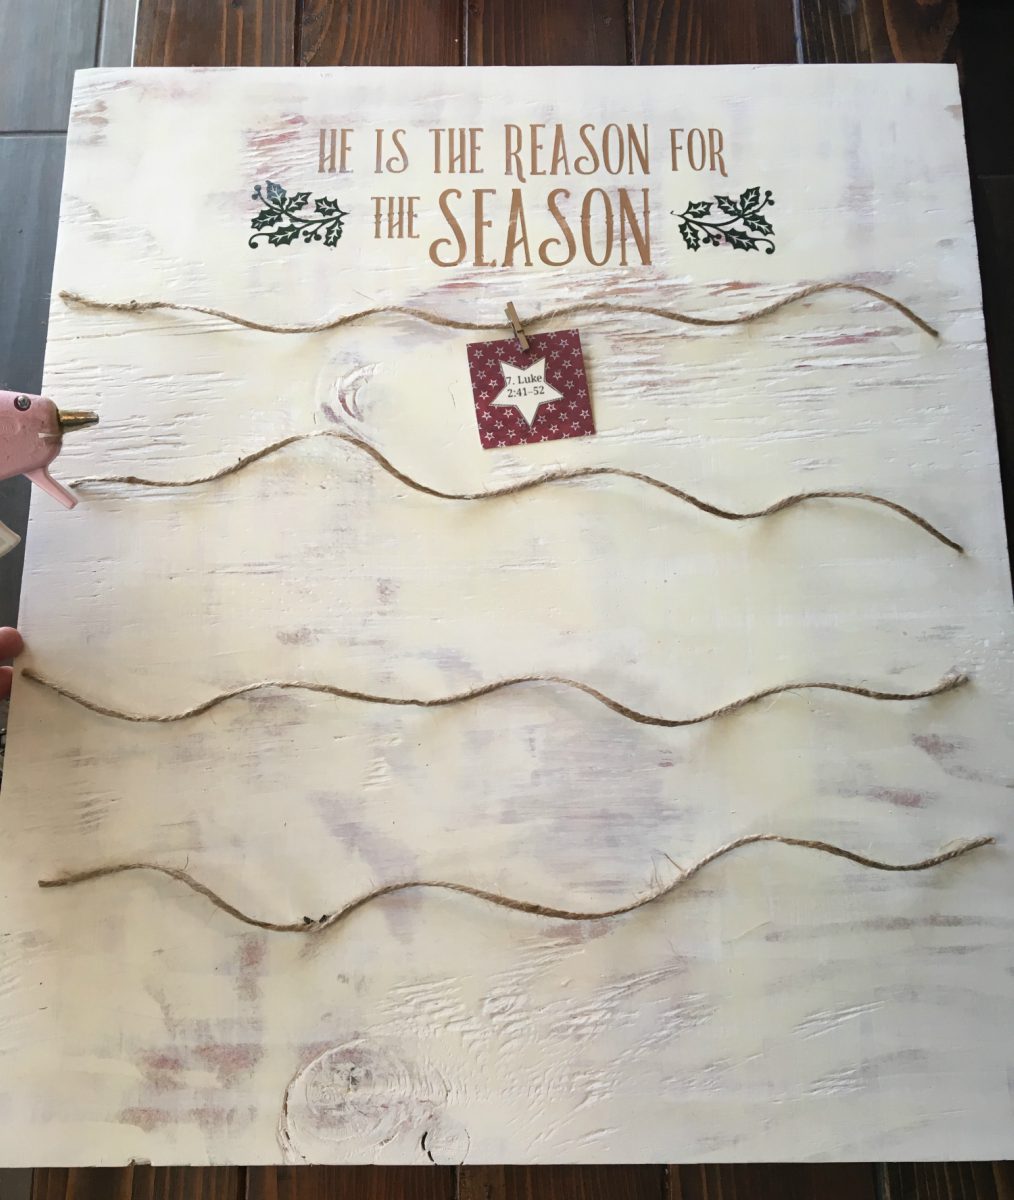
Cut four pieces of twine at 17 1/2″. Don’t go exactly to the edges of the plywood because you want the twin to hang just a little bit.
Hot glue them to the plywood on either end. The first one is 5″ from the top, and then the rest are spaced 3 1/2″ apart.
Step 5
Make your mitered cuts of the trim,

(Only 3 of my 4 are pictured) and glue the corners together.
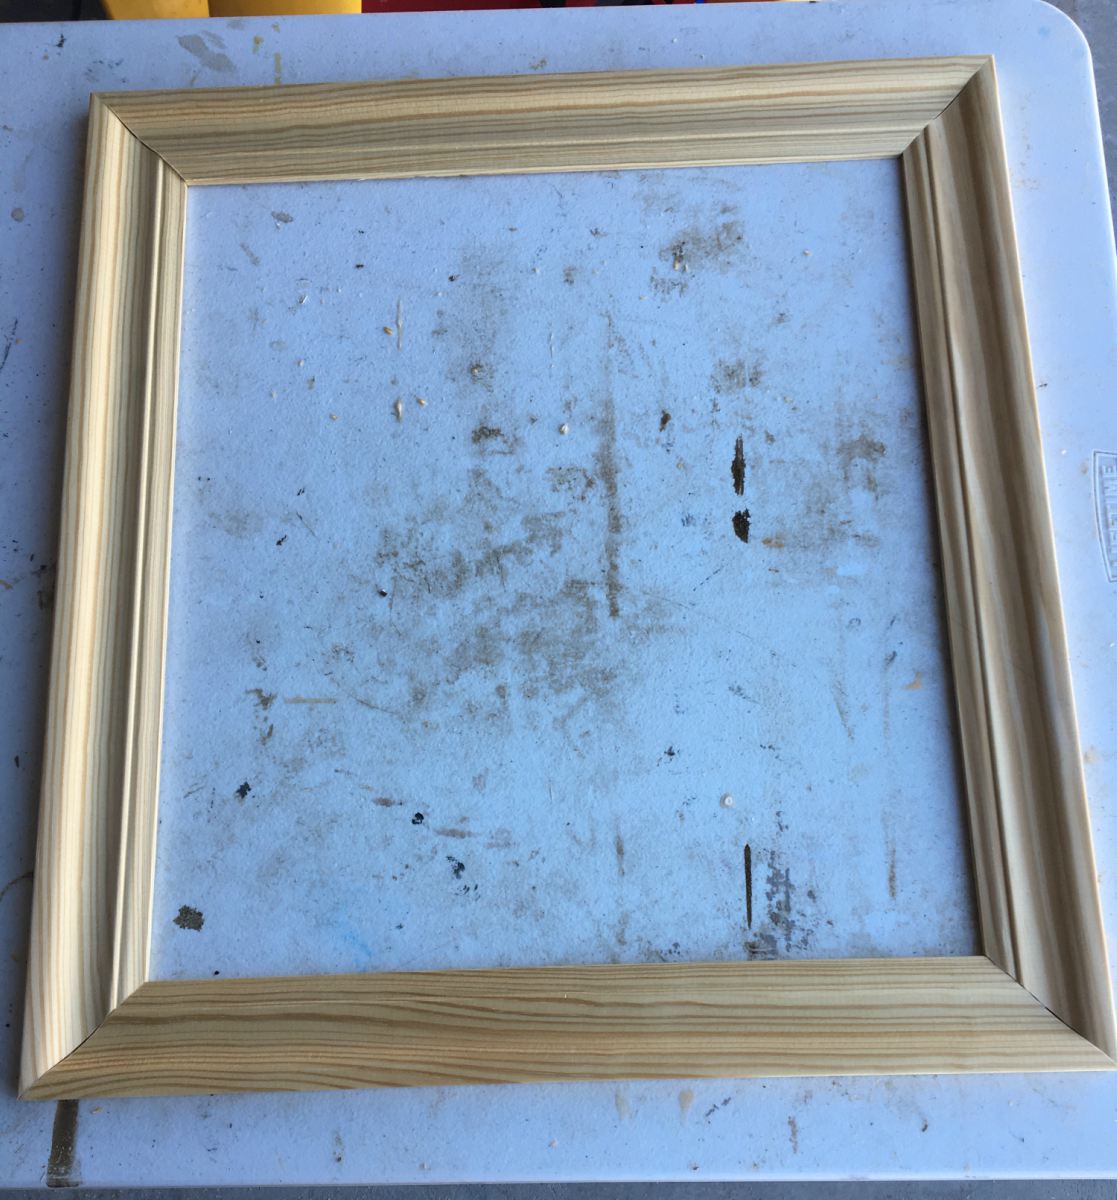
Don’t mind my disgusting table.. it serves as a workbench for me 😉
Step 6
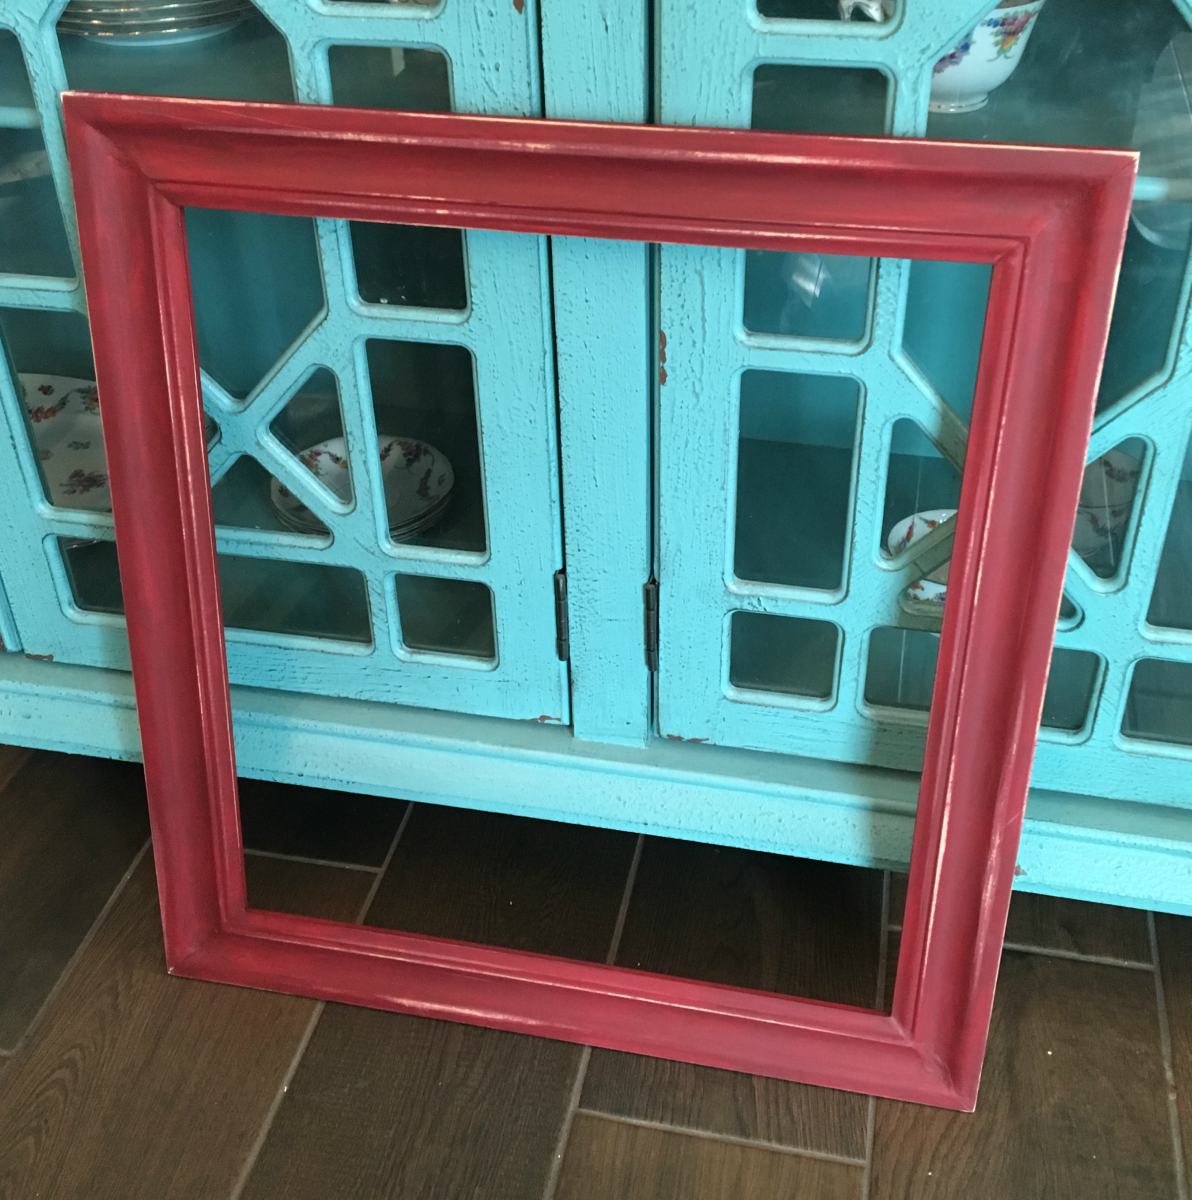
Paint frame. I did two coats of the burgundy and once it was dry,
I sanded some of the edges to distress.
Step 7
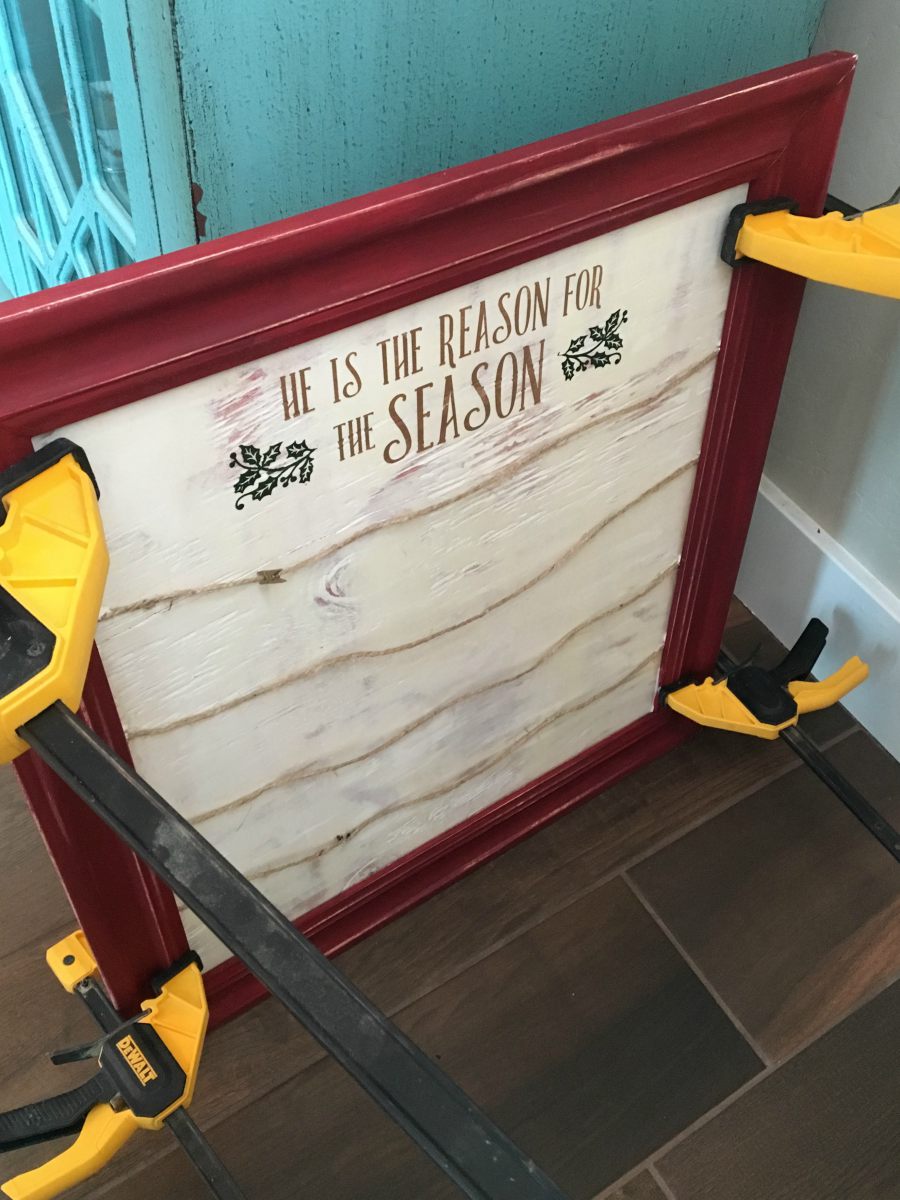
Run a line of glue around the edges of the plywood.
Clamp frame to the plywood.
Step 8
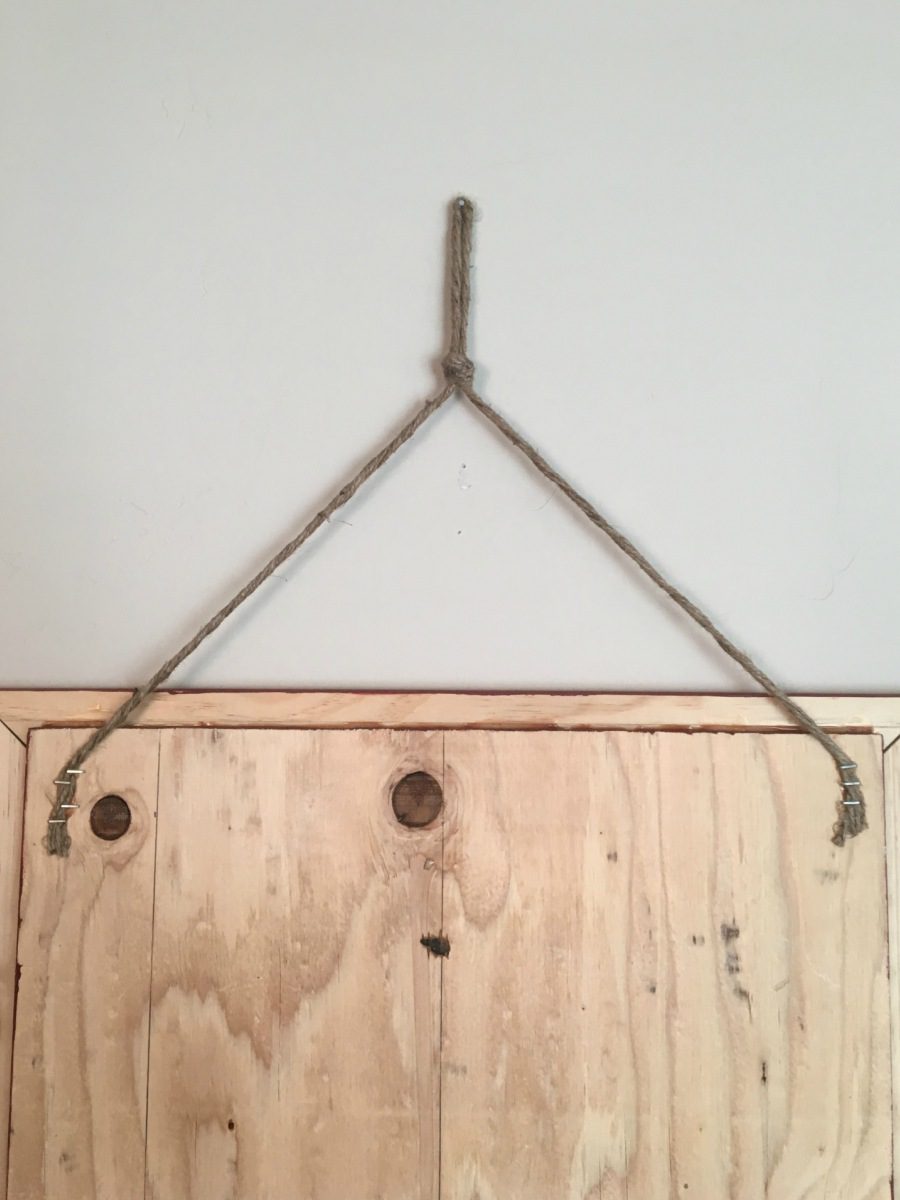
Cut four pieces of twine at 36″. Twist together and fold in half. Tie a knot 4 down from the middle fold. You may have to re-twist the sides after this. Then hot glue and staple the rope/twine to the back of the plywood.
Step 9
Create a 2 1/4″ x 2 1/4″ square template out of cardstock paper.
Use this as a reference to cut out the Christ pictures, as well as the Christmas scrapbook paper.
Modge Podge the Christmas scrapbook paper to the back of the Christ picture.
Do this 24 times.
Your advent will fit 6 squares on 4 pieces of twine (24 squares).
I made my 25th scripture into an ornament that I will show you a little later.
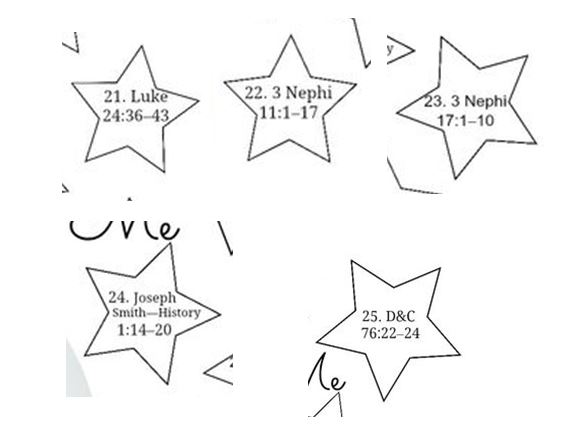
Print out these stars with scriptures on them, cut them out, and glue them to the scrapbook paper.
If you don’t want the scriptures you can just put numbers on the scrapbook paper.
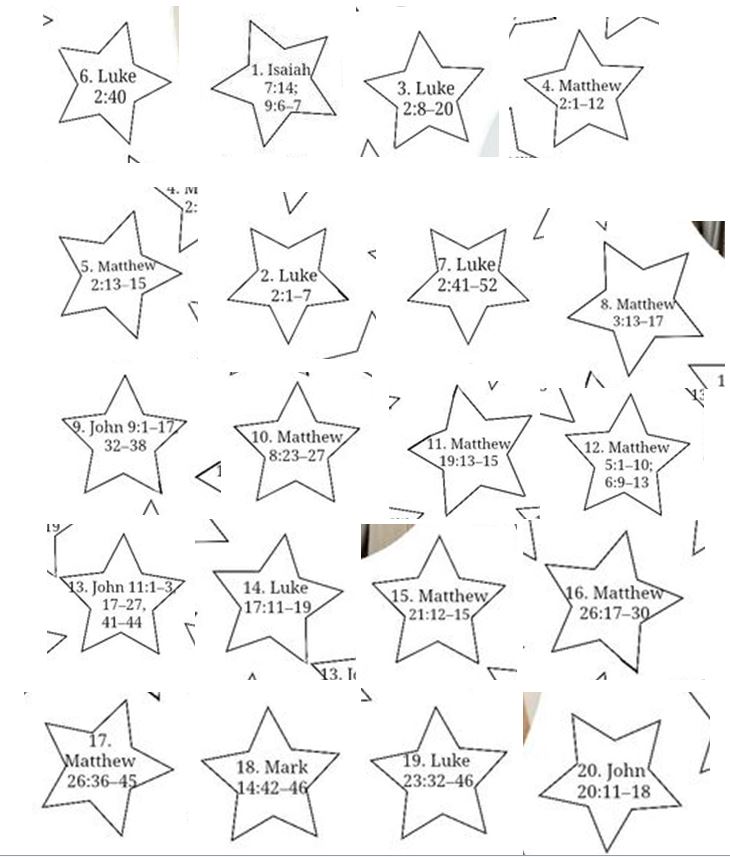
Now, hang on. I know these look like an absolute MESS. And that’s because they are.
I cropped the stars from an advent that was JUST numbers, and then pasted
these scriptures into them. But keep in mind, you are cutting these out.
So the mess doesn’t matter. (Other than that it’s a little embarrassing).
Also note: a few of these scriptures (Nephi and JS-History) are from the Book of Mormon/Pearl of Great Price.
They reference Christ’s life, but you are welcome to replace them with Bible verses.
Step 10
You can do the 25th day however you’d like.
I chose to have it as an ornament so when we’re finished opening presents,
we can pull it off the tree and read the final scripture together as a family.
I did this by cutting a star out of scrapbook paper and lining it with twine to hang it with.

Once you’ve modge podged the stars onto the Christmas scrapbook paper,
hang the squares on the twine using the tiny clothespins.
I know my picture shows the super adorable Christmas trees with numbers on them,
but unfortunately, I purchased those at a local store here in Utah called Tai Pan Trading
and they are constantly cycling their inventory and do not sell online.
It’s possible you could find something comparable at a hobby store like Michael’s,
but I think they look cute even just with the clothespins!
Thanks for following along and, as always, PIN this project,
post your photos, and tell your friends!