Home Decor, Tutorials
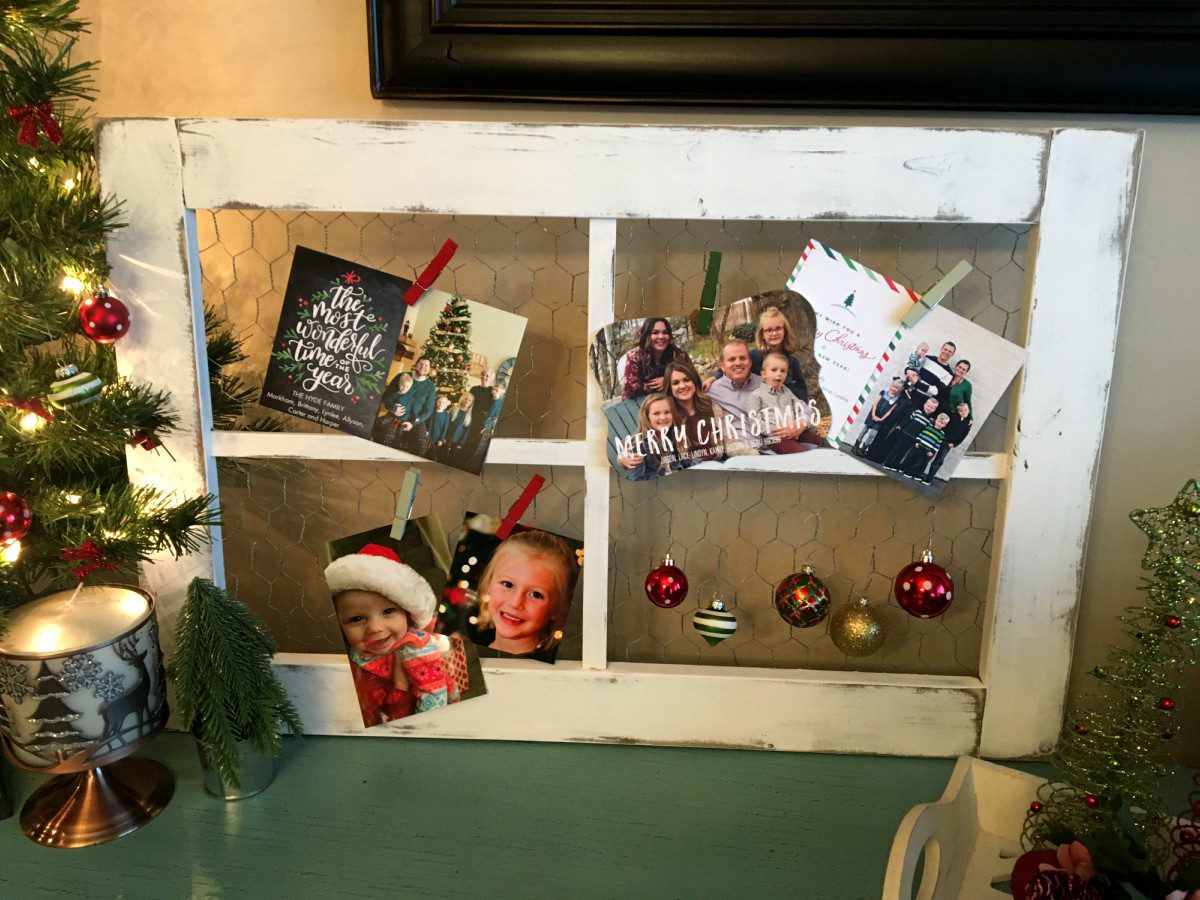
Window Photo Display
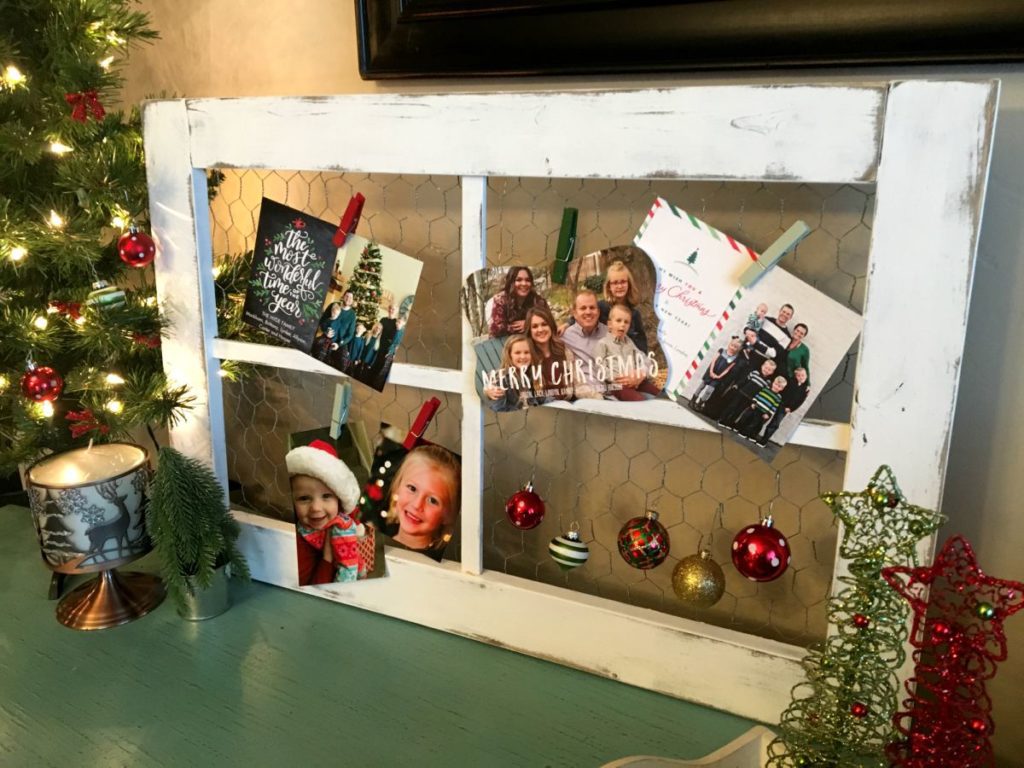
This DIY window photo display goes great in a kitchen, mudroom, or I even have mine above my bench in my front entryway! Perfect for displaying family photos, and at Christmas time – Christmas cards!
Dimensions: 19″x29″
This is very similar to my Window Frame Cork Board, but instead of cork we’re using chicken wire!
I like the cork board for quickly and easily swapping out my kids school work/art because
I don’t mind getting thumb tack holes in them. But for pictures,
I like using the clothes pins on chicken wire to help preserve them!
My favorite kinds of projects are my Naptime Hustle projects!
I love getting things done while the kids are asleep. Makes my life a lot easier.
And both my window frame cork board, and this chicken wire photo display are
quick and easy enough to accomplish during naptime!
Don’t forget to stay updated on future projects by following Overalls and Power Saws on Instagram and Pinterest!
Window Photo Display
Materials:
- 1x3x8
- 1×1/2×38 – I use a scrap piece of 1 by that you can rip 1/2 off of. You’ll need these to make the middle part of the window.
- chicken wire. I bought mine off of Amazon
- 8 pocket hole screws
- staples and staple gun
- wood glue
- dark walnut stain
- white paint
- palm sander
Cut List:
- 1x3x24 – 2
- 1x3x19 – 2
- 1×1/2×24
- 1×1/2×6 5/8 – 2

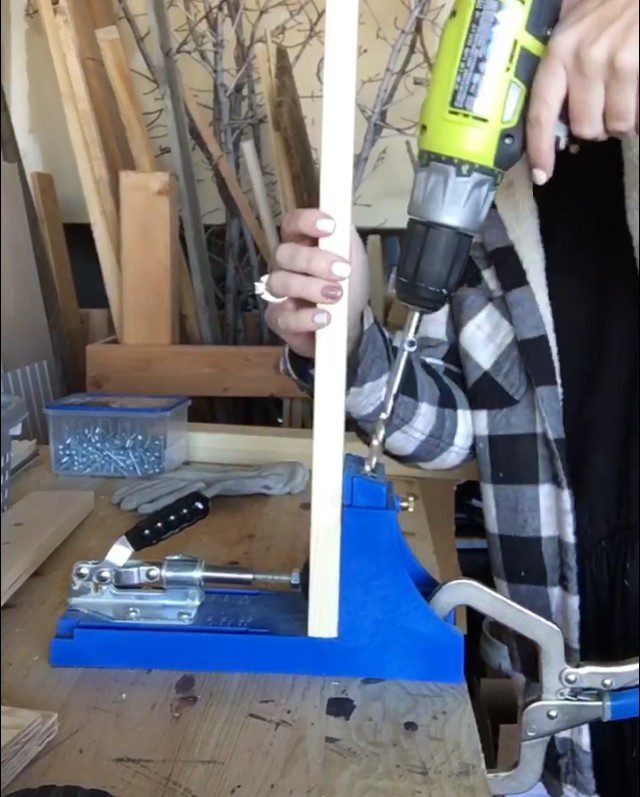
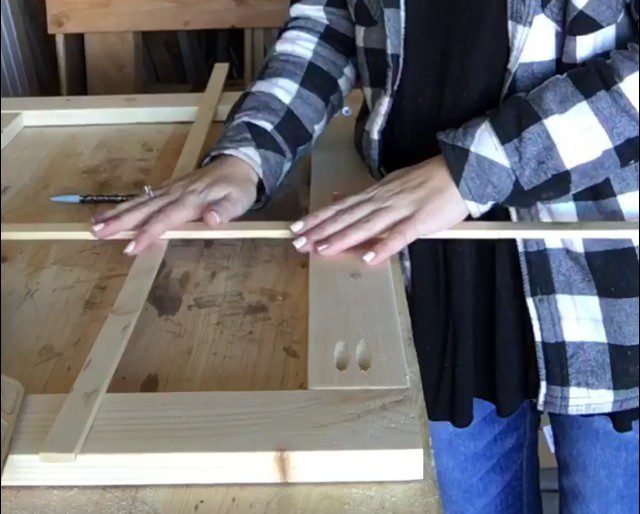
Step 1
Cut and Kreg your boards where indicated by arrows in the Cut List Chart. Wait to cut the 1/2″ strips until step 3.
Step 2
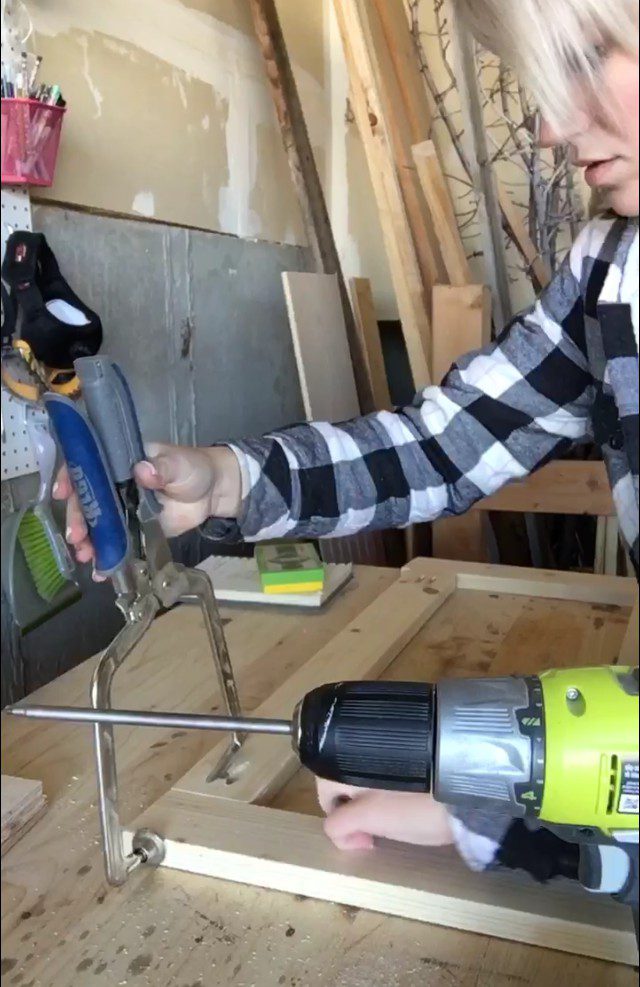
Arrange boards into a rectangle with the top and bottom boards being 24″ and the left and right boards being 19″.
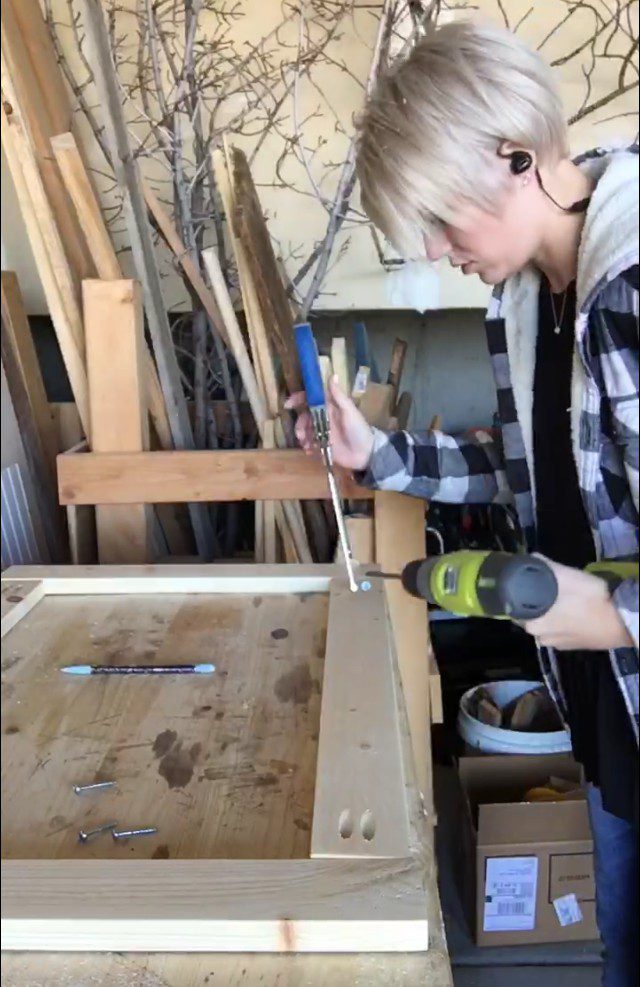
The Kreg Jig Right Angle clamp is a GAME CHANGER. One end goes into the pocket hole and the other clamps your boards together beautifully. If you don’t already own one, click here and go get one! There’s a close up view below.
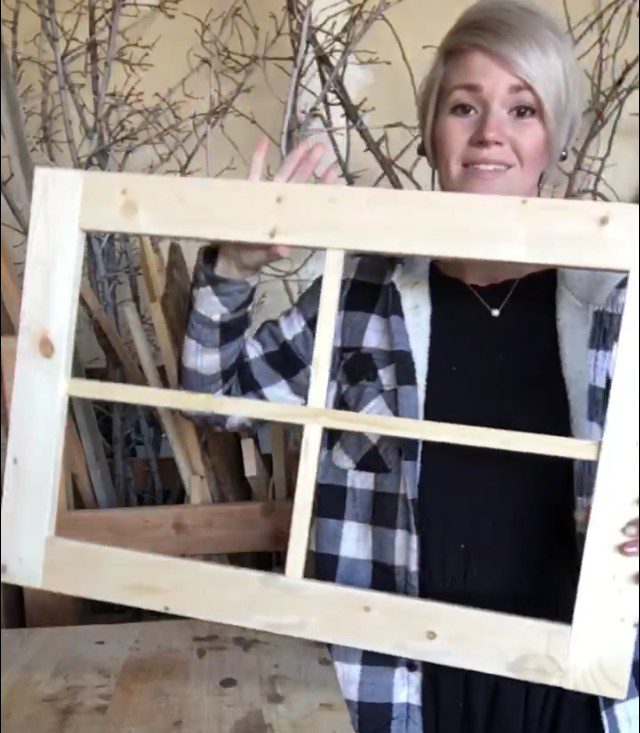
Step 3
Take your 1/2″ strips and lay them across your frame. The best way to cut these is to use the frame as reference.
That way you get the tightest fit possible, which is what you want since the only thing holding these on will be glue.
Step 4
Cut the strips to size and attach with wood glue.
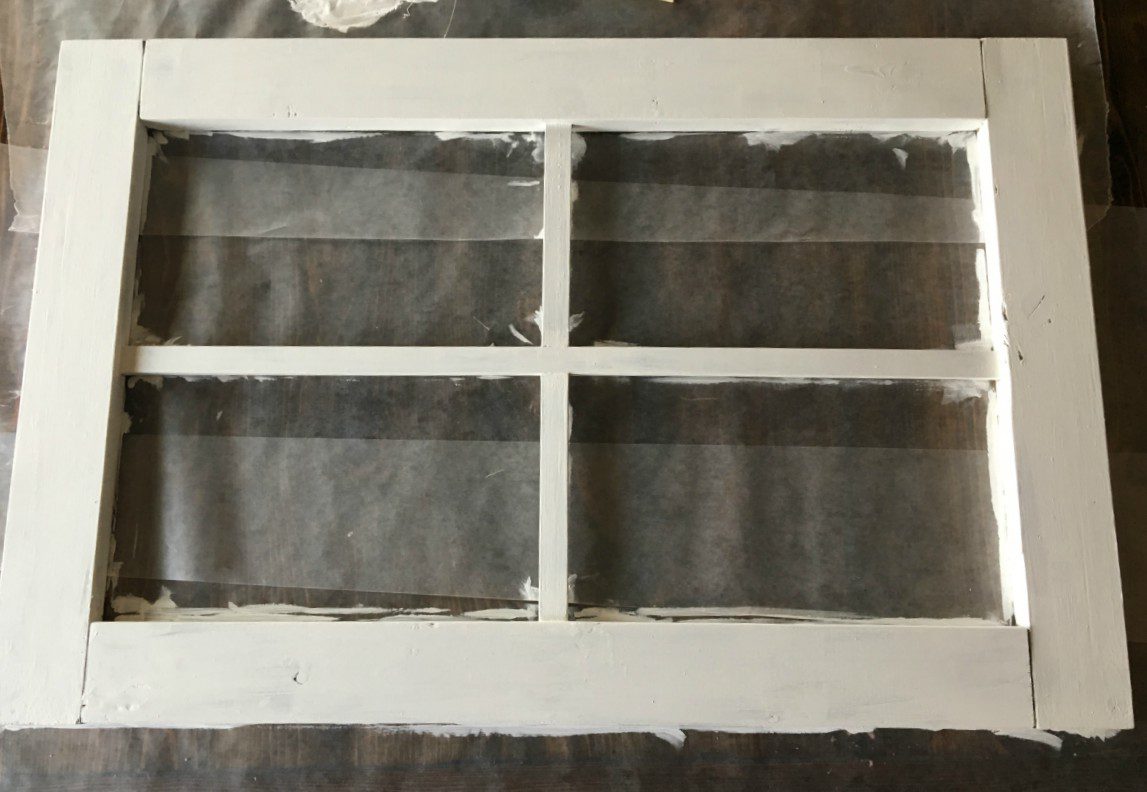
Let dry and then stain. I used Minwax Dark Walnut. After the stain dries, apply two coats of white paint. I like chalk paint, but acrylic will work too.
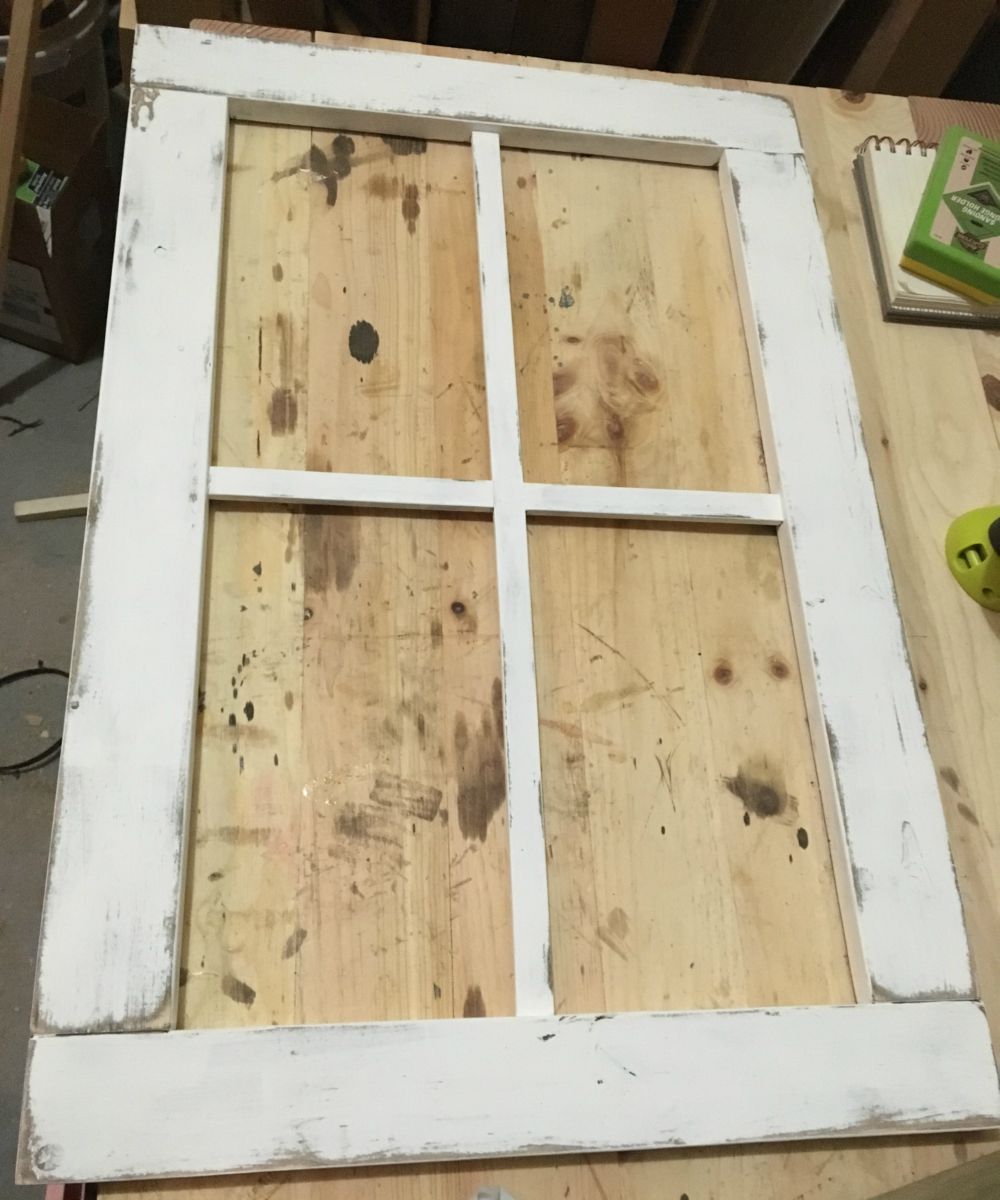
Take your palm sander and rock it around the edges of the frame to get a distressed look like this…
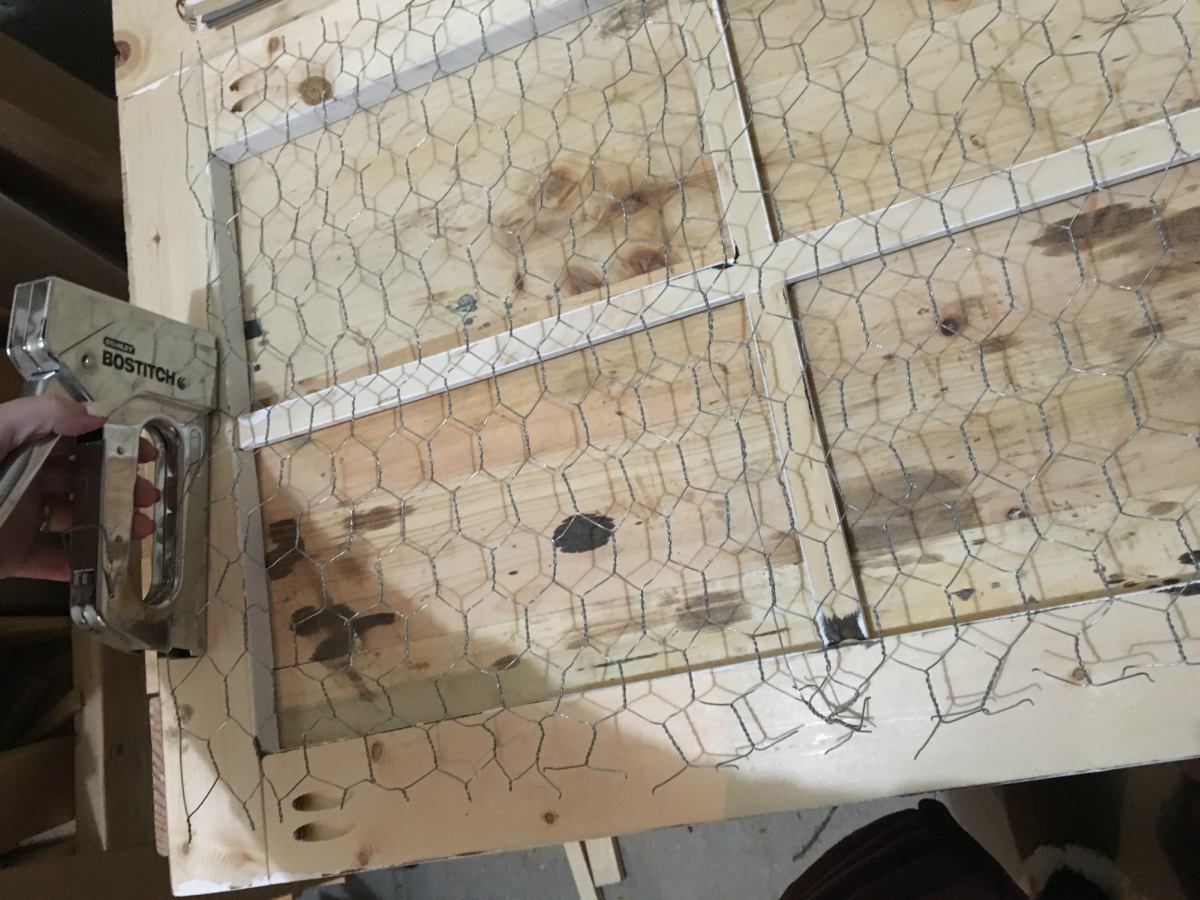
Step 5
Trim chicken wire to size and staple to back of frame.
That’s it! At this point you can attach hardware to hang it with or let it sit on a countertop or buffet, then
using clothes pins, attach photos to chicken wire. I got my christmas clothes pins in the Target dollar spot (in 2017)
and I found my mini gold clothes pins on Amazon.
Thanks for following along! And as always, don’t forget to post your photos, PIN this project, and tell your friends!