Home Decor, Tutorials
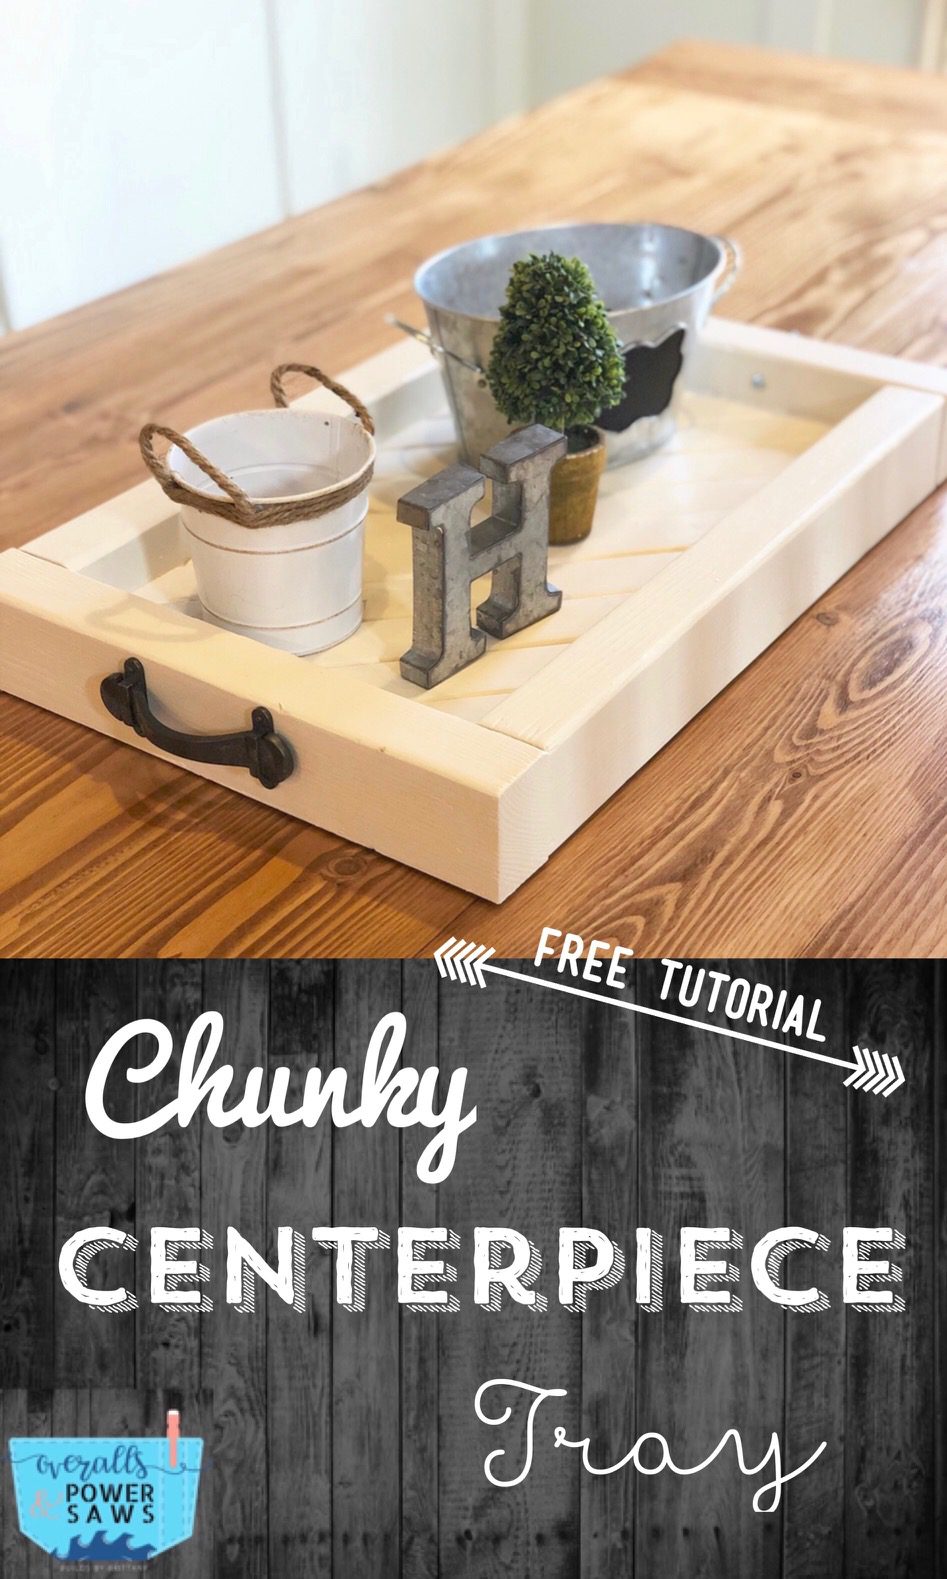
Chunky Centerpiece Tray
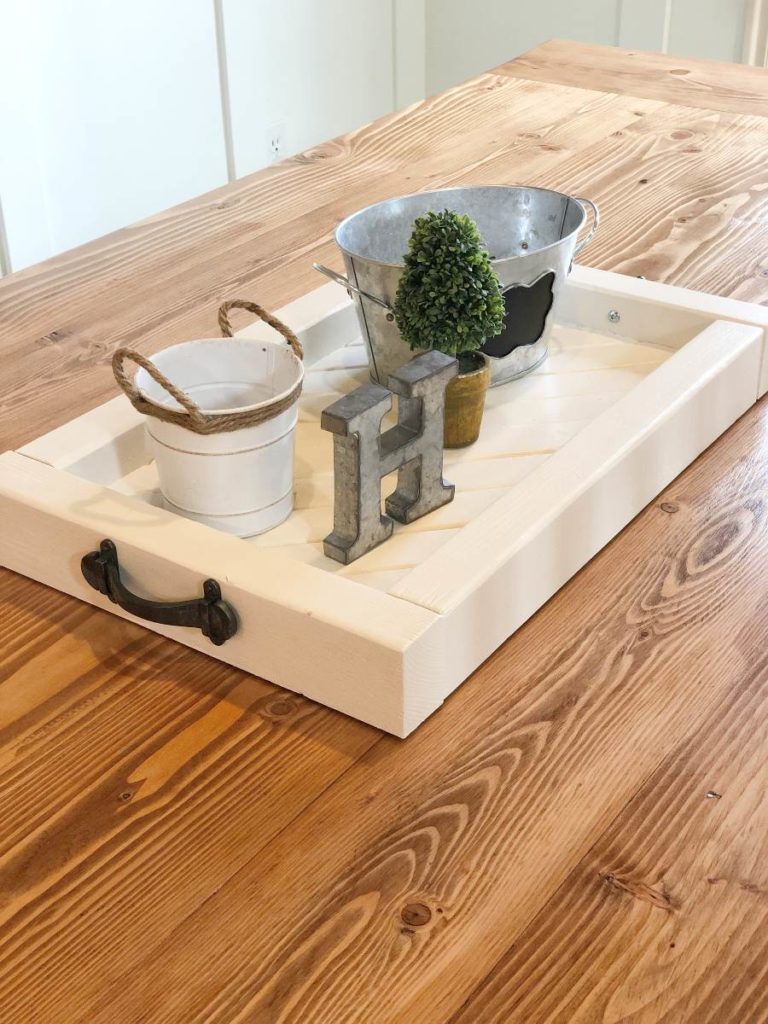
This centerpiece table tray was the perfect “final touch” to my sister’s living room/dining room makeover!
Hey Friends!
It’s been a hot minute since my last blog
post but, you know, the holidays.
Are the holidays as crazy for you as they are for me?
It’s non-stop with the parties and get togethers
and it just seems like the season just FLIES!
Not to mention how dang cold it gets
and the ice, and the snow, and the lack of heat
in the garage….
I guess you could say I take an unwanted
but completely necessary “break” from the shop
for a couple months.
BUT the weather is looking a little better
and I can handle being outside just long enough
for little projects like this adorable
little Chunky Farmhouse Tray!
For more DIY furnishing and decor tips, tricks, and tutorials follow
Overalls and Power Saws on Instagram, Facebook, and Pinterest!
Chunky Farmhouse Tray
Materials:
- 2×2 of 3/4″ Birch Plywood
- scrap 2×4 cutoffs
- 2x3x6
- brad nailer
- 2″ brad nails
- wood glue
- jigsaw or bandsaw
Cut List:
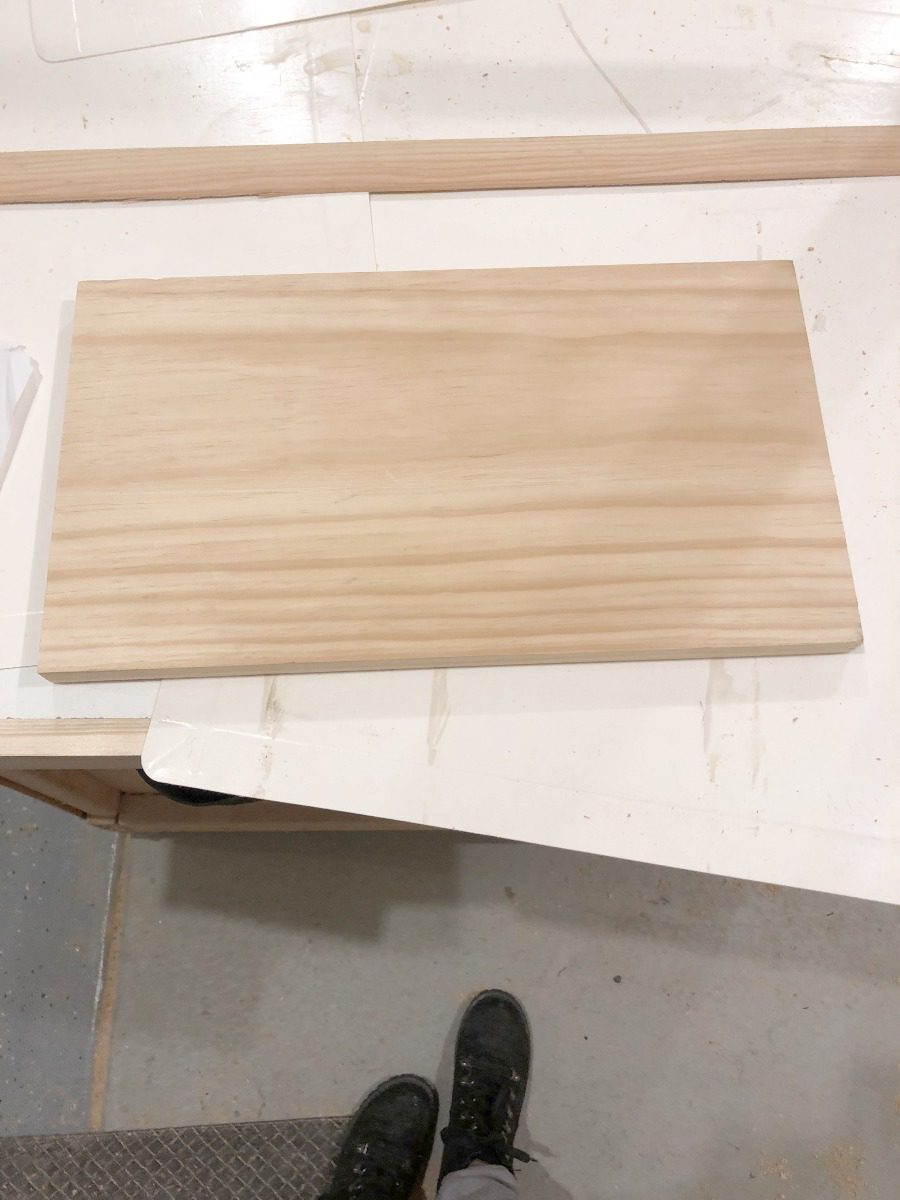
- Cut the 2×2 Birch ply to 16″1/2 x 11″
- the 2 by cutoffs will be cut to 45 degrees – I’ll explain in Steps 2 and 3
- 2x3x16 1/2″ – one edge ripped off so the tray is flush with the table
- 2x3x14″ – one edge ripped off also
Step 1
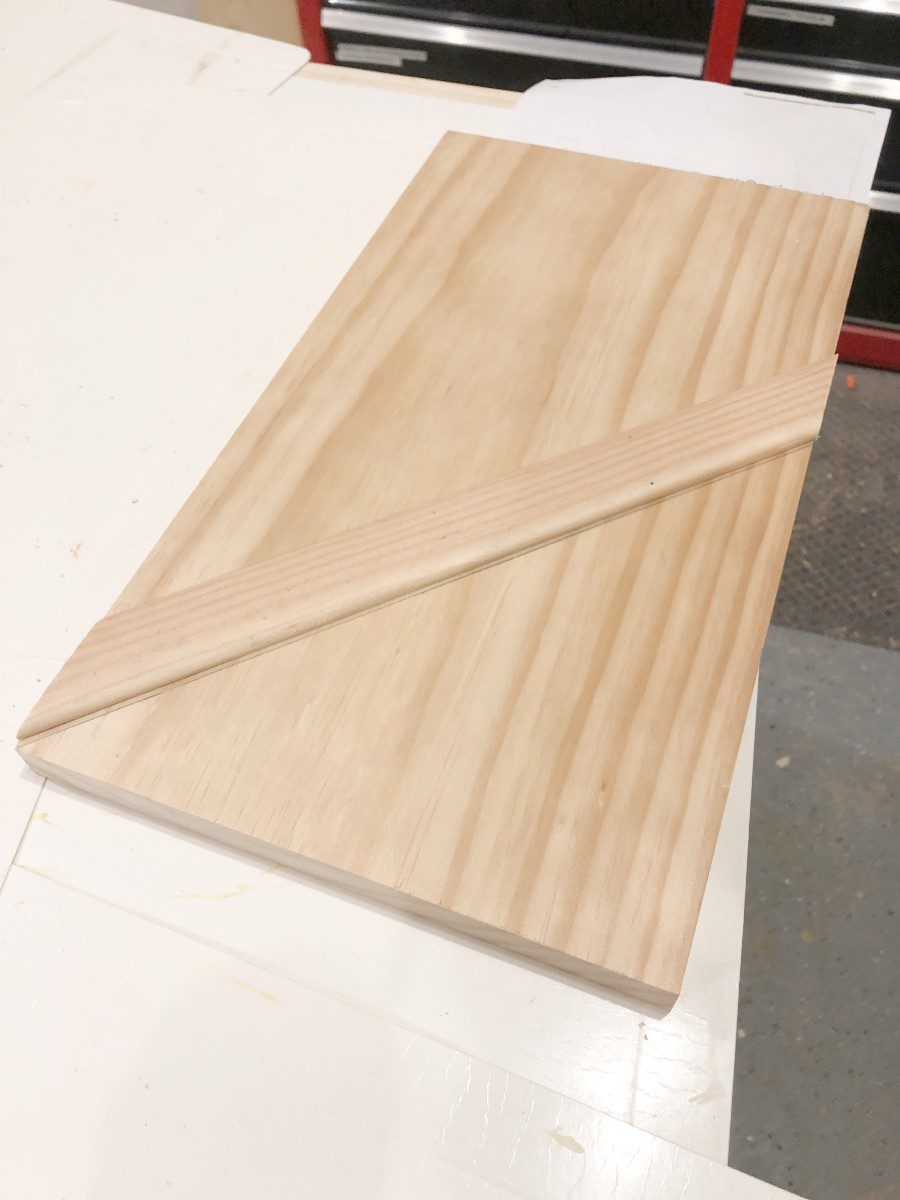
Cut birch ply to size. I used a scrap piece of select pine but 3/4″ birch will work perfectly.
Step 2
Grab your 2 by cutoffs. What these are is the thin round over strip you get when
trimming the edge off of a 2×4.
I had a bunch of scraps of these and wanted to put them to use.
They look like this…

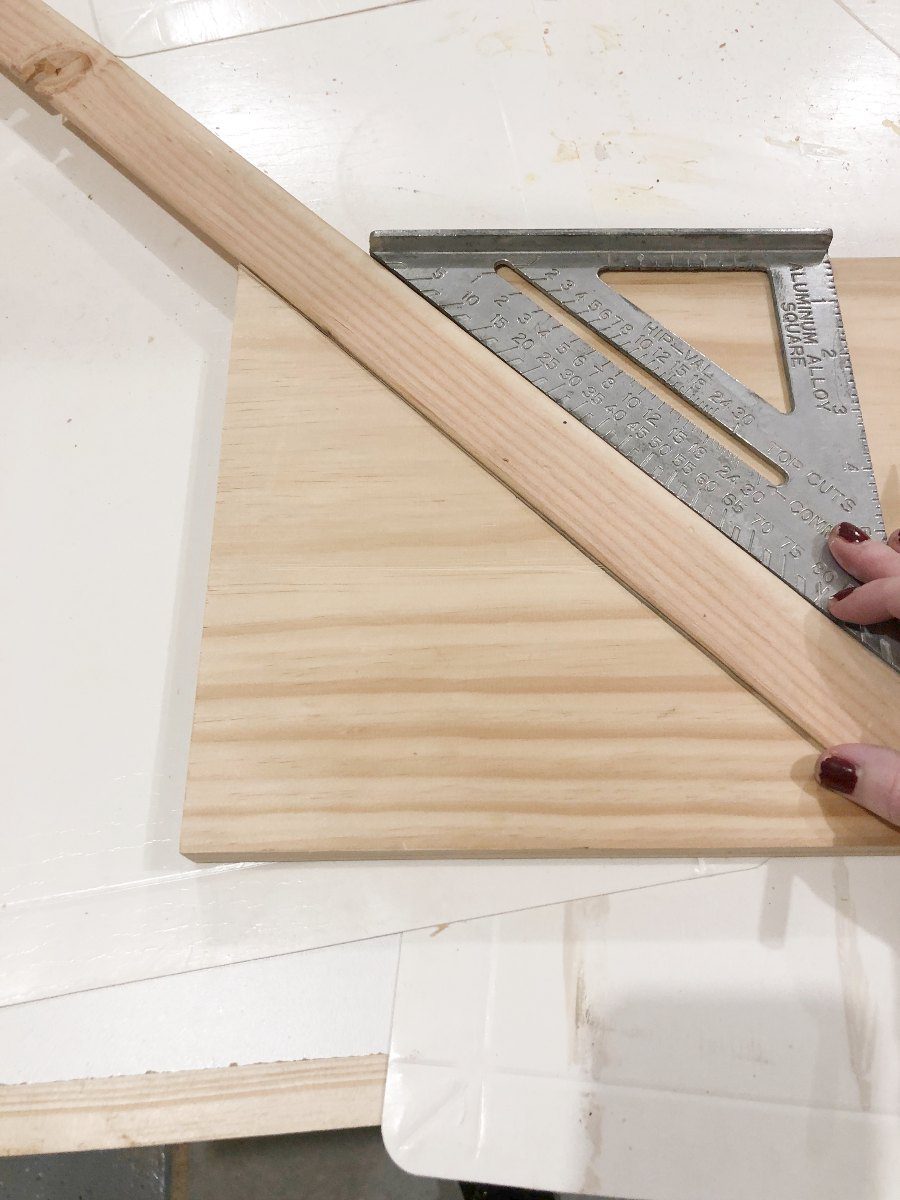
Cut one end at 45 degrees.
Align that edge with the top left edge of your plywood
and use a square to make sure it is flush.
At this point I took a pencil and traced under the long side and cut the other 45.
This eliminates the need to measure,
and the room for the typical “parallel vs perpendicular 45’s” fiasco.
Step 3
Glue this piece into place.
You will now base the rest of your pieces off of this one.
Step 4
The corner is a little tricky.
Mine lined up to where the corner was in the middle of the piece
so I held it on and traced from underneath.
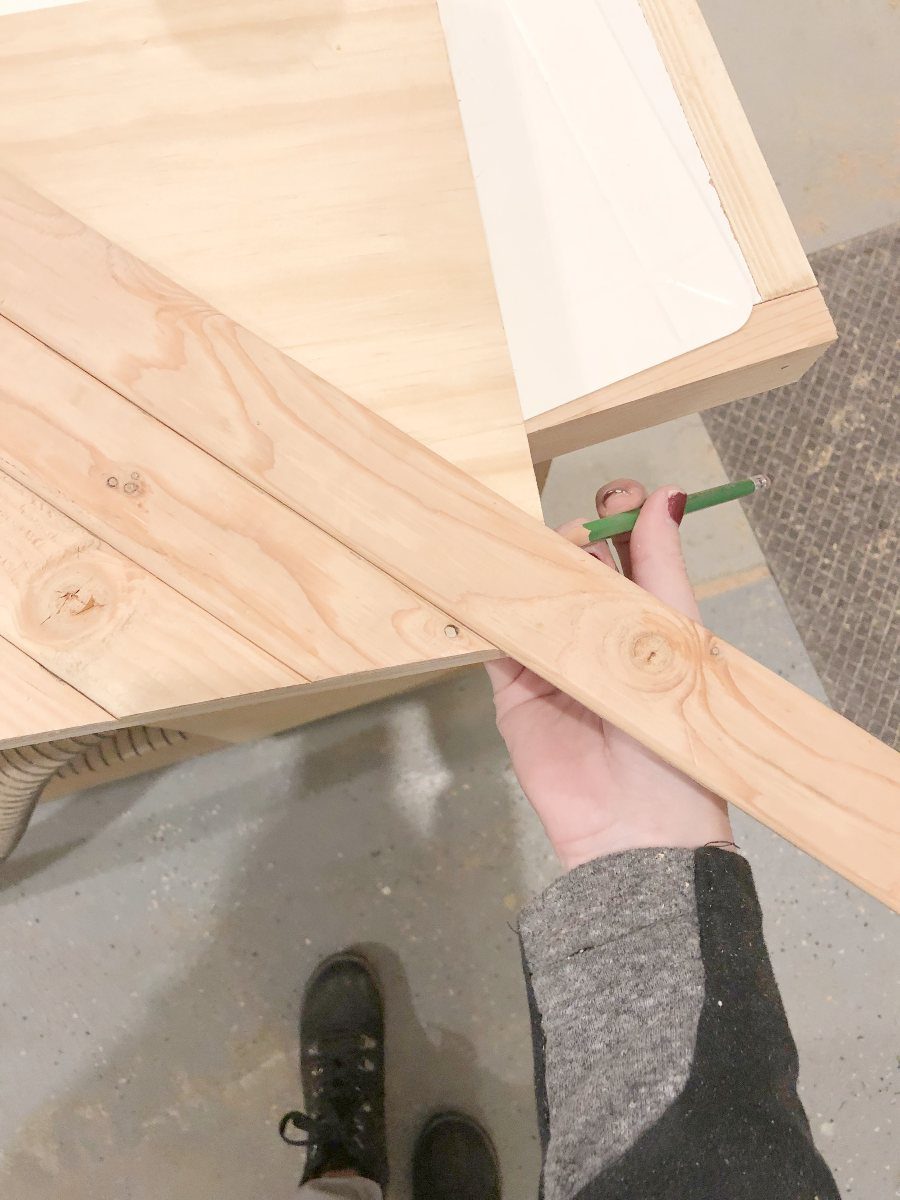
I then took it over to the bandsaw to make the corner cut.
You could also use a jigsaw if needed.
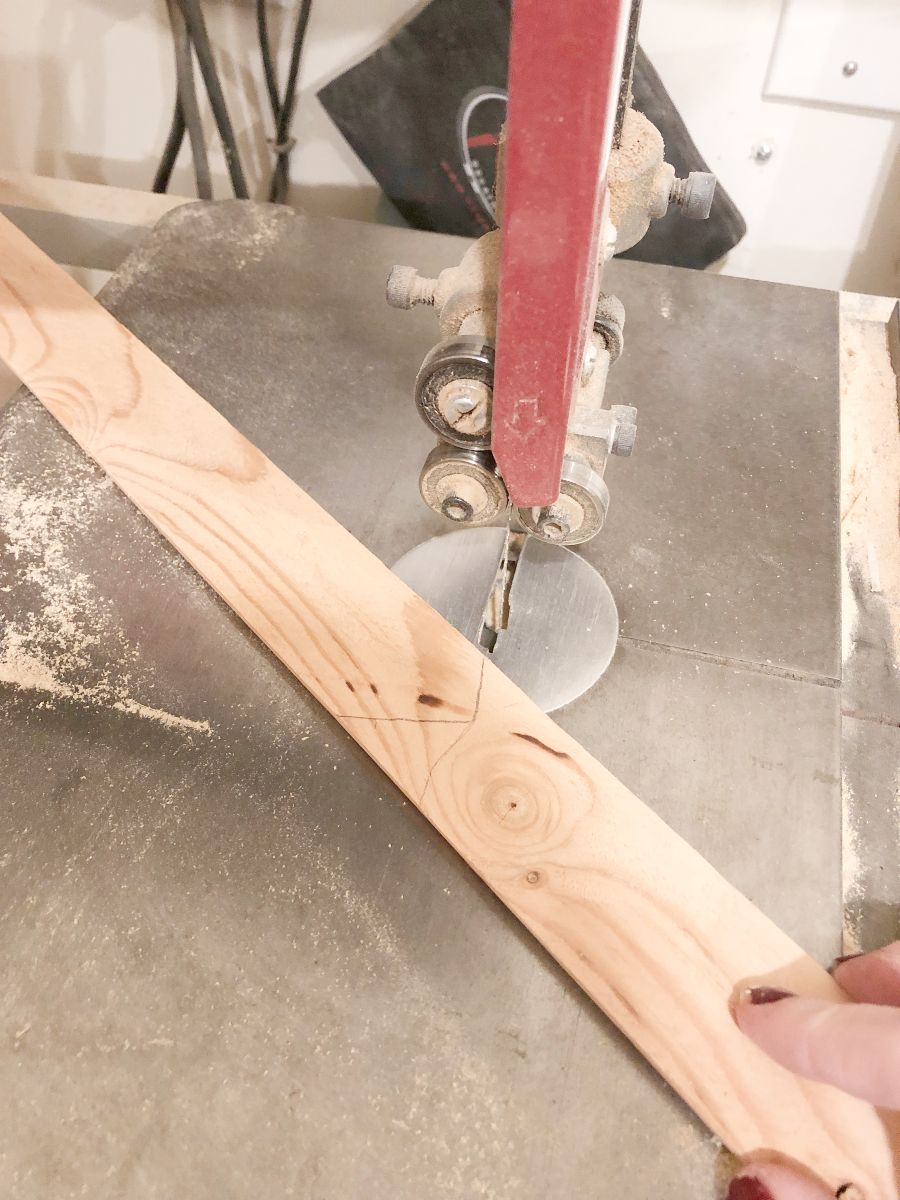
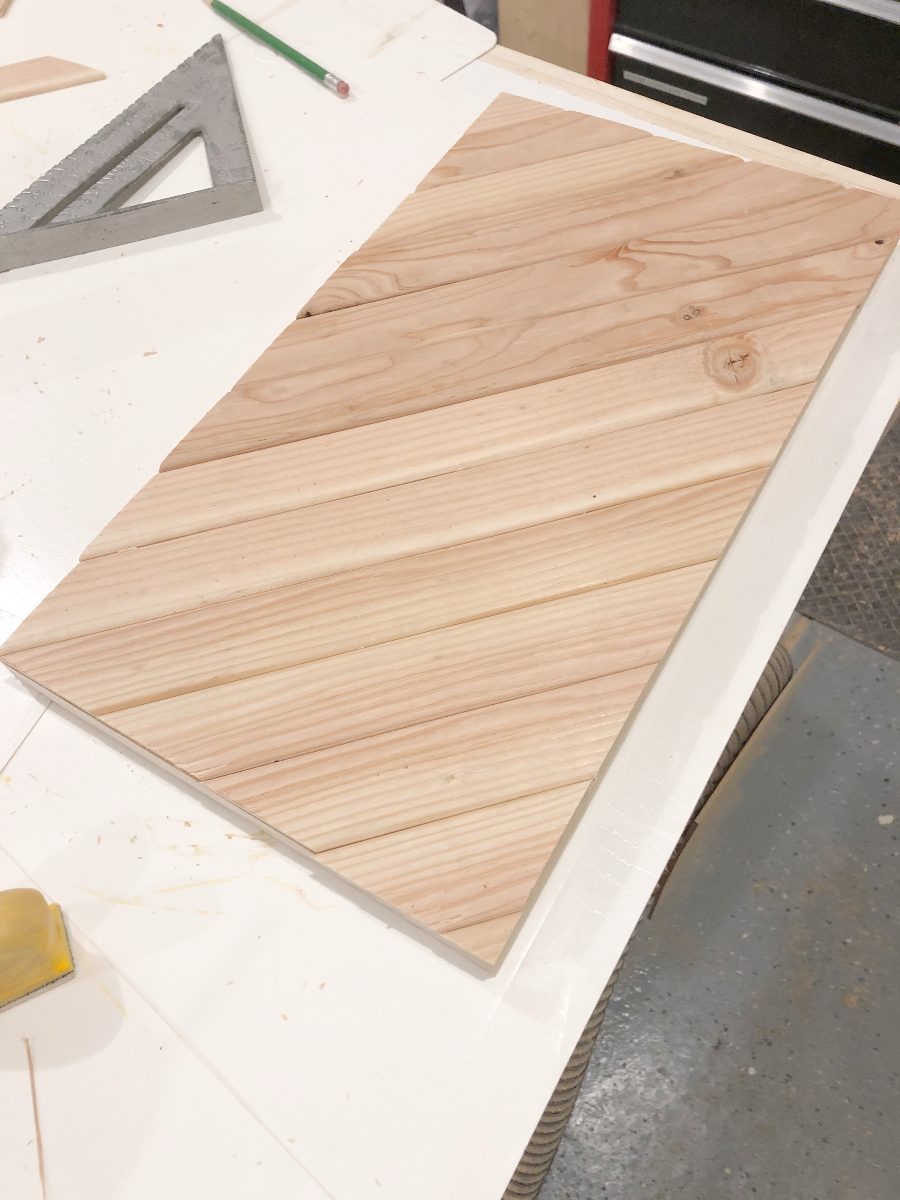
I also used the band saw to make the smaller cuts
on the other corners and continued filling it
all in until it was complete.
Step 5
Rip off one rounded over edge of your 2×3 so that the frame to the tray will sit flush against the table.
Cut your 2×3 into two 16 1/2″ pieces and two 14″ pieces.
Align those pieces around the outside edges of your tray
and nail them into each other and into the tray.
I dropped the ball here and didn’t get photos of this step but
I hope I explained it clearly.
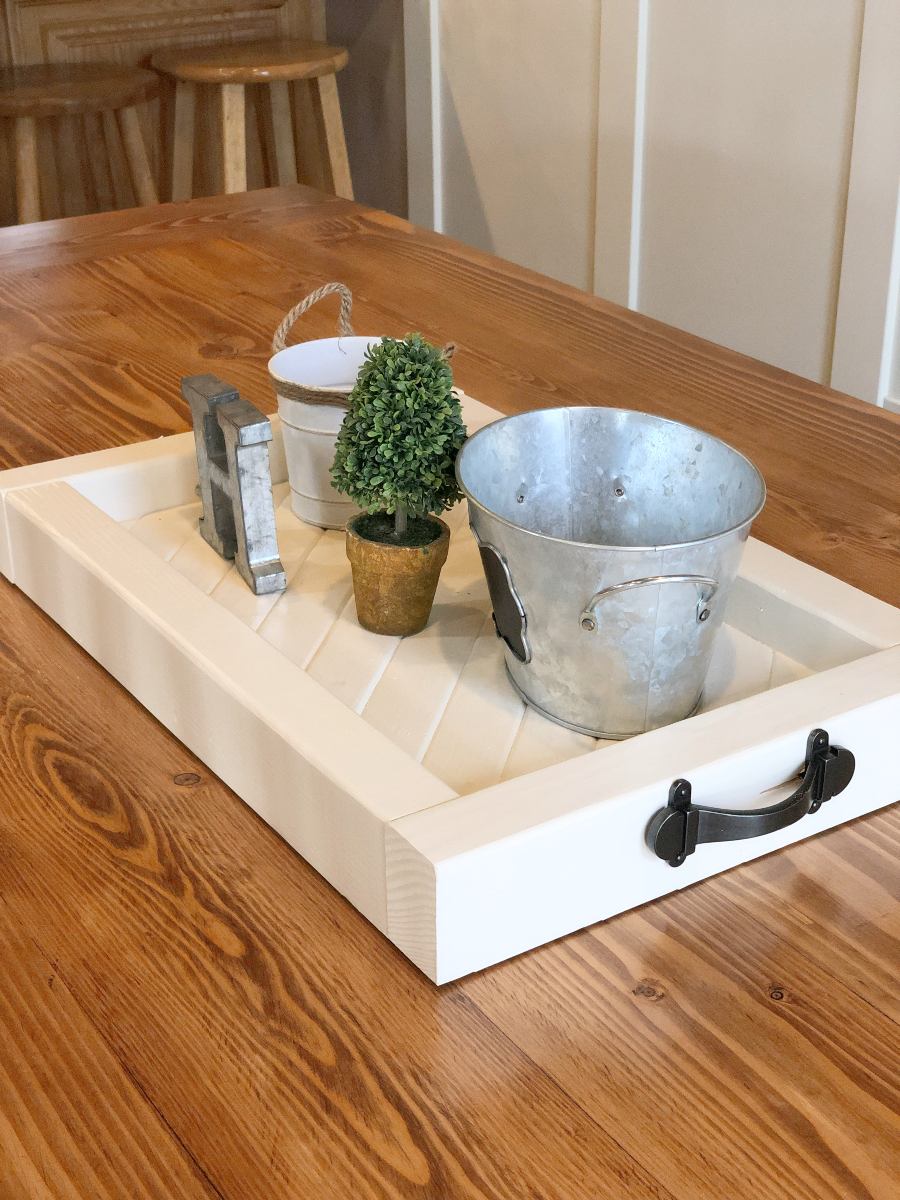
Also here’s a finished shot to help.
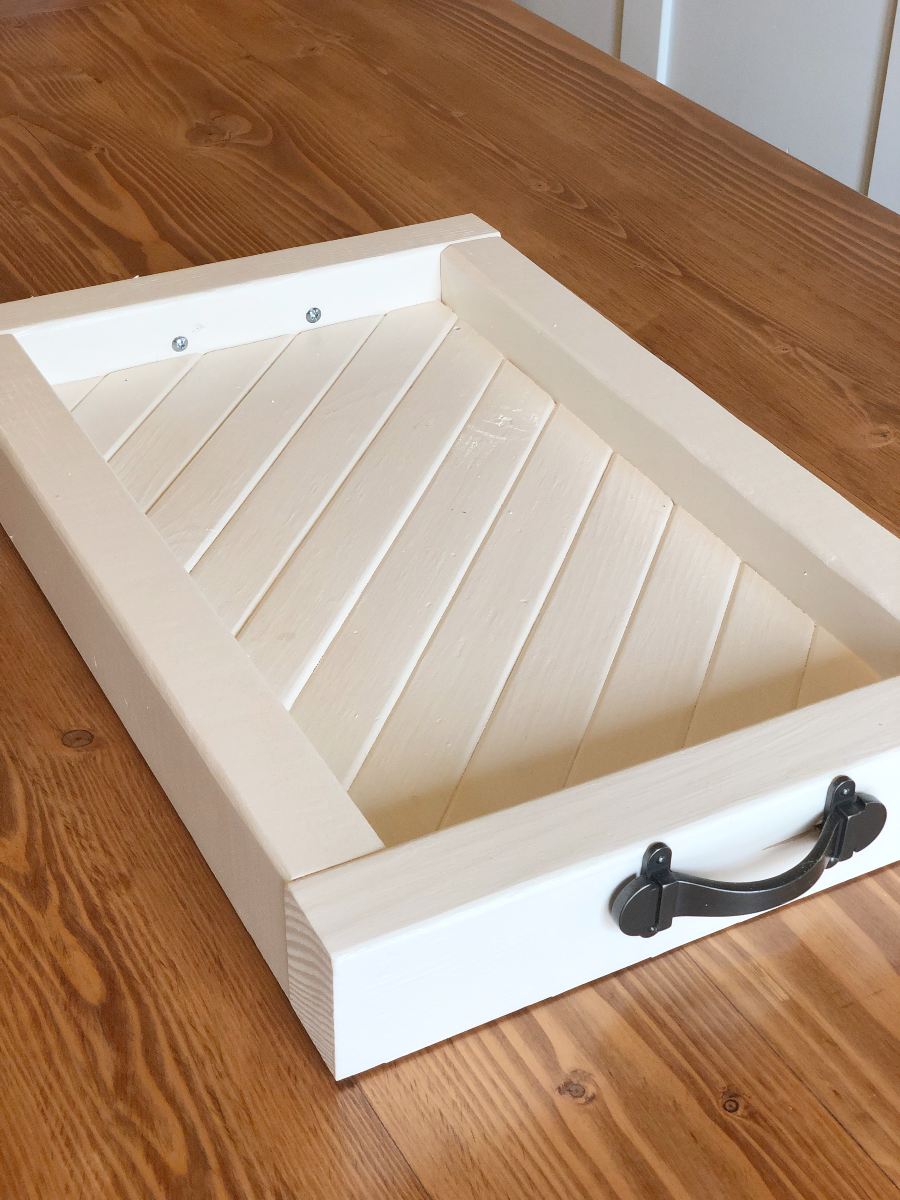
Once it was all framed out I filled the nail holes and painted the tray.
I also added those super cute decorative handles I found at Home Depot.
And your little Chunky Centerpiece Tray is finished!
It really is a fairly quick and simple project
you can finish in a Naptime Hustle! 😉
Thanks for following along, and, as always, don’t forget to post your pics,
PIN this project, and tell your friends!