Home Decor, Tutorials
DIY Board and Batten Wainscoting
Don’t forget to stay updated by following Overalls & Power Saws on Instagram and Pinterest!
Hi Friends!! This DIY board and batten wainscoting is so unbelievably easy. I’m not gonna lie, I was pretty nervous taking on this project, since it was the first time I’d ever attempting any time of “home renovation” project. But it could not have gone smoother! It cost just under $100 for the entire room, and it only took two hours to get all the MDF in place!
So, of all the home reno projects to attempt, why wainscoting?? Well, we moved into our current home about 3 1/2 years ago and while I loved the size and shape of the master bedroom, I always felt it was lacking something. Honestly, it felt plain. That’s when I decided to replicate the wainscoting in our front entryway in the bedroom!
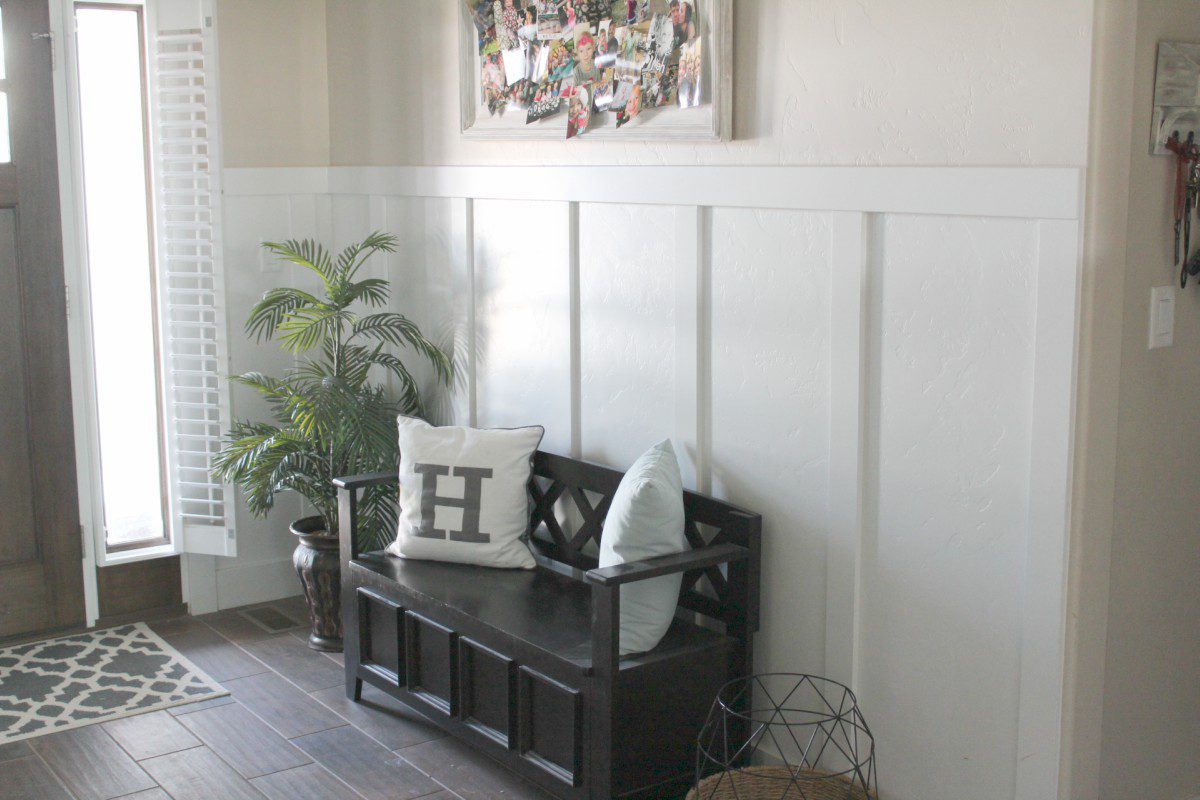 (front entryway)
Its a very simple and sleek design and requires only straight cuts and brad nailing. Even the beginnerest of beginners could tackle this!
Follow along for a step by step tutorial on how you can do your own DIY board and batten wainscoting!
DIY Board and Batten Wainscoting
I want to preface this by saying that this entire tutorial is completely customizable! To simplify things, I am going to give you the exact measurements and materials that worked for my space. However – note that you can change ANY of this to fit yours! For example, I used 3/4 primed MDF for my room, but I recently did wainscoting in my friends entryway and due to her smaller baseboards, I used 1/2″ primed MDF on hers.
Materials:
- 3/4″ x 3 1/2″ x 8′ Primed MDF – 14
- Liquid Nails Paneling
- 2″ brad nails
- brad nailer
- white caulk
- caulking gun
- level
- tape measure
- wood filler
- paint
Cut List:
- 3/4″ x 3 1/2″ x 26 1/2″ – 27
- 3/4″ x 3 1/2″ x 19″ – 3 (these were for under my window)
- The remaining boards were used for the top, which I cut as I went. I’ll show you an example below.
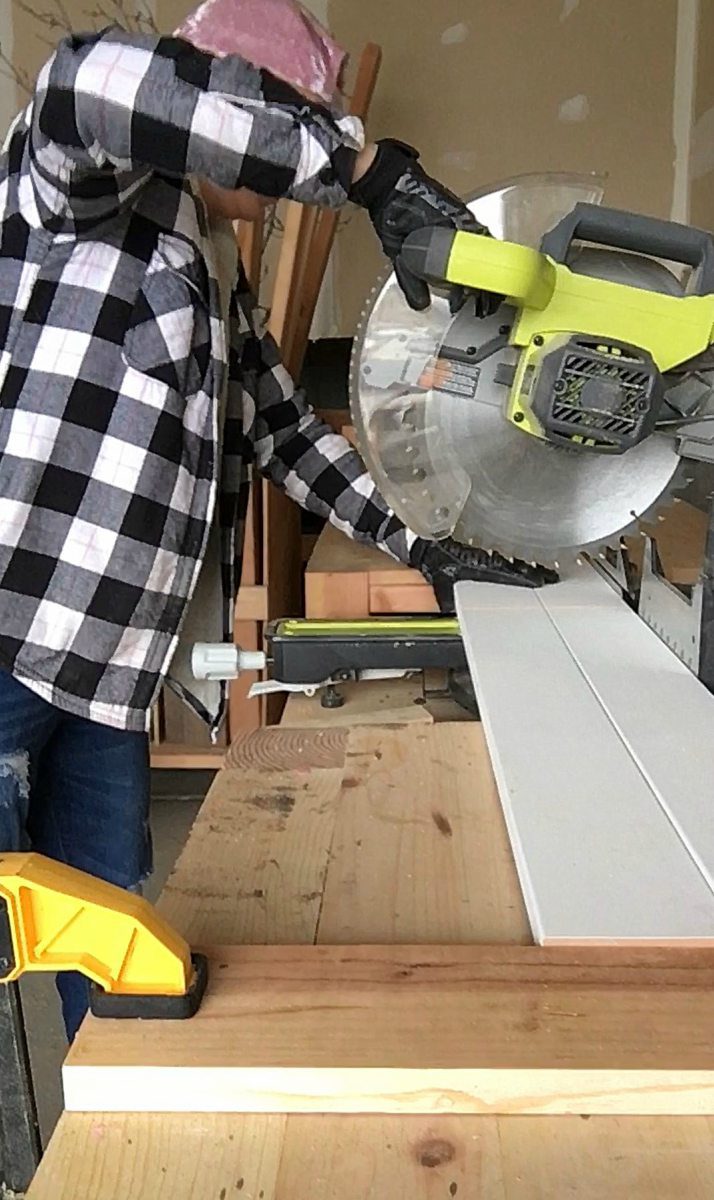
Step 1
Cut ALL your vertical boards!
Here we’re going to use one of my favorite little woodworking pro tips!
When you have to cut multiples of the same length, set a stopper!
It’s the easiest way to make a million accurate repetitive cuts.
Since I had to cut 27 of the 26 1/2″ boards, I clamped a board at exactly 26 1/2″ from the blade of my miter saw.
Then each time I cut, I made sure to but the MDF up against my “stopper” board evenly.
**One thing you want to absolutely make sure of, though, is that when you cut your boards, let the blade come to a complete stop before pulling it back up again. When you have a board wedged between a “stopper” and your blade and you pull up before it has stopped spinning, it will catch the board and shoot it at you.
So please be careful!!
I’ve also had a lot of questions via Instagram on my process, so I will try to answer them all as I go! If you have any questions by the end of this tutorial feel free to shoot me a comment or head to my instagram and DM me!
Question 1: Why use MDF, rather than a regular 1 by pine or whitewood?? I have lots of reasons why I choose primed MDF for this project and here’s a few:
- In general, it is cheaper than pine.
- It comes already primed! Who wouldn’t want to skip a step?!?
- You’re guaranteed a straight board. Every time.
- You never have to worry about grain lines or knot holes!
If that doesn’t convince you, I don’t know what will.
Step 2
Figure out your spacing. I spaced each of my boards 15″ apart on my wall. Which is how I came up with needing 27 boards. I based this off of how far apart our builder had spaced the wainscoting in our front entryway and I liked the look of it.
There are a couple different ways you can start your wall. When working on my bedroom, I have casing around all of my doorways, so I started my first board 15″ in. I didn’t want a board to butt right up against the casing. However, when I worked on my friends entryway, I did my first board right up against the curve of her wall, as shown in step 5. This is also a preference thing and you can start your wall however you think would look right.
Using the caulking gun, put a squiggly line of the liquid nails paneling on your board.
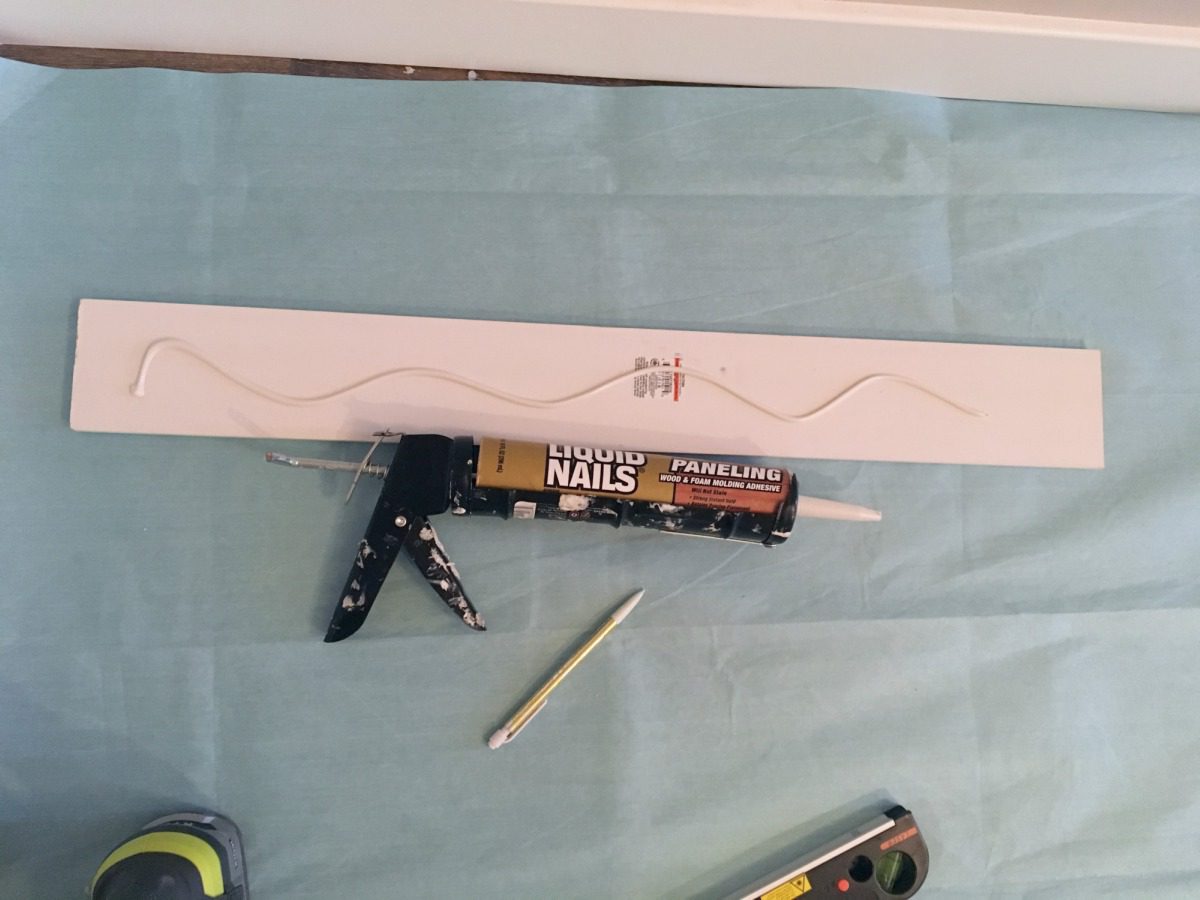
Line your board up at your mark, and use your level to be sure it’s straight.
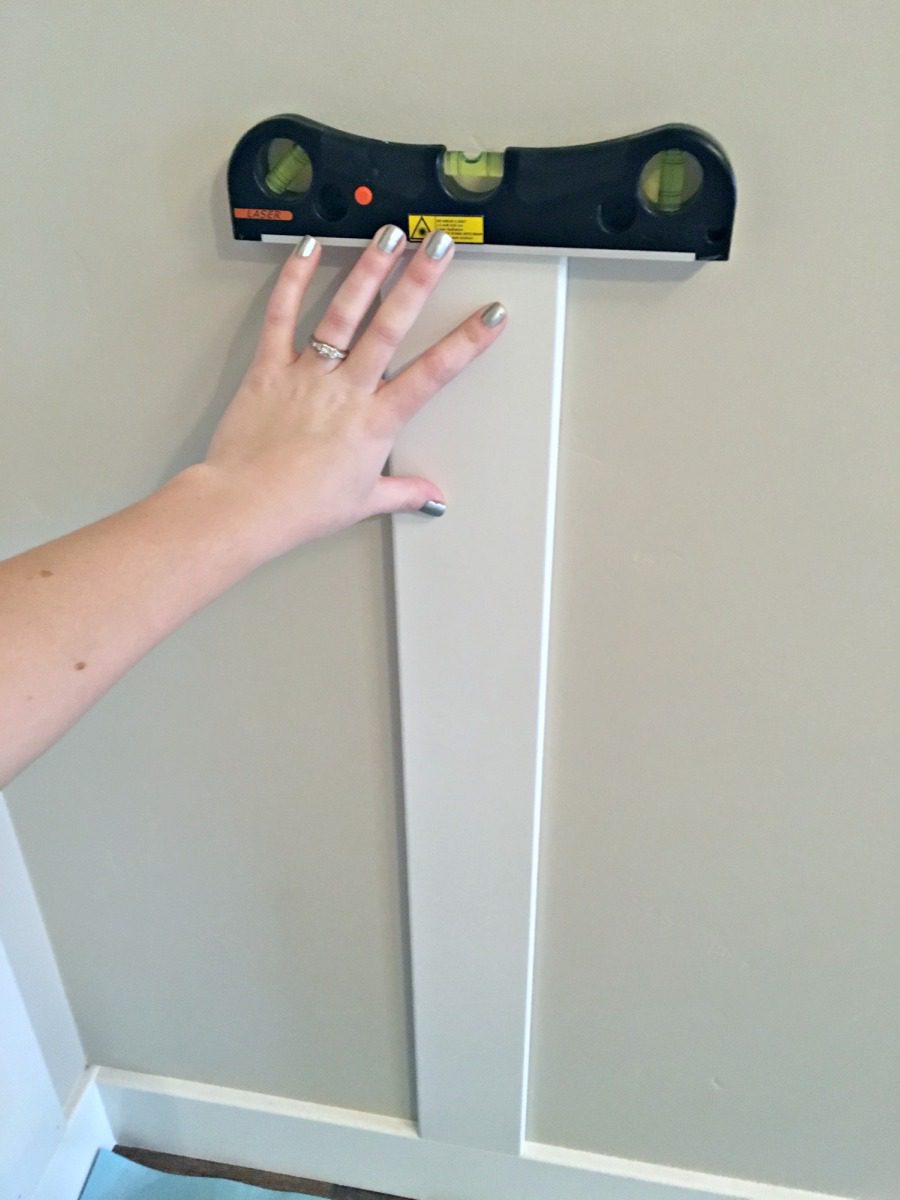
Using your brad nailer, shoot a couple nails into the top, and a couple into the bottom of your board.
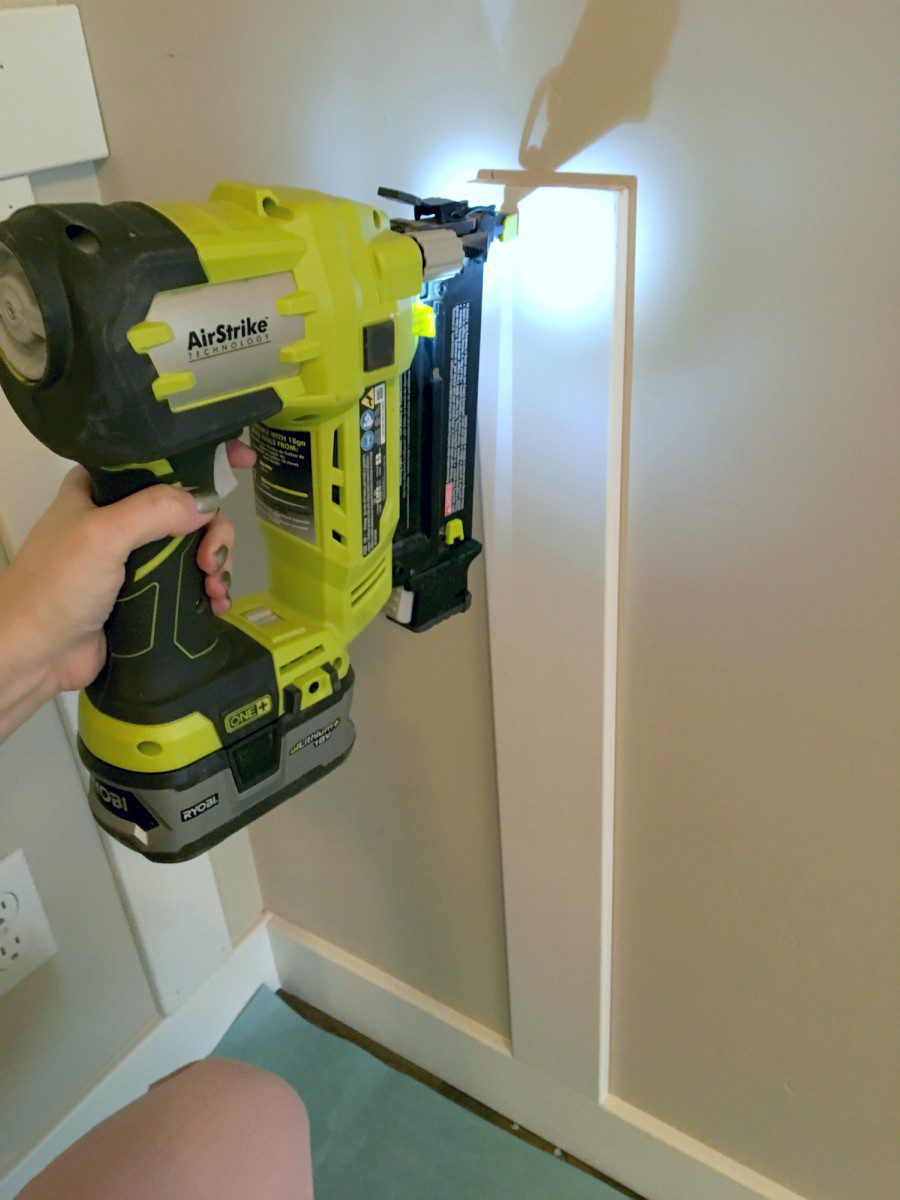
Question 2: How do I space my boards so that the nails hit studs? Fuggedaboutittttt! You don’t need no studs! This is why we have the liquid nails! The brad nails are literally there as a “brace” to hold the boards in place until the liquid nails dry. So DON’T WORRY about finding studs!
Step 3
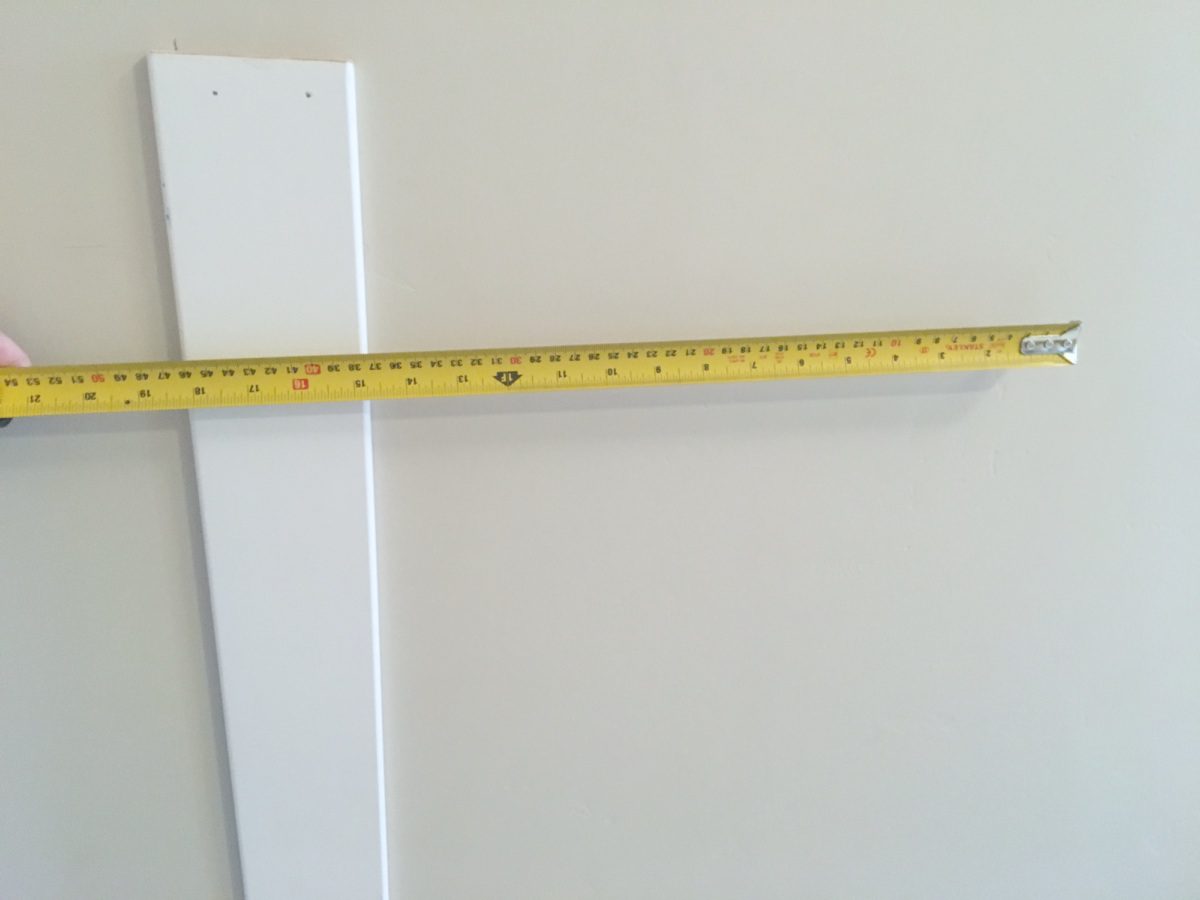
Measure 15″ from your board, make your mark, and nail up your next board.
Question 3: What do you do when you get to the edge of a wall/corner? First I measure the remaining wall space like I did below…
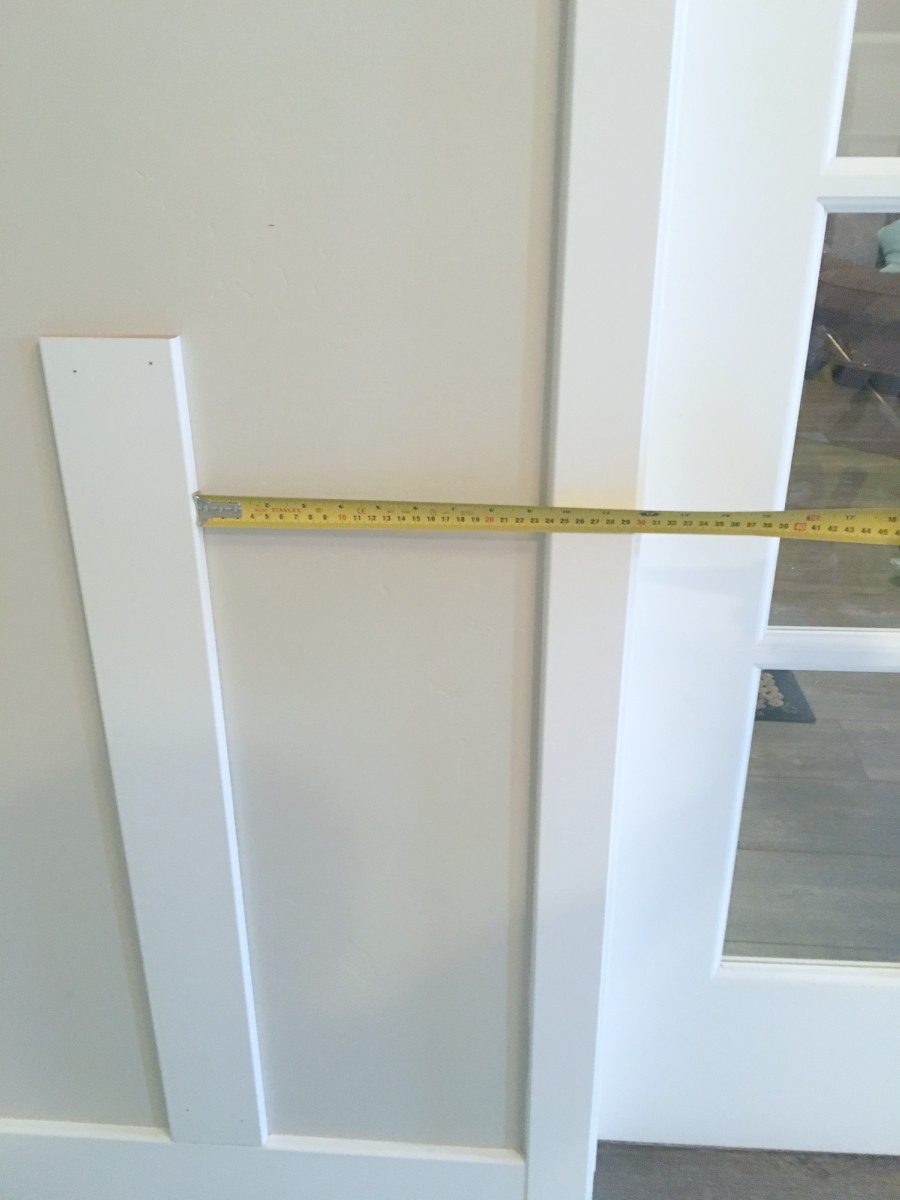
In this case it was 9 1/2″ to this doorway. Then I’ll subtract that from 15, giving me 5 1/2, and I’ll measure that from the beginning of the next wall. Like this…
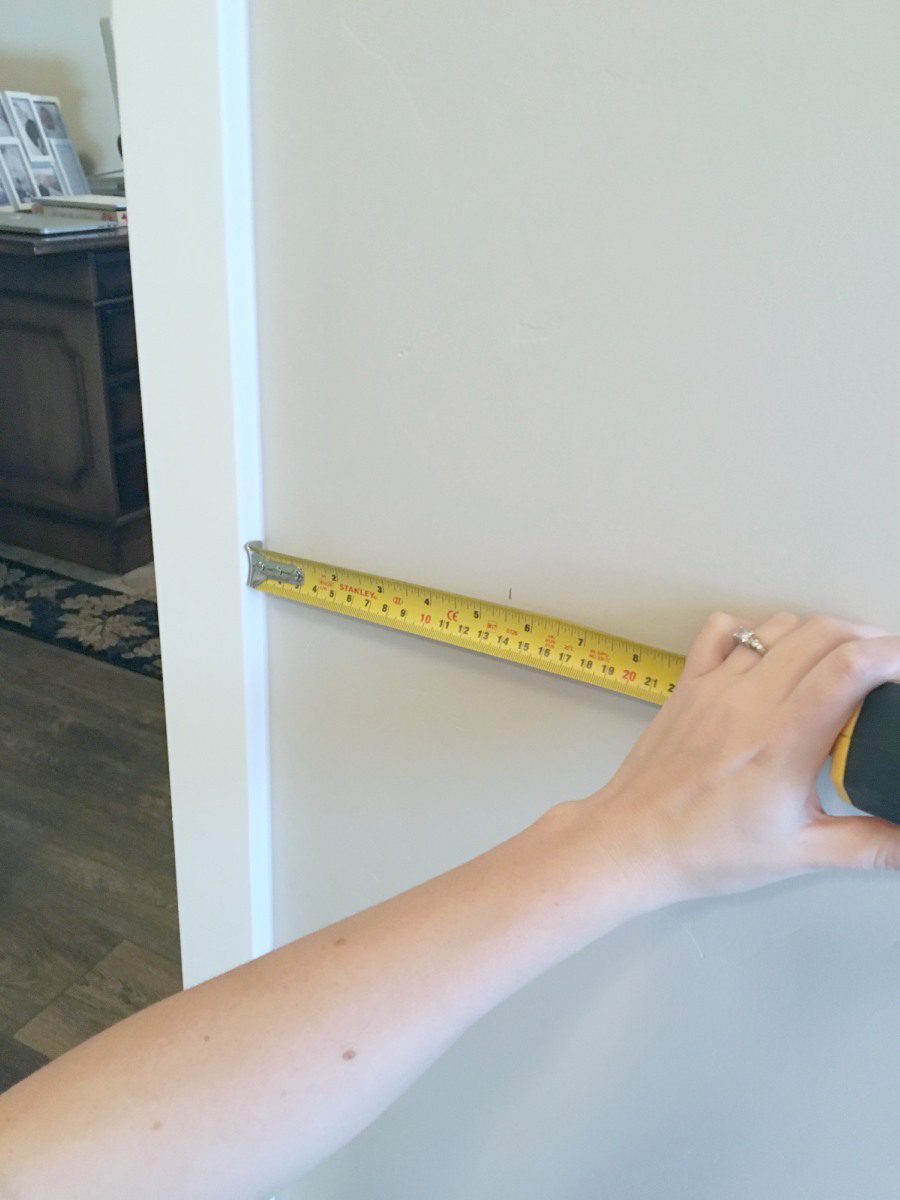
This is where I’ll start my first board on my next wall. When all is said and done, it will look evenly spaced and like everything is cohesive and flows well.
Step 4
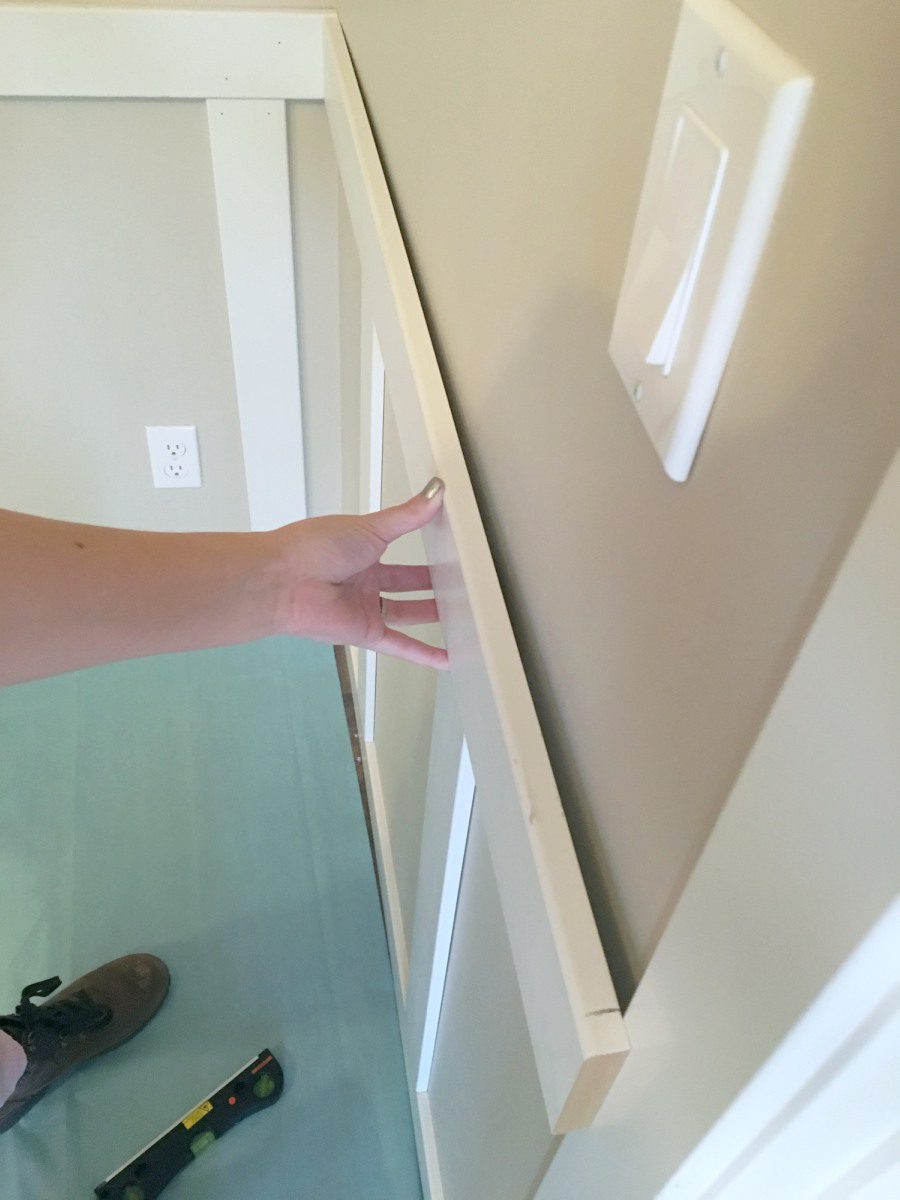
Once you’ve got all of your vertical boards in place, measure for your horizontal top board.
When working in a corner, your first horizontal board will sit flush against the wall in the corner.
Your second board will butt up against your first board, ensuring that your corner is completely covered with MDF.
To get accuracy, I like to hold it up against the wall and mark on the board where to cut, so that it is snug as possible.
Step 5
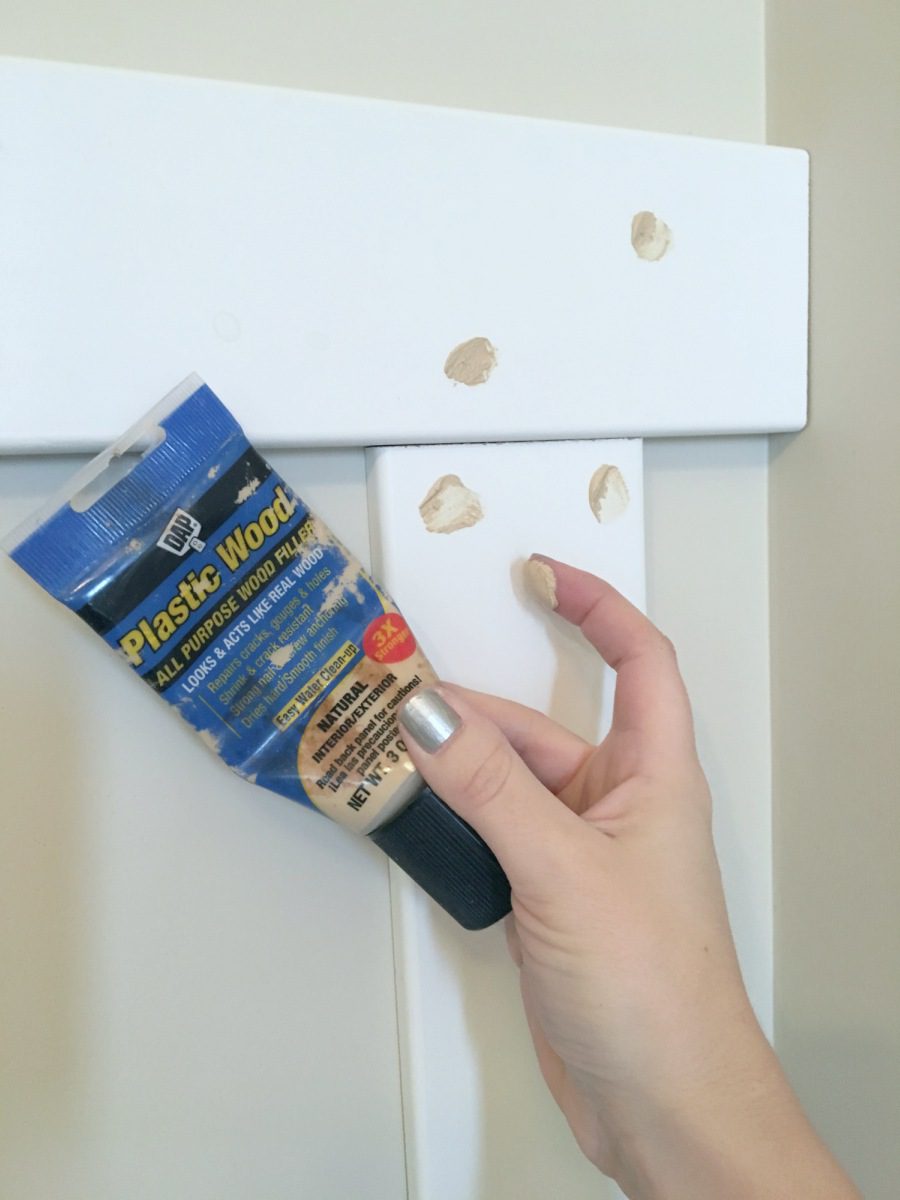
Fill your nail holes! The DAP Plastic Wood is my favorite wood filler.
Step 6
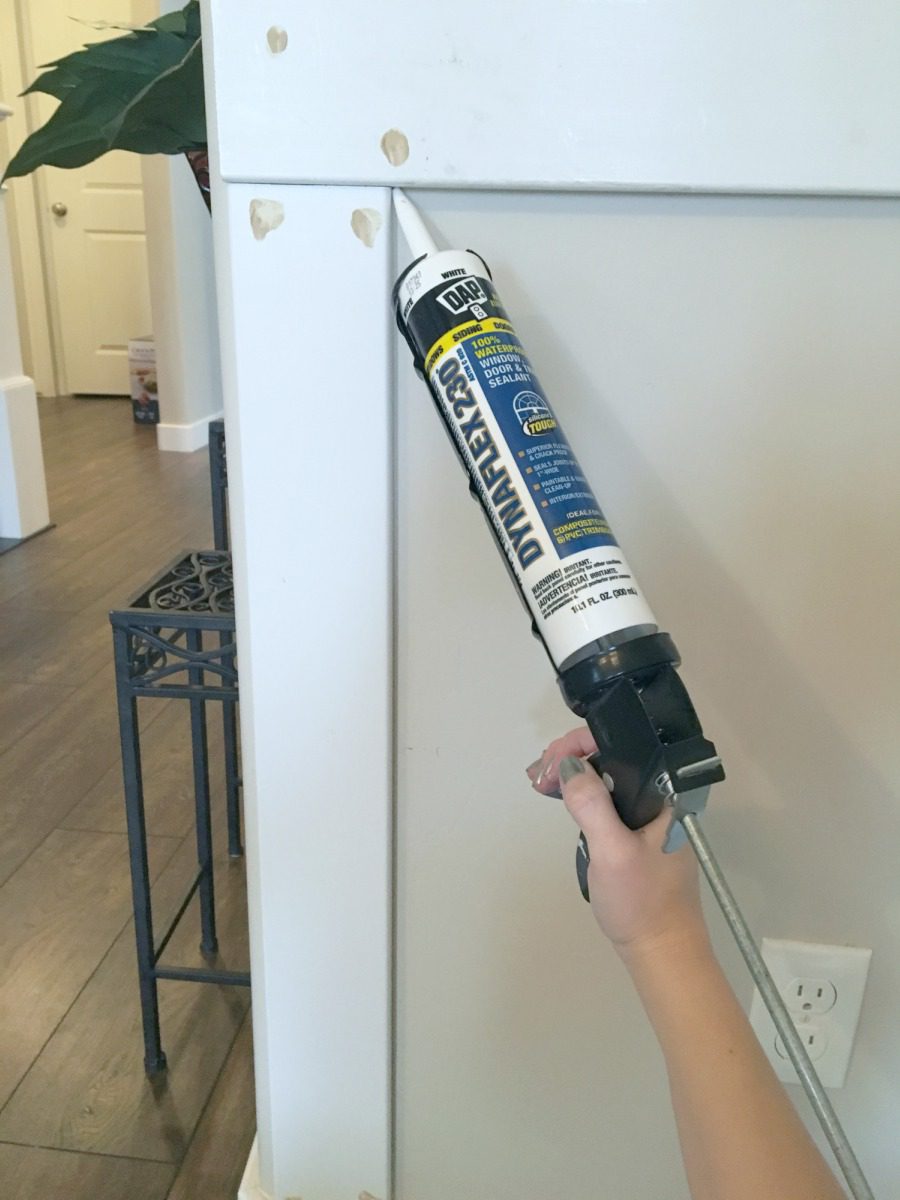
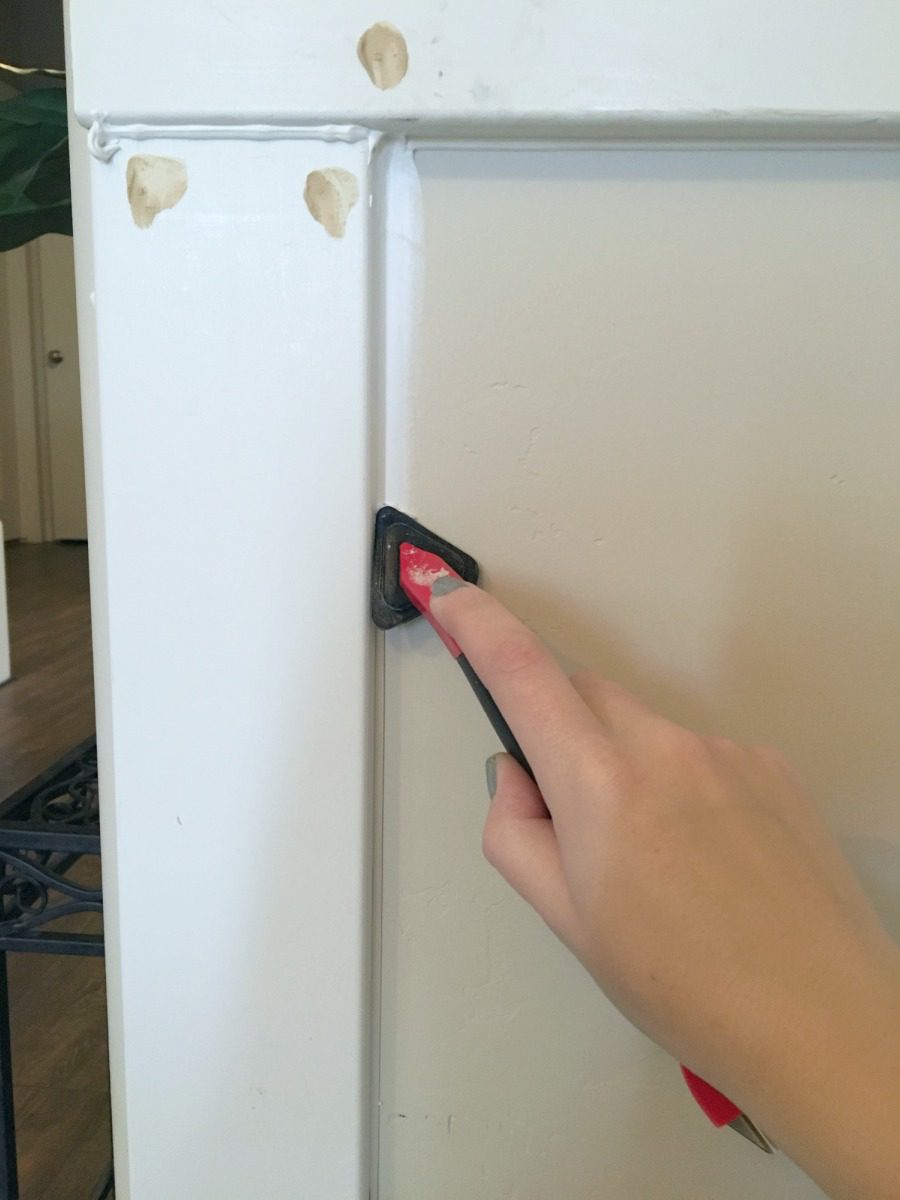
Caulk all your edges. CAULK IS MAGIC. Don’t even worry about tiny little gaps/errors. Caulk will cover them!!
BTW, this is the board I put up against the rounded corner I referenced earlier.
Look how pretty it is now!!
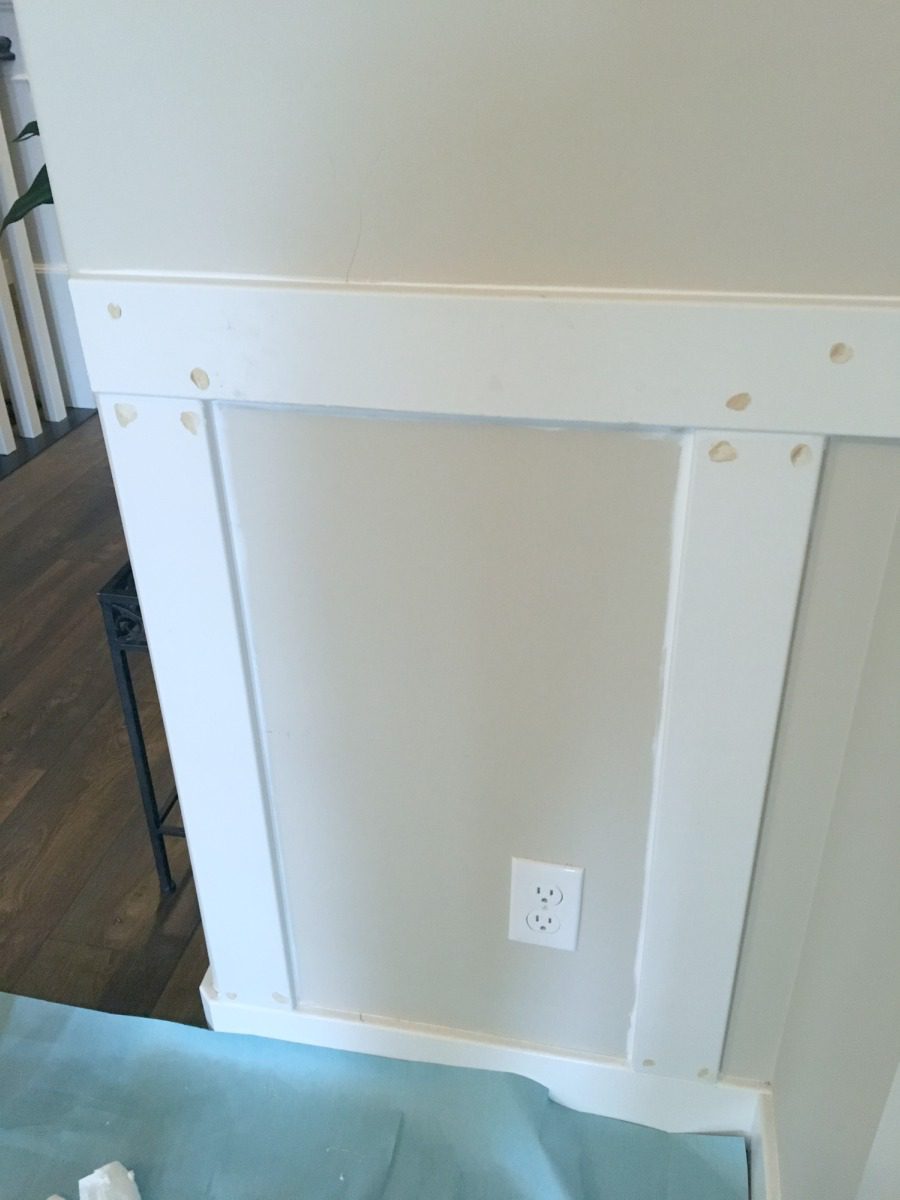
Okay, so the caulk between the boards isn’t THAT pretty… but that’s going to be covered by paint!
The important thing is that my edges are sealed!
Question 4: Do you use the caulk then finger swipe method?? I did! And it absolutely works. But then my husband brought home this little $3 caulking tool from Walmart and I never looked back! This little guy is totally worth it. And my fingies don’t get gross.
Step 7
Sand your nail holes, then tape and paint!
But don’t be lazy like me.
Use a drop cloth.
I got lucky, and I didn’t drip anything on my floor.
But, really, be a pro. Don’t be like this girl…
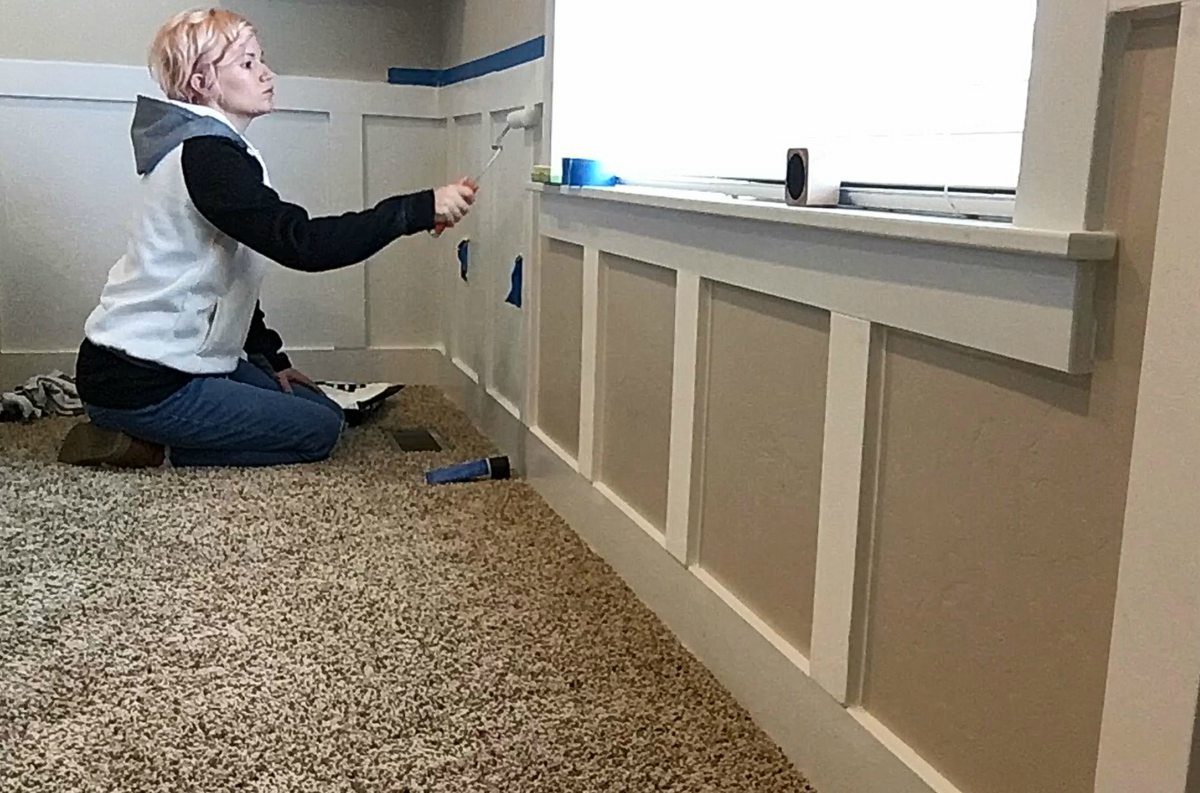
Also don’t paint in a sweatshirt you like. This one now has a little white on the black sleeve…
Question 5: Why didn’t you paint the wall first? I definitely would have if I wasn’t also painting the MDF. But the prime on the MDF wasn’t exactly the same color as the white I was using and I figured I didn’t want to paint twice, so I wanted until the end and did it all at once.
Guys. That’s IT!
I know I talked a lot, making this seem like a longer process than it actually is.
It’s not. Its so quick and easy.
I just wanted to be thorough and try to answer as much as possible!
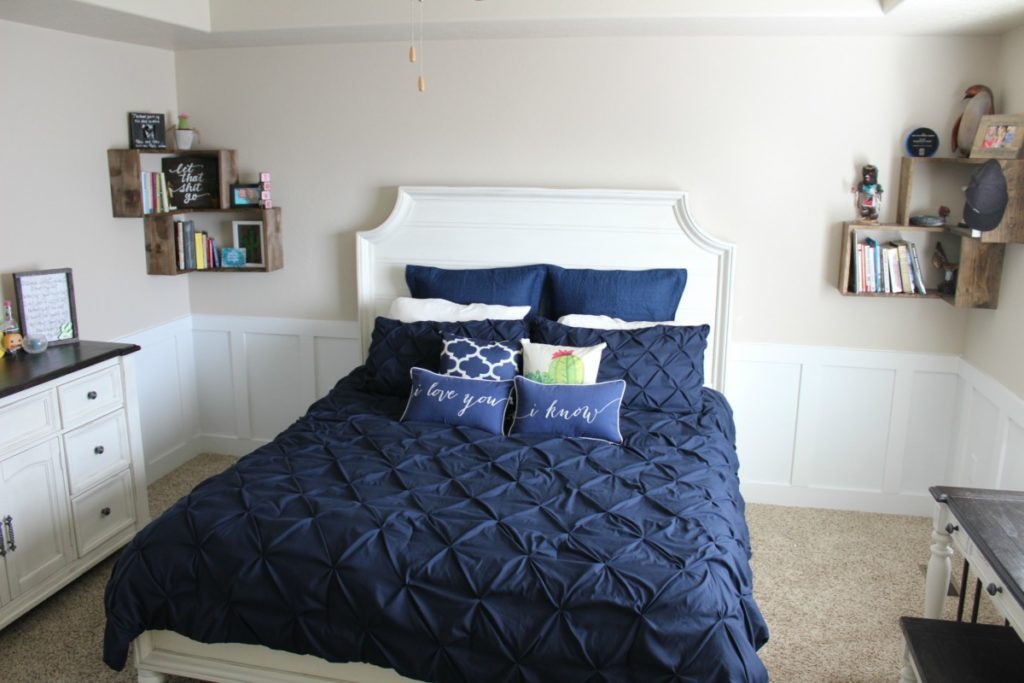
And while I’m kicking myself for not taking a BEFORE photo… Here’s how it turned out!
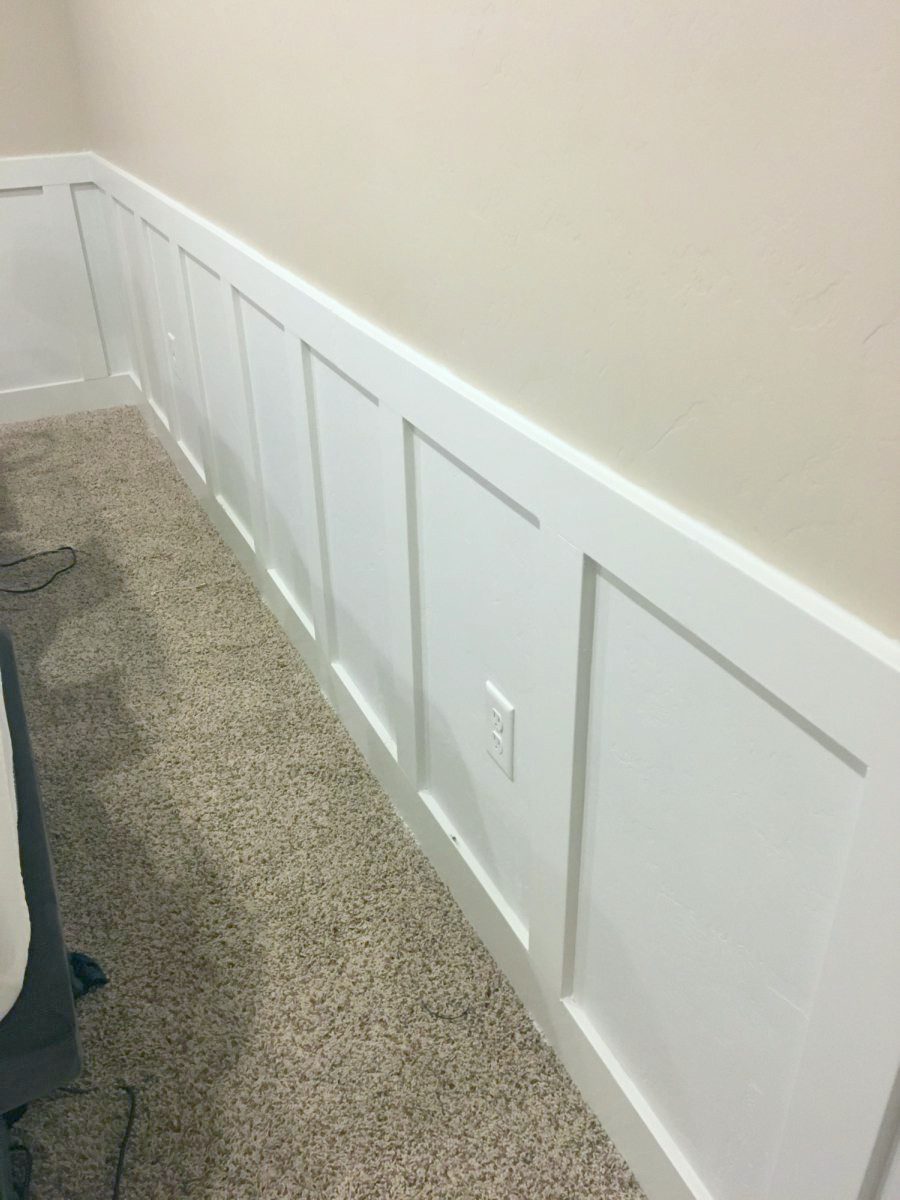
I can’t even tell you how much I love it!
Even my hubby… who was reluctant to let me do it… told me that it really adds to the room and makes it look bigger!
Always a plus when you can prove you were right 😀 haha
Alright I’m going to wrap this sucker up. Thanks, as always, for following along and don’t forget to PIN this project, tell your friends, and post your photos!!