Home Decor, Tutorials
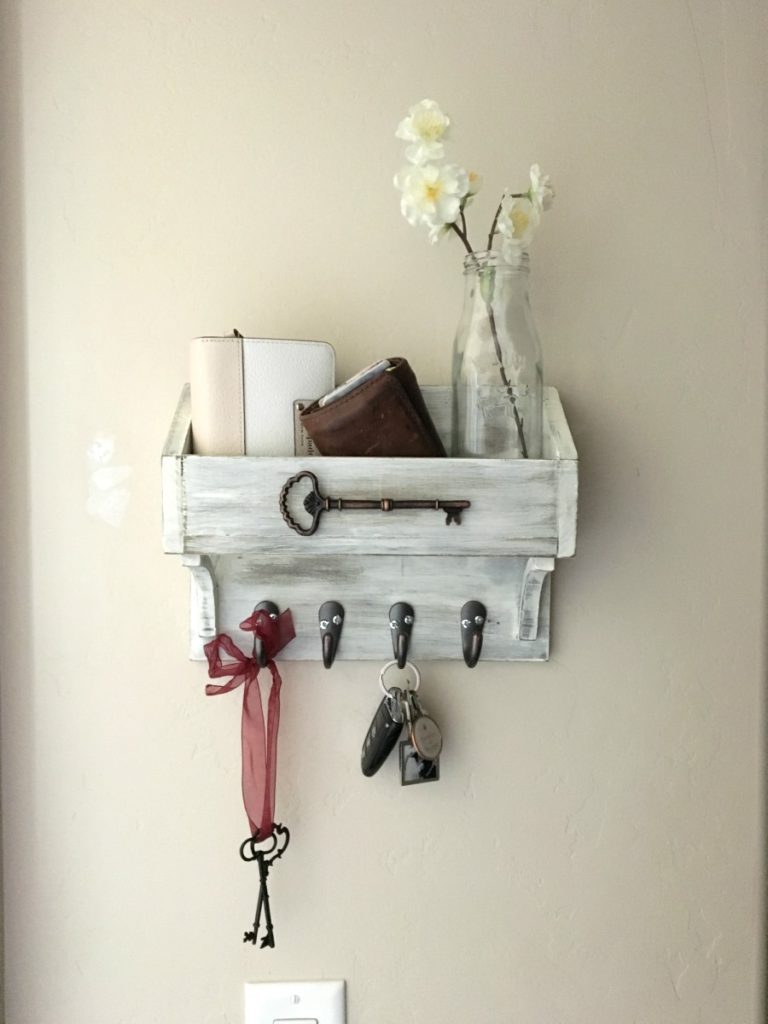
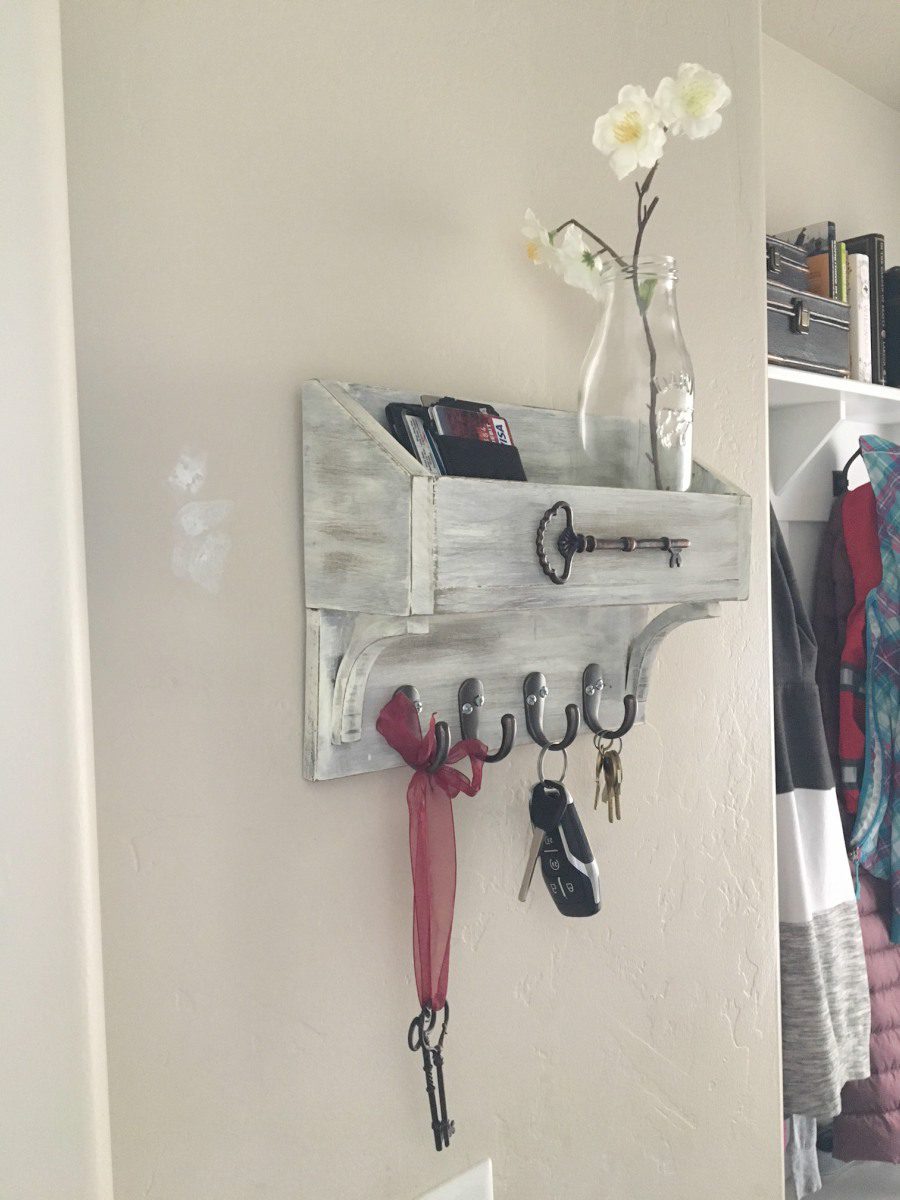
DIY Key Hanger
Don’t forget to stay updated by following Overalls & Power Saws on Instagram and Pinterest!
I’m all about that Nap Time Hustle
and this DIY Key Hanger definitely falls under that ‘nap time project’ category!
It only requires ONE board, THREE tools, and TWO hours to complete!!
With Mother’s Day quickly approaching, this could be the perfect gift.
Handmade and practical.
Win-win! I even made one for my mom last year!
(not for mother’s day… she just wanted one ;))
DIY Key Hanger
Materials: (it’s a short list)
- 1/2″ x 5 1/2″ x 4 ft poplar board – I get my poplar at Lowe’s (Home Depot only sells it in 3 ft)
- 1″ brad nails
- brad nailer
- band saw or jig saw (optional)
- four single hooks
- decorative key – I got mine in the dollar section at Michael’s
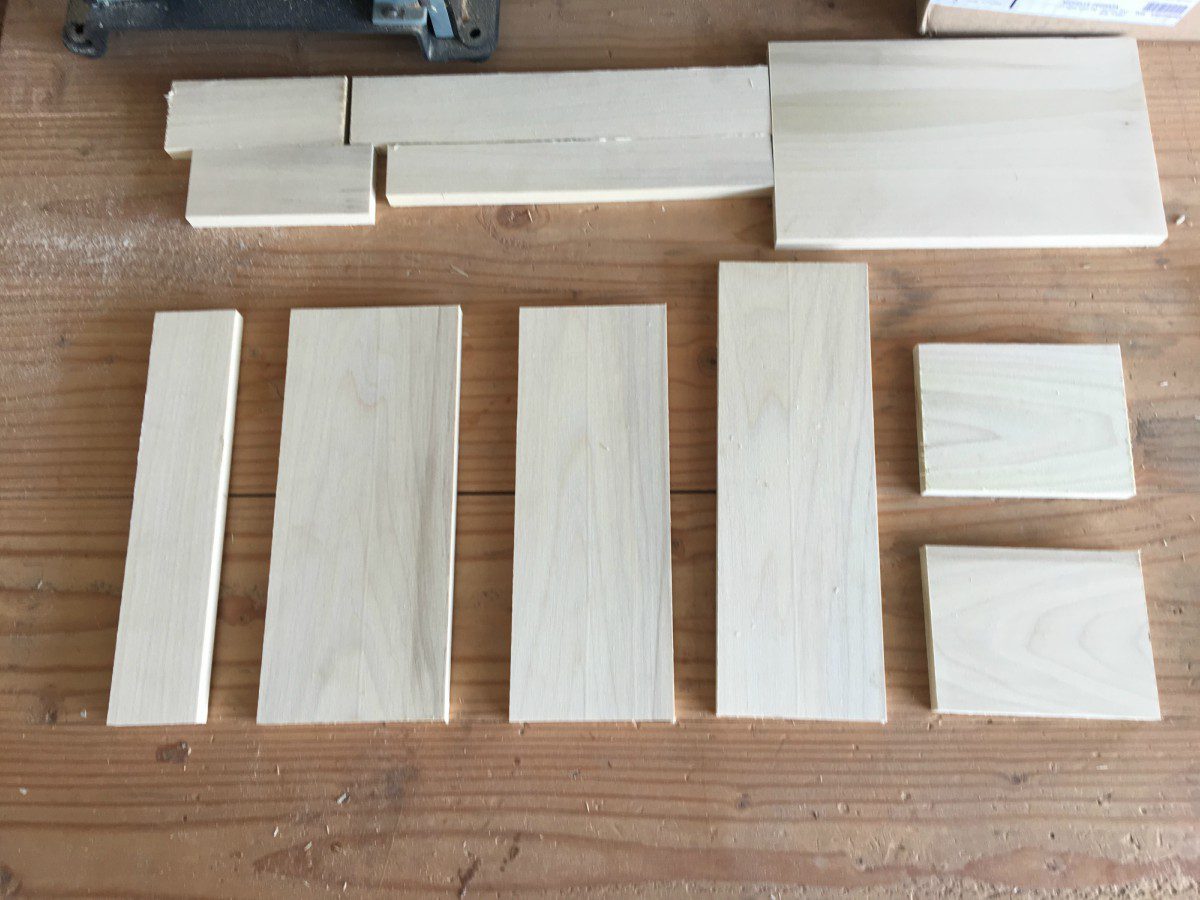
Cut List:
- 3 1/2″ x 10 1/2″
- 3 1/2″ x 9 1/2″
- 2″ x 9 1/2″
- 4″ x 9 1/2″
- 3 1/2″ x 4 1/2″ – 2
- decorative arches (optional)
*Measure twice, CUT ONCE. This board will exactly fit all of your pieces once so there is no room for error in cutting.

Step 1
Make your 10 1/2″, 9 1/2″ (just one) , and two 4 1/2″ cuts on your miter saw.
Run those four cuts through the table saw at 3 1/2″.
Save your 9 1/2″ x 2″ cutoff.
*I realize that due to blade width, this cut will not be exactly 2″ wide. In this project, that is okay*
Make your final 9 1/2″ cut and run it through the table saw at 4″.
Keep the last 9″ of your board to use for the arches.
Step 2
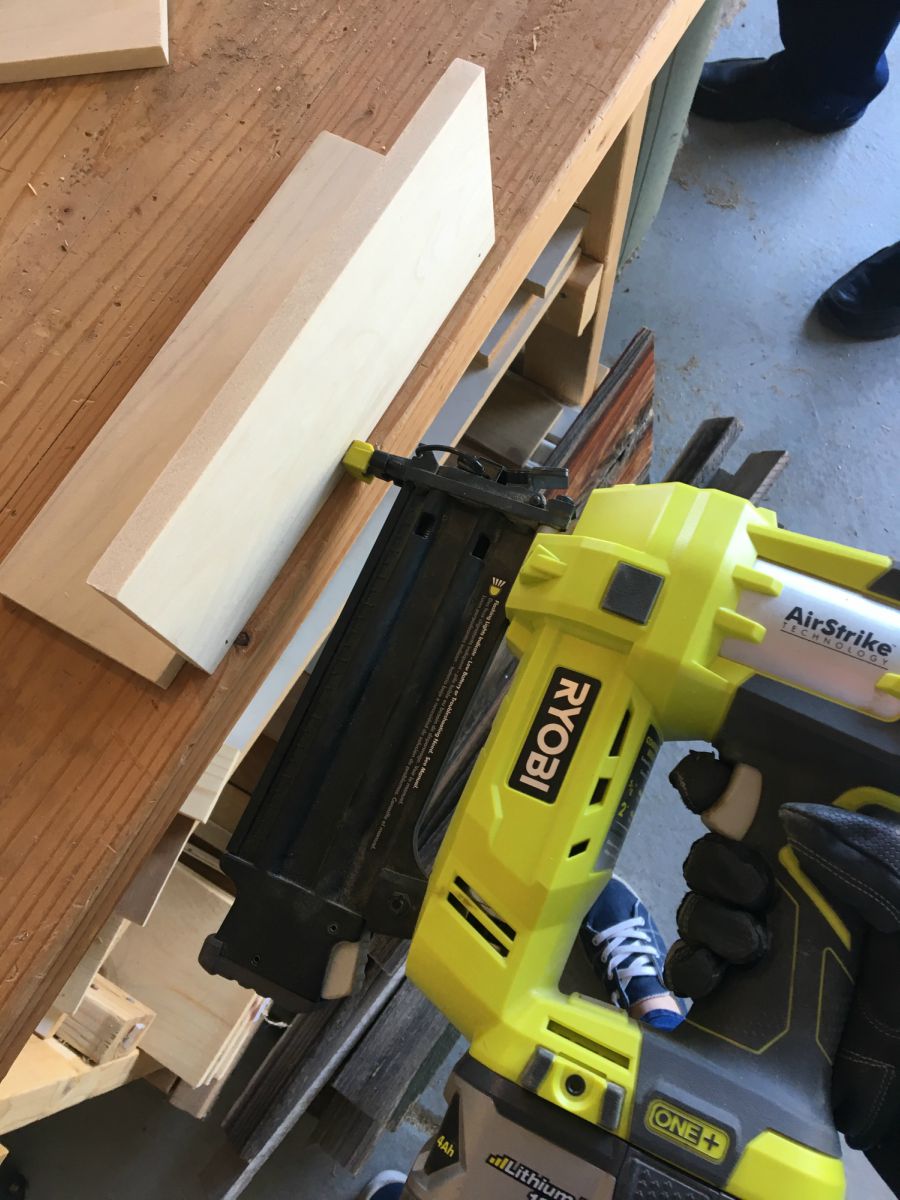
Center your 9 1/2″ x 3 1/2″ piece along the edge of the 10 1/2″ piece and nail into place.
Step 3
This step requires a band saw or jig saw.
If you do not own either of those,
skip to step 4.5 to see how to use your miter saw for this cut.
Take your 4 1/2″ pieces and measure in a half inch from the edge.
Take the opposite corner and measure the height of the 2″ piece and then in 1/2″.
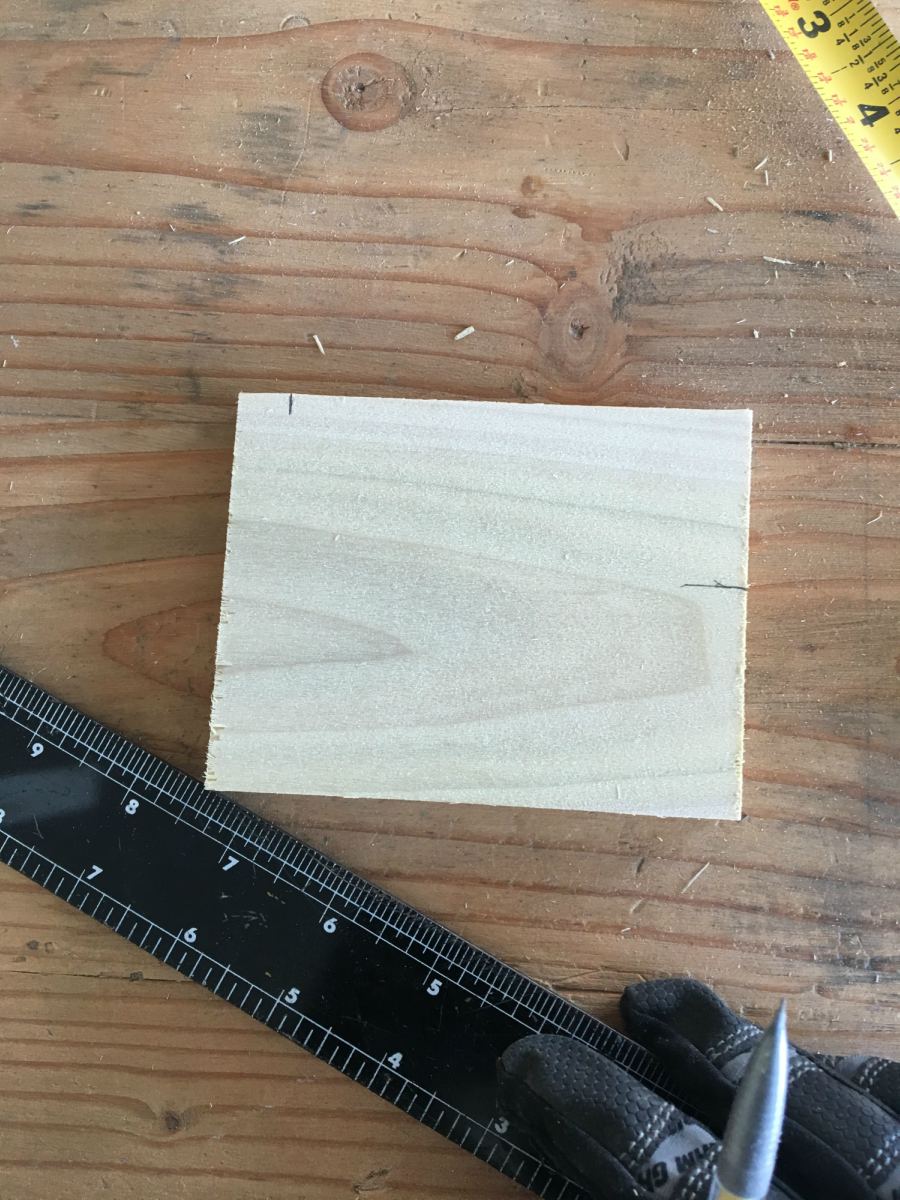
Draw a line from the top 1/2″ mark to the inside edge of the bottom 1/2″ mark.

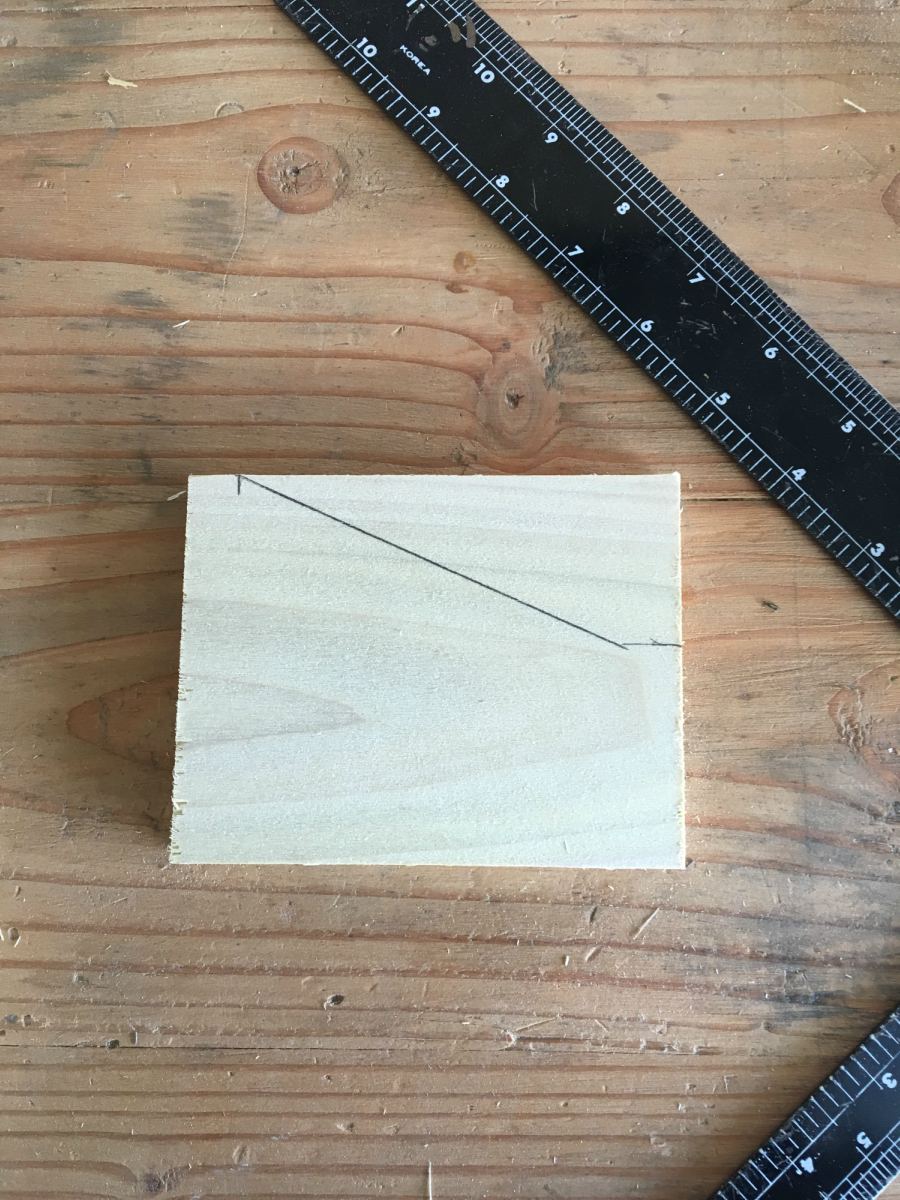
Cut along this line using the band saw or jig saw.

Skip to step 4.
Step 3.5
Take your 4 1/2″ pieces and measure in a half inch from the edge.
Take the opposite corner and measure the height of the 2″ piece.
Draw a line from the 1/2″ mark to the 2″ mark.
Angle your miter saw until it lines up with your angle. Clamp the piece and make the cut.
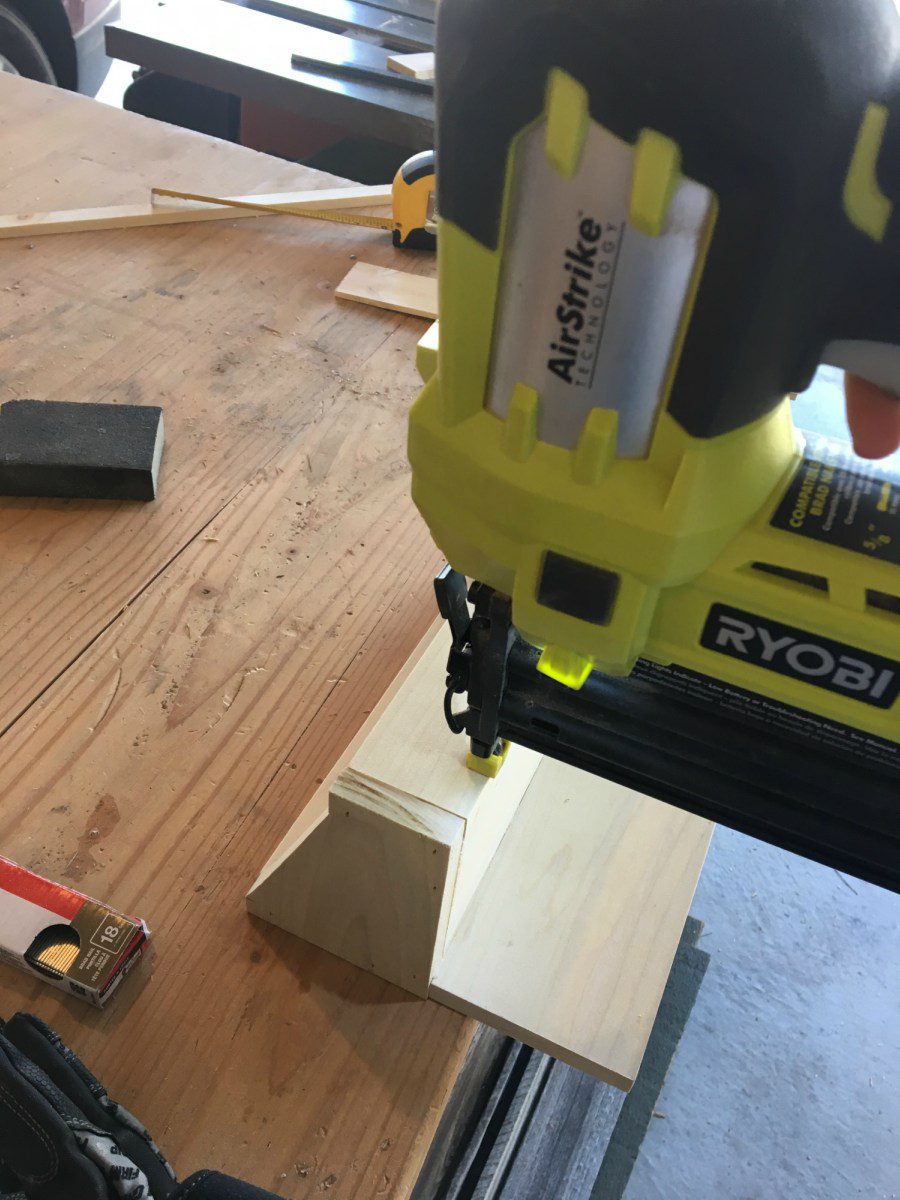
Step 4
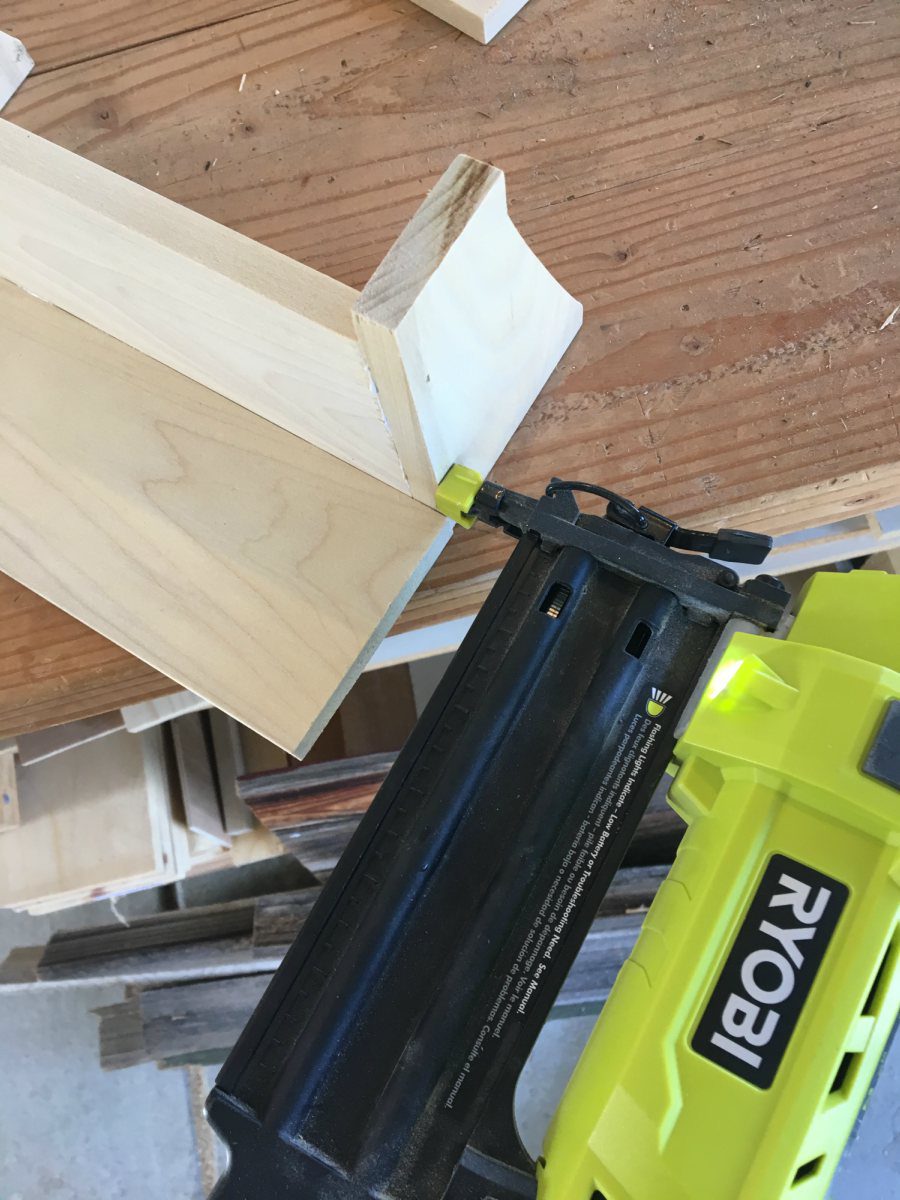
Arrange the pieces you just cut on the left and right sides of the base.
Nail into them from the side.
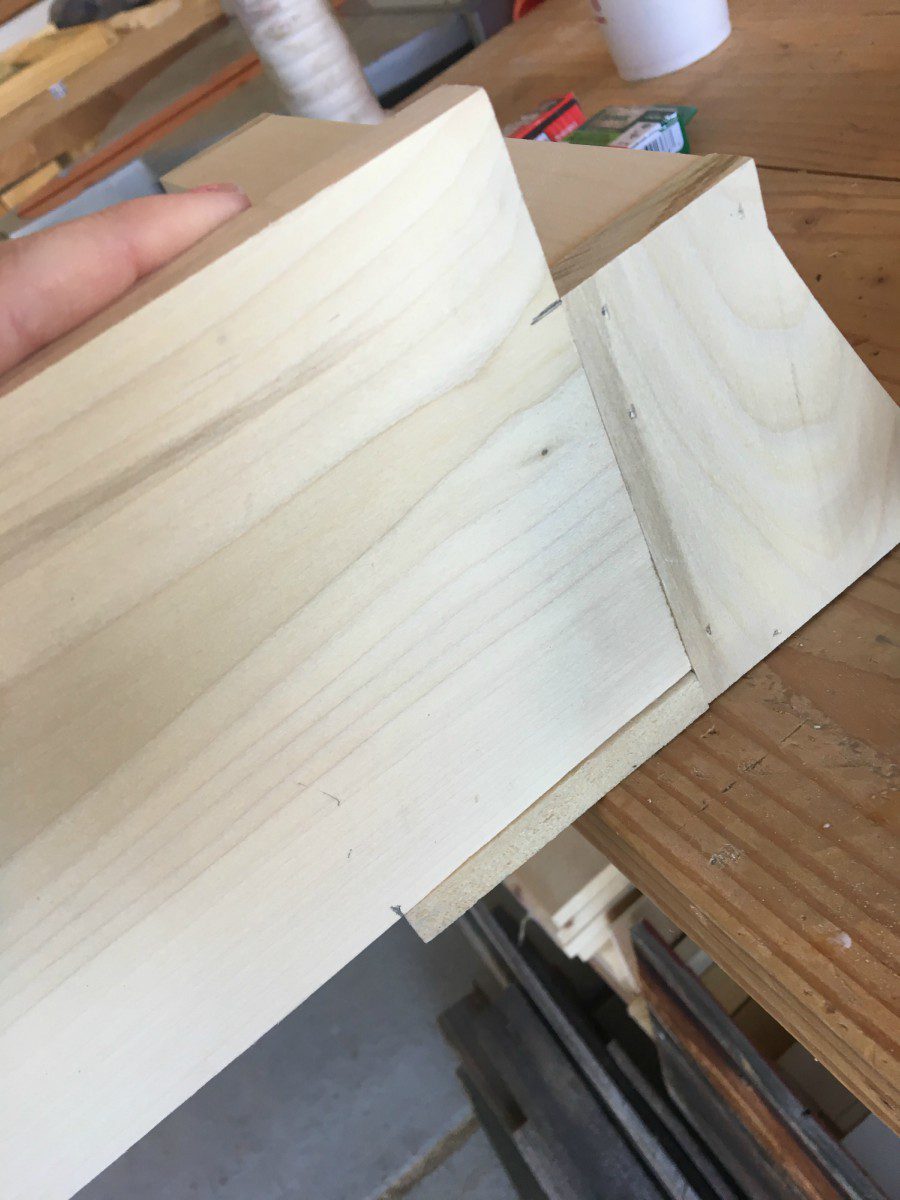
Step 5
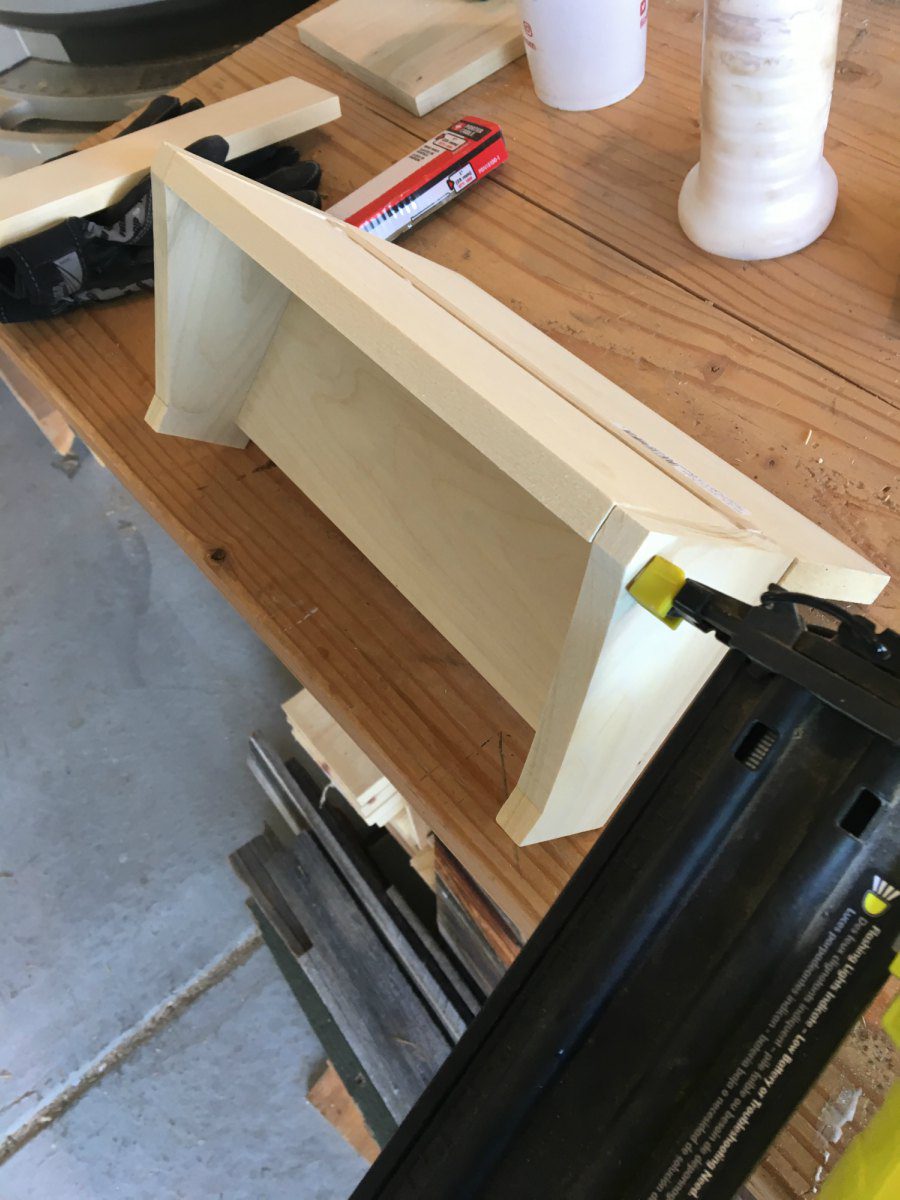
Align your 9 1/2″ x 4″ piece along the back of the project between the side pieces.
Nail into the back from the sides.
Step 6
Align the 2″ piece in the front between the sides.
Nail into it from the sides.
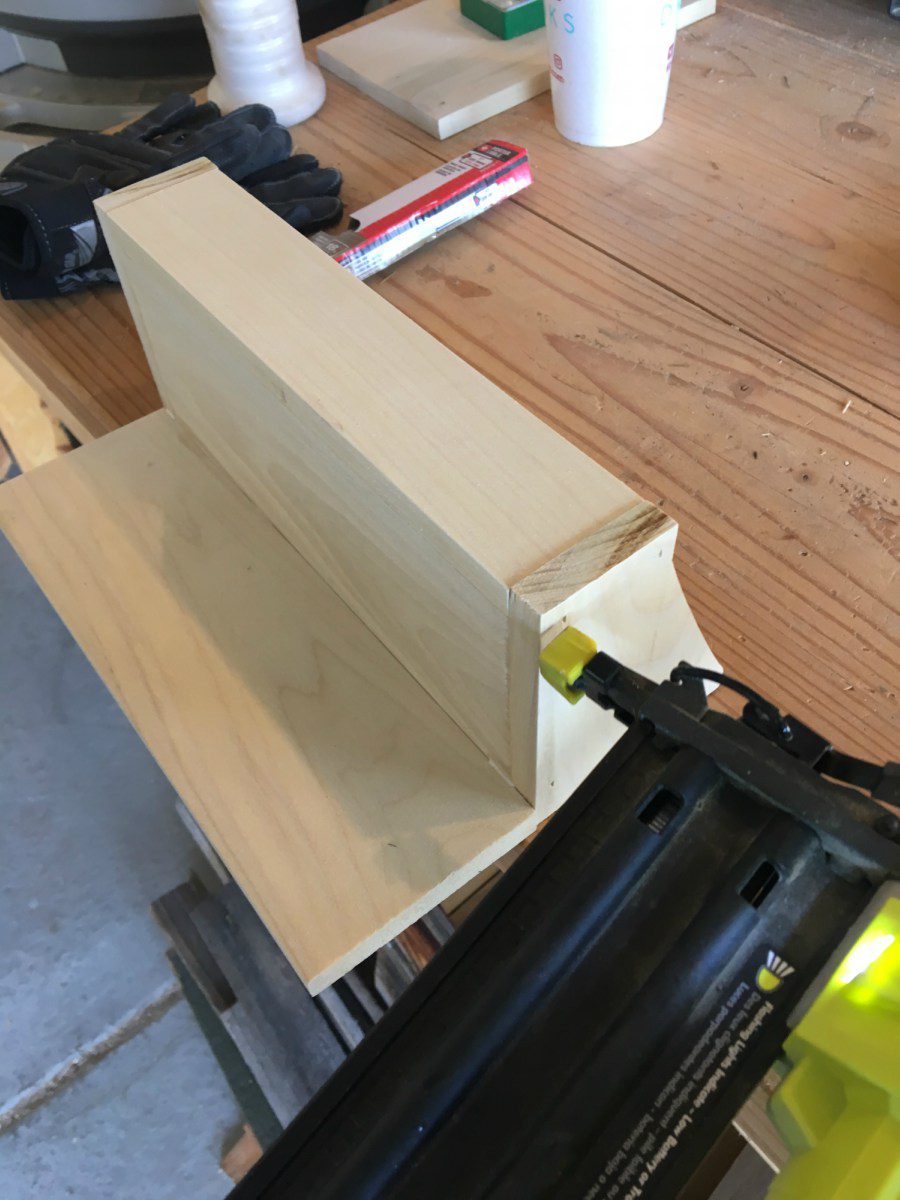
And then across the front.
Step 7
Optional decorative arches.
Take your last piece and put it up into the corner of the key hanger.
Mark the top edge and the bottom edge.
Take a paint can, or in my case, a popcorn bucket, and mark an arch from the top to bottom.
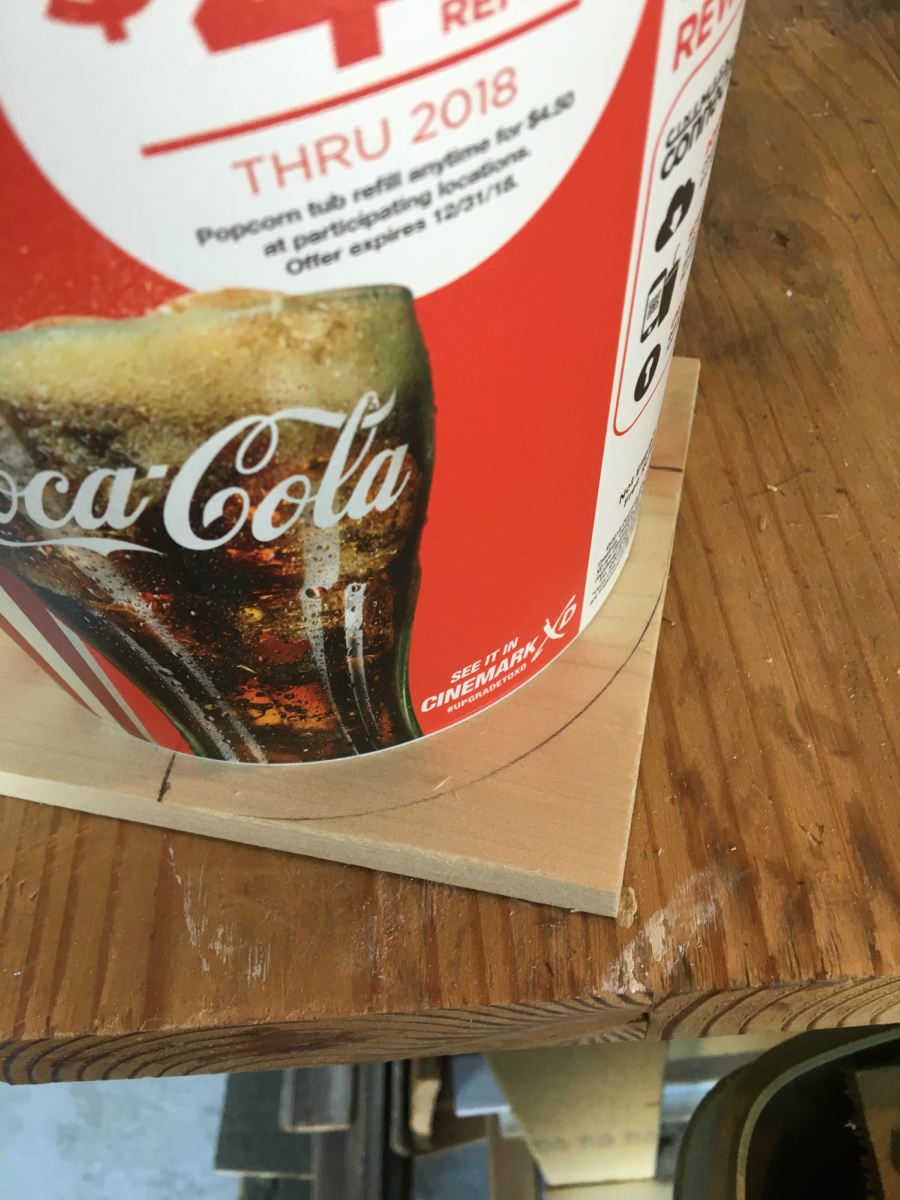
Move in a half inch and mark again.
Take this over to your band saw and cut out your arches.
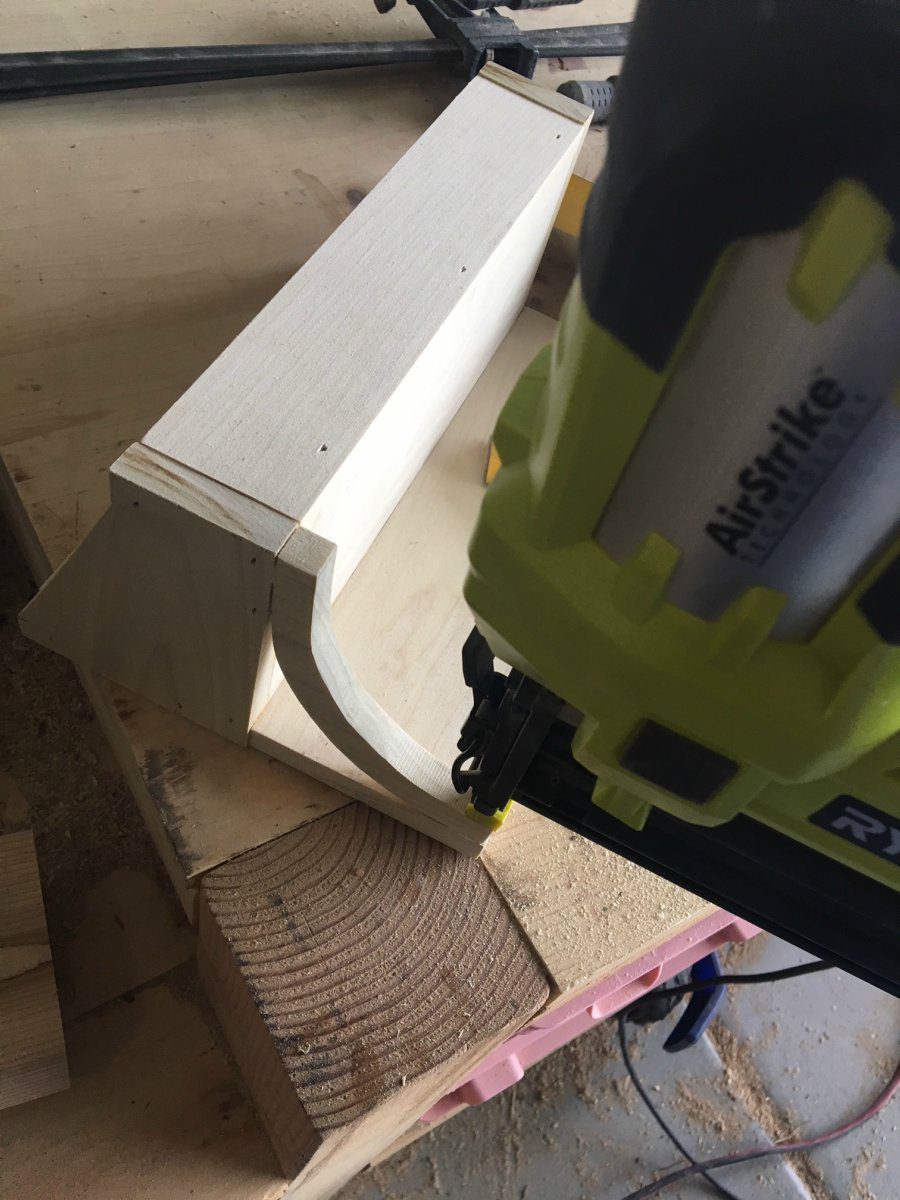
Step 8
Sand arches smooth.
Nail them into place.
Step 9
Finish! I filled the nail holes, stained it Dark Walnut by Minwax then painted over it with Sheepskin Chalk Paint
and distressed it with my orbit sander. I used hot glue to attach the key and screwed on the hooks!
Thanks so much for following along today!! As always, share your photos, PIN this project, and tell your friends!
XO,
Britt
This turned out adorable! Love the skeleton key on the front!
Aloha,
Charlee