Home Decor, Tutorials
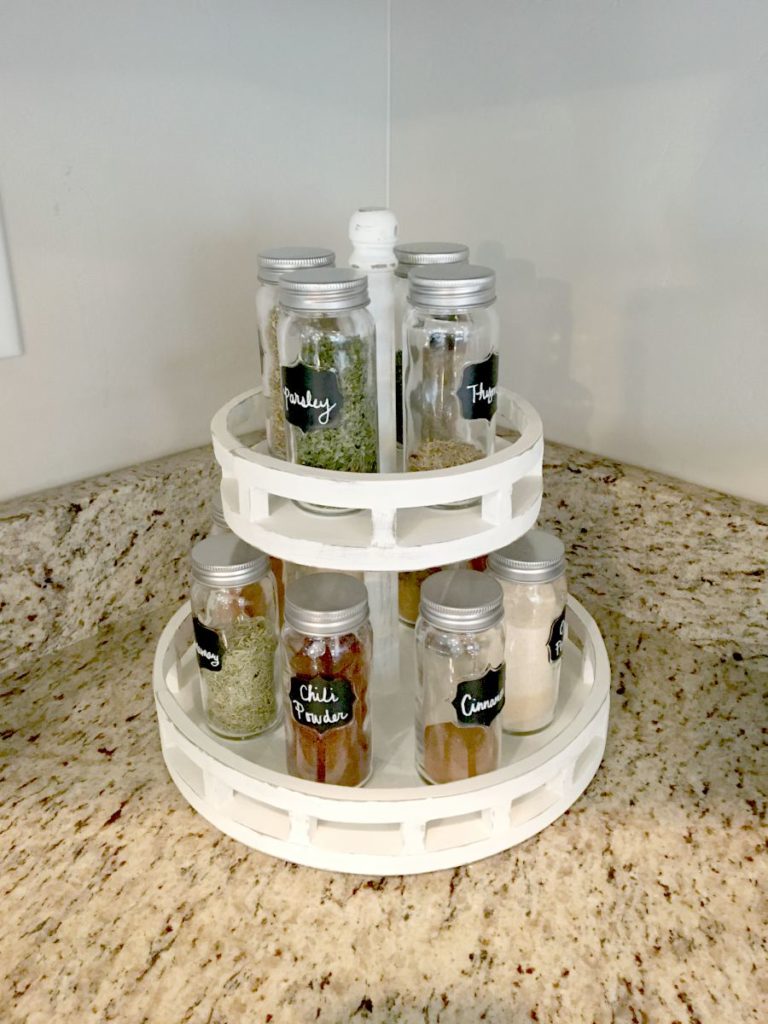
DIY Lazy Susan Spice Rack
I don’t know about you… but I went through three different spice racks in the first 5 years of my marriage.
That’s normal right?
No, of course it’s not. But I HATED them! All of them!
There are no cute spice racks out there.
Unless you wanna fork out a gazillion dollars.
For a spice rack.
No Thanks.
So, by golly, I designed one. That I actually LIKE!
And all in all, it wasn’t too difficult to make!
Here’s a quick tutorial on this DIY Lazy Susan Spice Rack so you, too, can actually like your spice rack!
Don’t forget to stay updated with current builds by following Overalls & Power Saws on Instagram and Pinterest!
DIY Lazy Susan Spice Rack
Materials:
- 1/2″ x 5 1/2″ x 48″ – 3
- 3/4″ dowel
- Gorilla Wood Glue
- band saw
- pencil, nail, and string
- dowel cap – there is a photo of this on step 11
- lazy susan hardware
- chalk label spice jars
I’m going to go ahead and skip the “Cut List” on this post since I’ll be going over each cut along the way!
Step 1

Glue two of your boards together. Let dry for 24 hours.
Step 2
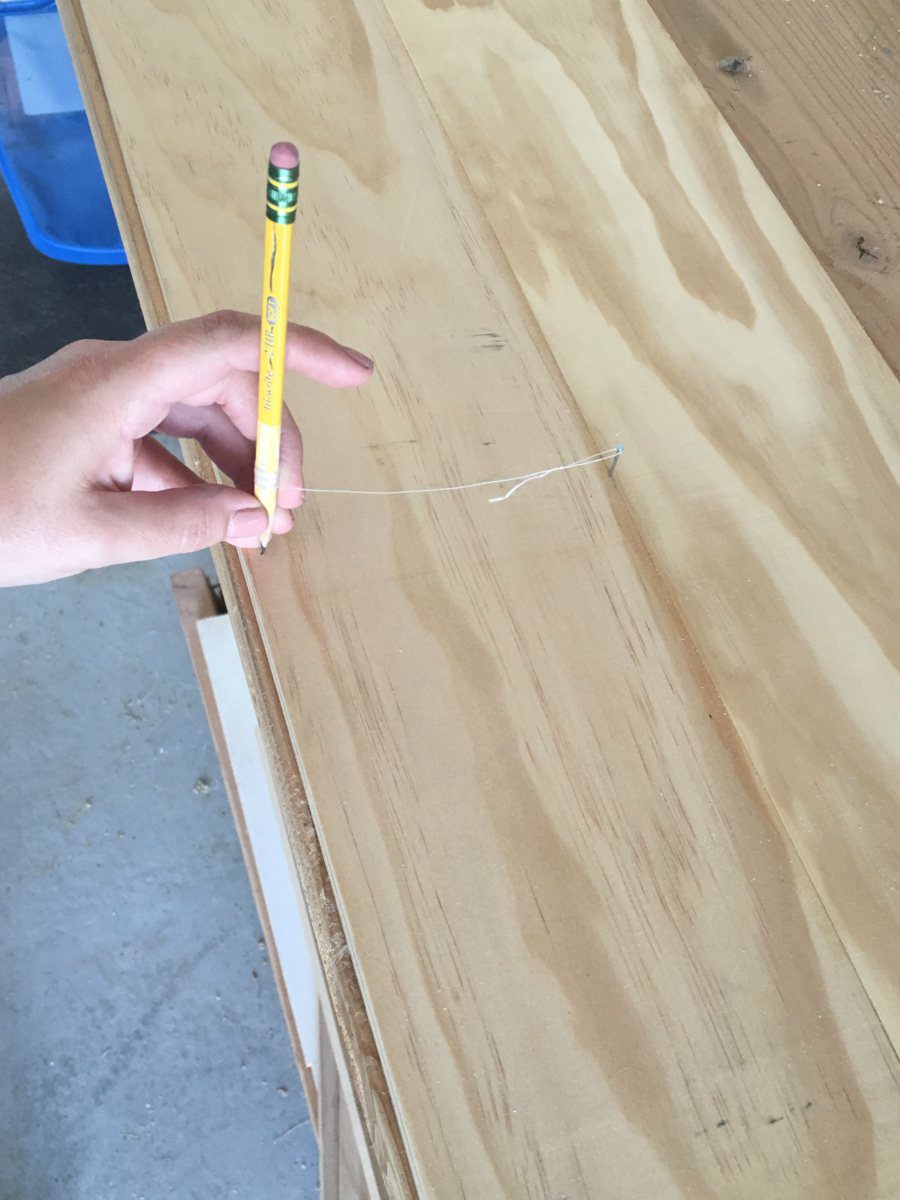
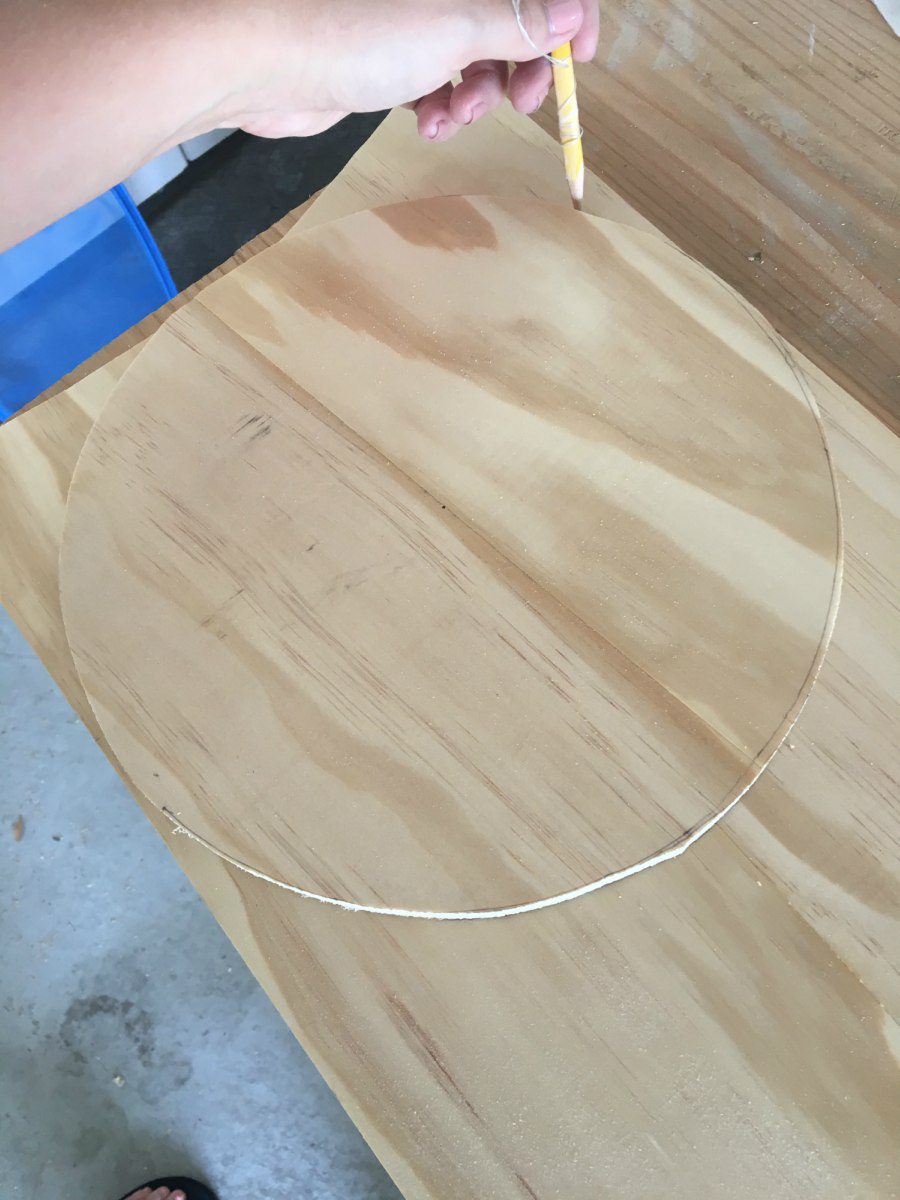
Hammer a nail into the seam of your glued boards. Tie a string around the nail and a pencil.
Swing the pencil in a circle as wide as the boards to form your larger circle.
It will be about 10″ in diameter.
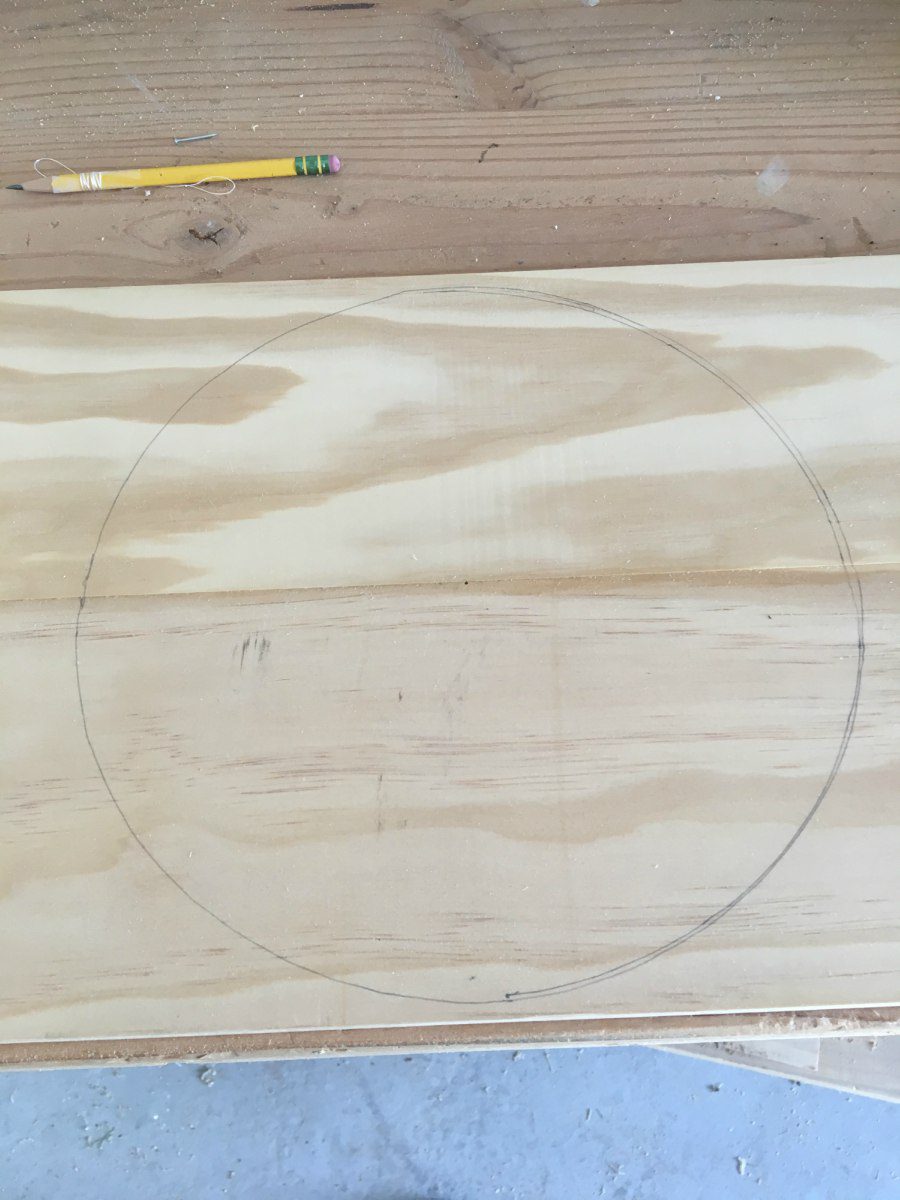
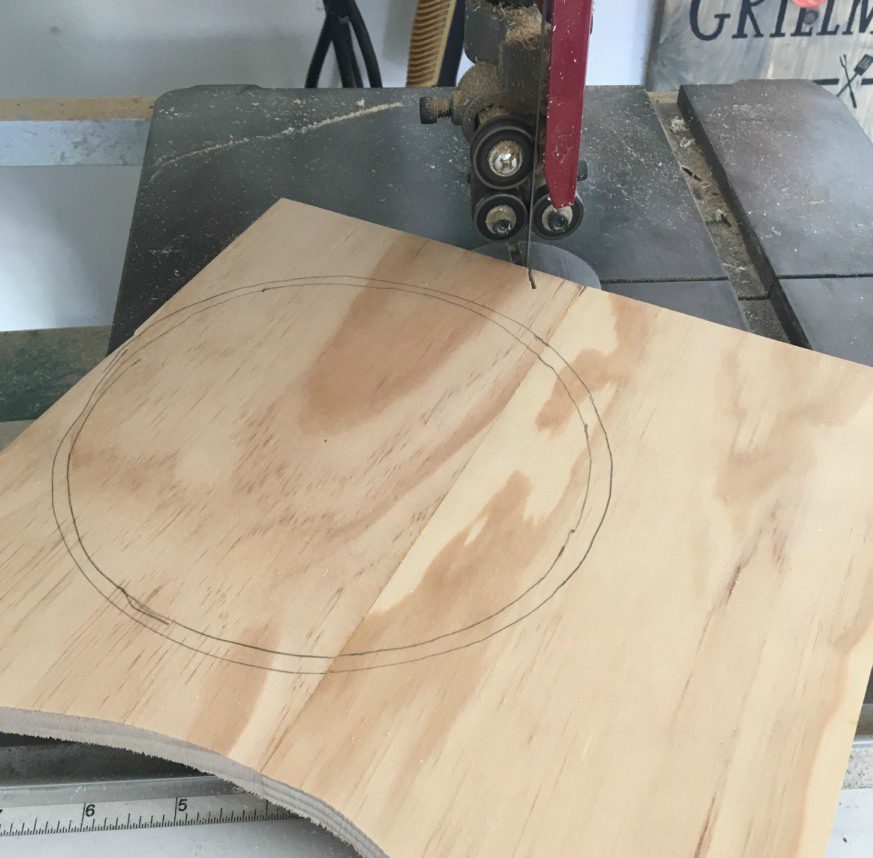
Step 3
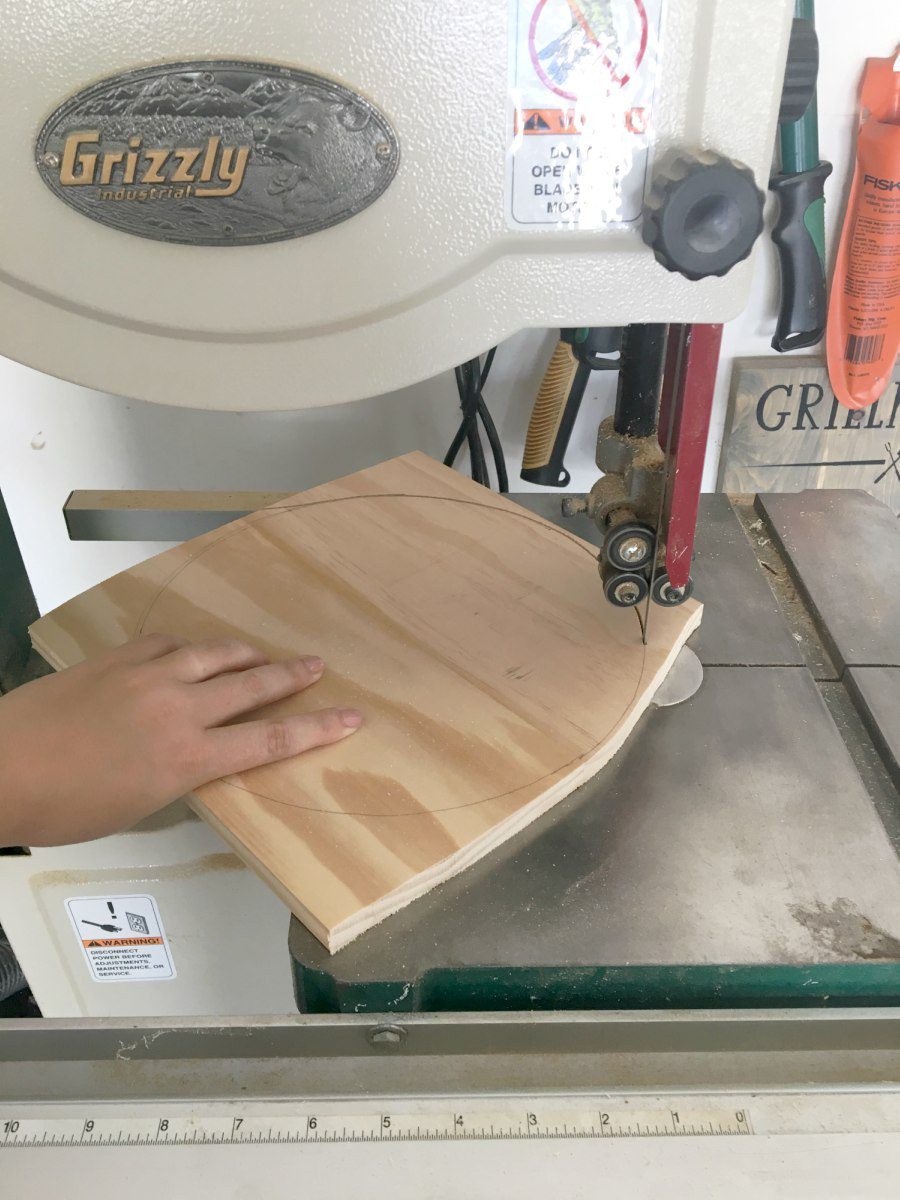
Use band saw or jig saw to cut out your circle.
Step 4
Use that circle to trace a circle onto the board.
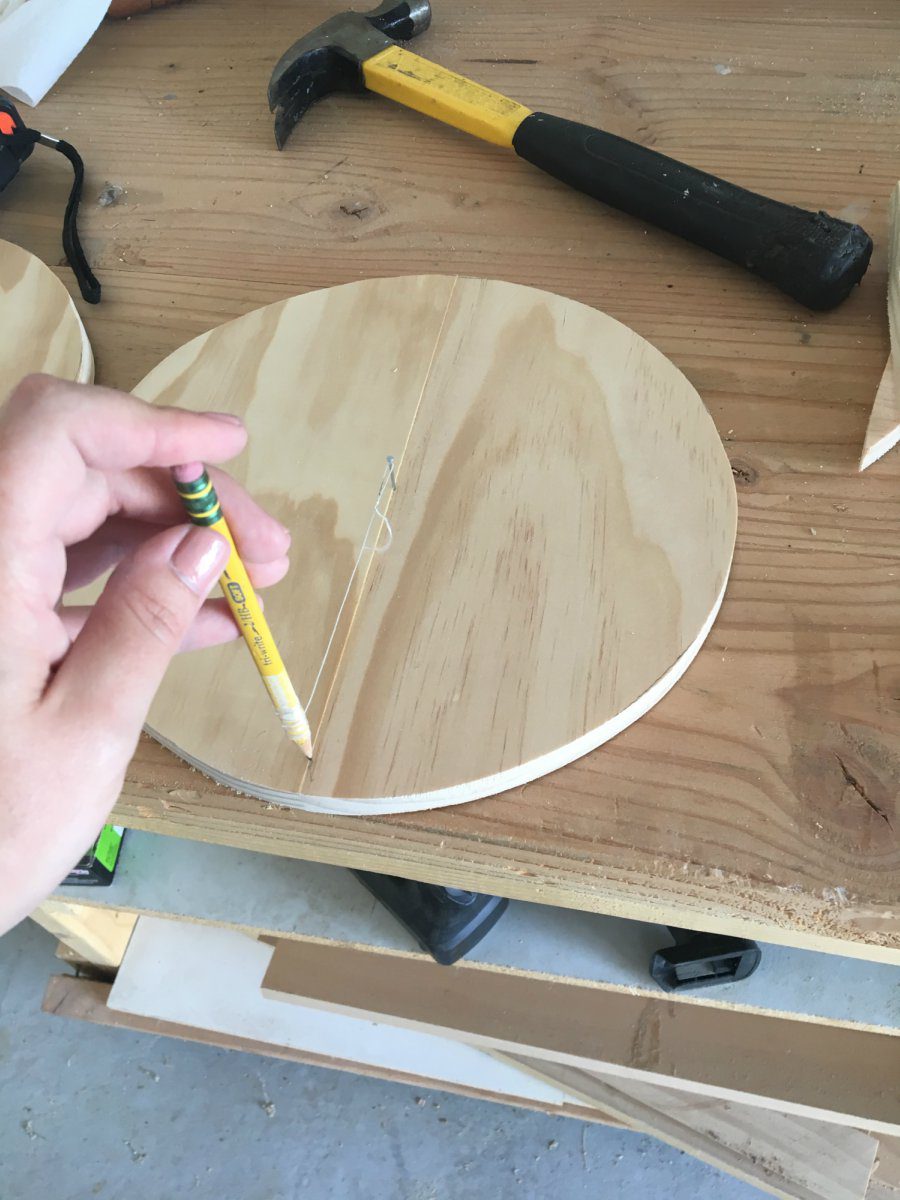
Hammer a nail into the center of that circle.
Make your string a half inch smaller than the circle and trace a new circle.
It by no means looks perfect… but it works. And we will clean it up later.
Cut out your hoop.
You’ll need to cut across it to get the center of the circle out (unless you can do this on a scroll saw).
But don’t worry, we’ll glue it back together later!
Stick with me guys, it turns out cute, I promise 😉
Repeat steps 2-4 for the smaller circle. It will be about 6″ in diameter.
Step 5
I don’t have a photo here (boo) but you’ll want to sand the edges of the circle
to clean them up a bit and make them more circular.
Step 6
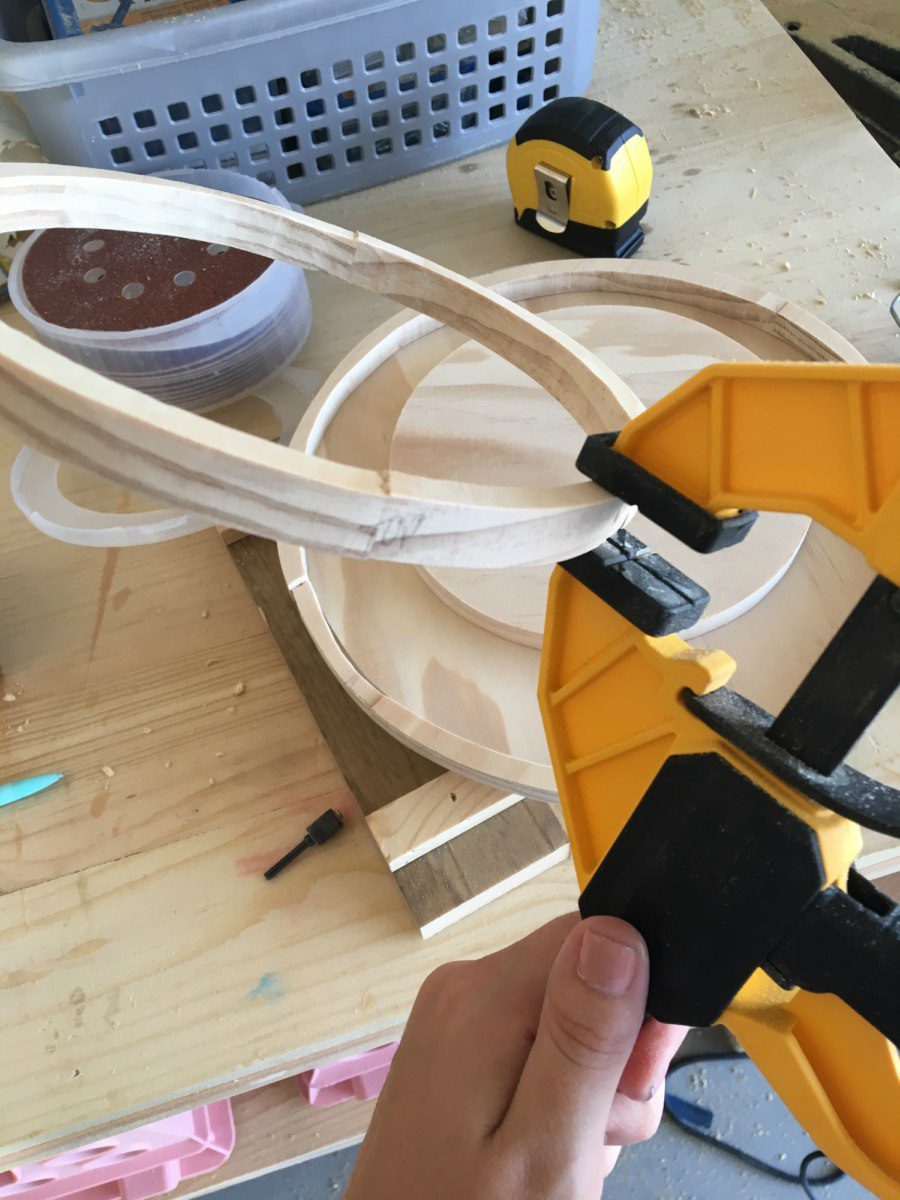
Glue and clamp the cuts in your hoops.
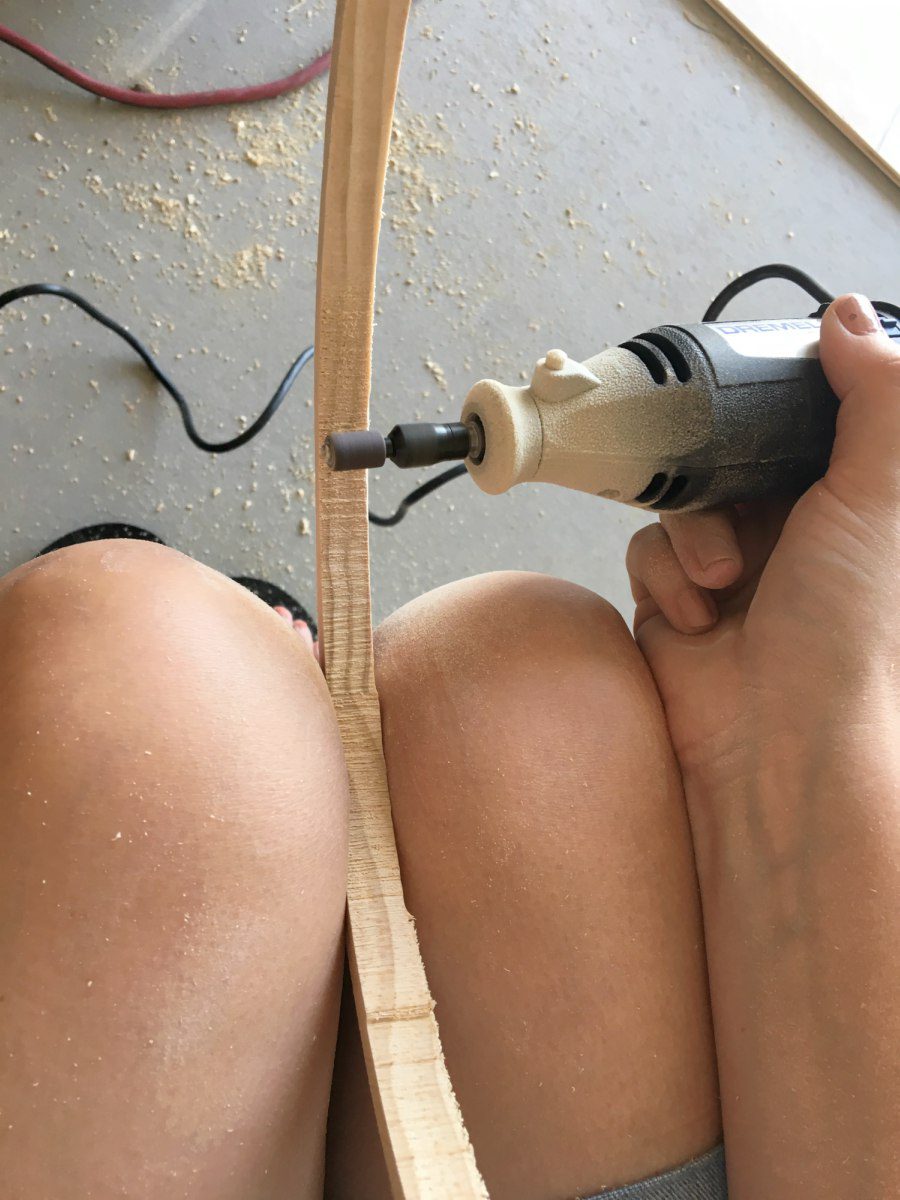
Once the glue is dry, use a Dremel to smooth out all the sides of the hoops.
Step 7
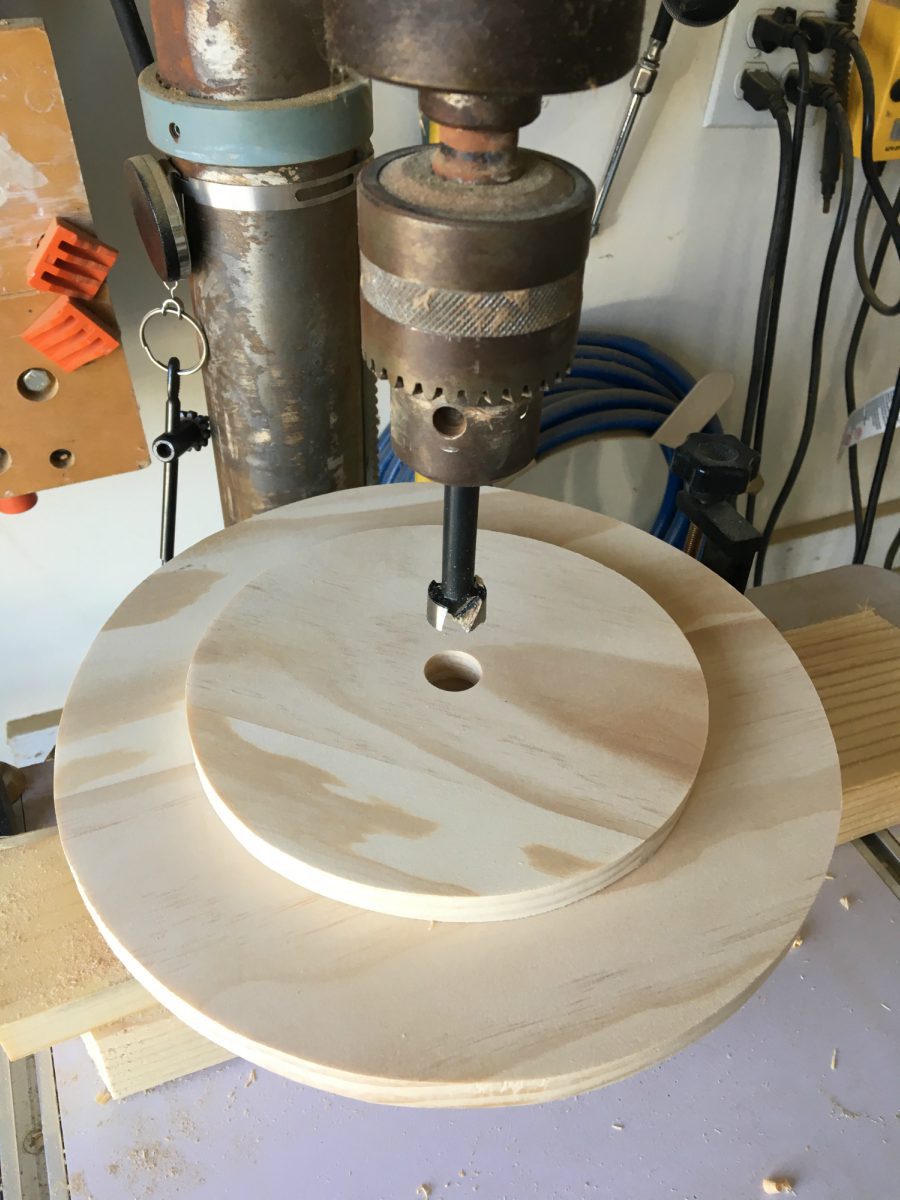
Center your smaller circle on top of your larger circle and drill a 3/4″ hole through both circles.
Step 8
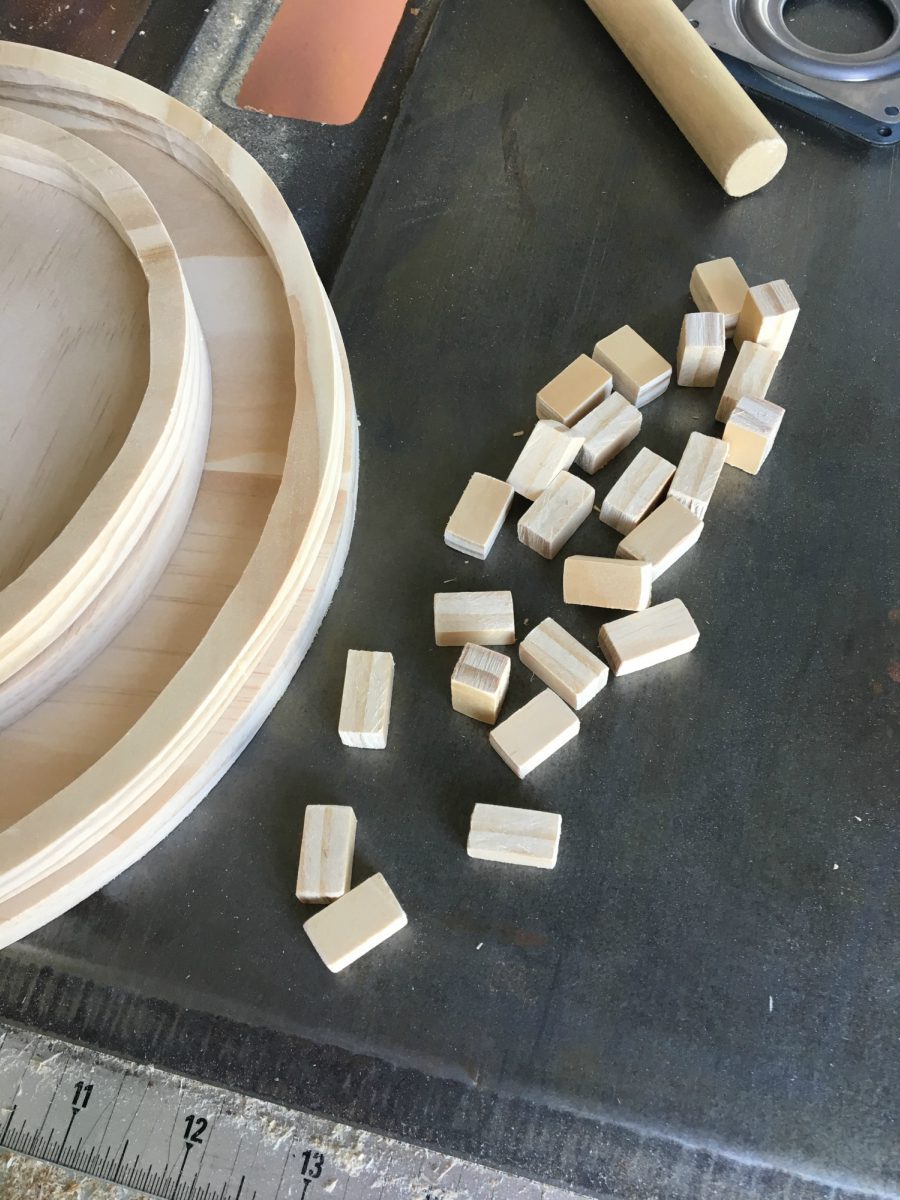
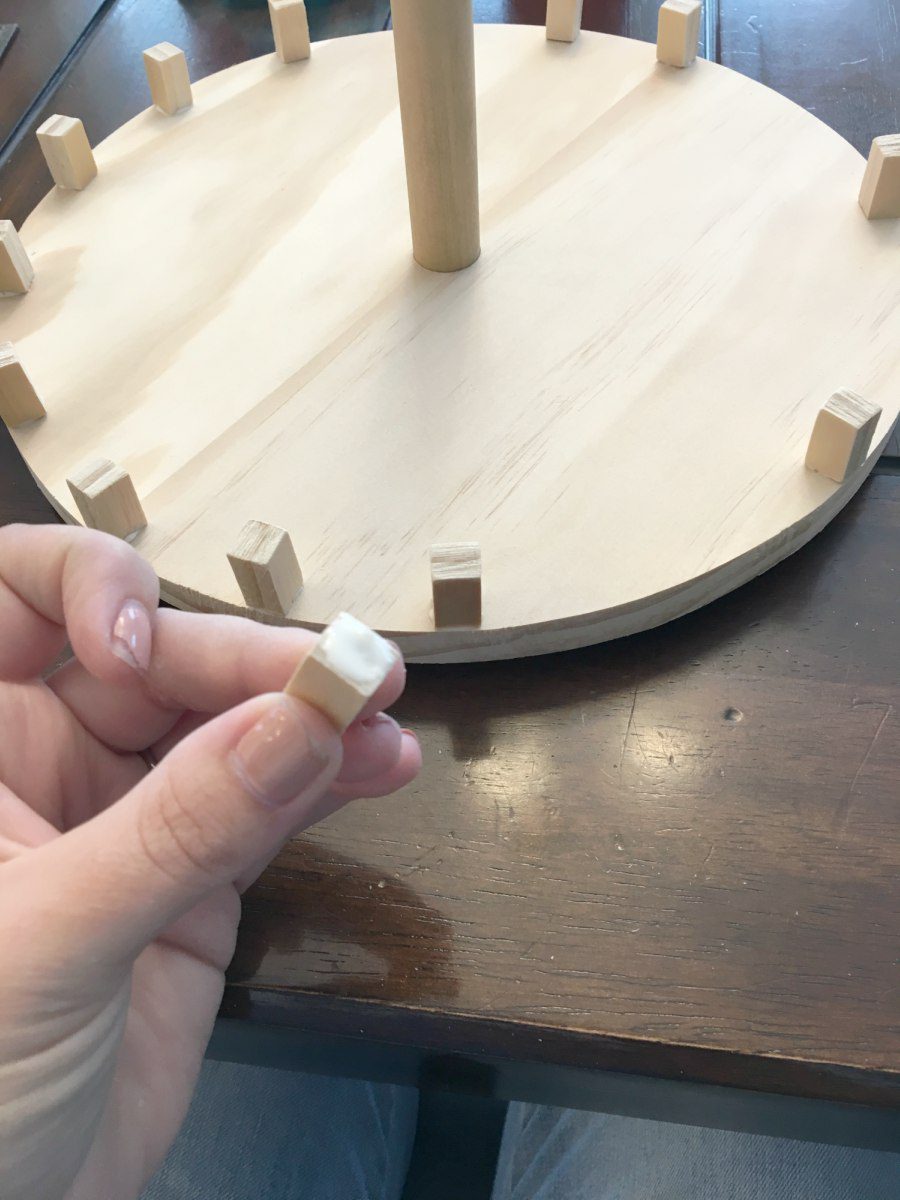
Cut 1/2″ strips from your remaining scraps.
Cut those strips at 3/4″ to make these little decorative rectangles.
I have 16 on the large circle and 8 on the small circle.
Feel free to make as many as you like.
Do what you think looks good 🙂
Step 9
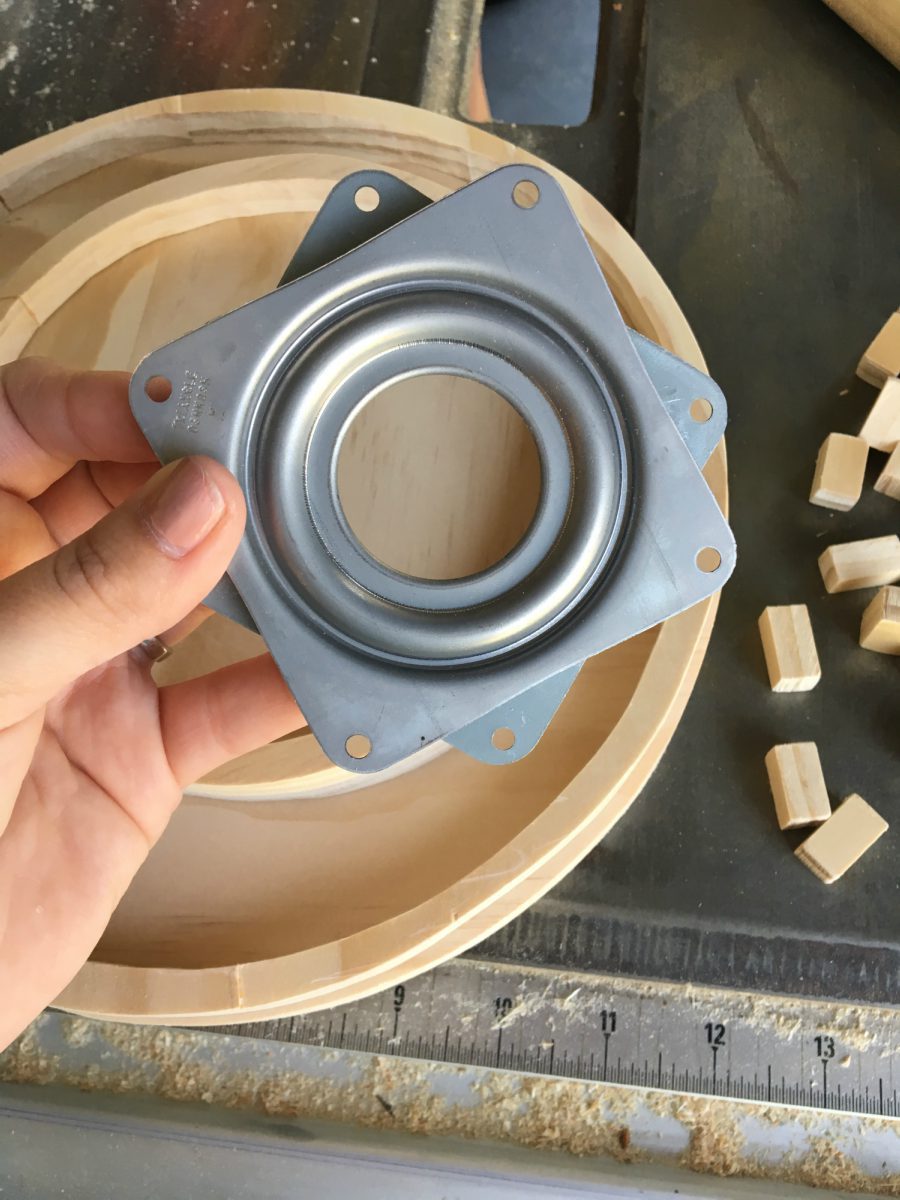
Before you glue ANYTHING down… attach your lazy susan hardware to the bottom of the large circle.
You will need to shift it like I have in order to drill the bottom plate to the circle.
Flip that sucker back over and give it a whirl!
Come on, you know you want to test it out.
Step 10
Cut your dowel to 10″.
Dab a little glue around one end of it and pop it into the center of your large circle.
Start gluing your rectangles to the outer edge of your circle.
I don’t have a specific amount of space between my rectangles. I basically used the “pizza cutting” method.
I placed one, and then place the second one directly across from it.
Then I rotated it 90 degrees and placed the third.
Then placed the fourth directly across from that one so they formed a plus sign.
Then just kept rotating and placing across until all 16 were placed.
I really hope that makes sense!
Step 11
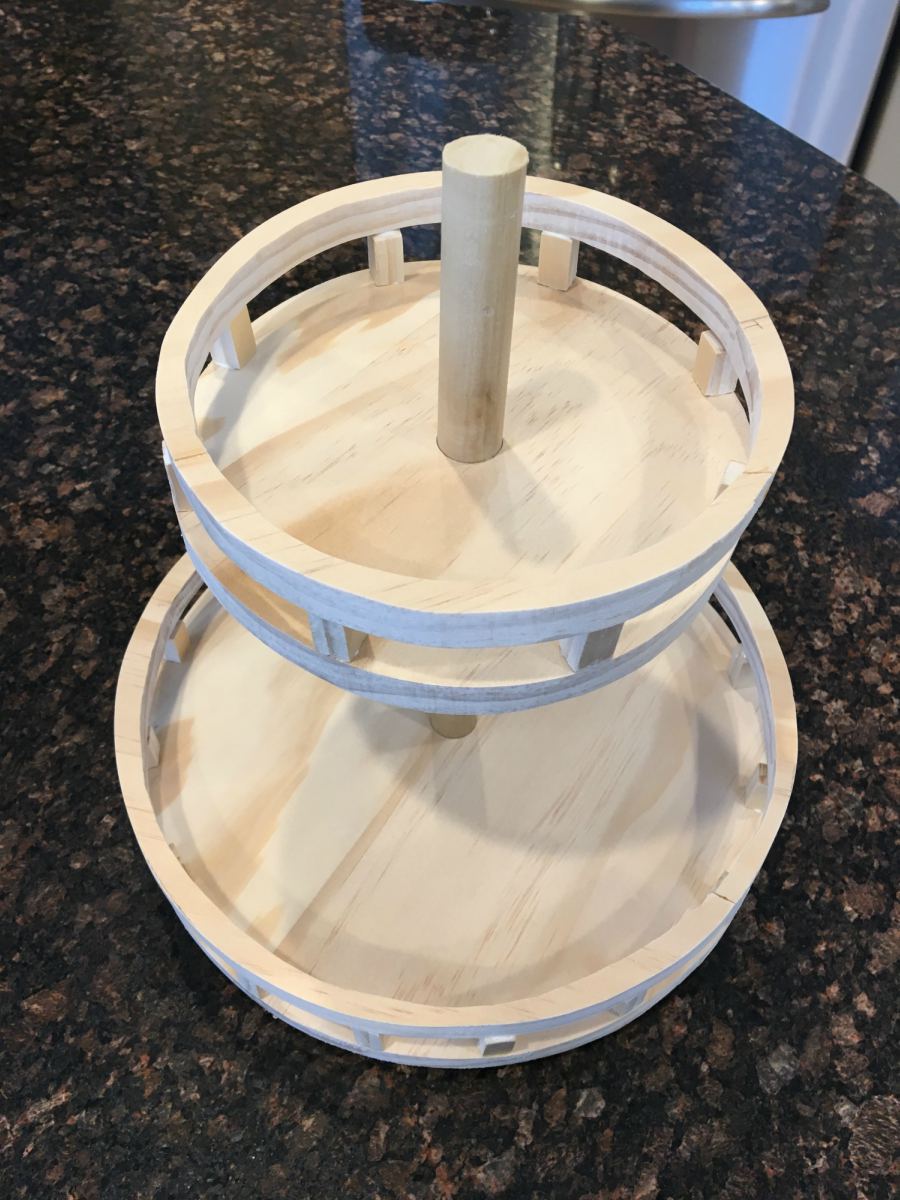
Dab glue on the tops of each of the rectangles and place your large loop on top of them.
Slide your smaller circle onto the dowel.
I placed it about 4 3/4″ down from the top.
When you get a 1/2″ away from where you want it,
place a little glue on the dowel and then slide it down over to glue into place.
Repeat step 10 for the smaller circle.
Step 11
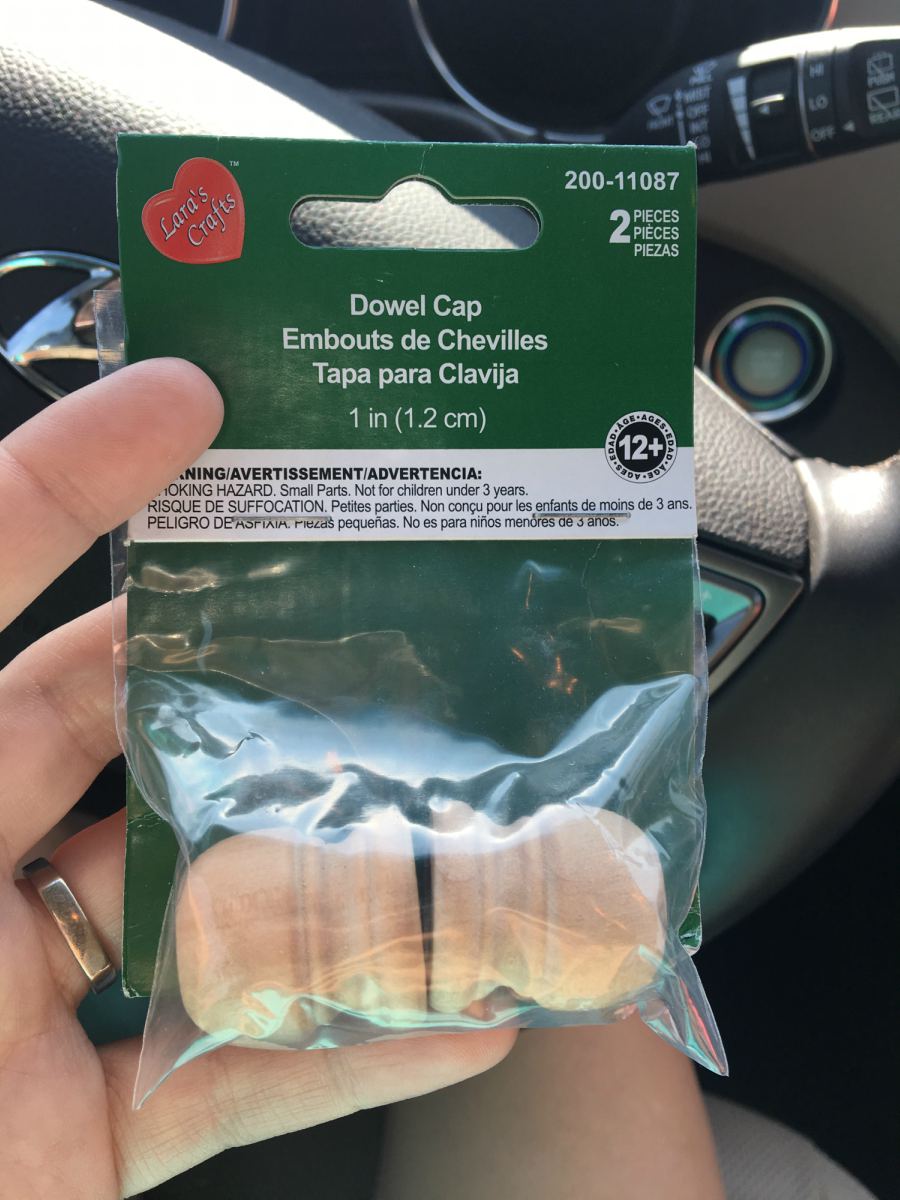
Glue one of these dowel caps to the top of the dowel.
I found these at Benjamin Franklin but I imagine you can find them at Michael’s and JoAnn’s as well.
At this point I wood filled any gaps I needed to.
Then I stained it using Minwax Dark Walnut
and painted over it with FolkArt Home Decor Chalk Paint in Sheepskin.
I distressed it using 150 grit Gator sanding sponge.
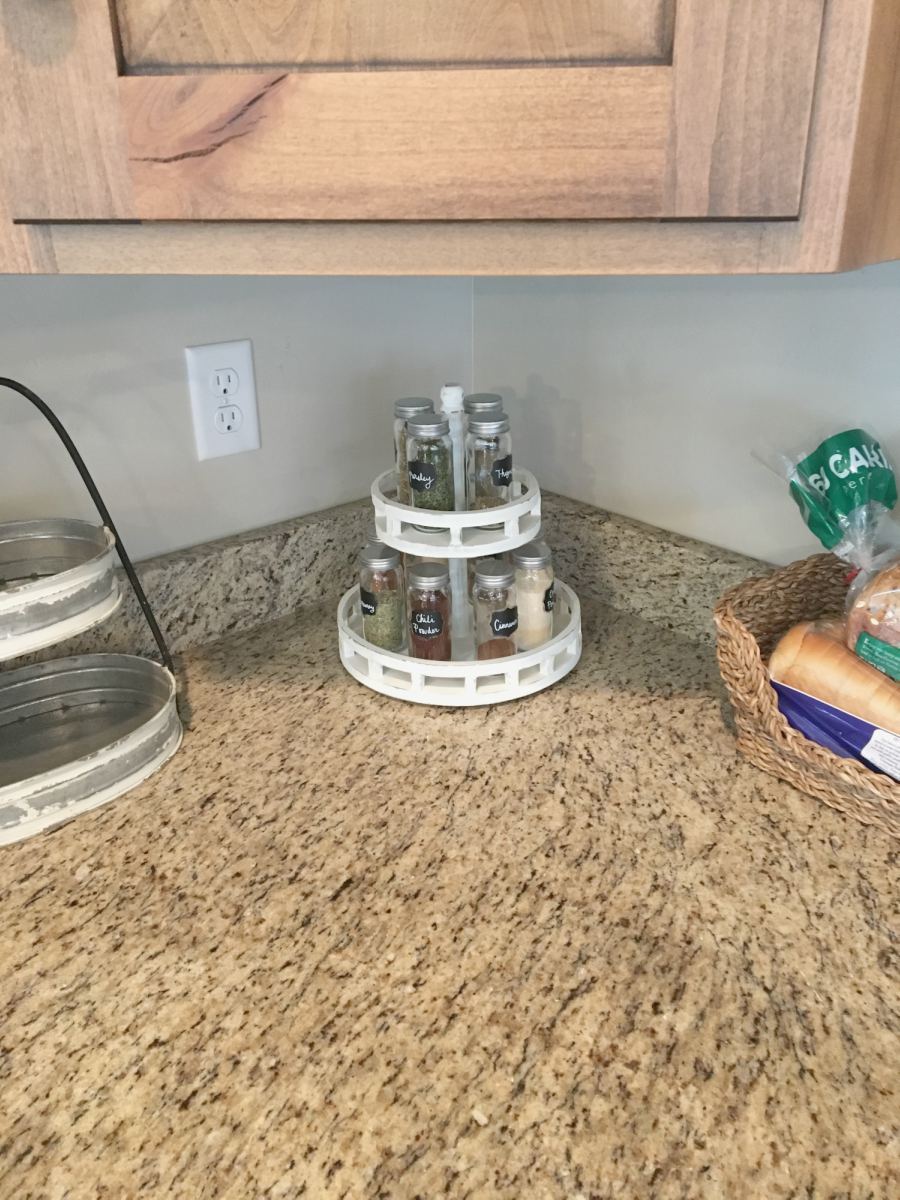
Thanks for hanging out with me today, guys! I hope you had fun creating your own DIY Lazy Susan Spice Rack.
And, as always, don’t forget to share your photos, PIN this project, and tell your friends!
Does the lazy Susan hardware sit on the counter? How do you prevent the screws used to screw in the hardware from coming through the largest circle.
Hi Cheryl! Yes my hardware does sit directly on the counter, but I did put those little fuzzy dots on the bottom of it that are usually used for chair bottoms so that the metal wouldn’t scratch my counter top. As for the screws, I didn’t use the ones that came with the hardware. I bought new ones and I am almost positive they were 1/2″ screws. Hope that helps!
Britt