Home Decor, Tutorials
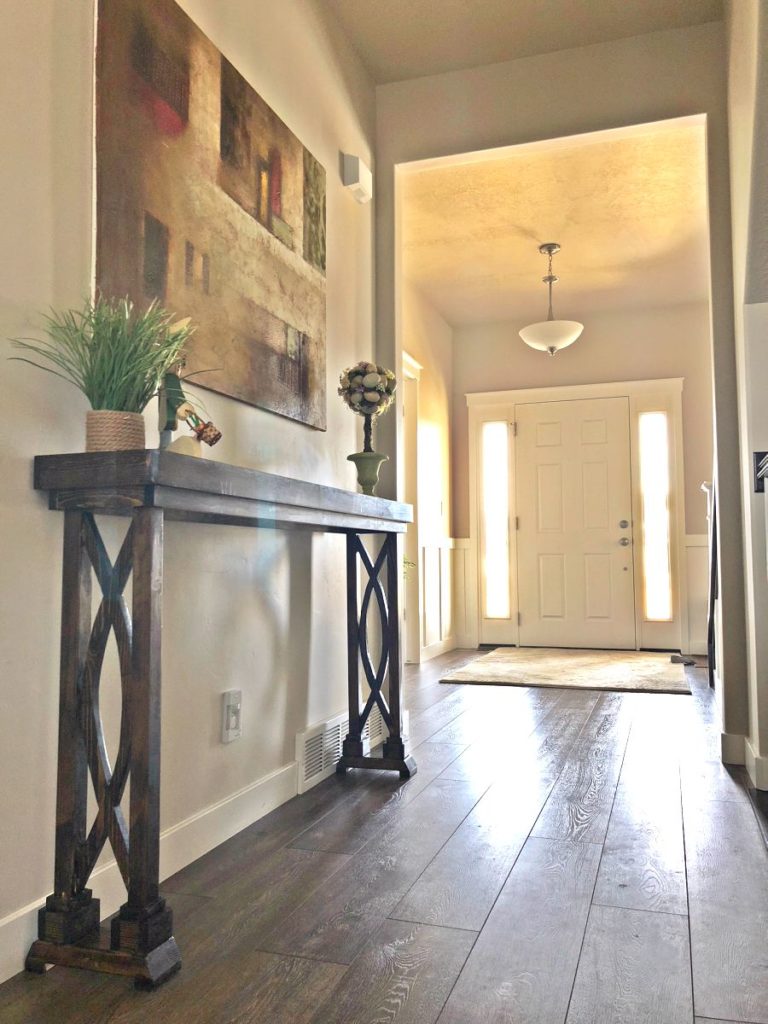
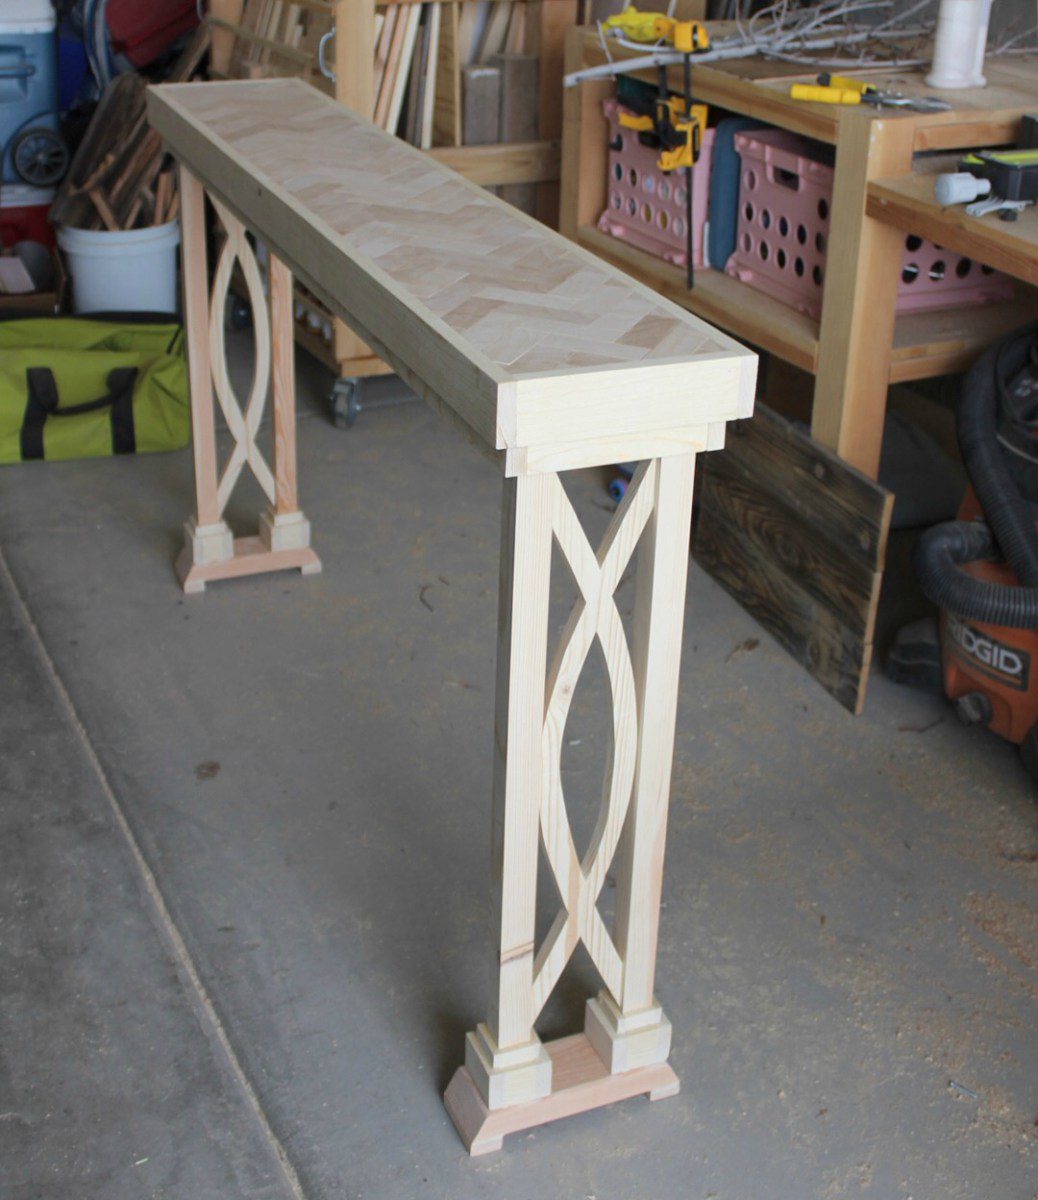
Herringbone Entryway Table
Don’t forget to stay updated by following Overalls & Power Saws on Instagram and Pinterest!
This herringbone entryway table may actually be one of my very favorite projects to date!
You know when you have a vision of something in your mind, and then on paper, and you’re not sure how it will turn out?
And then it turns out exactly like you pictured?
Best Feeling Ever!!
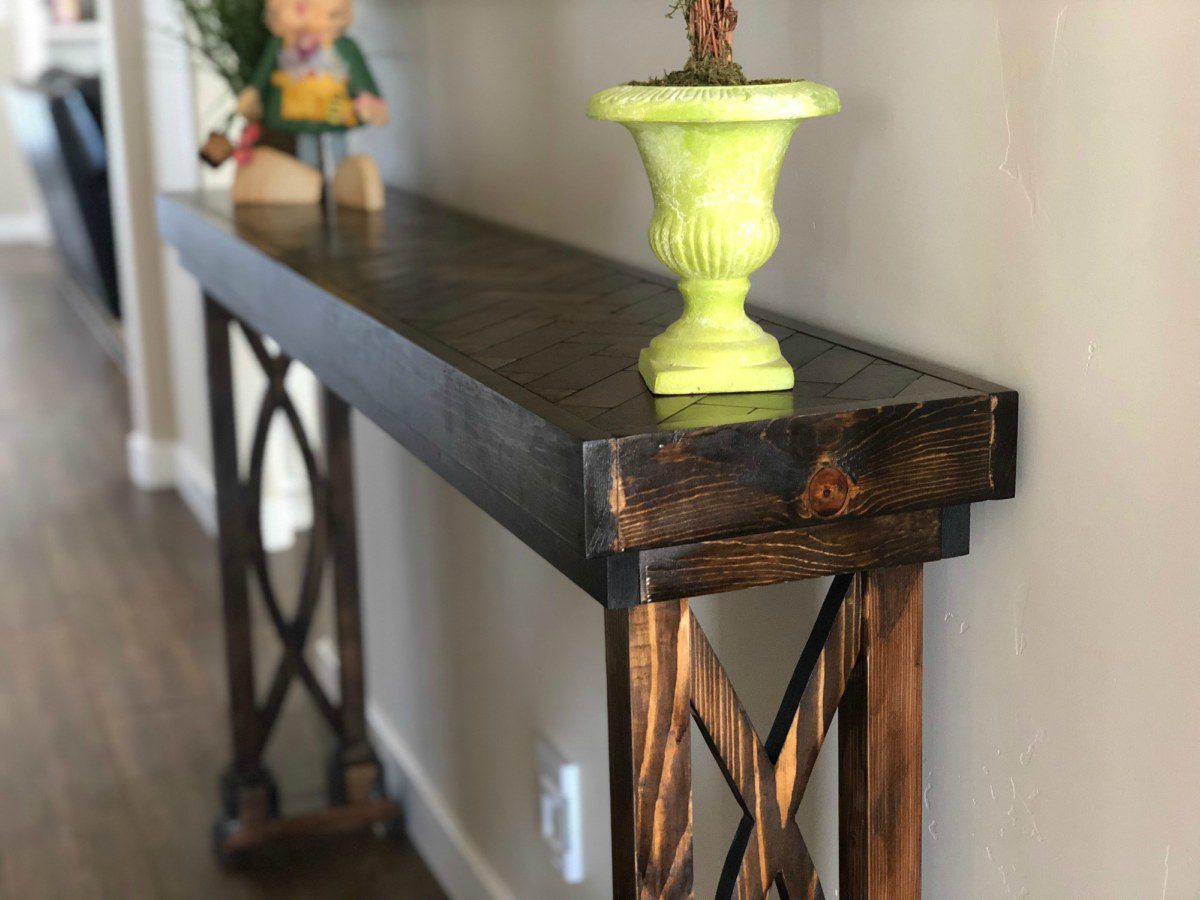
For me, that was the legs on this table.
I love the tall skinny #legsfordays, and the curves just add so much character!
This was a bit more labor intensive than my typical builds so it’s going to be a much longer tutorial
and require more than just the basic tools,
but I’ll walk you through each step in depth
and if you have ANY questions do not hesitate to reach out and ask!!
I’m here for ya! 😉
Herringbone Entryway Table
Dimensions: 5 ft long x 10 1/2″ wide x 3 ft tall
Materials:
- 4×8 sheet Birch plywood
- 1x4x6 – 4
- 2×2 – I like to buy a 2×4 and rip it down to 2×2 so the edges are crisp (you’re also going to want to use the thin bendy strip you get from ripping off the edge as a guide for the legs – refer to Step to see what I’m talking about)
- 1x3x6 – 1
- 1x8x6 – 1
- 2x4x8 – 1
- wood glue
- circular saw
- band saw
- jig saw
- brad nailer
- kreg jig
- right angle drill – or Ridgid palm impact driver (as seen in Step 4)
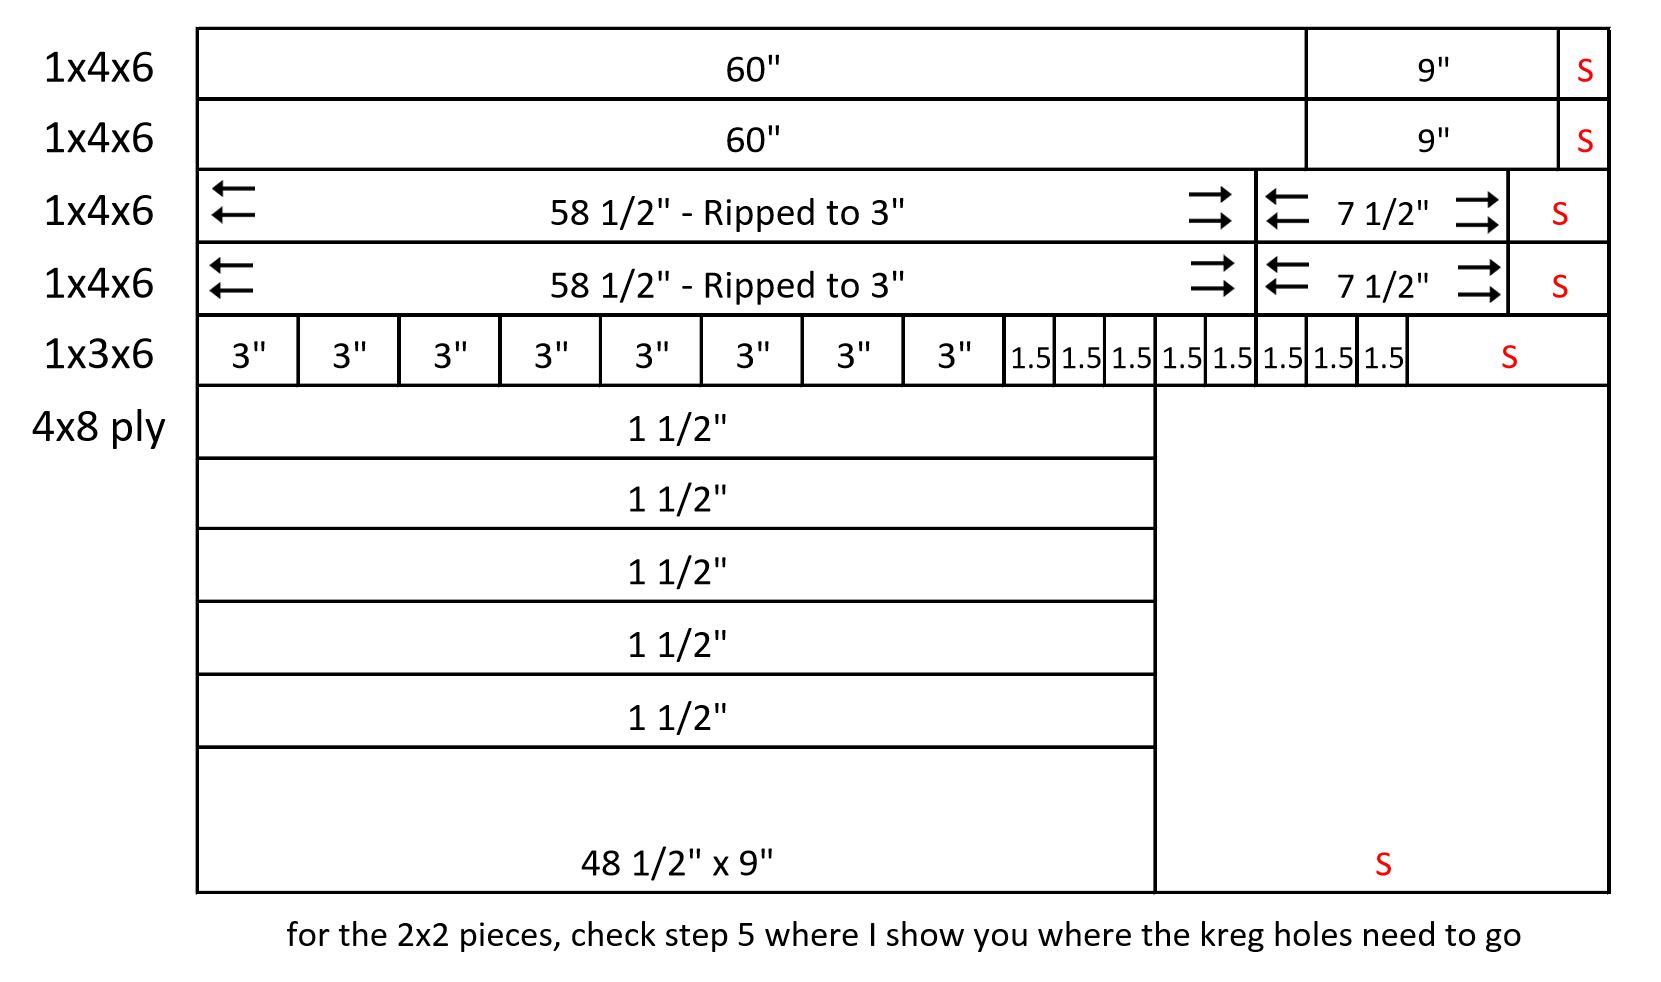
Cut List:
For this project (and most projects) I would recommend cutting as you go.
- 9″ wide x 58 1/2″ plywood
- 1 1/2″ strips plywood
- 1x4x60″ – 2
- 1x4x9″ – 2
- 1x4x58 1/2″ – 2 – I ripped my 1×4 down to 3″ so it would be a little shorter than the frame and give it a little dimension
- 1x4x7 1/2″ – 2 – Same with this one
- 2x2x33″ – 4
- 1x3x3″ – 8
- 1x3x1 1/2″ – 8
- 1/2″ strip left over from ripping down your 1×4’s – cut (8) 3″ pieces and (8) 1 1/2″ pieces
- 2x4x11″ – Angled at 27 degrees – 2
- 2x4x1/2″ – 4
Step 1
Make your plywood cuts.
The most crucial thing when doing a herringbone pattern is
making sure all of your pieces are the same width and length to minimize gapping.
To do this, you will set up a stop block on your miter saw at 5″.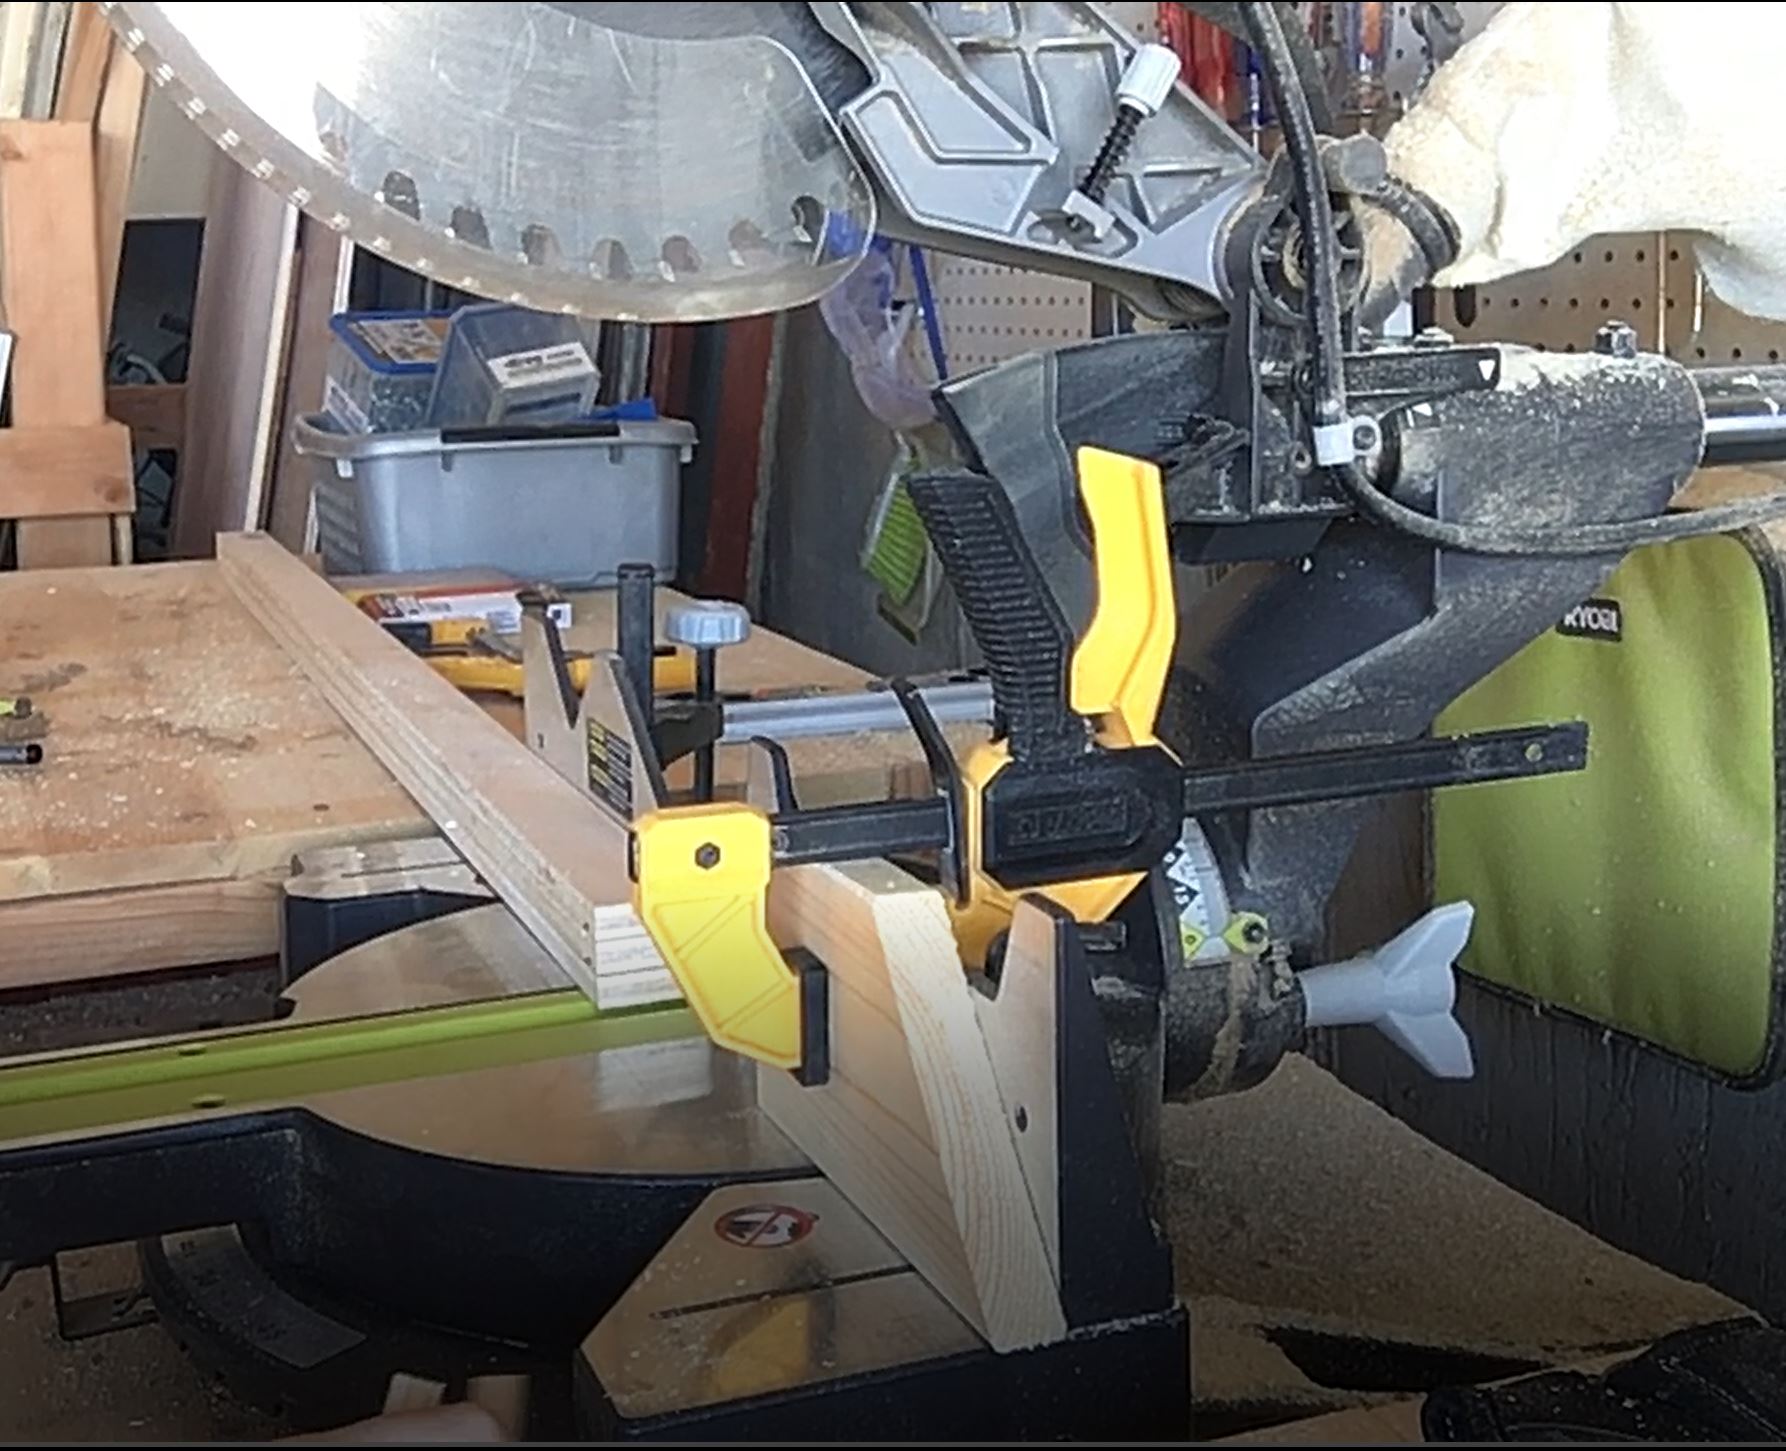
With a scrap piece clamped at 5″, you can cut multiple strips at a time.
Just line them up snug against the stop block, make the cut,
and be sure the miter saw blade comes to a complete stop before removing the cut pieces.
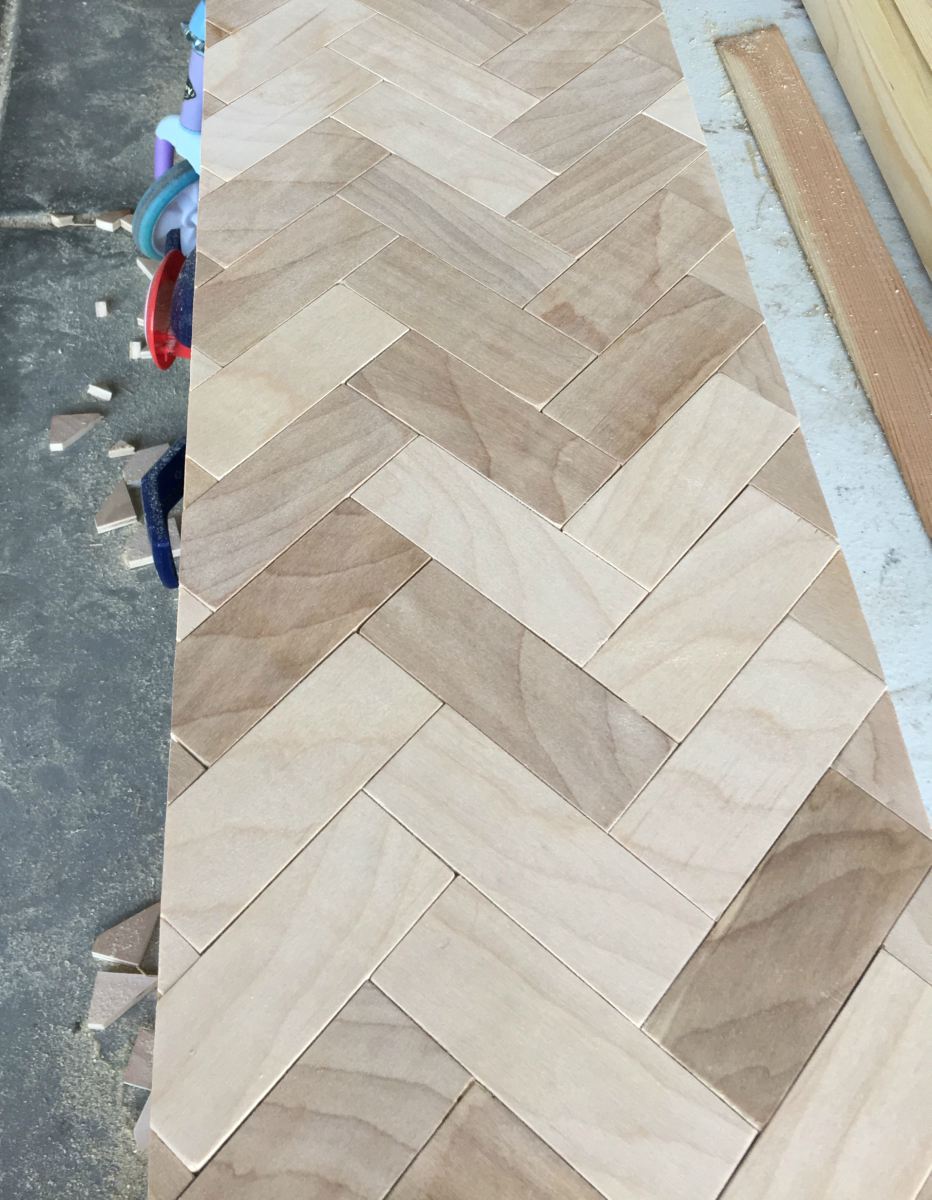
I usually cut a few strips worth of pieces at a time, and get them sanded and glued in place.
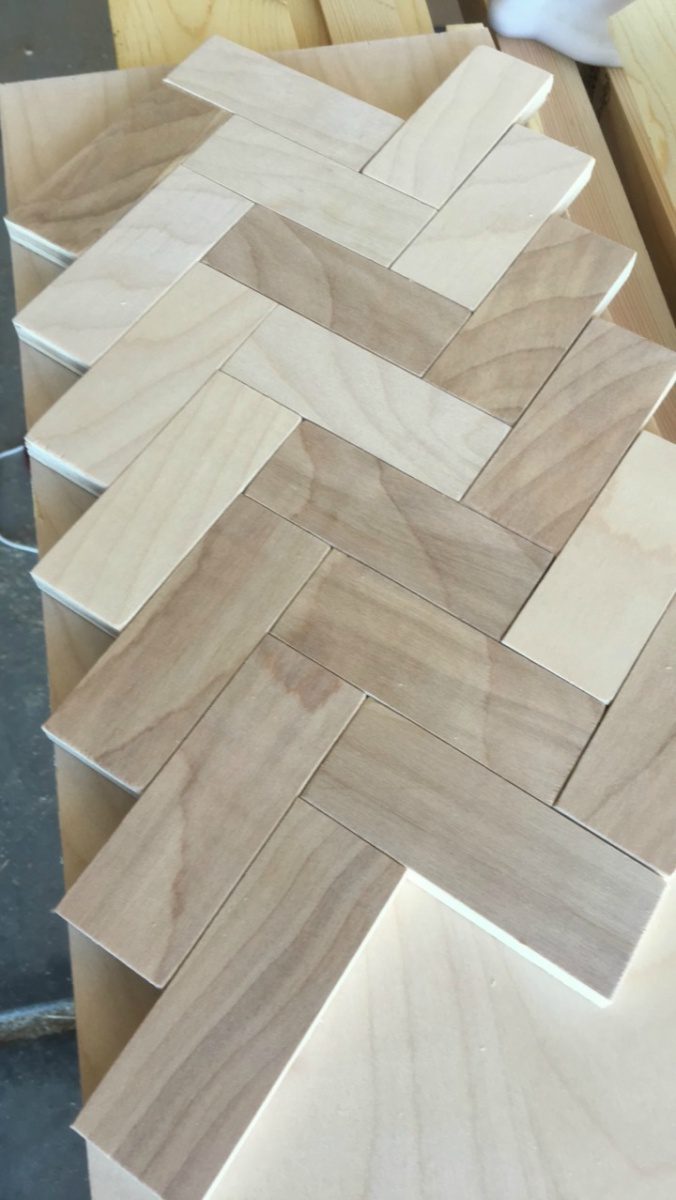
When doing a herringbone pattern it’s important to keep the pieces uniform.
I always align the left pieces against the edge and the top piece against the top edge.
Once those are glued down the rest are easy to put into place.
Step 2
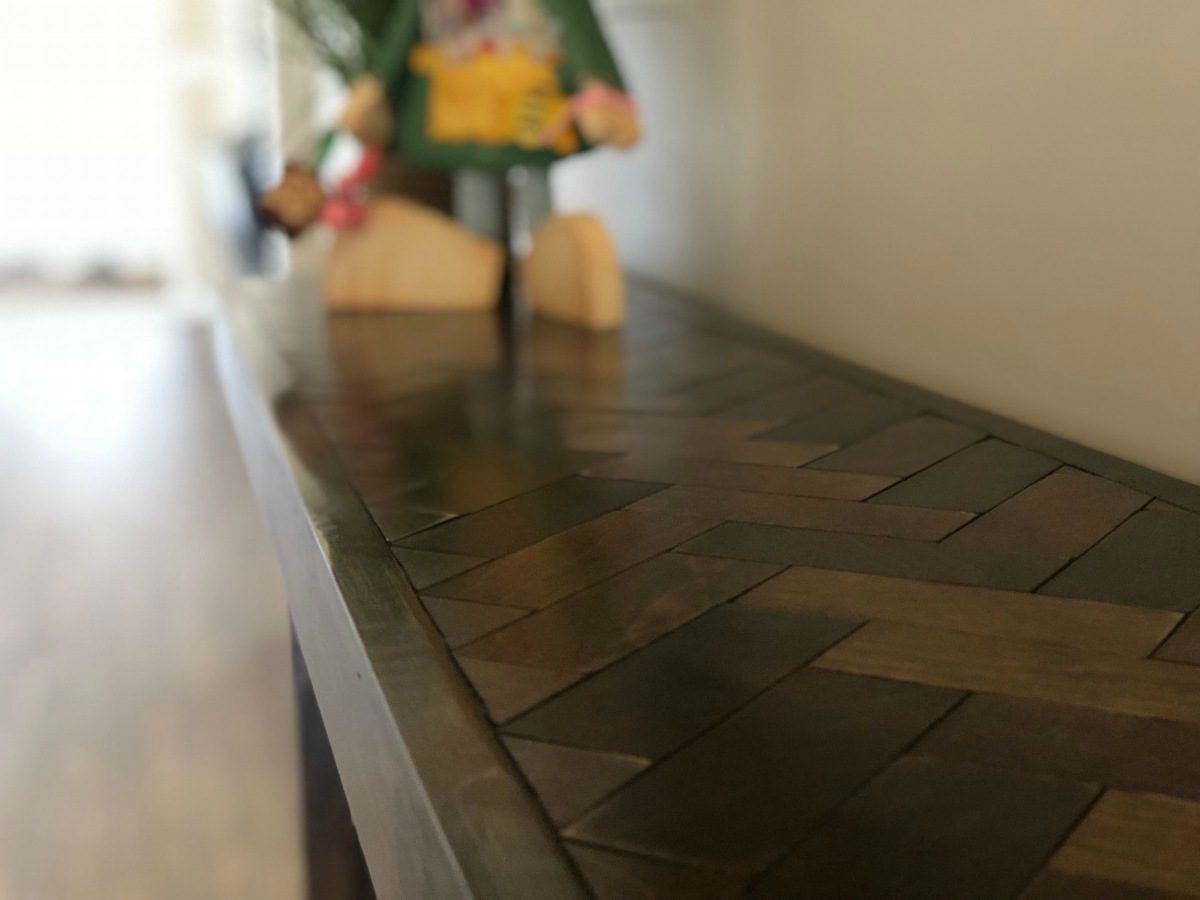
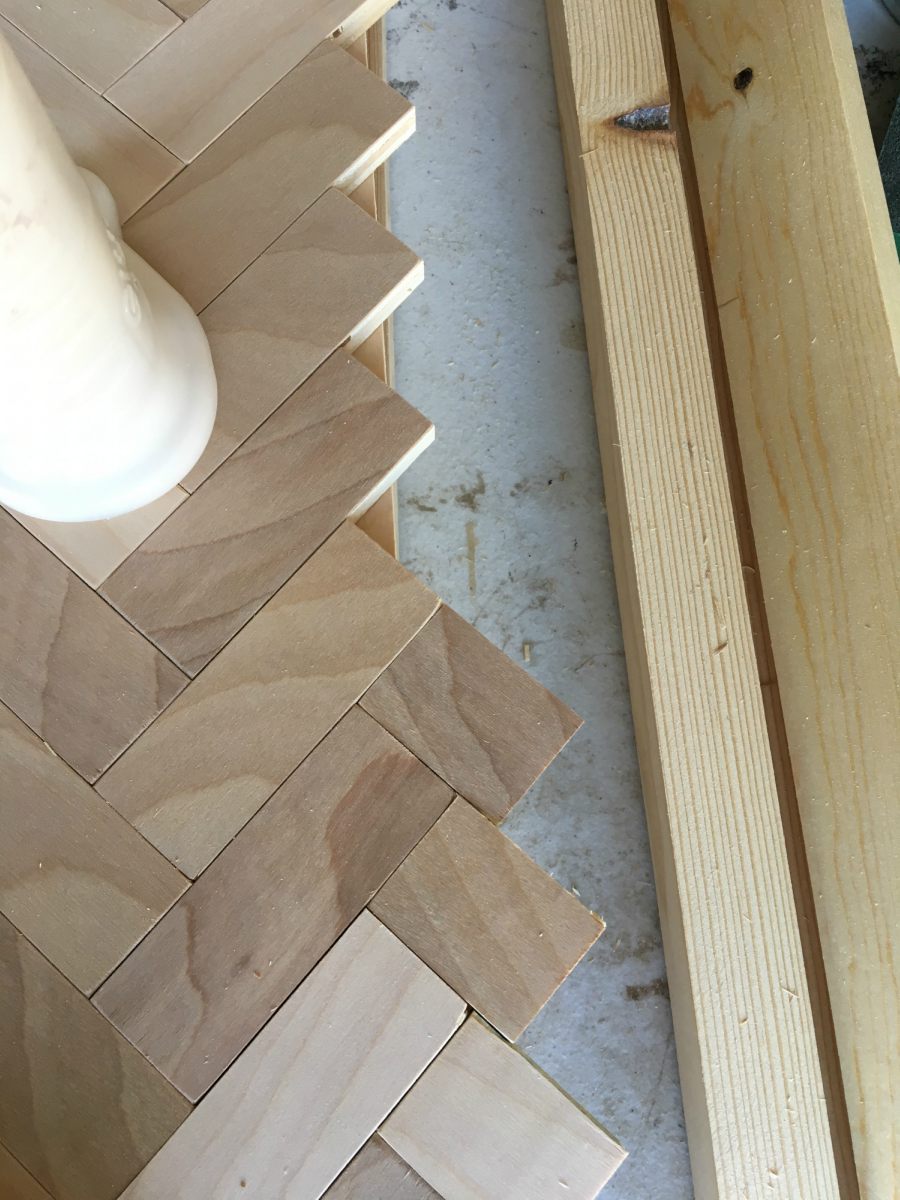
Line the plywood with the herringbone pieces.
Once you’ve filled it all in, cut smaller scrap pieces to place around the edges.
After the glue has dried, flip it over, clamp it down, and trim off the excess with your circular saw.
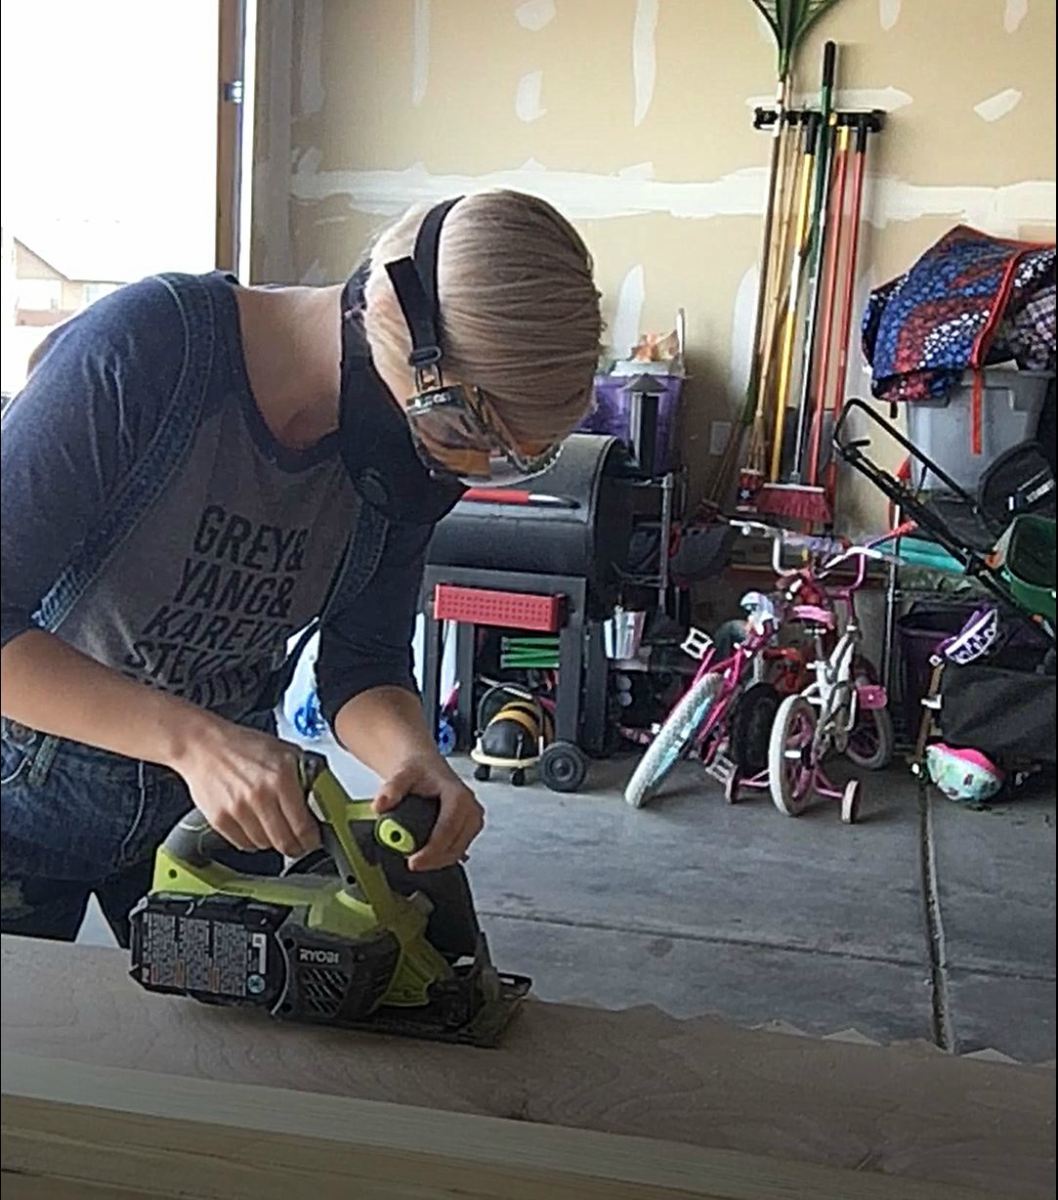
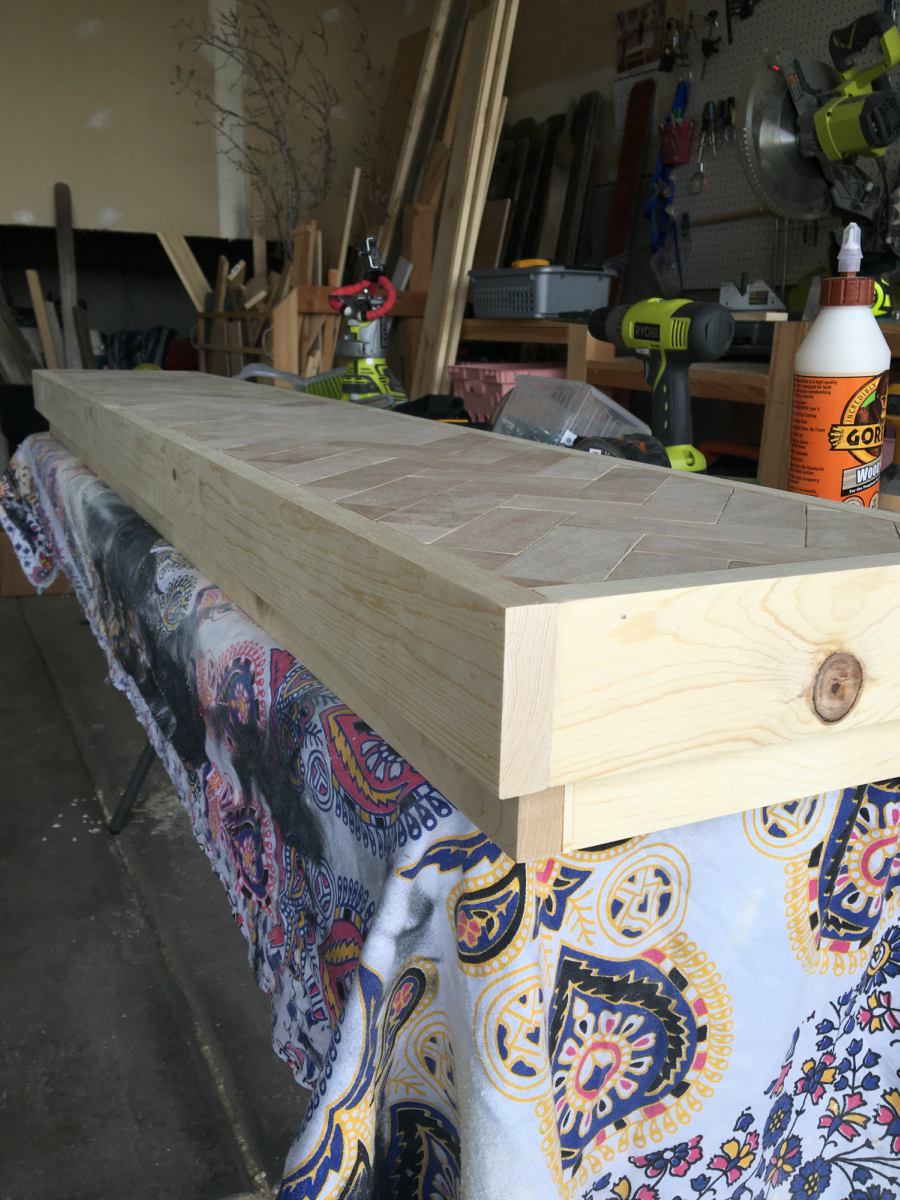
Flip it back over and admire the beauty.
ALLLLL the heart eyes for herringbone!
Step 3
Lets frame out the top! I like to do the ends first so that I can cut the sides EXACTLY to length.
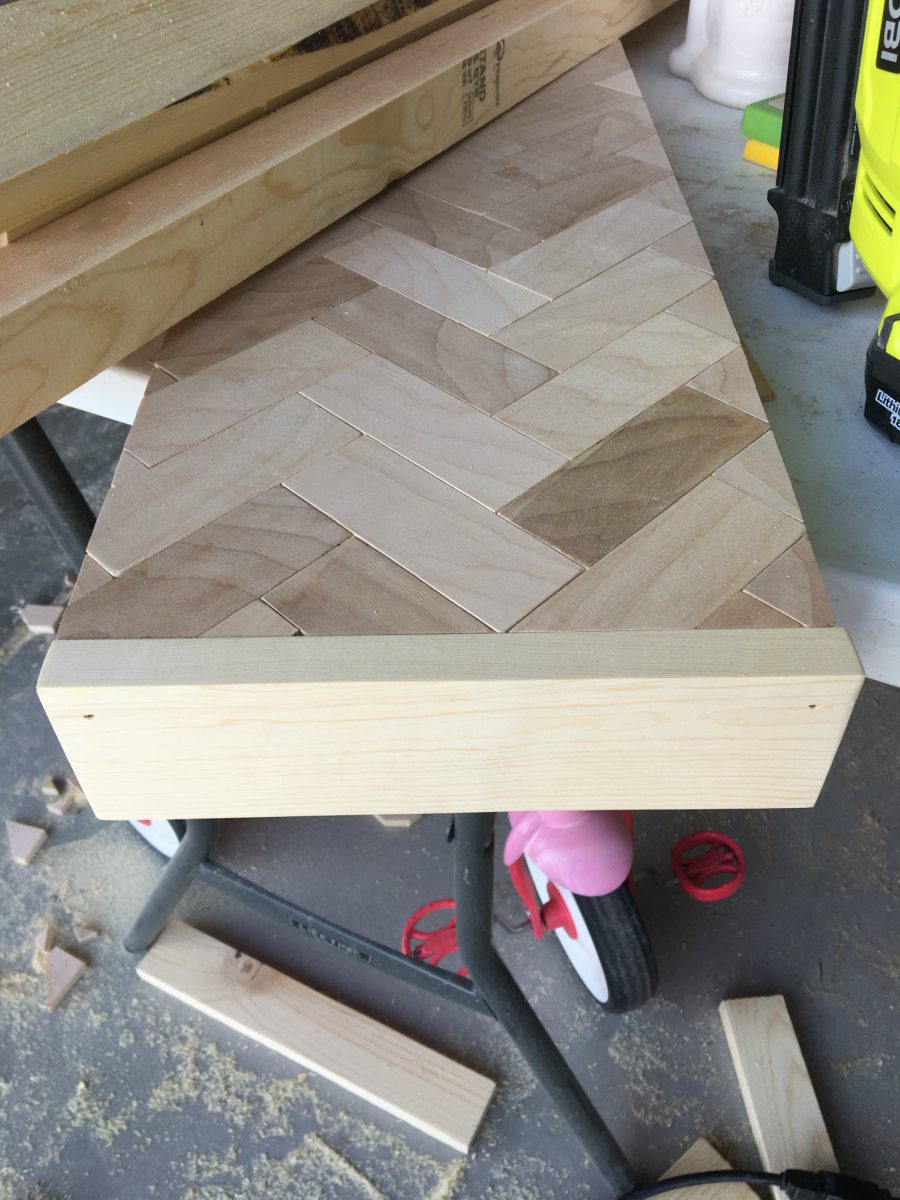
Glue and nail your 1x4x9″ pieces on either end.
Line up your side pieces, mark where to cut, make your cuts,
then glue, clamp, and nail them into place!
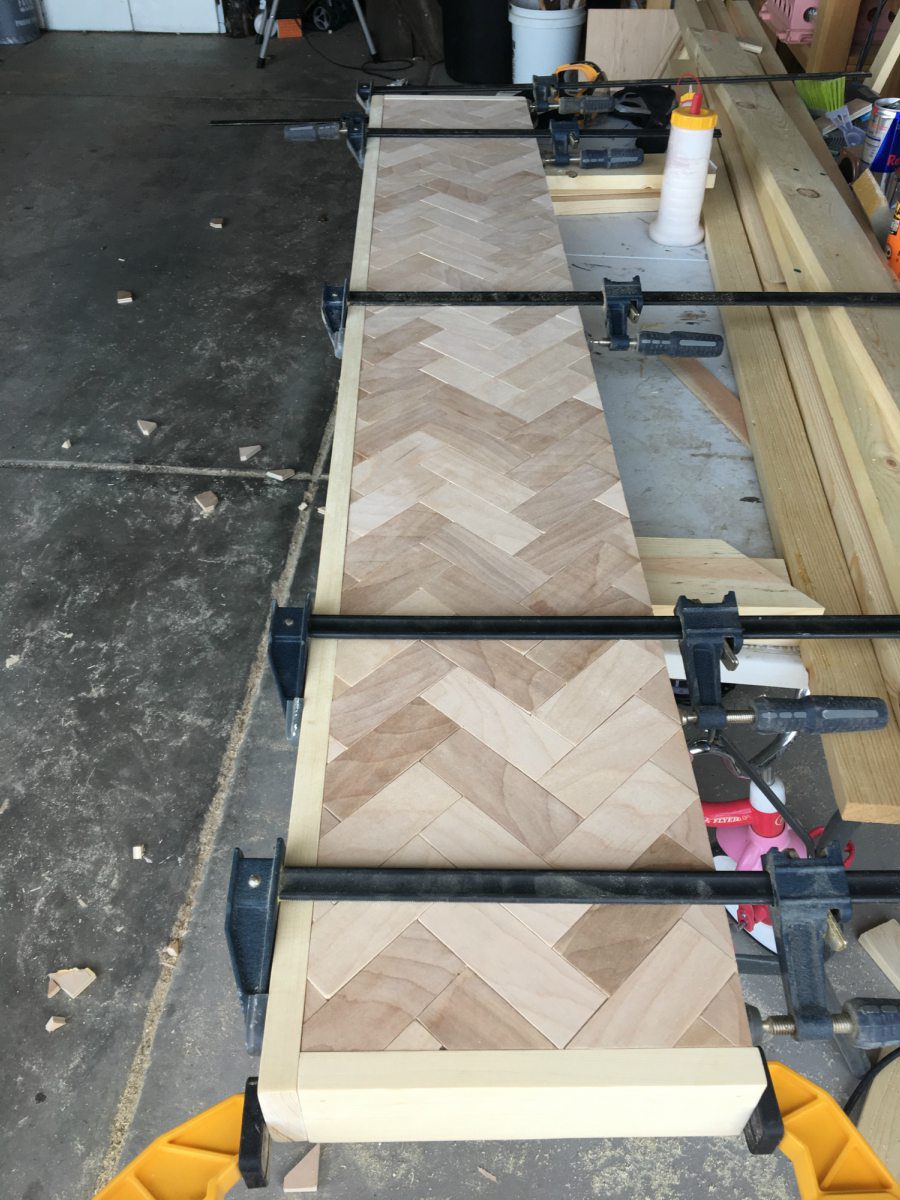
Step 4
Rip down your remaining 1×4 to 3″. Cut to length and Kreg.
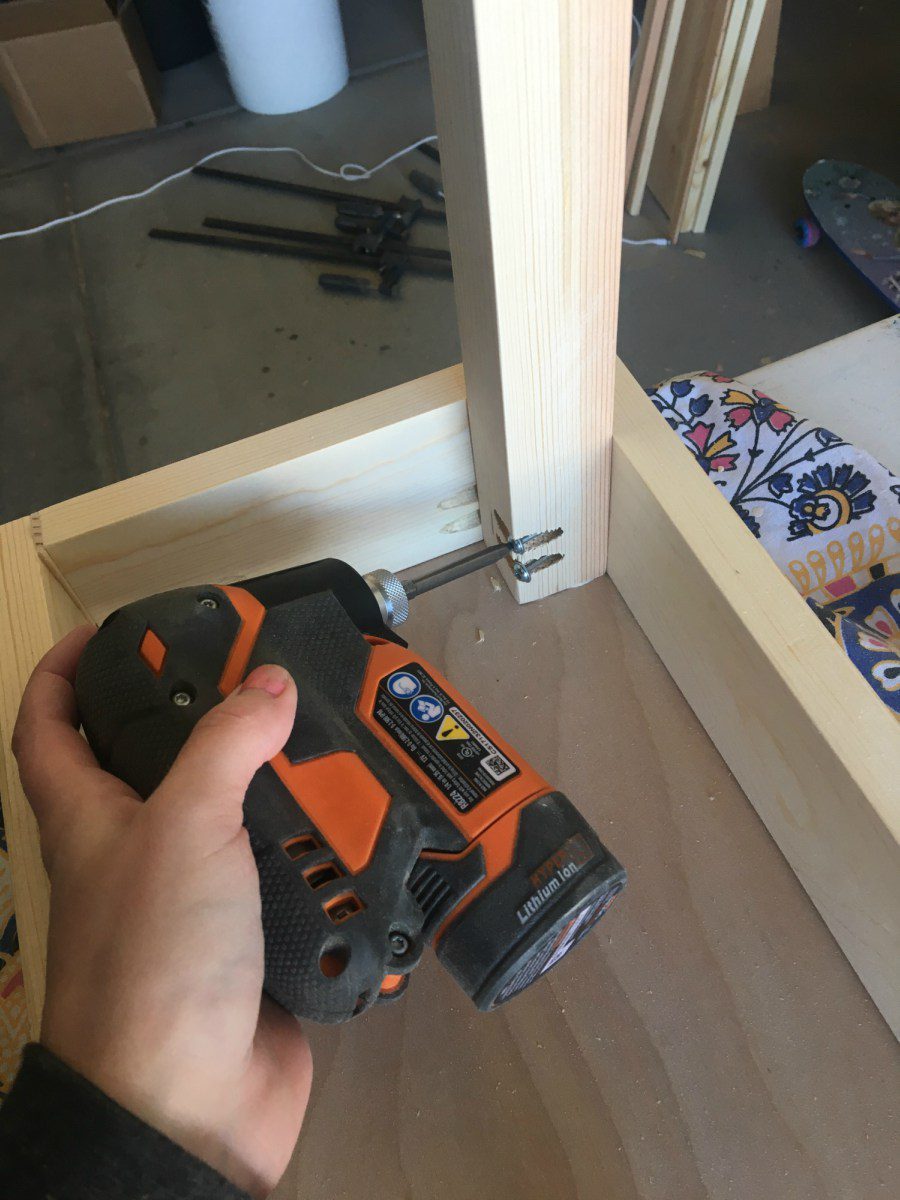
Flip the top over and screw the sides to the inside of the frame.
Then screw the end pieces in.
This is where you need a right angle drill or palm driver.
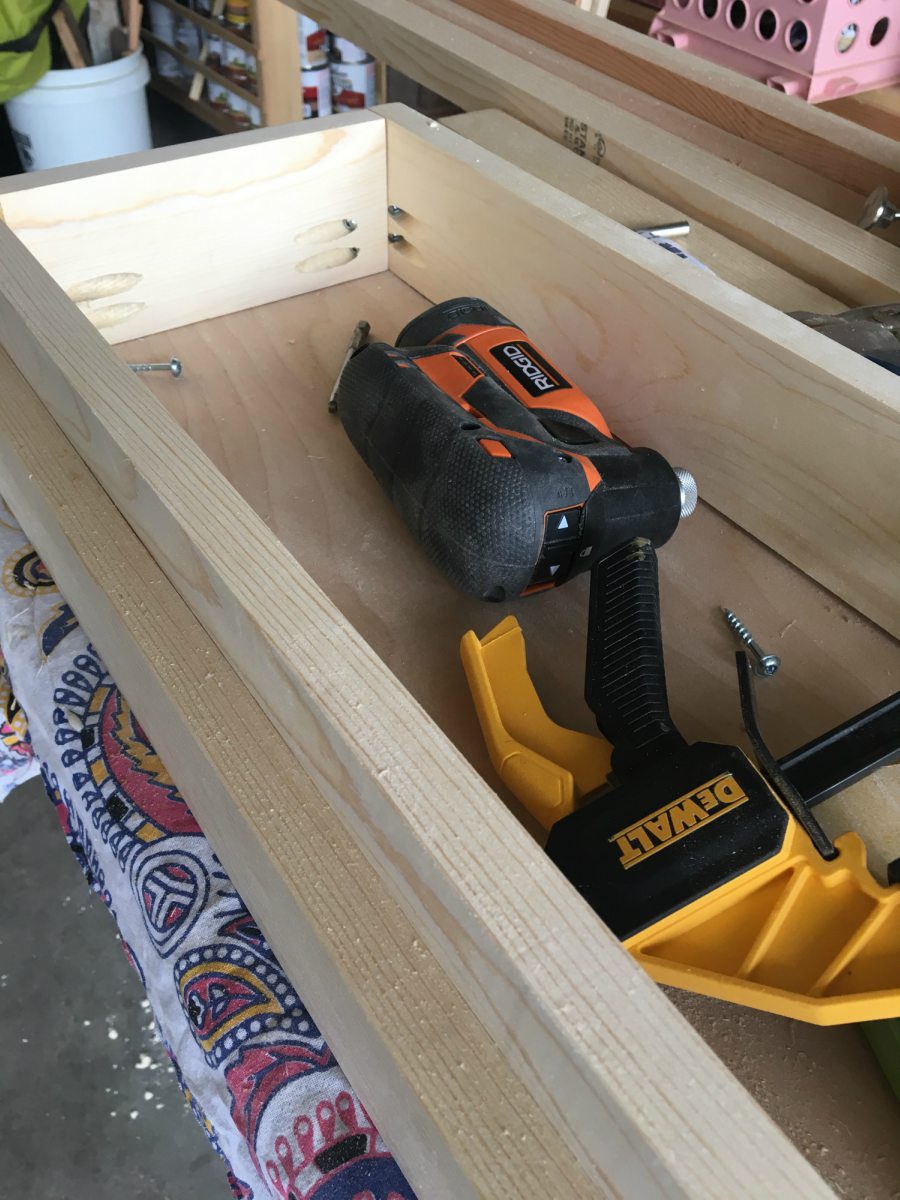
When the skirt is finished it should look like this!
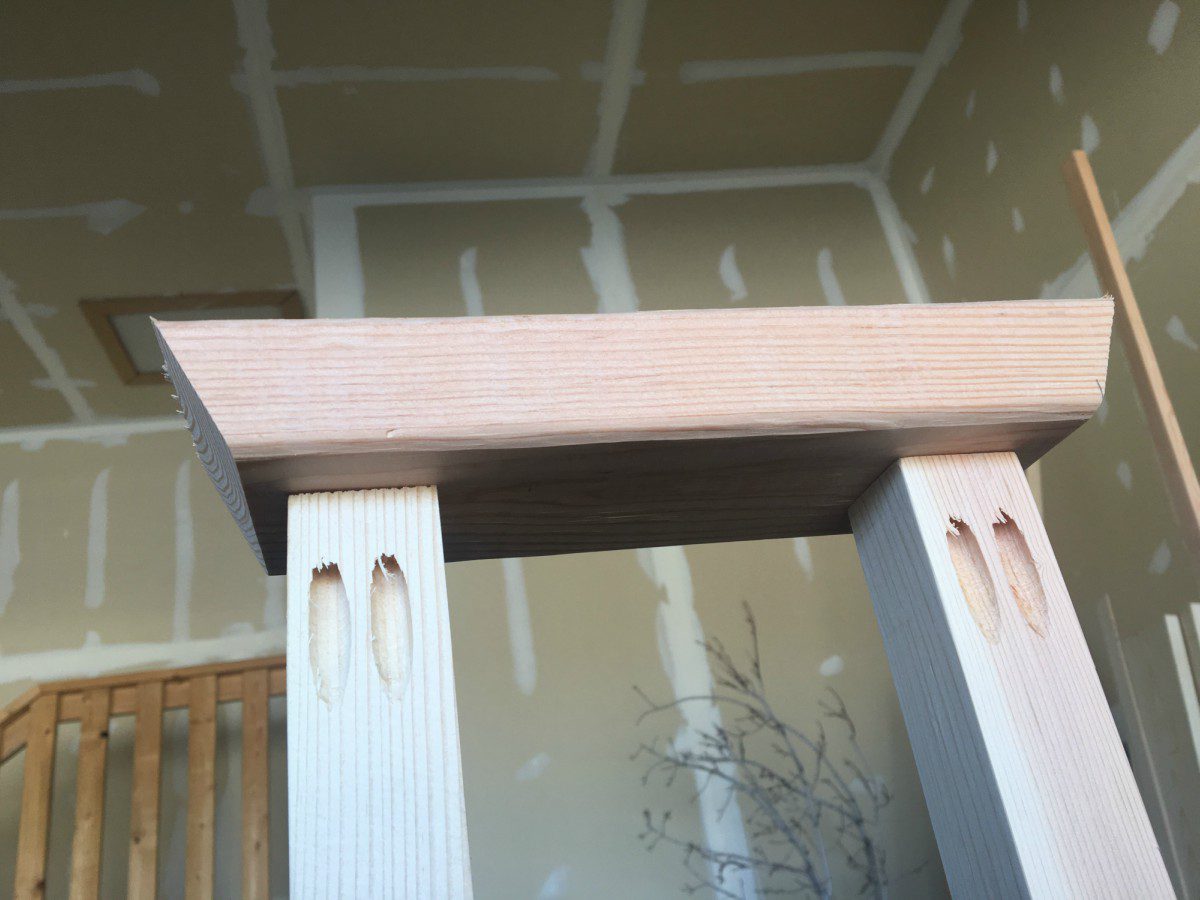
Step 5
Cut your 2×2’s to length and Kreg the ends.
You will need to kreg both ends of your legs.
One end will have vertical pocket holes on the front and back of the legs.
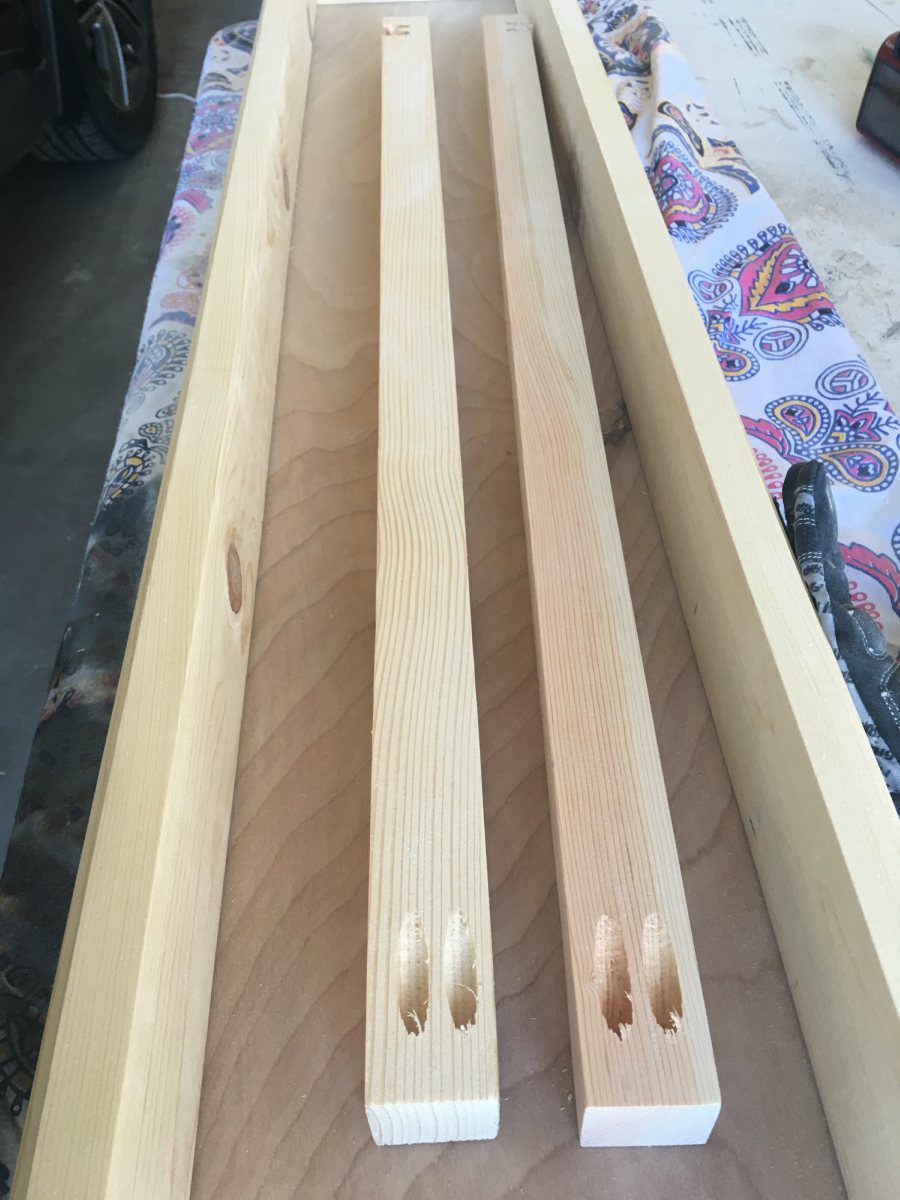
The other end will have horizontal pocket holes on two adjacent sides.
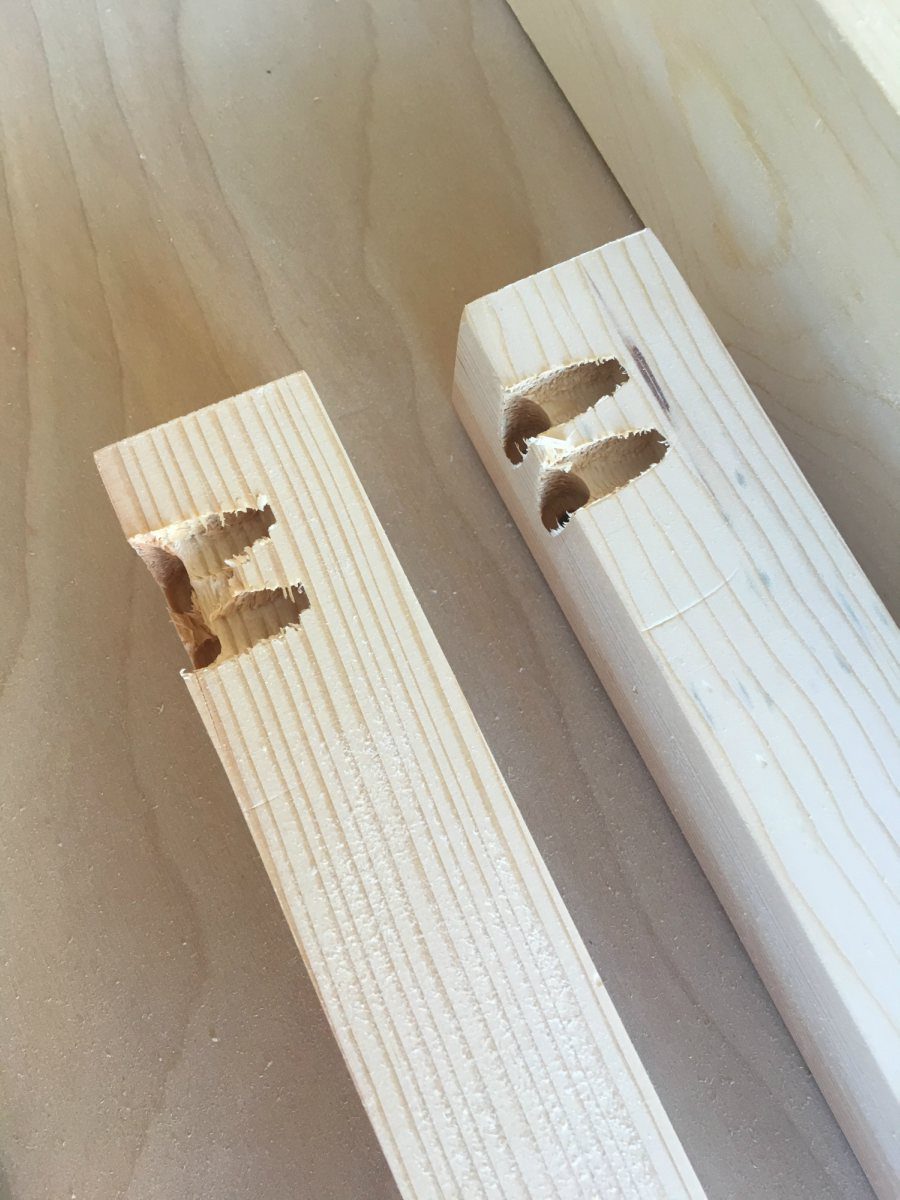
This is so that you can place them in the corners of the skirt and screw them in on the left and the right.
Install all four legs.
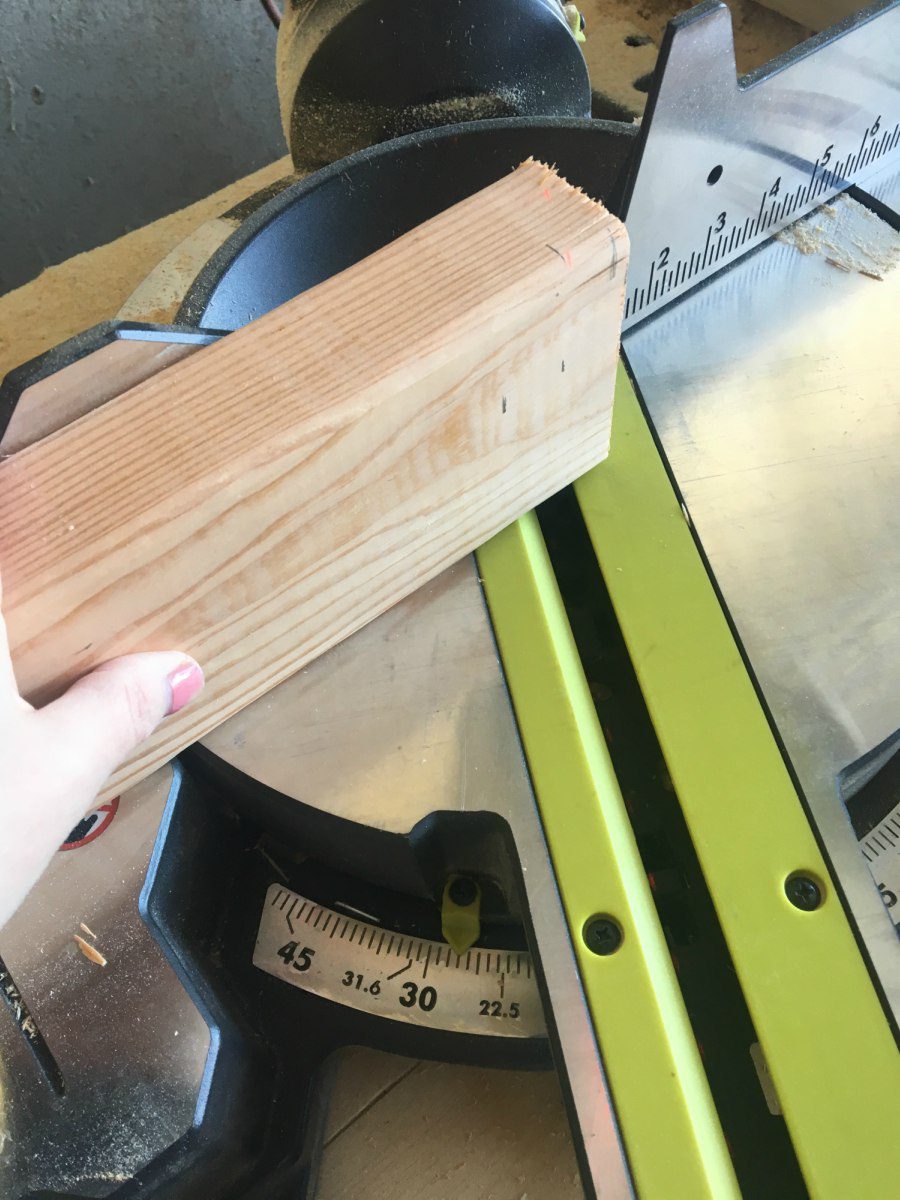
Step 6
Turn your miter saw to 27 degrees and cut your 2×4’s.
They should be 10 1/2″ from long point to long point.
Line up the feet on the legs and screw them on using the pocket holes in the legs.
Step 7
Let’s work on the leg cuffs! I like to think of them as little leg warmers 🙂
This is where your little cuts of 1×3 come in!
Glue and brad nail two 3″ pieces and two 1 1/2″ pieces to each leg.
Do the same with the 3/4″ pieces for a layered look.
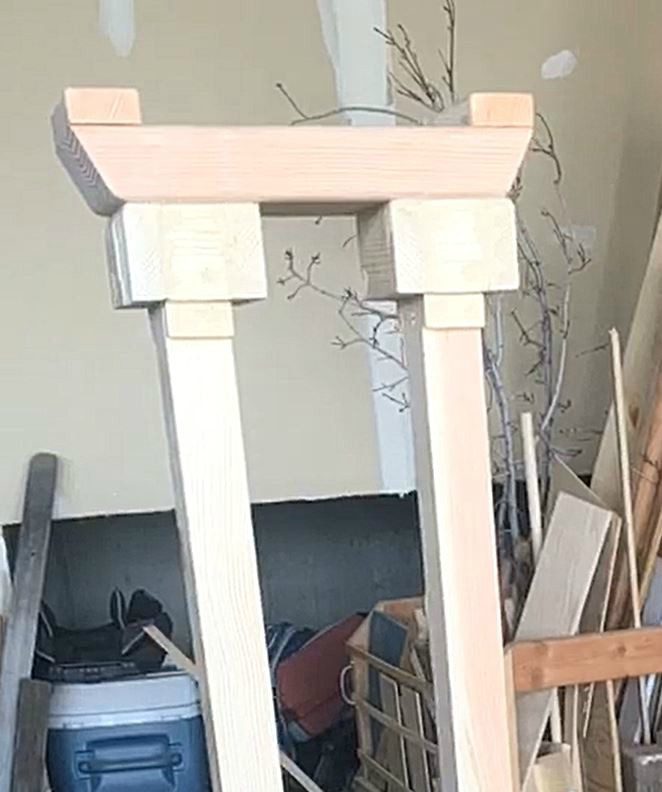
You can also add the feet at this point! These are the 2×4 cutoffs.
I glued them and then brad nailed them.
Just be super sure that none of the nail sticks out so they don’t scratch the floors!
Step 8
Time for the curvy details!! These are my favorite part!!
A good friend of mine (look up @jonnyrocker_ on IG) taught me this method for finding arches.
It’s going to take a bit of explanation so bear with me.
First thing you’ll do is hold the 1×8 board up to the legs and use a pencil to mark the width.
I ran it up and down the left and right sides (and didn’t take a photo. So this one already has the curves on it, but it does show how I held it up and marked the sides.)
Once you have your width marked, take the board over to a workbench, lay it horizontally and you’re going to nail 3 nails into it.
One nail on the bottom right of your width lines, one on the bottom left,
and one on the top width line in the center of the board.
Then you’ll wrap your thin 2×4 cutoff around the nails.
Trace the line to create an arch.
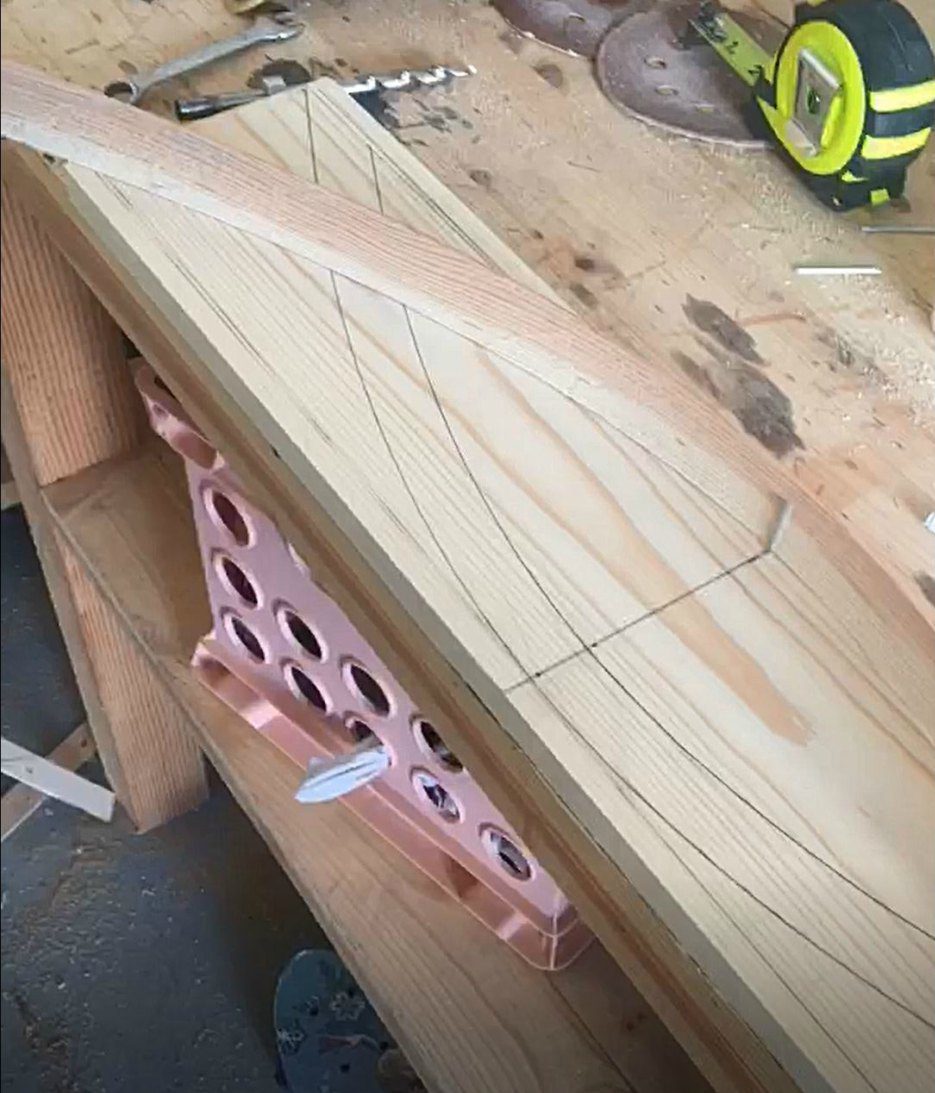
Move the nails in an inch and wrap the cutoff around the nails to create a second arch an inch from the first one.
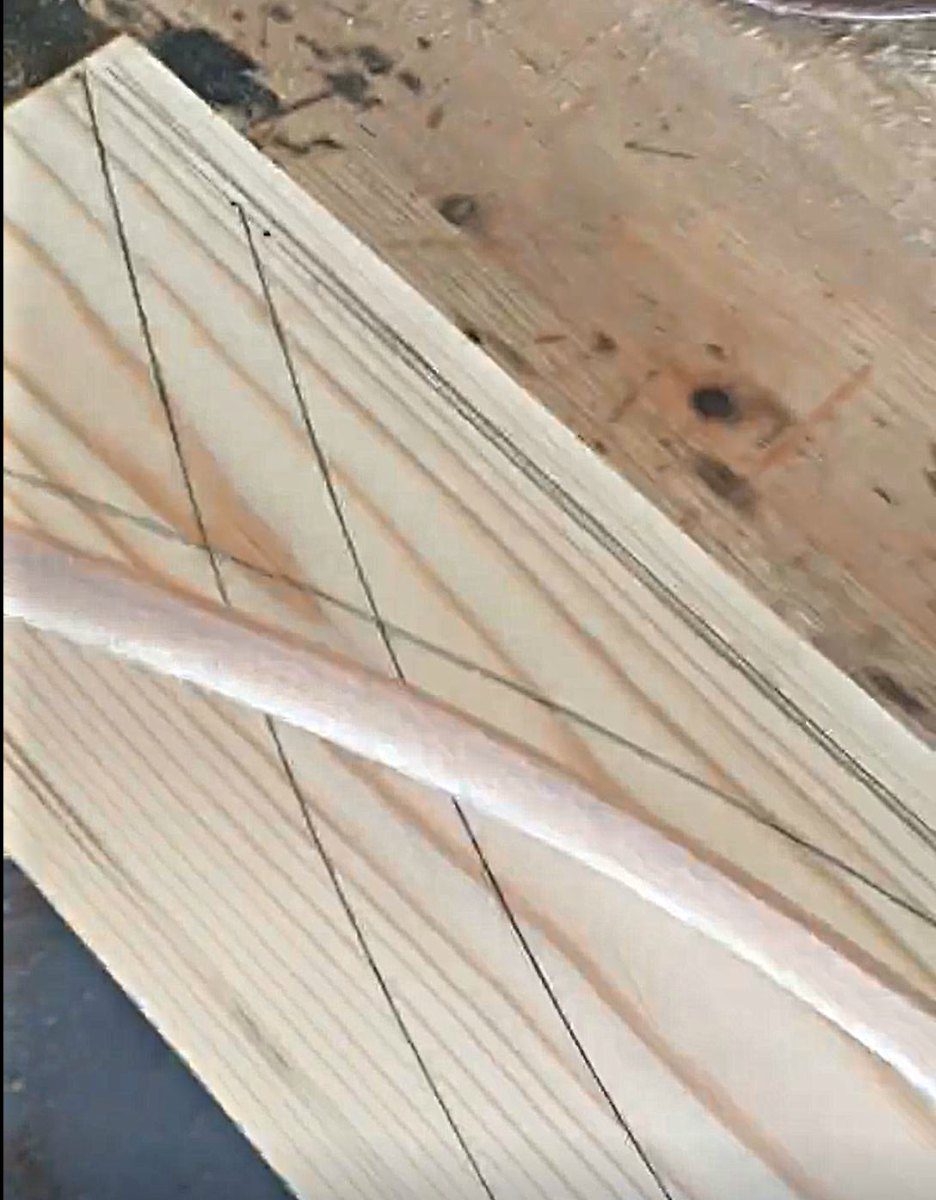
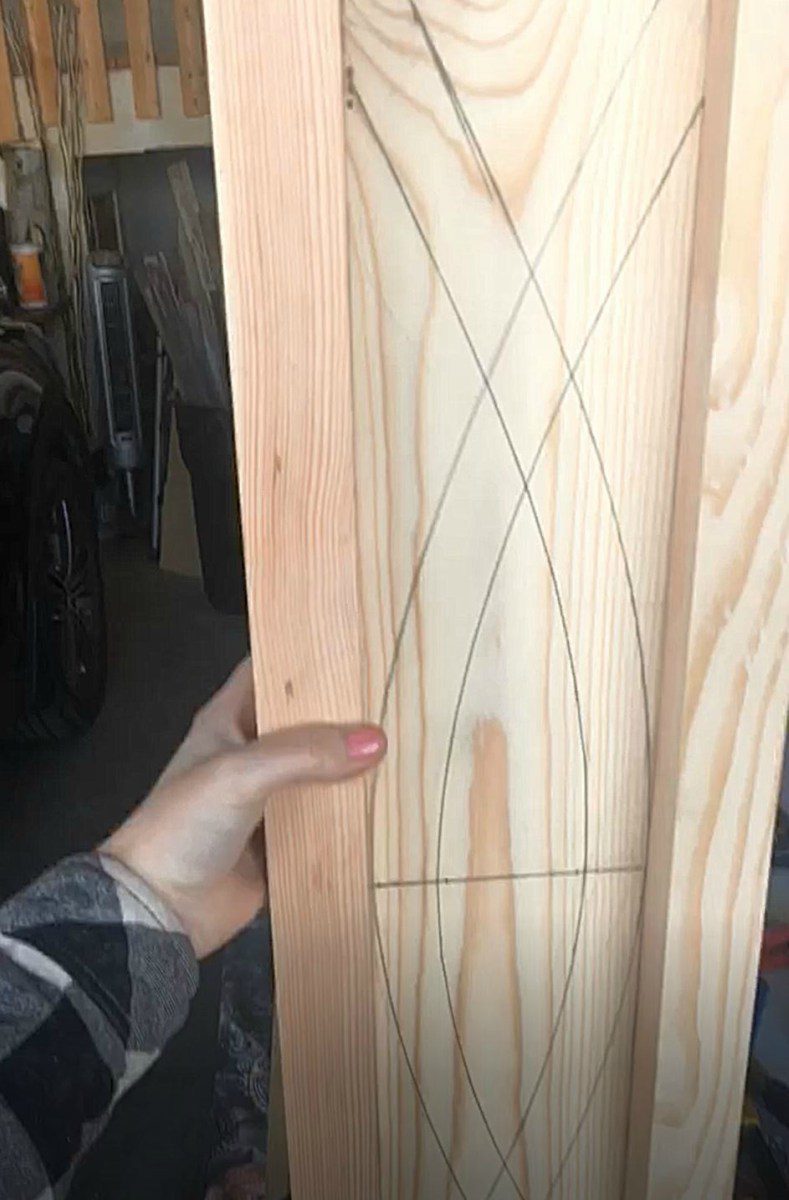
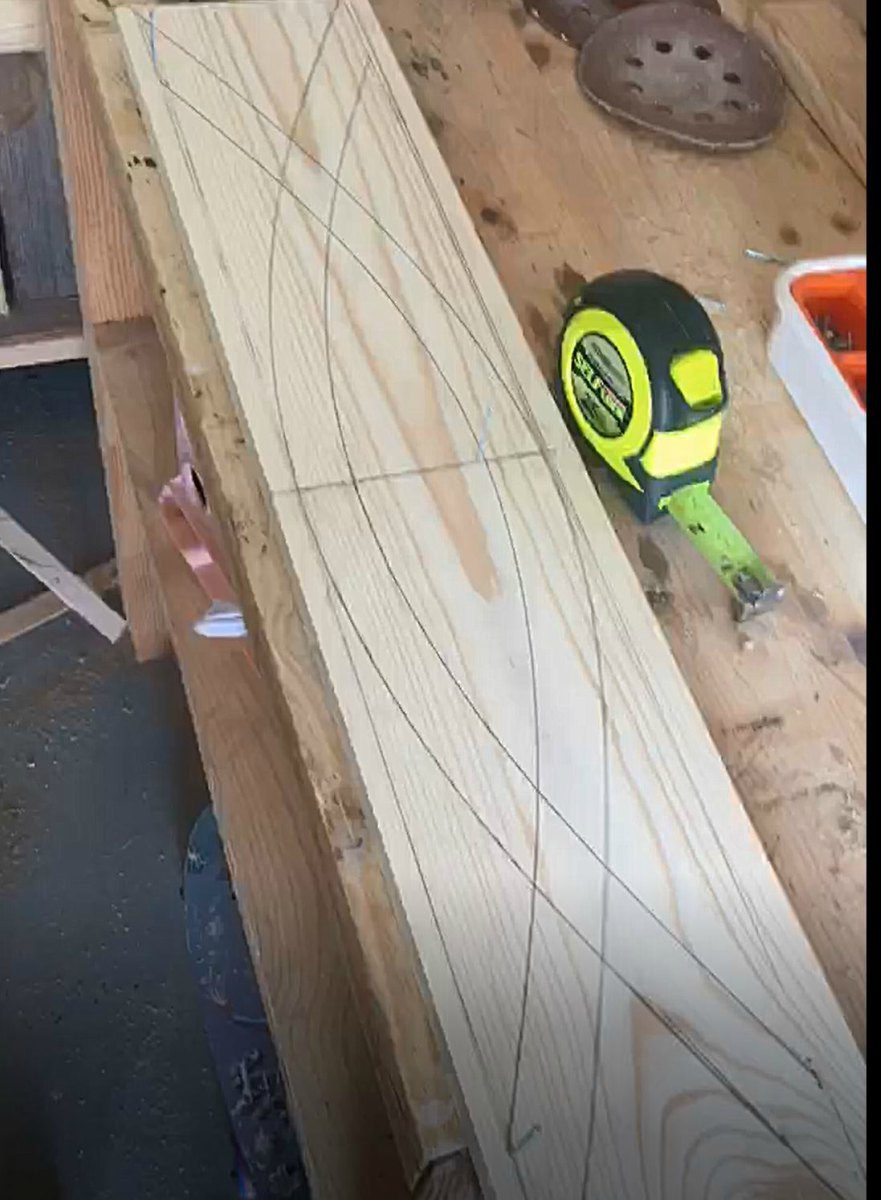
Flip the board around the do the same thing curving the other way.
You should have a design like this:
Once you have your design drawn out, cut all the outlines with a band saw or jigsaw.
Drill a hole in the center large enough for a jig saw blade and cut out the center.
Should have a cutout like this:
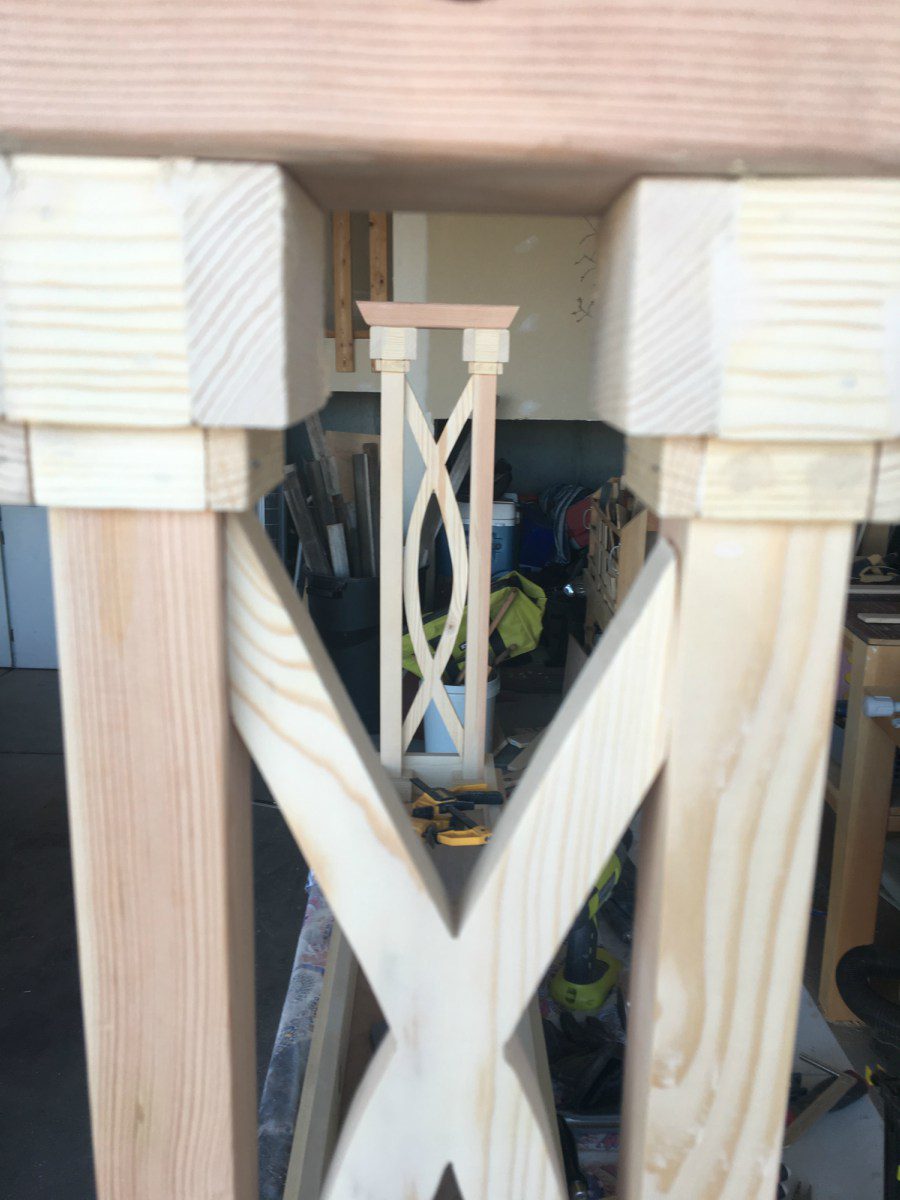
Dry fit your cutout between the legs and make any sanding adjustments you need to.
Repeat this process to make a second cutout.
Step 9
Flip the table over and admire its beauty!
I finished mine in Minwax Jacobean with General Finishes Arm-R-Seal as a finish!
Thanks for following along!! As always, share your photos, tell your friends, and PIN this project!
And please please please let me know if you have any questions! I am always happy to help! 🙂
That top just gives me all the heart eyes! SOOOOooooo pretty!
Aloha,
Charlee