Home Decor, Tutorials
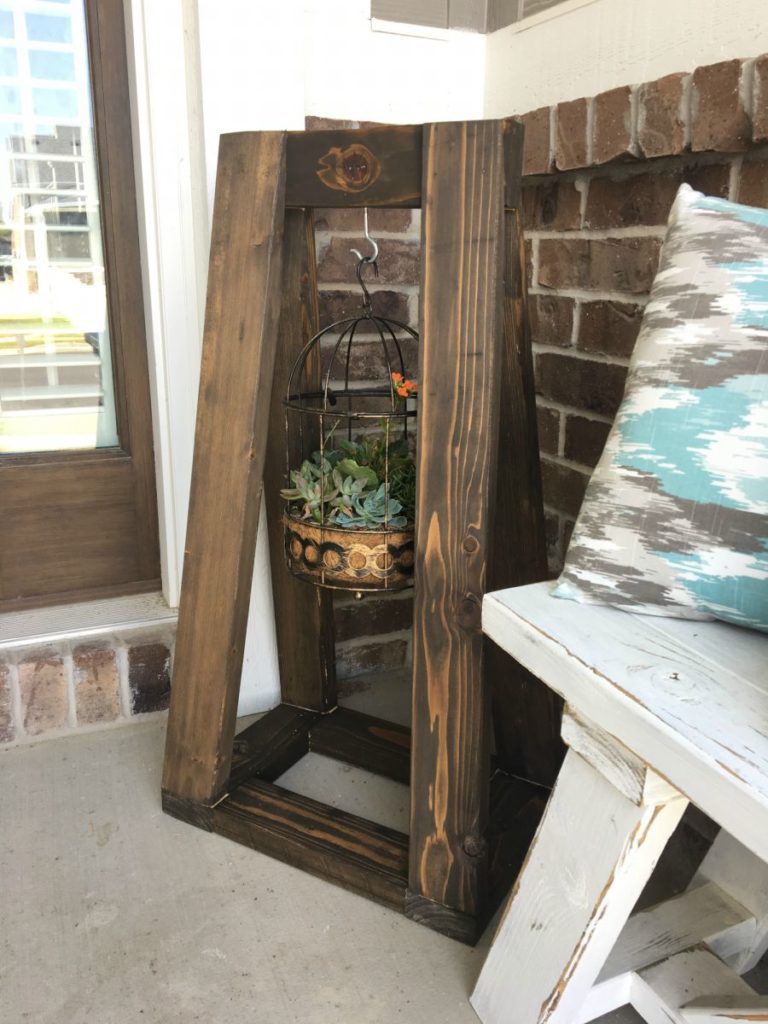
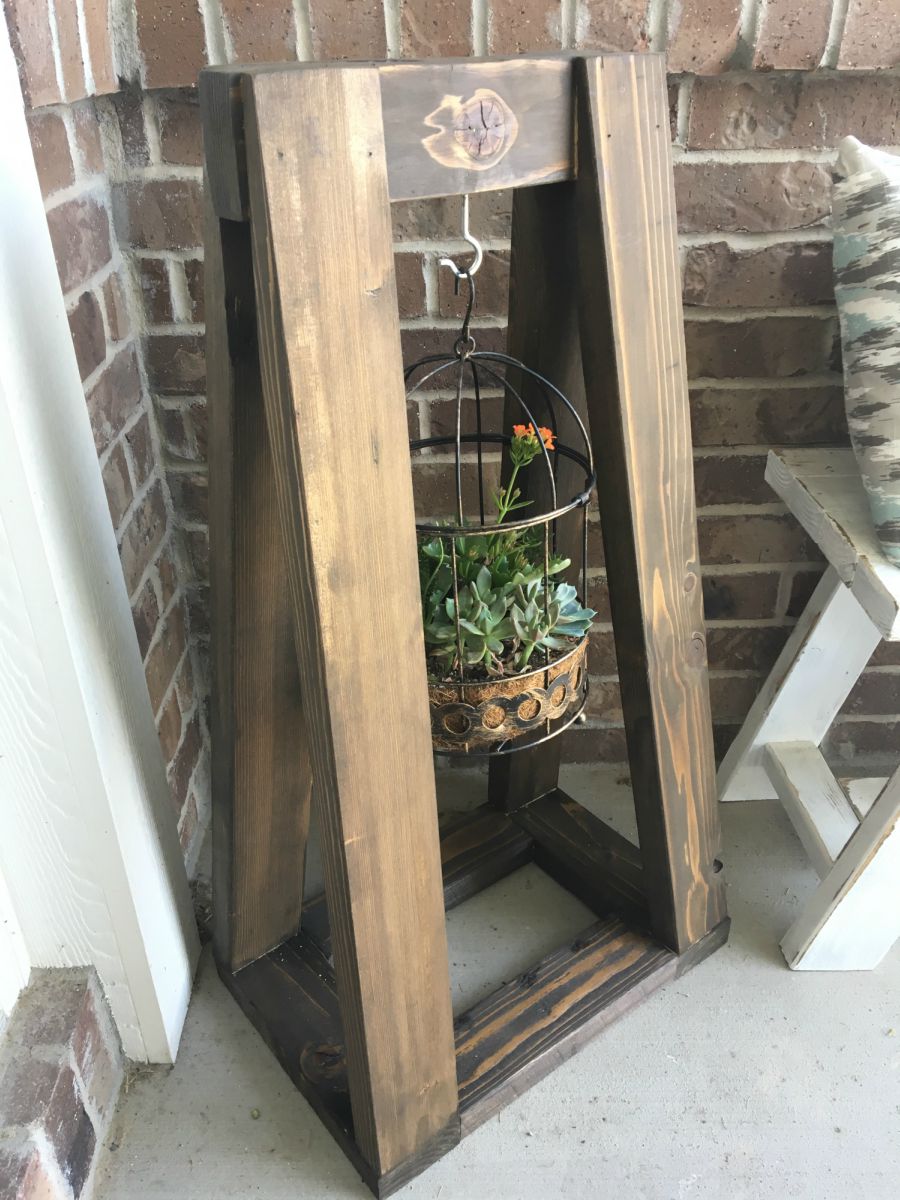
DIY Angled Planter Stand
Hi guys!! It’s sprriiiiiiiiiiing time and I am about ready for some warm weather….
aren’t you?!?
Gimme all the flowers, and fresh cut grass smells
and SPRING DECOR!!
Speaking of spring decor… how about we tackle this hanging planter stand
so you can get some flowers on your porch ASAP!
Sound good?? I thought so.
Real quick before we get started, don’t forget to give me a follow on Instagram and Pinterest
to stay up to date on the current builds and new projects!
Okay, let’s get started.
DIY Angled Planter Stand
Dimensions: 36″ tall – 14″ wide at the top – 16″ x 12″ at the base
Materials:
- 2x4x8 – 1
- 2x4x10 – 1
- 2 1/2″ Spax Screws
- 1 1/2″ Pocket Hole screws
- 1 1/4″ brad nails
- large metal hook
- hanging planter – I found my birdcage version at Lowe’s in 2017
Cut List: – I recommend you CUT AS WE GO
- 2x4x12″ – 2
- 2x4x11″ – 2
- 2x4x34 1/2″ – 4
- 2x4x14″

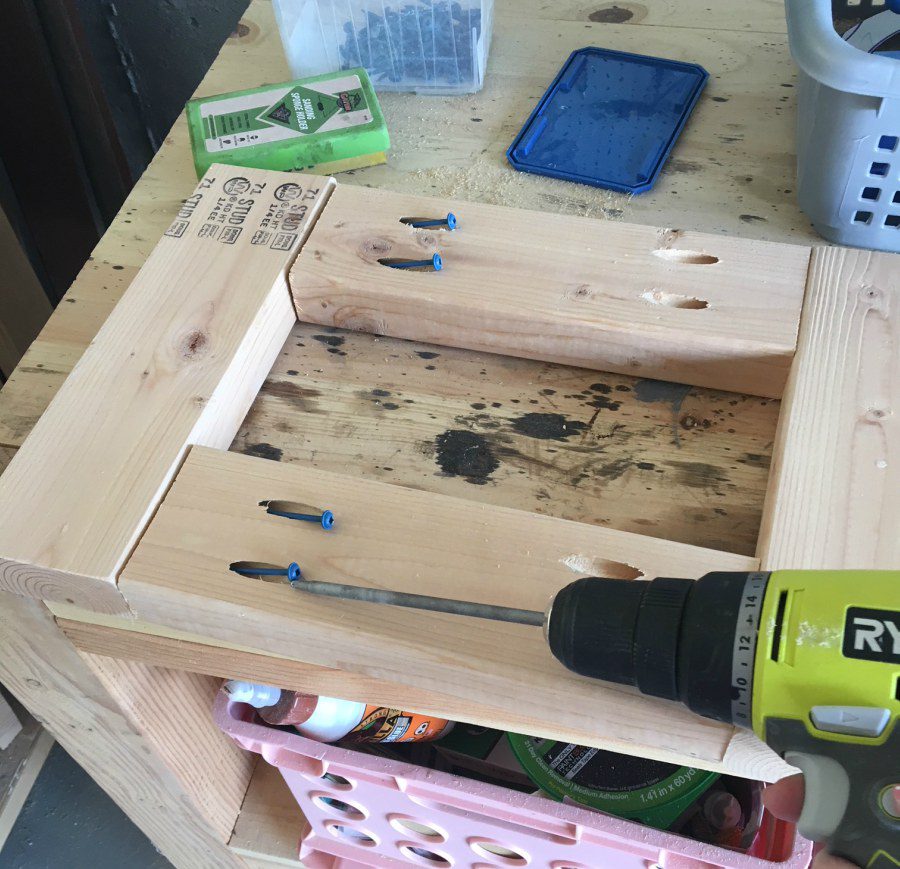
Step 1
Cut your 11″ and 12″ pieces, add your Kreg holes to the 11″ pieces and assemble in rectangle shape with your 12″ pieces on the right and left.
Step 2
Drill pilot holes with your 3/16″ bit in the corners of the 12″ sides.
Step 3
This part can seem a little tricky since you are cutting two angles at the same time, but don’t worry, I will show you how!
Set your miter saw to 5 degrees mitered
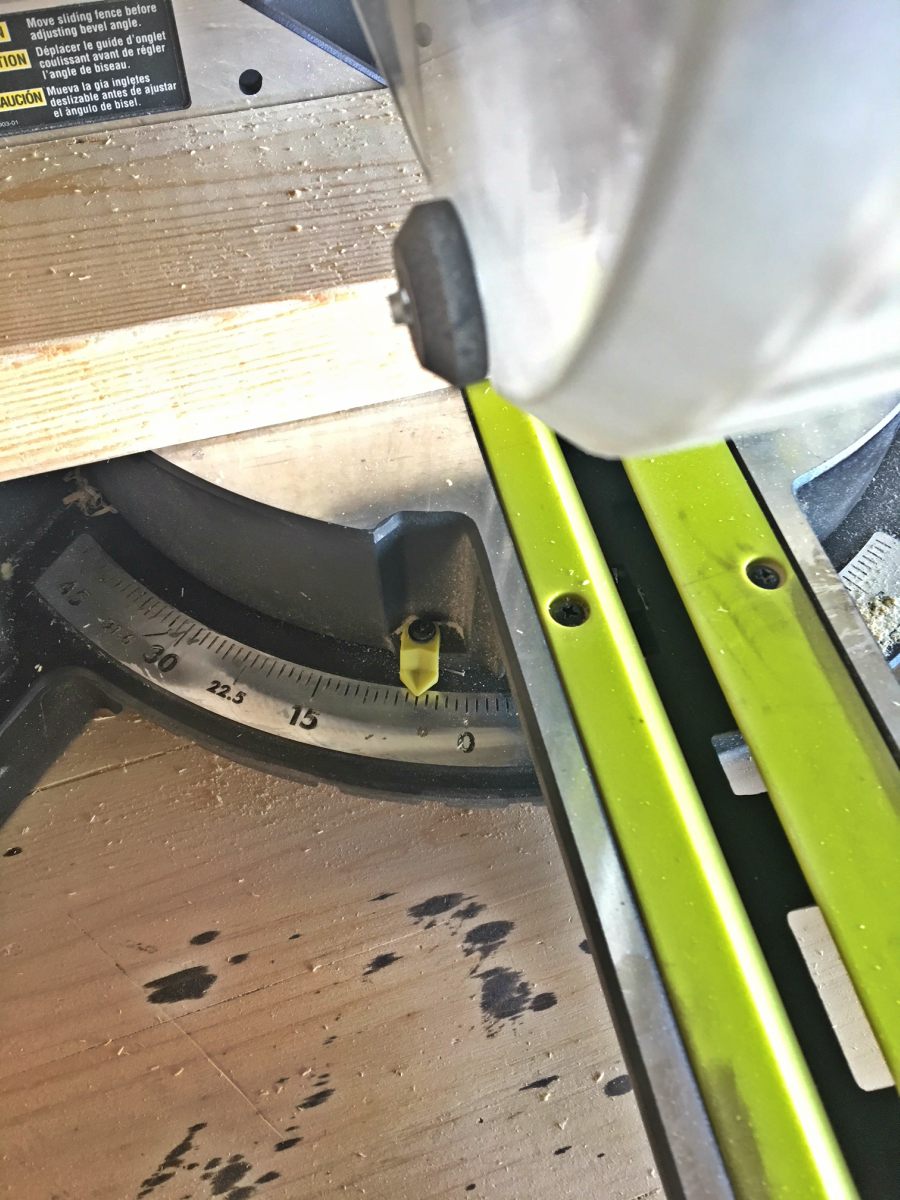
and 7 degrees beveled.
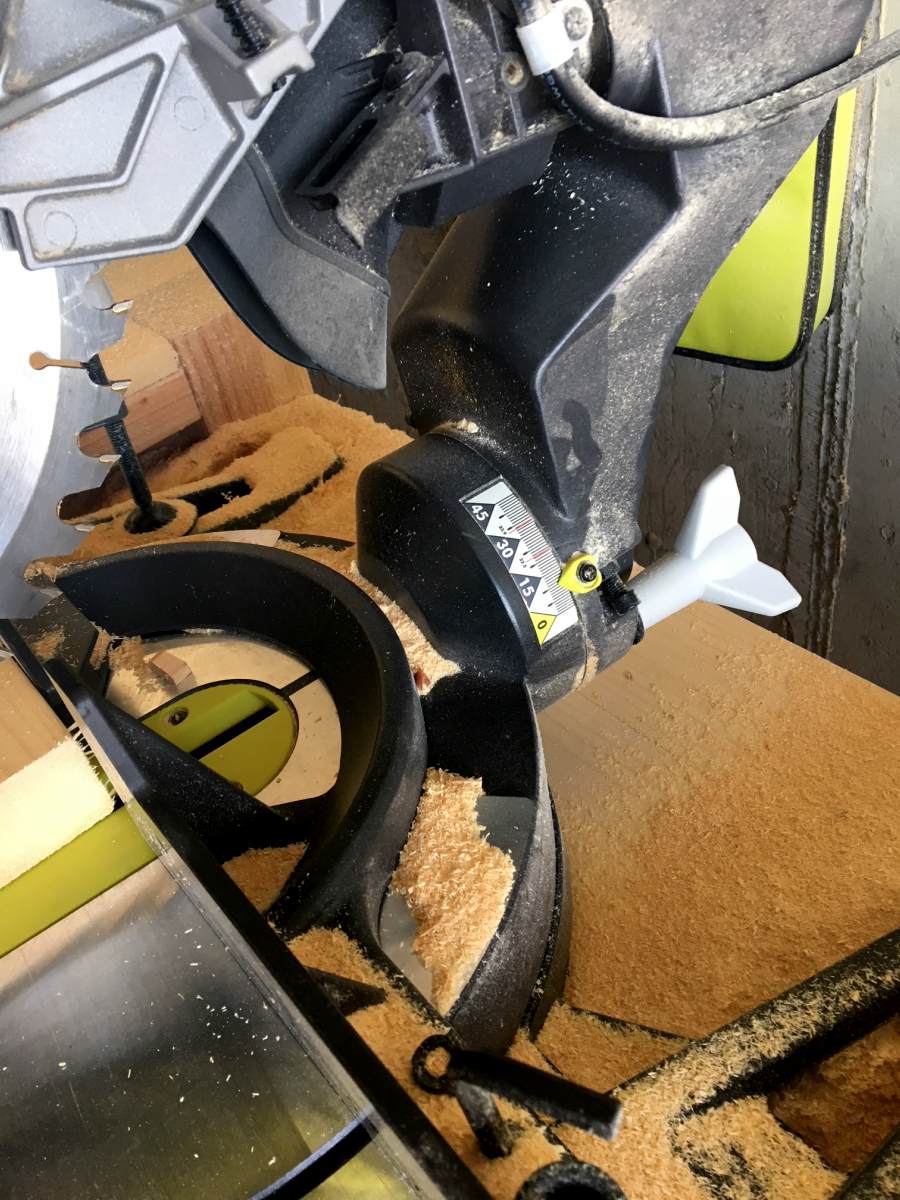
*If you look closely, mine is actually set to 10. It was too steep of an angle. Set yours to 7.
Now, you’re going to cut two 34 1/2″ pieces with the long part of your 2×4 to the left, like this
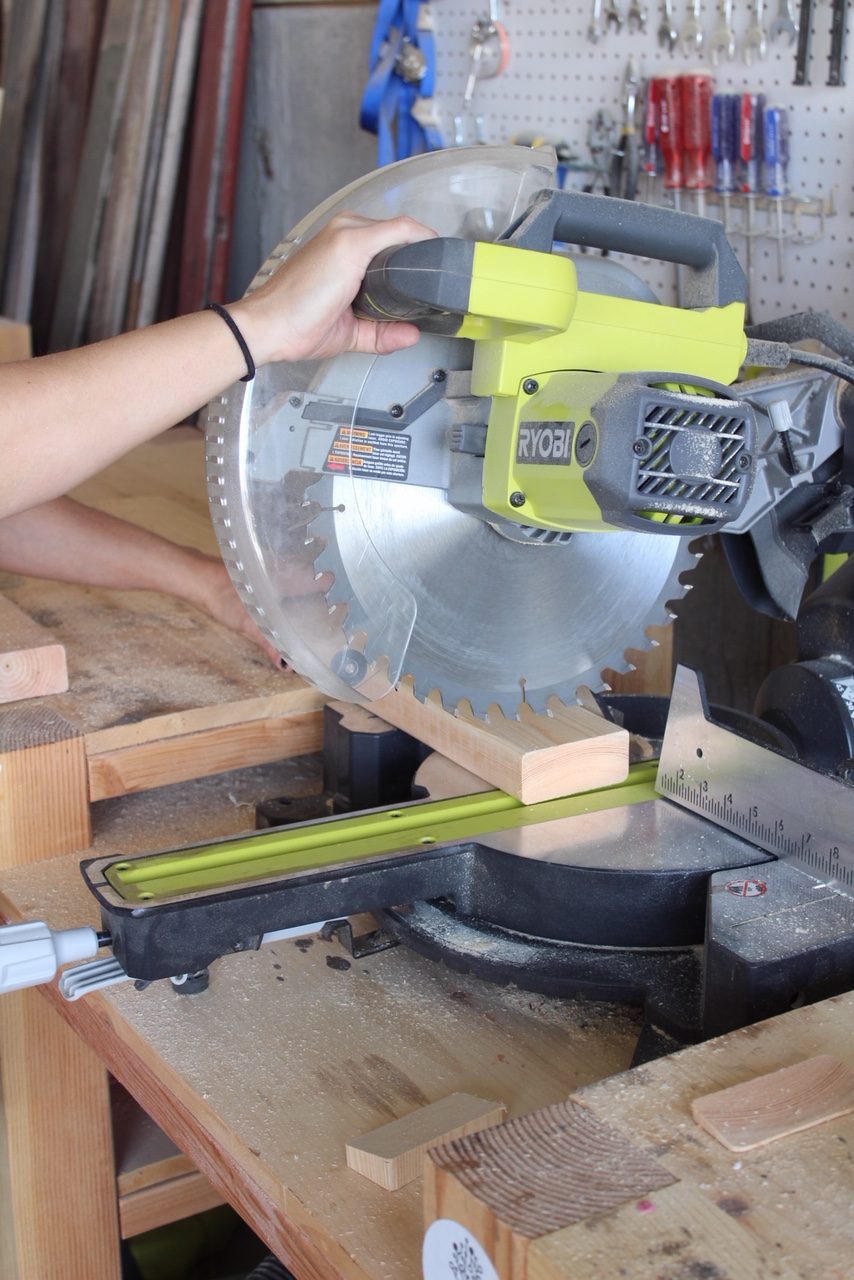
then flip it over and cut the other two to the right, like this
This will give you the mirrored legs you will need.
One end will be angled, and the other end of the 34 1/2″ will be a straight cut.
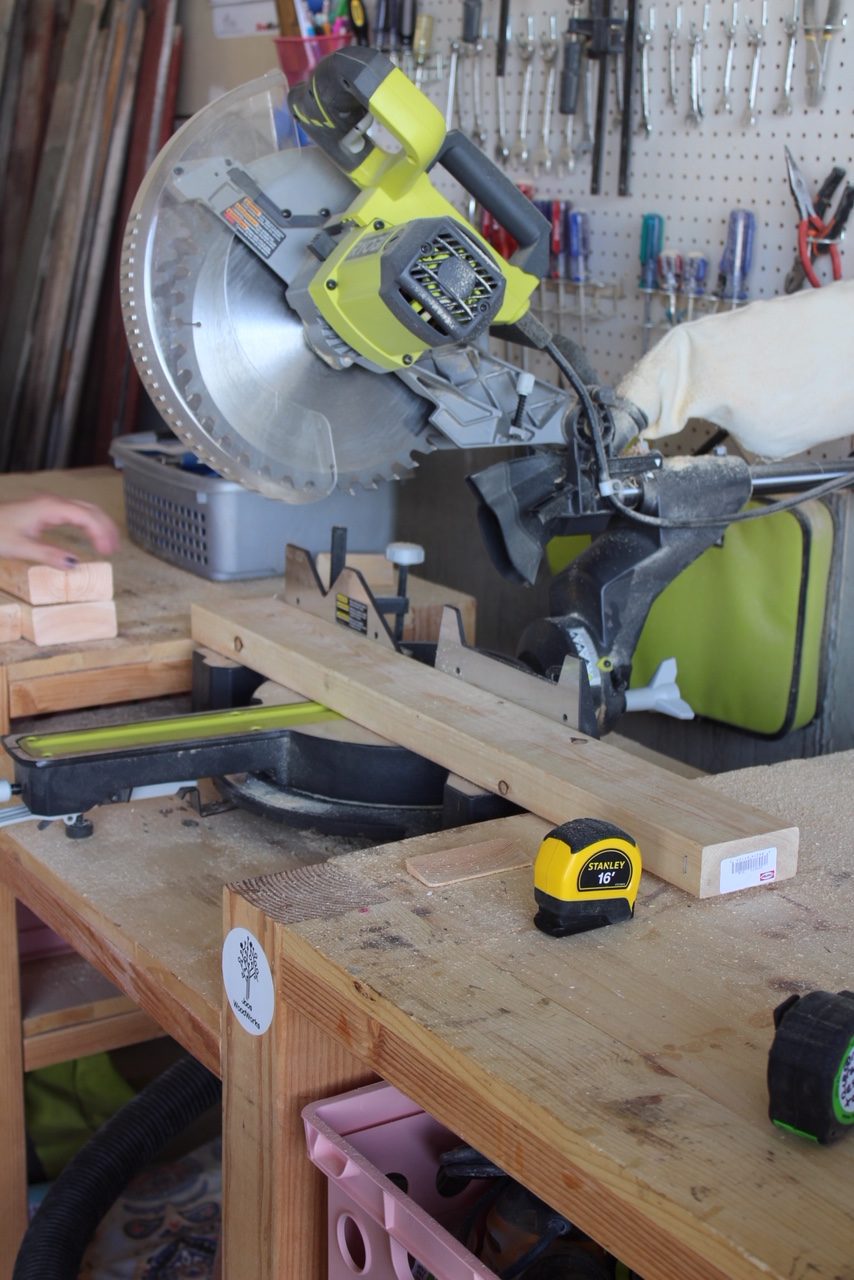
Step 4
Okay, phew, if you’re still with me… prop up your pieces with the angle flat on the ground so you can see which direction they will lean.
This will help you determine how to cut your steep angles on the straight edge.
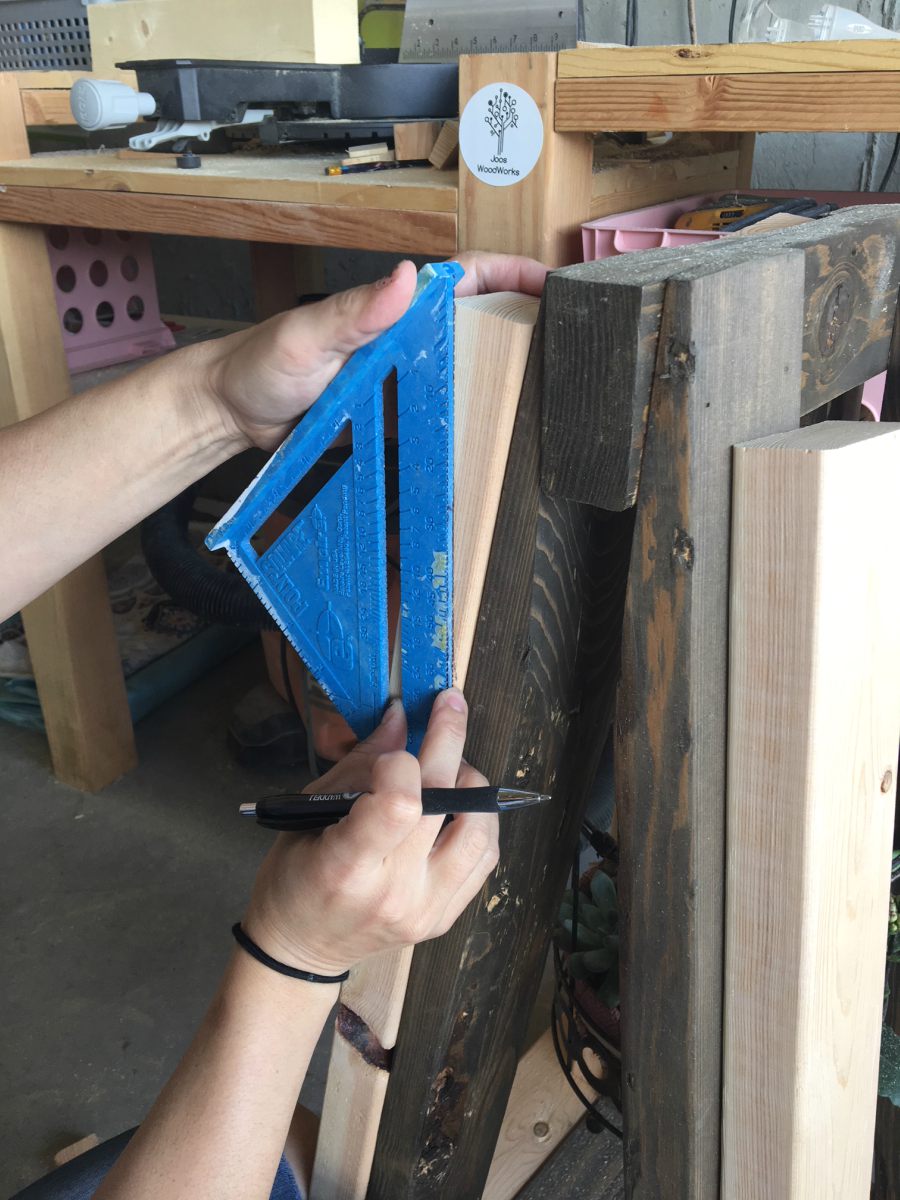
Once you have determine which way they lean, measure in a half inch from the outside and down six inches on the opposite side.
Draw a line between those two marks and you will you have your angle.
This next part will be easiest to cut on a band saw.
If you don’t have access to a band saw, you get do to it the hard – *ehem* – FUN way like me!!
Clamp your board to your workbench with the end with the angle line hanging off.
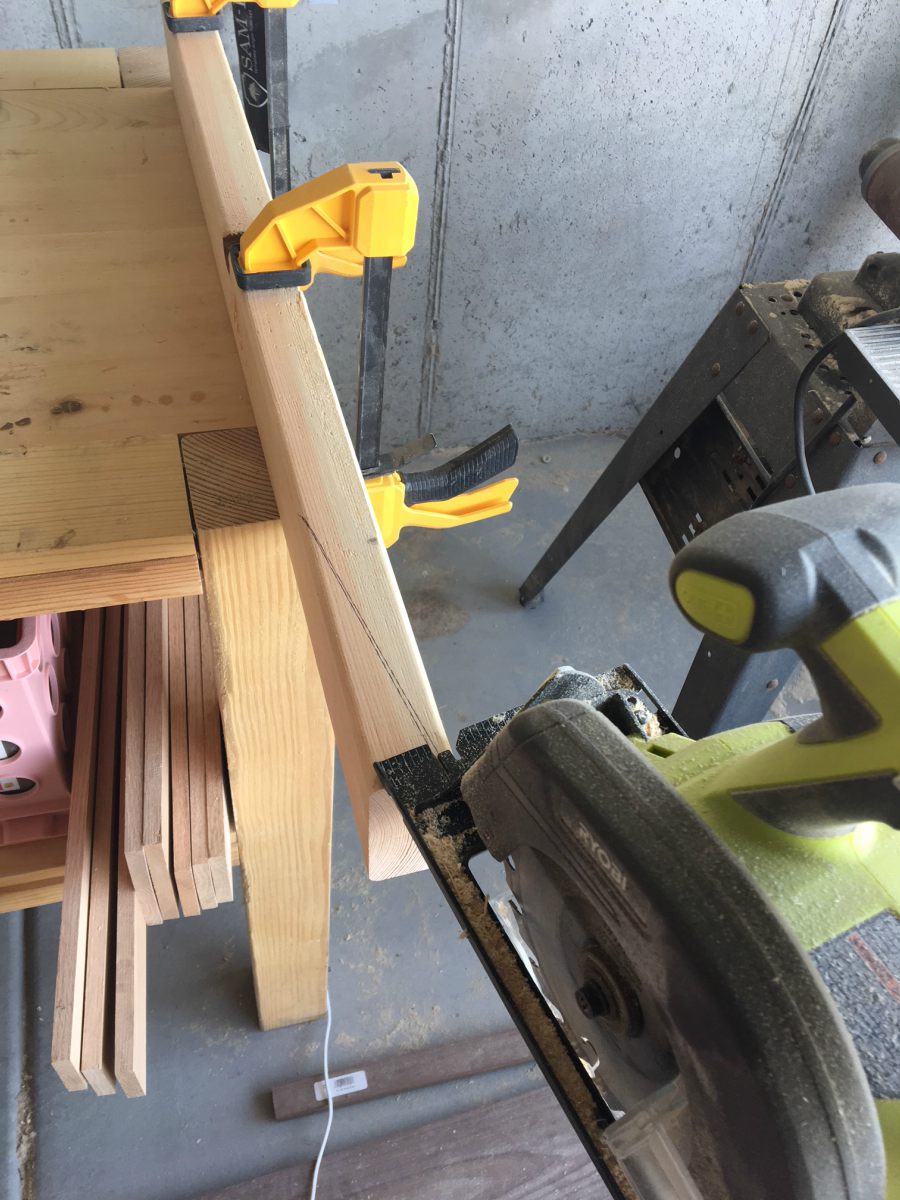
Use your circular saw to make a cut along this line.
The blade won’t be big enough to cut through the whole board on one pass.
You will now need to flip the board over and find the same angle on the opposite side and make a second cut.
If you’re really unfortunate, like me, the blade still won’t make it all the way through,
and you’ll have to finish the rest of the cut with a hack saw. By hand.
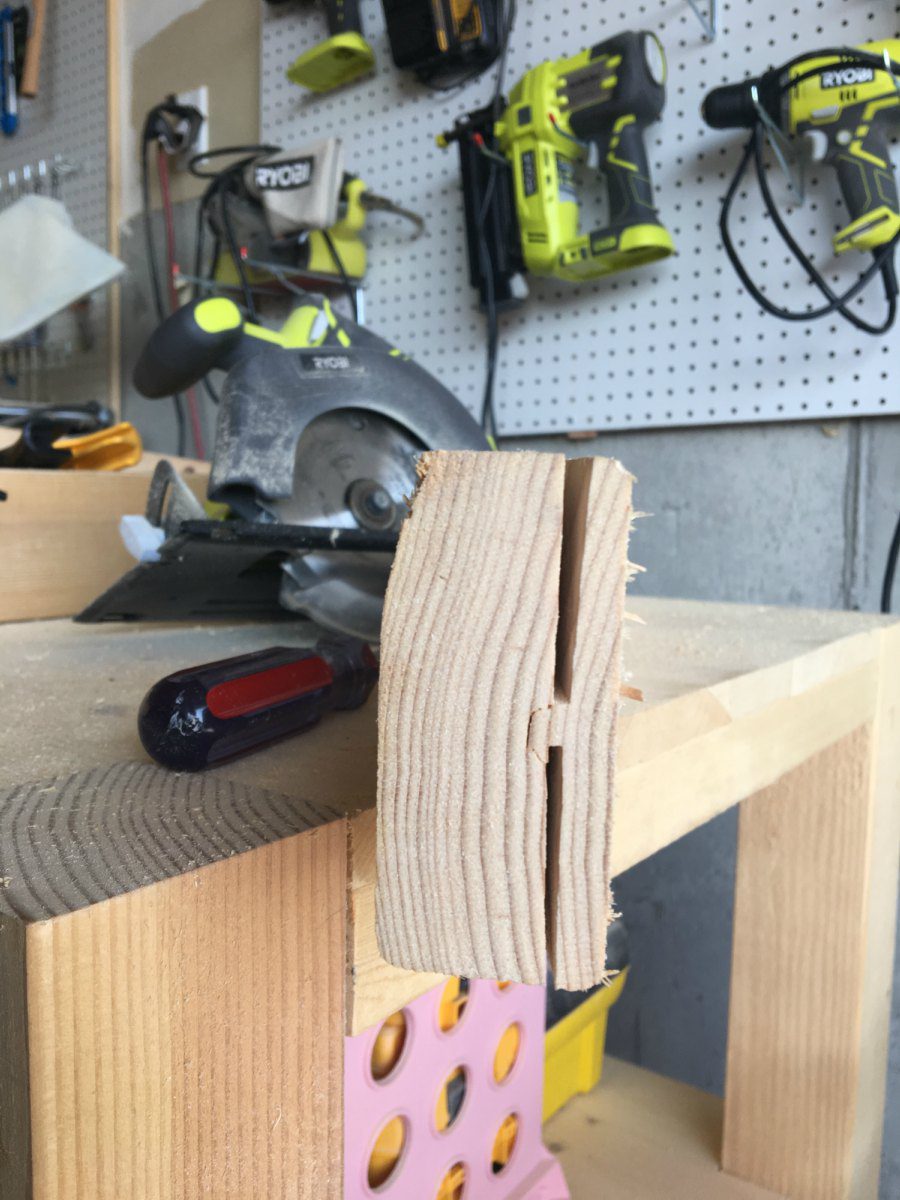
Your finished angle should look like this…
It’s not perfect, which is why a band saw would really be ideal, but it’s nothing a little sanding can’t fix!
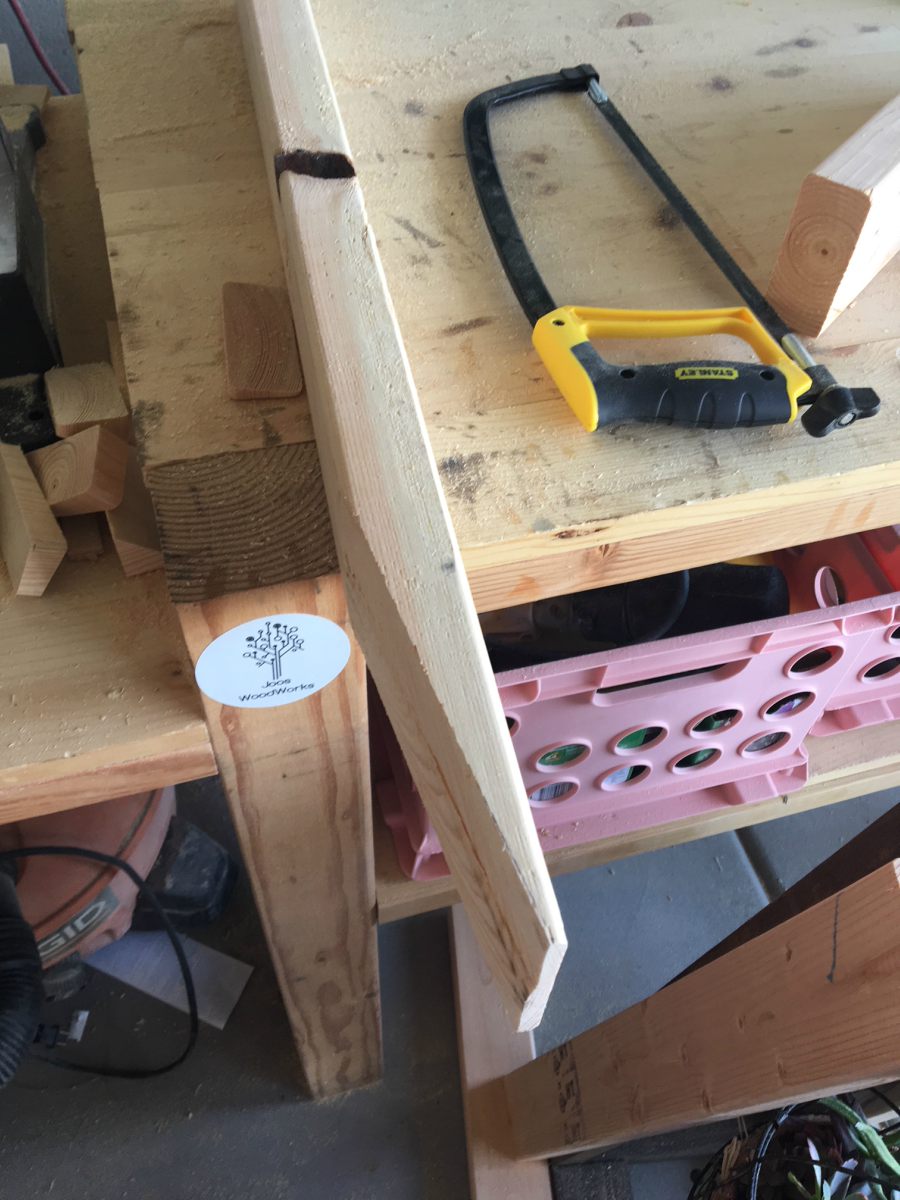
Repeat this process for the next 3 boards.
Step 5
Cut at 5 degree angle at the tops of your legs. It should be parallel to the bottoms. Your bevel will be set at zero. This is just a mitered cut.
I’m so so sorry but I don’t have a photo of this step.
Just picture that when your boards are all in place and the 14″ board is running across the top,
the tops of your legs will be flush with the 14″ board.
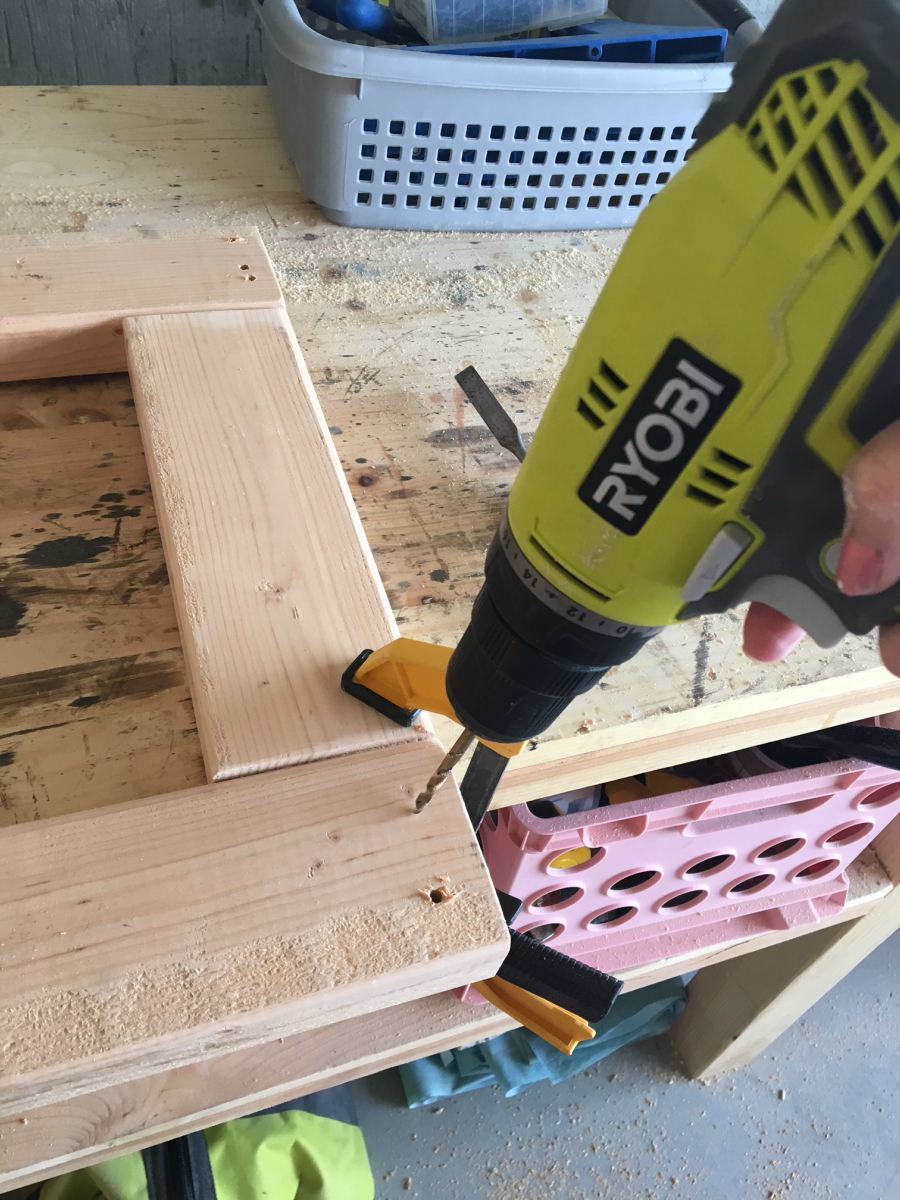
Step 6
I applaud those of you still with me, who haven’t tapped out yet. 🙂
We’re almost to the finish line!!
Grab those spax screws and drill up from under the base into the bottom of the legs to attach.

The legs should angle in toward the center from both the front view and side view.
Step 7
Cut your remaining board down to 14″.
Glue and clamp the board between the tops of the legs so it sits flush
and nail the legs into the board.
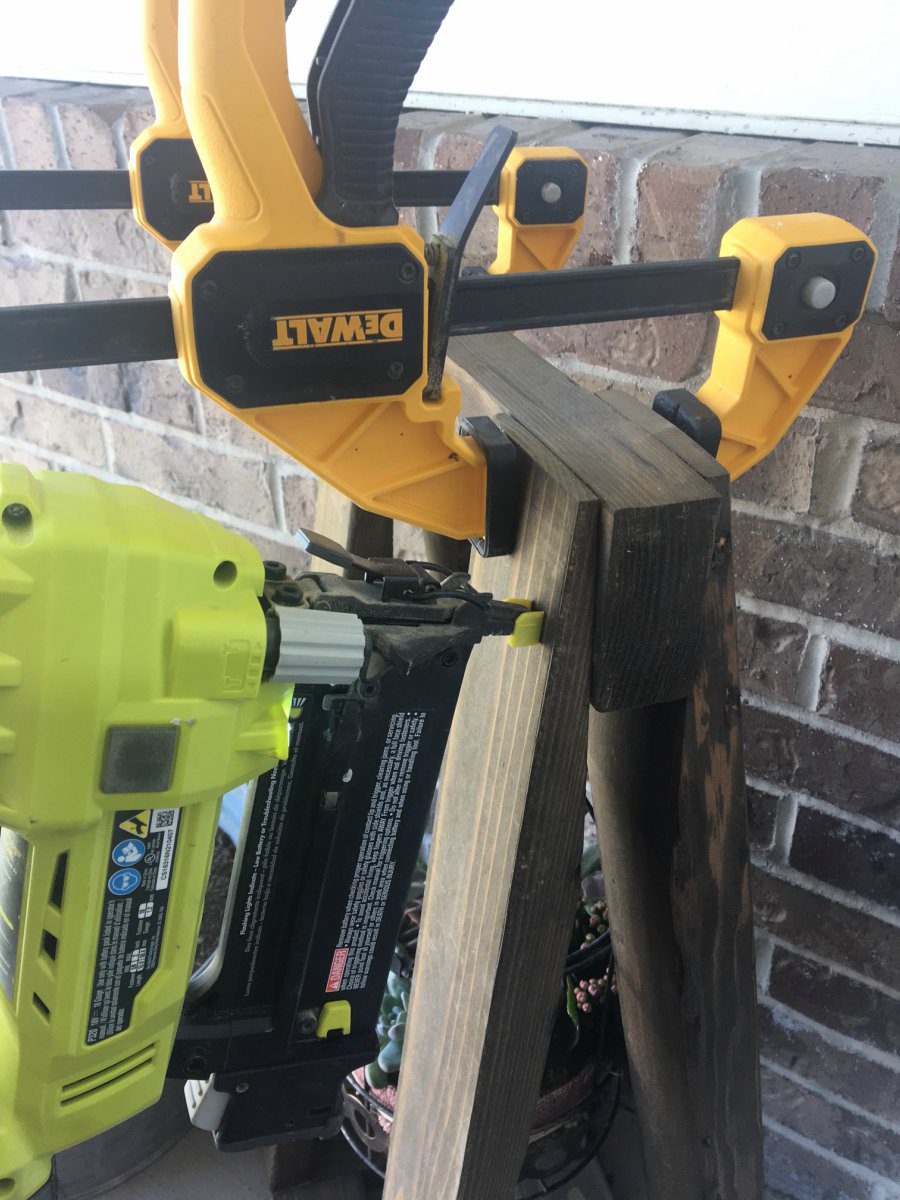
I didn’t have an unfinished photo of this step so I recreated it for you 🙂
By the way, these DeWalt clamps are my fave!
Check them out, along with the Ryobi 18 gauge brad nailer on the
Tools I Use page!
Step 8
Finally, find your center along the 14″ board, pre-drill a hole for the hook, and twist it up into place!
Then hang your plant and admire your work!!
Thanks for following along on this crazy ride!! Don’t forget to post photos, PIN this project, and tell your friends!!
Great tutorial, Britt! Love the design! Did you see my “guillotine plant stand”? Haha! This is so much better! 😉
Aloha
Charlee