Home Decor, Tutorials
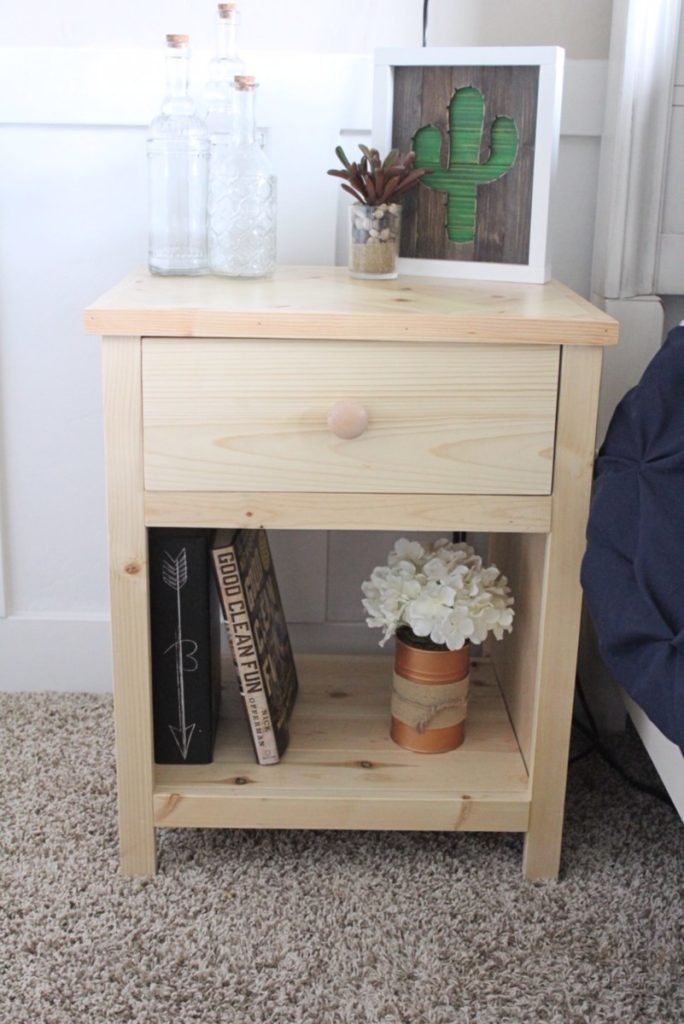
Herringbone Farmhouse Nightstand
Hey guys! A friend of mine came to me a few weeks ago with an idea
for this Farmhouse nightstand with a twist – a herringbone top!
I loved it and told him I’d get to work on it right away!
It came with a few unexpected mathematical challenges,
but this Mom-Brain got to stepping and got it done!
I even throw in a few tips and tricks I’ve learned on getting your herringbone
pattern totally perfect!
And as always, don’t forget to stay updated by following Overalls & Power Saws
on Instagram and Pinterest!
Herringbone Farmhouse Nightstand
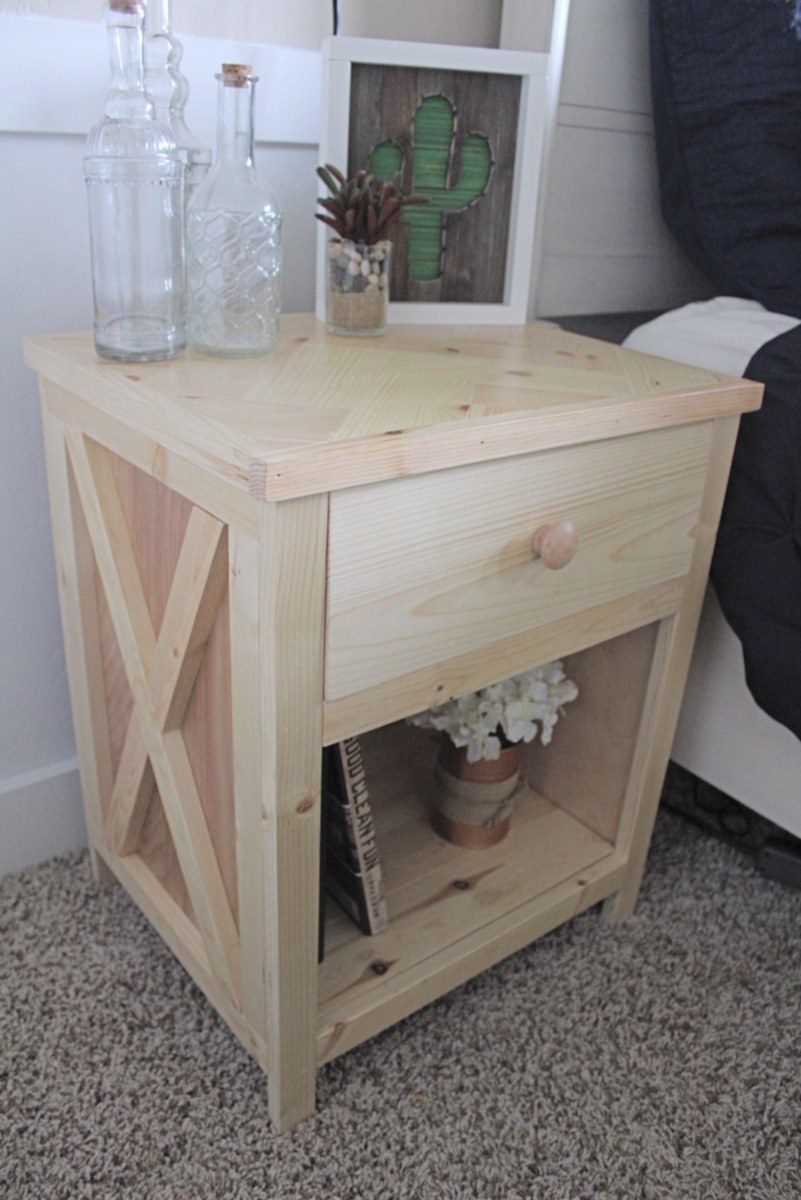
Dimensions: 20″ wide x 16 1/2″ deep x 25″ tall
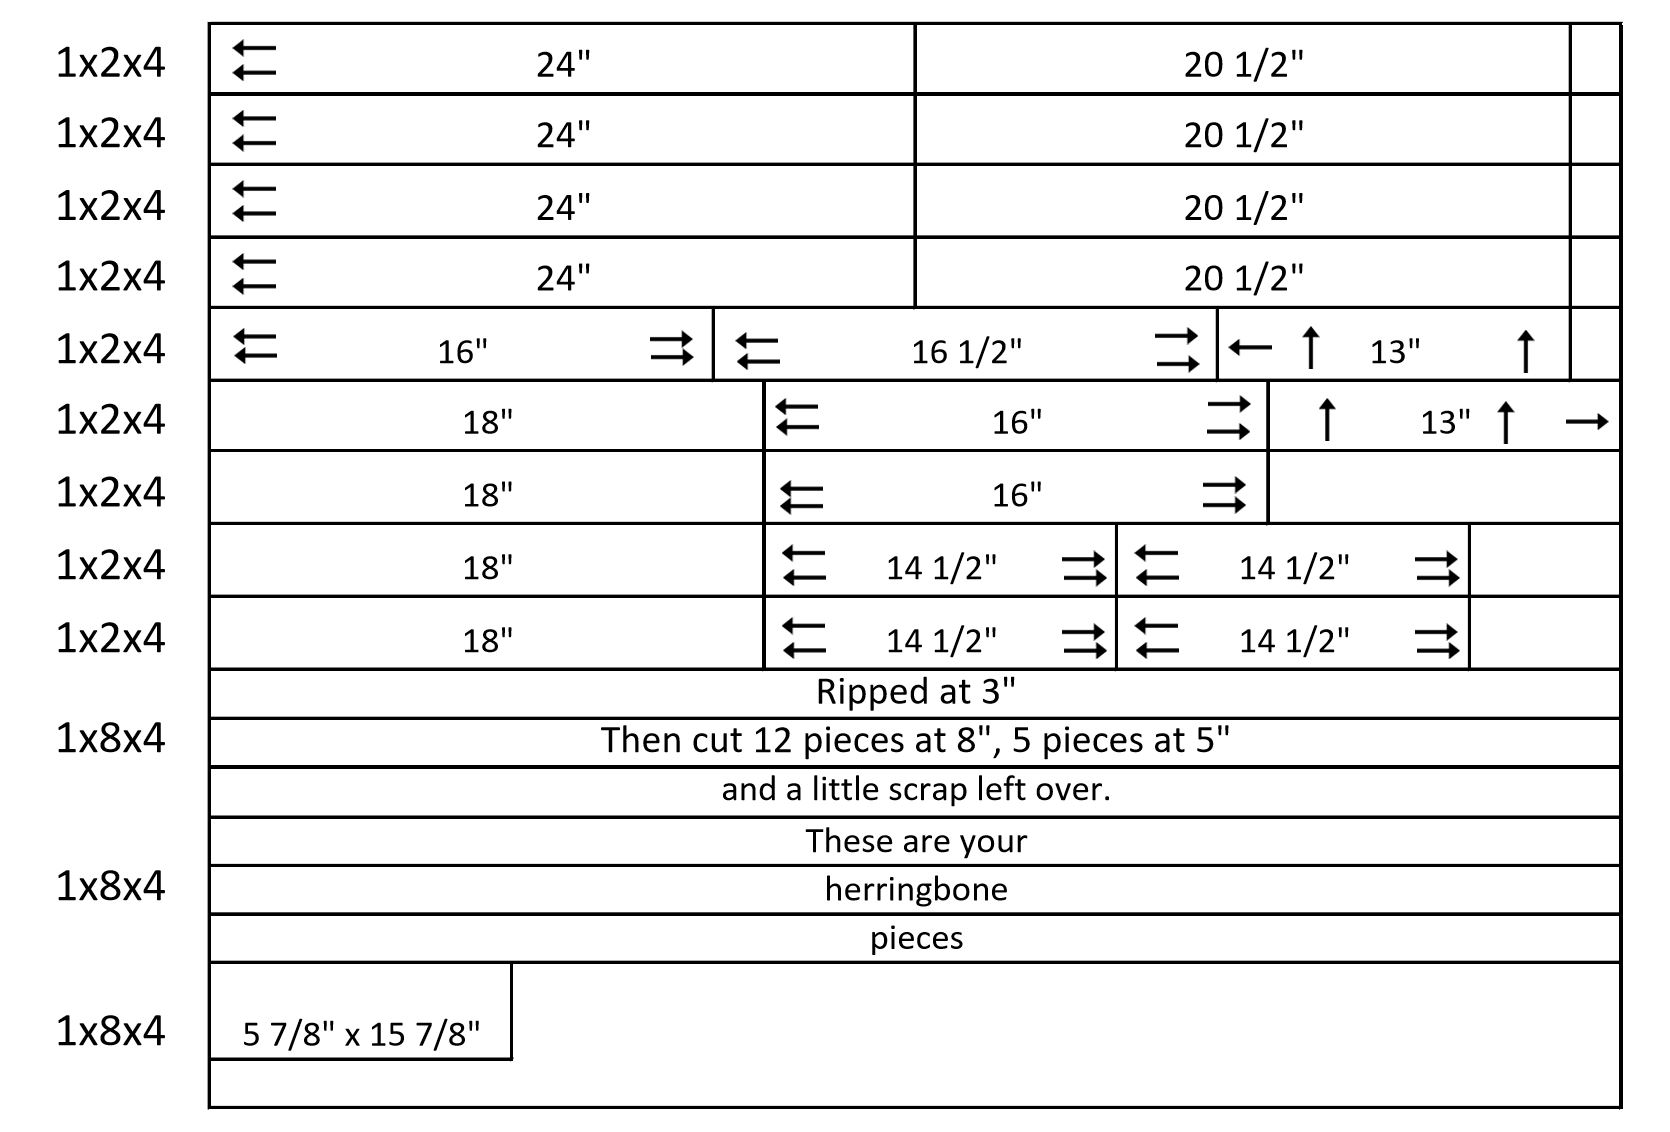
Materials:
- 1x2x4 – 9 – buying 4 foot boards isn’t necessarily the cheapest route, but I’ve found that you are more likely to find straight usable boards when they’re in shorter lengths.
- 1x3x6 – 1
- 1x8x4 – 3
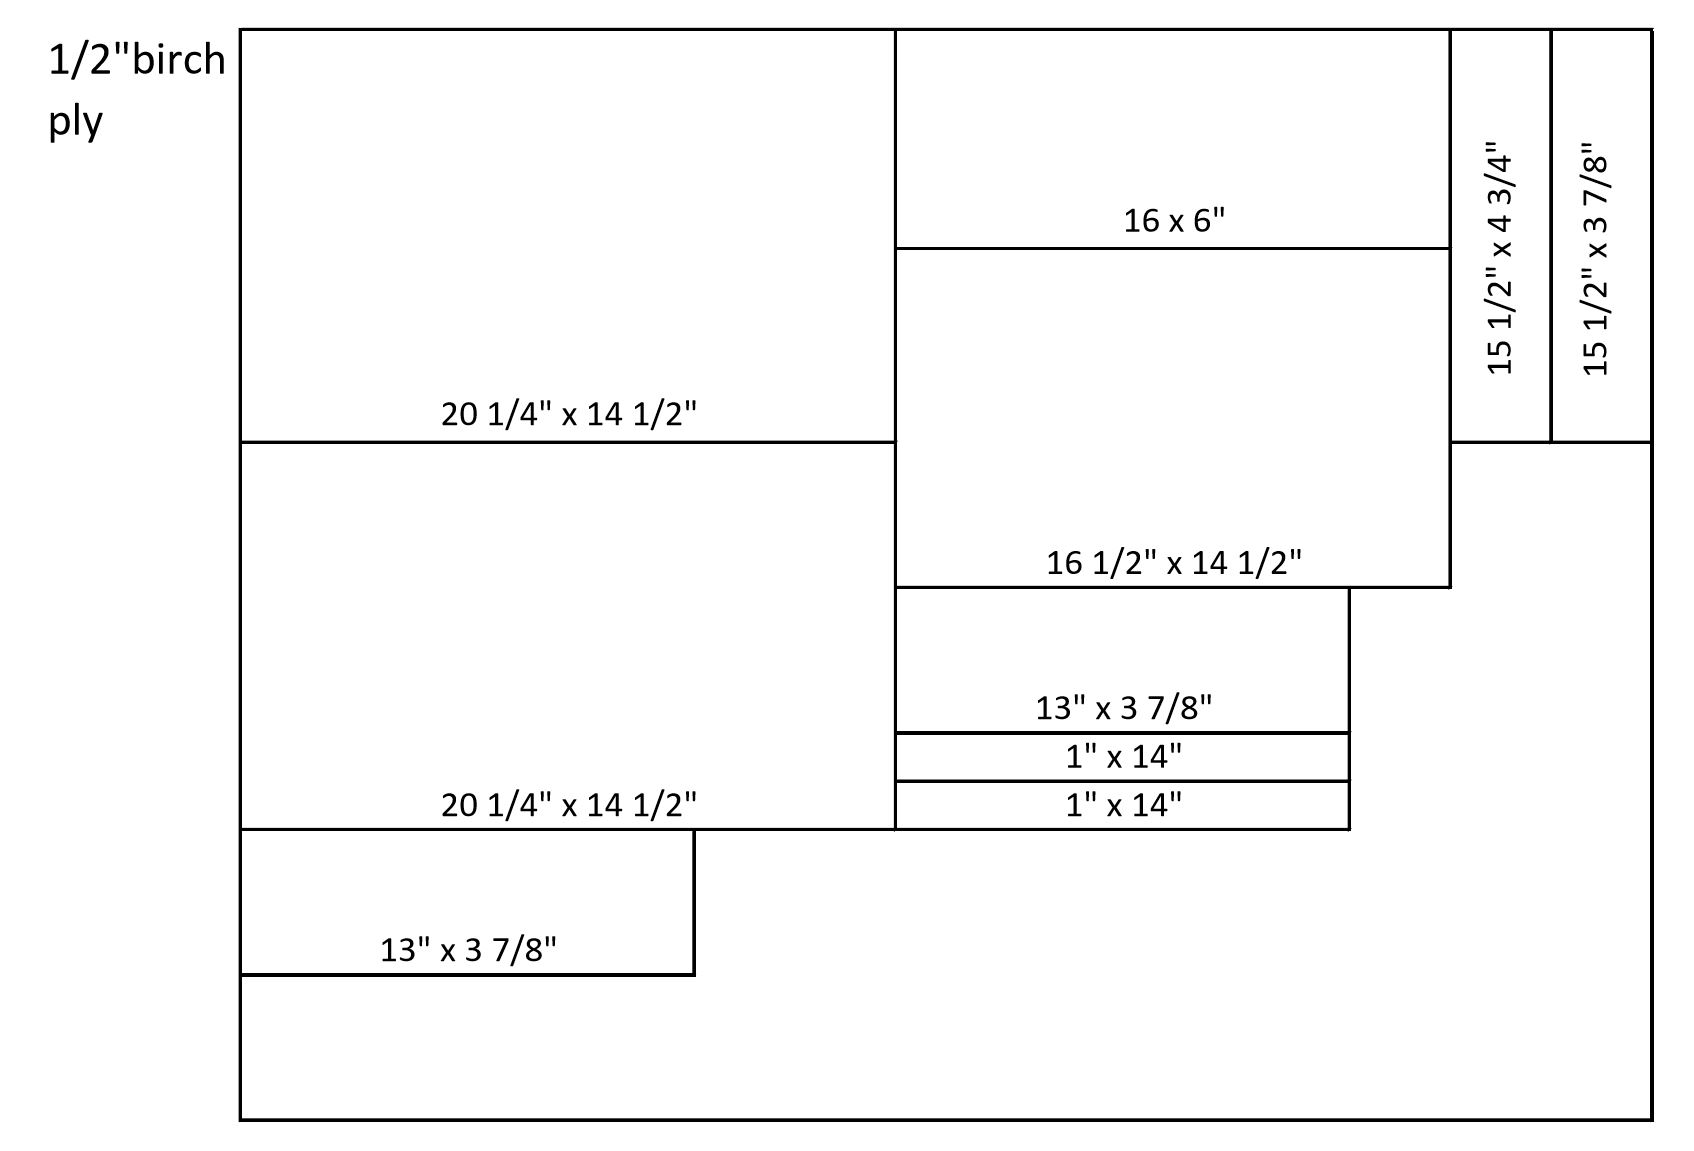
- 1/2 birch plywood – 4×4 sheet
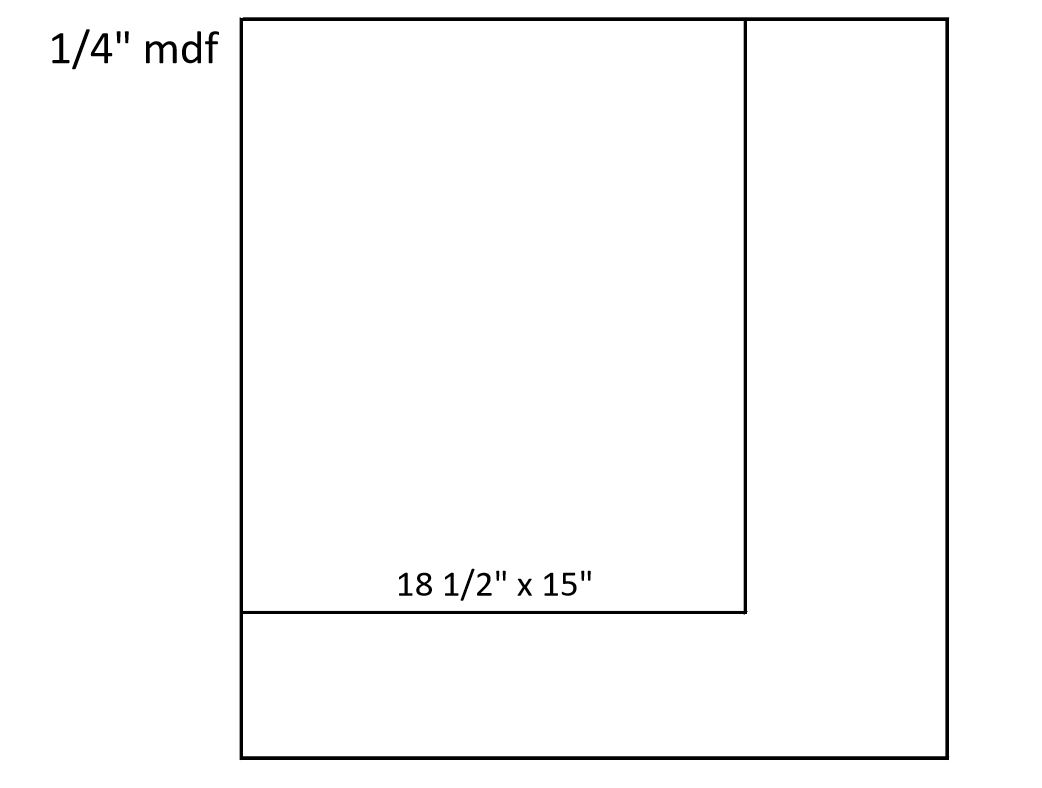
- 1/4 mdf – 2×2 sheet – they may actually only sell this in 2×4 sheets
- pocket hole screws
- wood glue
- brad nails
- drawer knob
Cut List:
- 1x2x24 – 4
- 1x2x18 – 4
- 1x2x14 1/2 – 4
- 1x2x16 – 3
- 1x2x13 – 2
- 1x2x16 1/2″
- 1x2x20 1/2 – 4 – parallel mitered (these are your X’s. It’s 20 1/2 from long point to short point)
- 1x3x16 1/2″ – 4
- 1x8x4 – Rip 3 (3″ wide) boards and rip 3 (1″ wide) boards on two of the boards. The third board will cut at 15 7/8 and then ripped to 5 7/8 – this will be your drawer front
- take your 3″ ripped boards and cut 12 pieces at 8″, 5 at 5″, and you’ll have 3 scrap – these are your herringbone pieces
- 1/4″ mdf – 18 1/2 x 15
- 1/2″ birch ply:
– 20 1/4 x 14 1/2 – 2
– 13 x 3 7/8 – 2
– 15 1/2 x 4 3/4
– 15 1/2 x 3 7/8
– 16 x 6
– 16 1/2 x 14 1/2
– 1″ x 14″ – 2

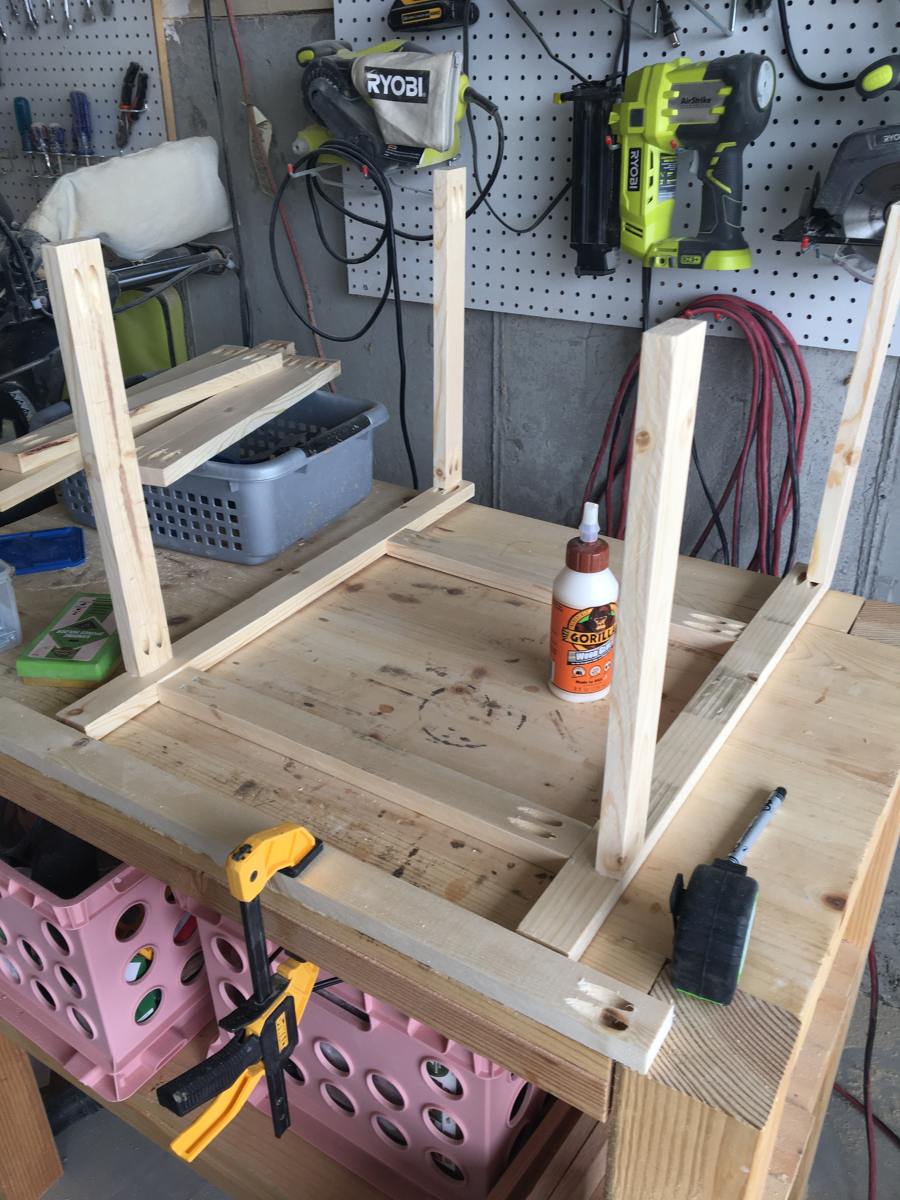
Step 1
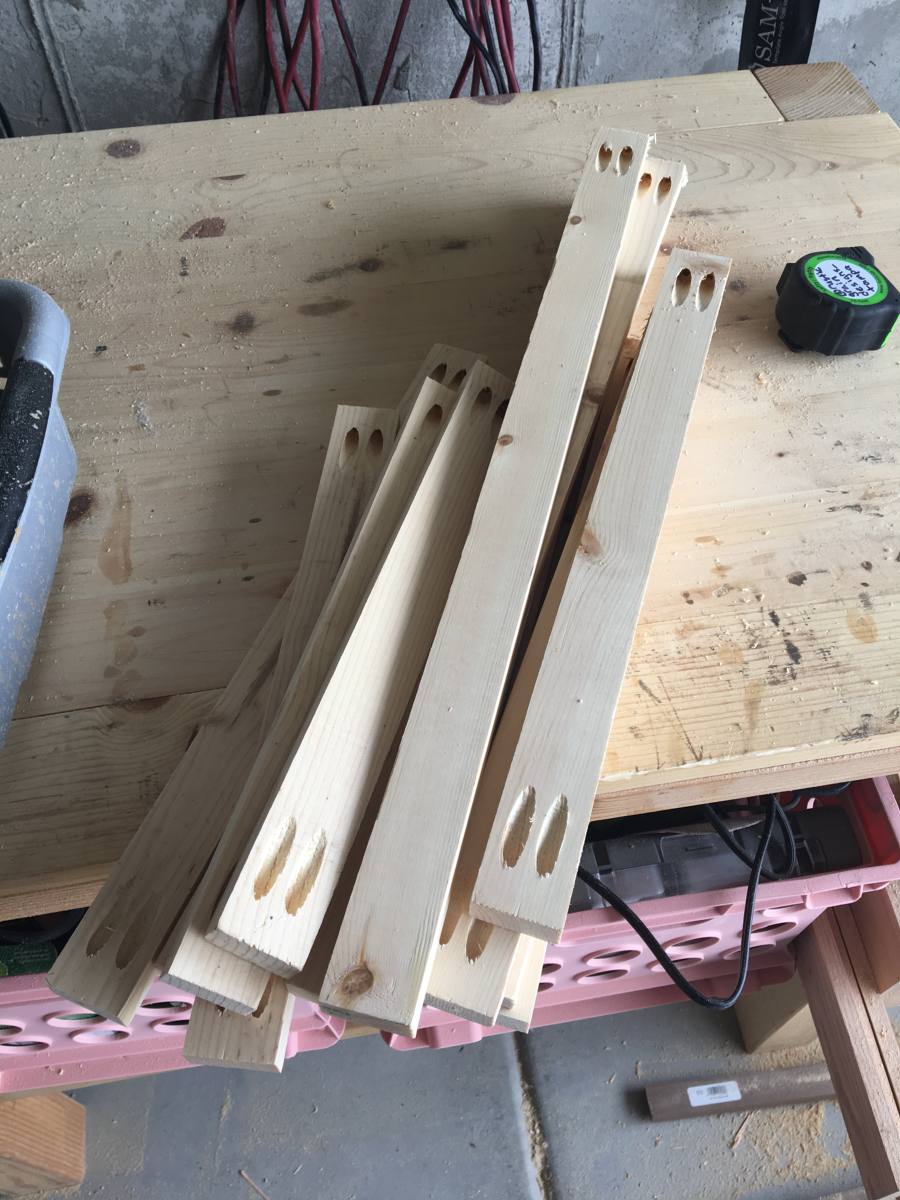
Cut all of your 1×2’s (except for your X’s) and Kreg the ends as indicated by the arrows in the cut chart.
You will need (2) 24″ 1/2’s and (2) 16″ 1×2’s to assemble the front frame.
24″ boards will be on the left and right. The bottom cross brace will sit up 3″ from the bottom.
The top cross brace will sit up 12″ from the bottom cross brace.
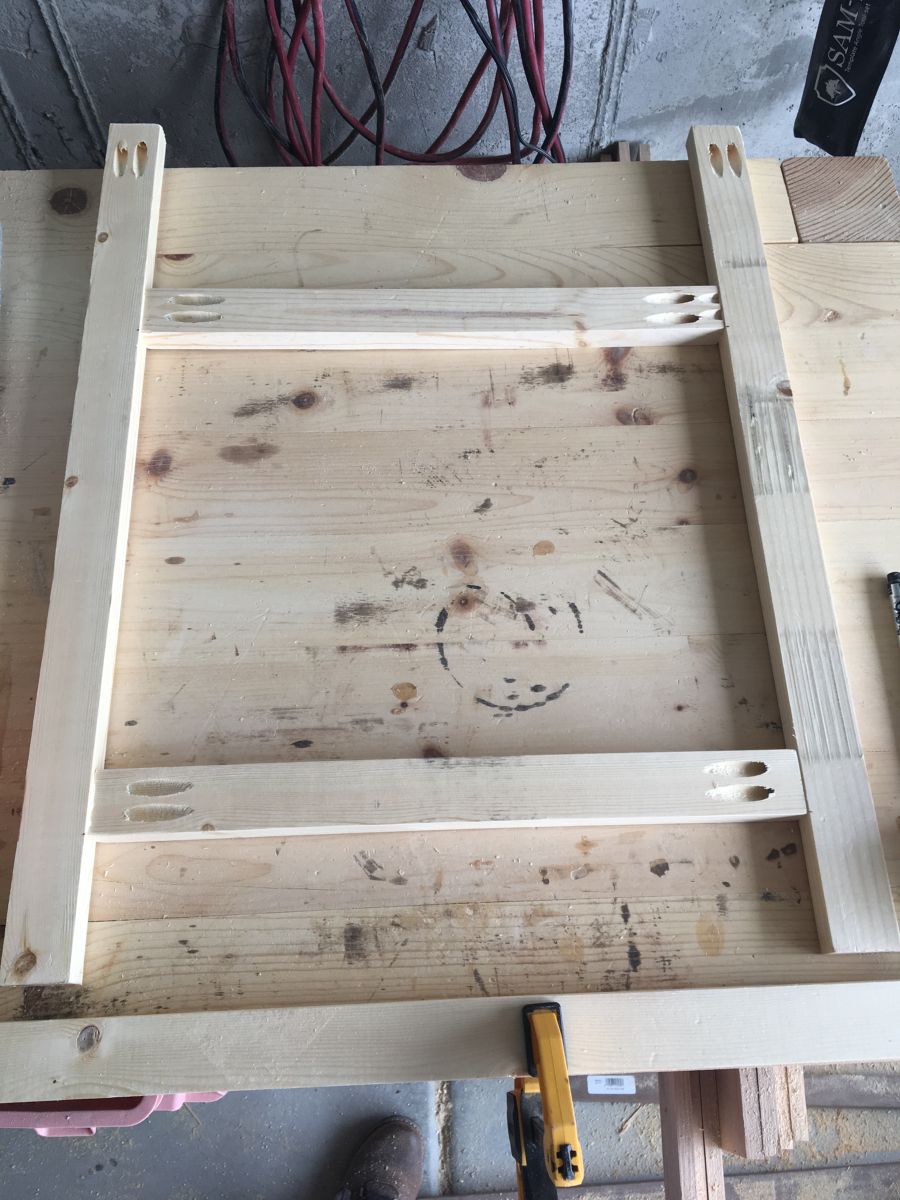
I clamped a straight board to my bench to line my sides up on and make sure they will sit flush.
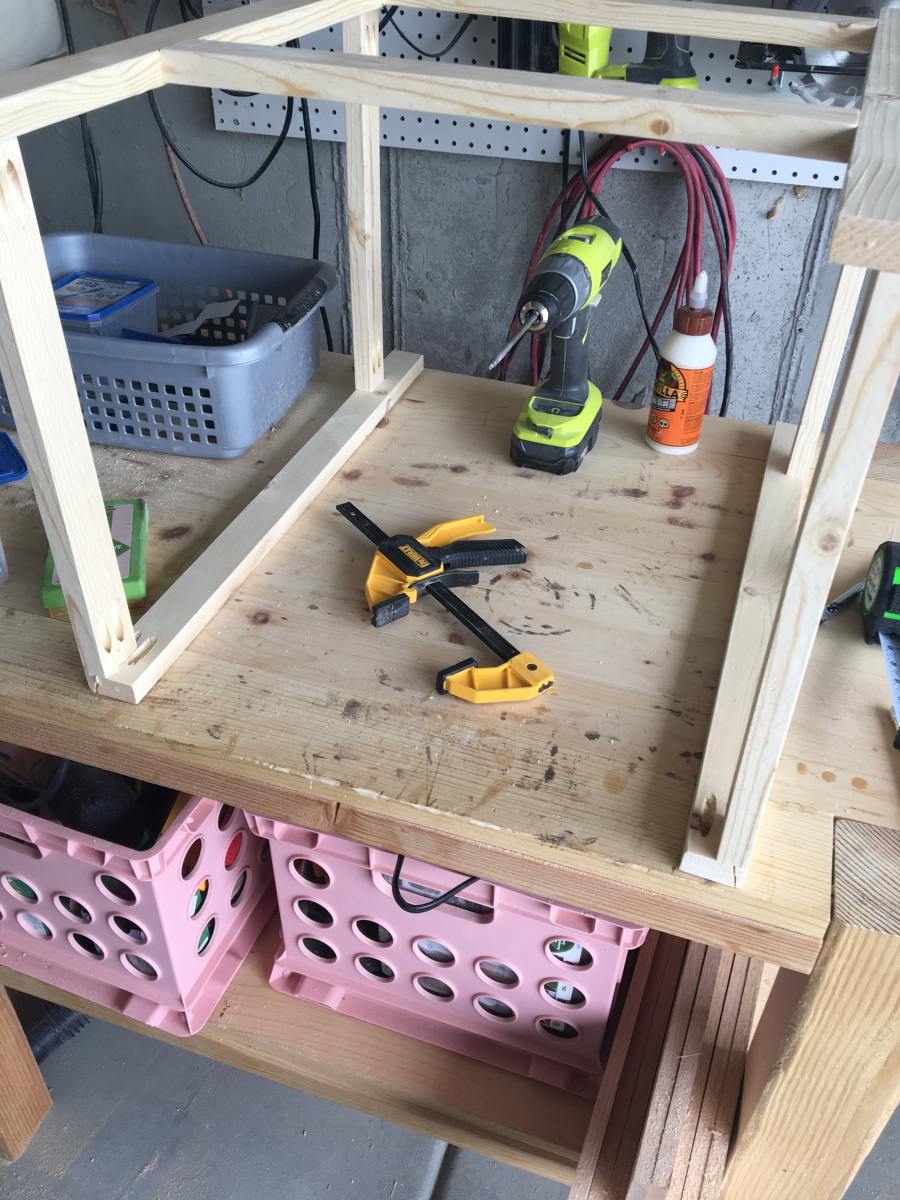
Step 2
Now you need your 1x2x14 1/2″ pieces.
Two will line up with the bottom brace
and two will be flush with the top.
Step 3
Line up your last two 24″ boards and flip the carcass over on top of them.
Make sure the bottom side braces are 3″ up.
Step 4
Take your side panels and glue and clamp them to the 14 1/2″ side braces.
Make sure your pocket holes are pointing up!
Then use your 18″ boards to frame out the sides of the plywood.
Glue and clamp them in place.
Use 1″ brad nails to nail into the side frame from the back
(if you do it from the back you don’t have to go back and fill nail holes! woo!)
Sorry I don’t have a super clear photo of this process so I hope it makes sense!
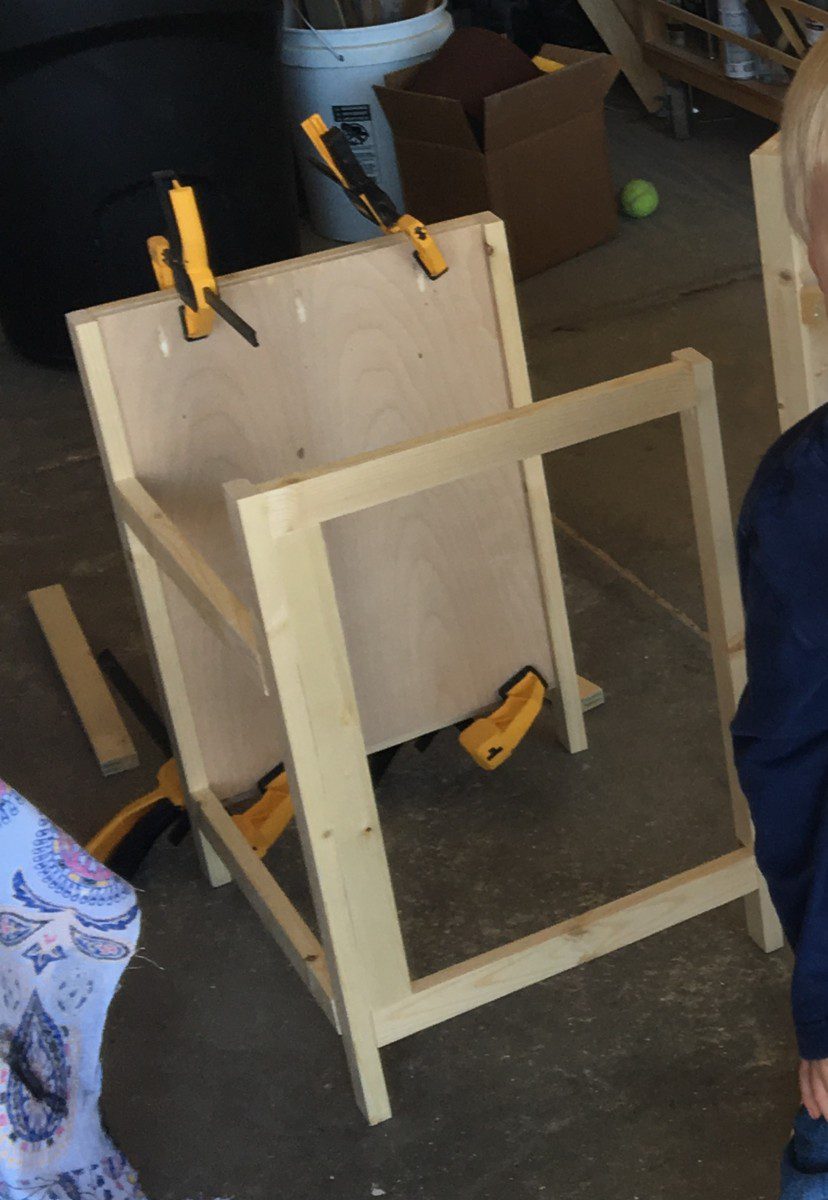
Should look like this when finished…
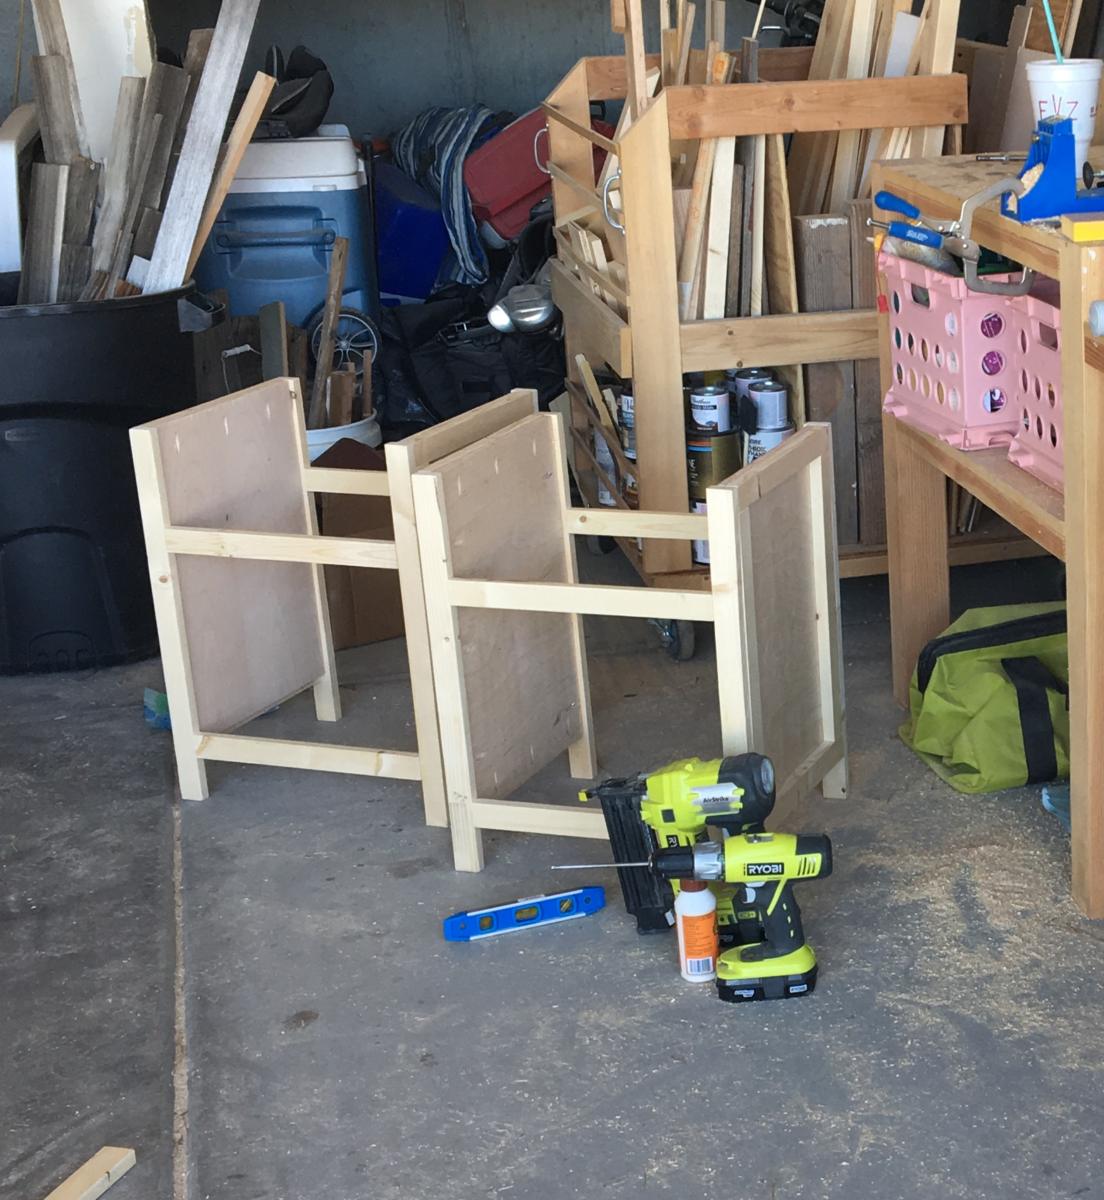
By the way, so there is no confusion, I built two nightstands at the same time.
BUT these plans are just for ONE nightstand!
If you want to build two, double the recipe! 🙂
Step 5
Let’s talk herringbone.
I loooooooove herringbone.
And now I herringbone ALL the things!
#crazyherringbonelady
I’m going to go over this fairly quickly.
For a more in depth tutorial on herringbone check out my Herringbone Video.
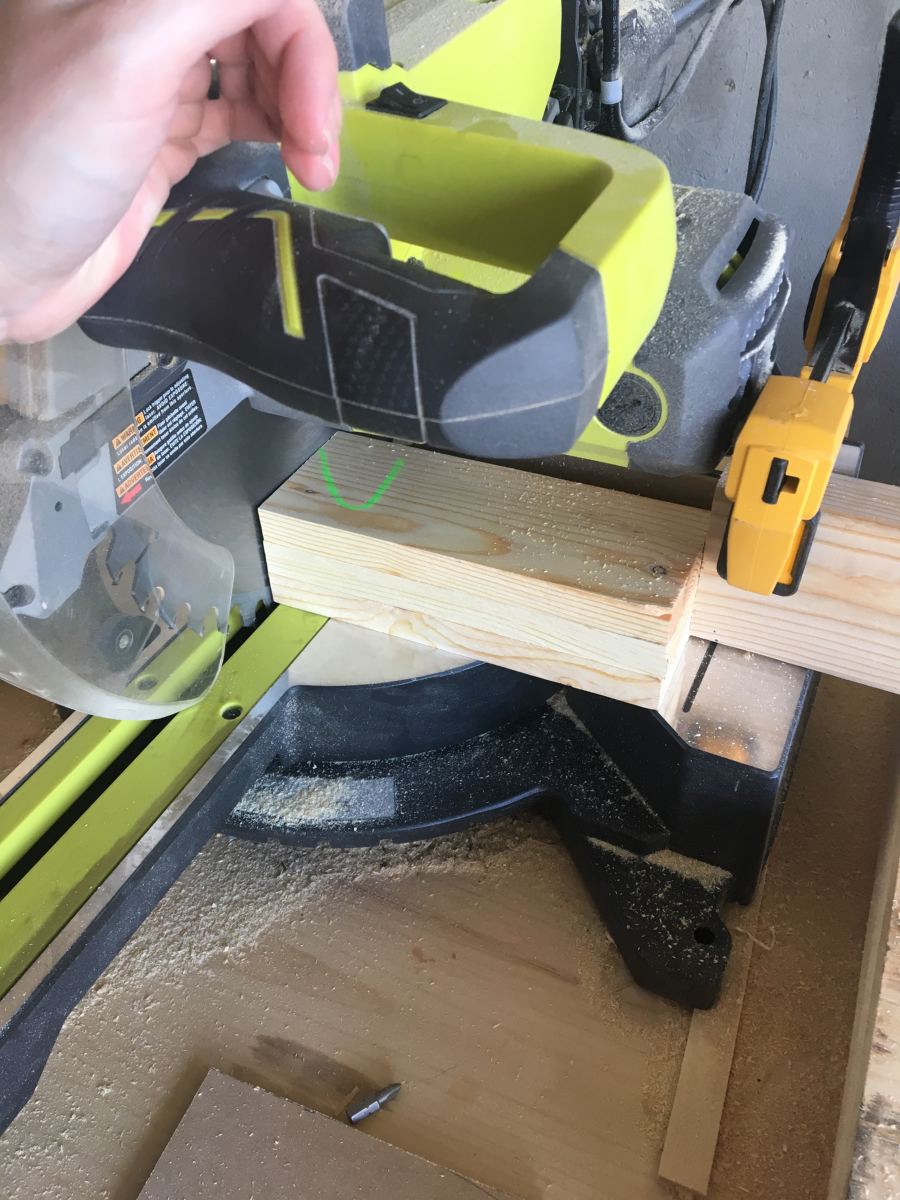
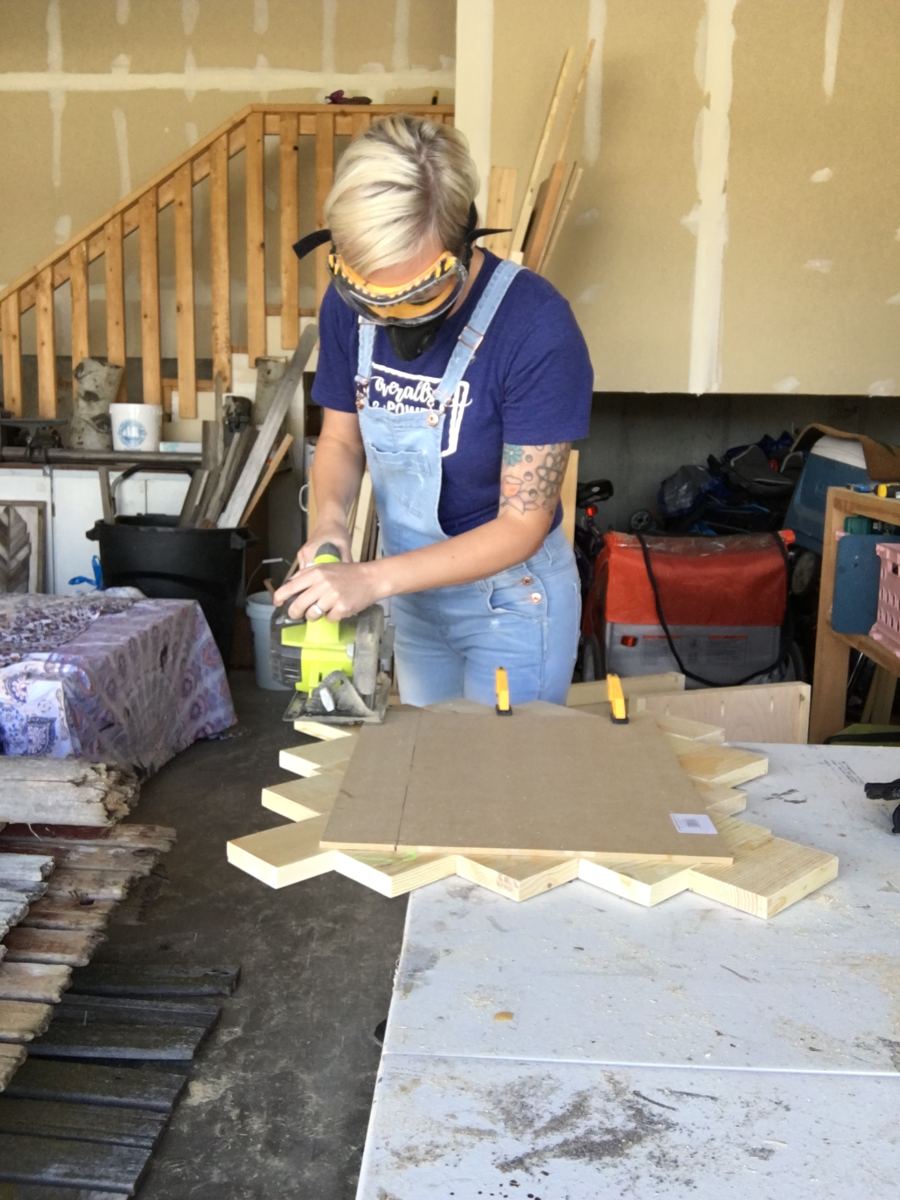
First things first. Create a stop block at the length you want your herringbone pieces cut to.
This ensures they are all the exact same length.
Line up your pieces and make the cut.
WAIT for the blade to come to a complete stop before removing the pieces and THEN release the blade.
That’s important.
Otherwise you get kickback and pieces flying at you.
Nobody needs that in their life.
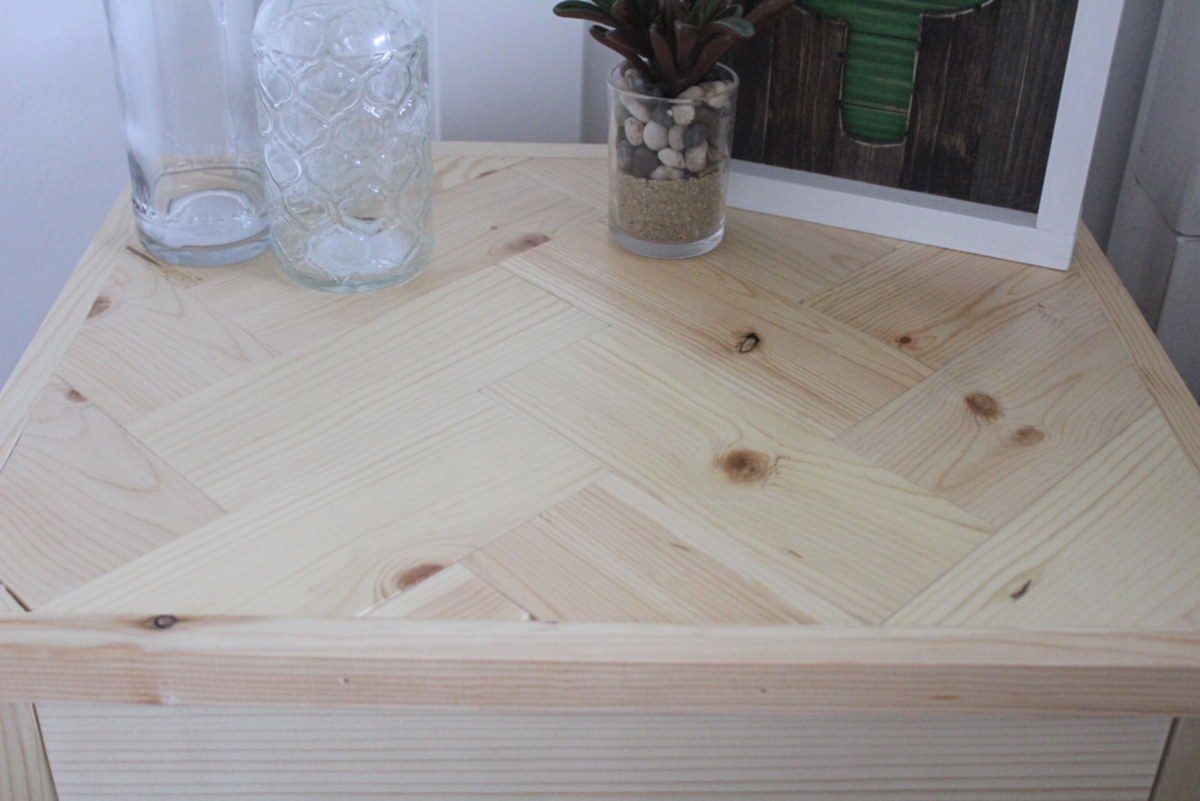
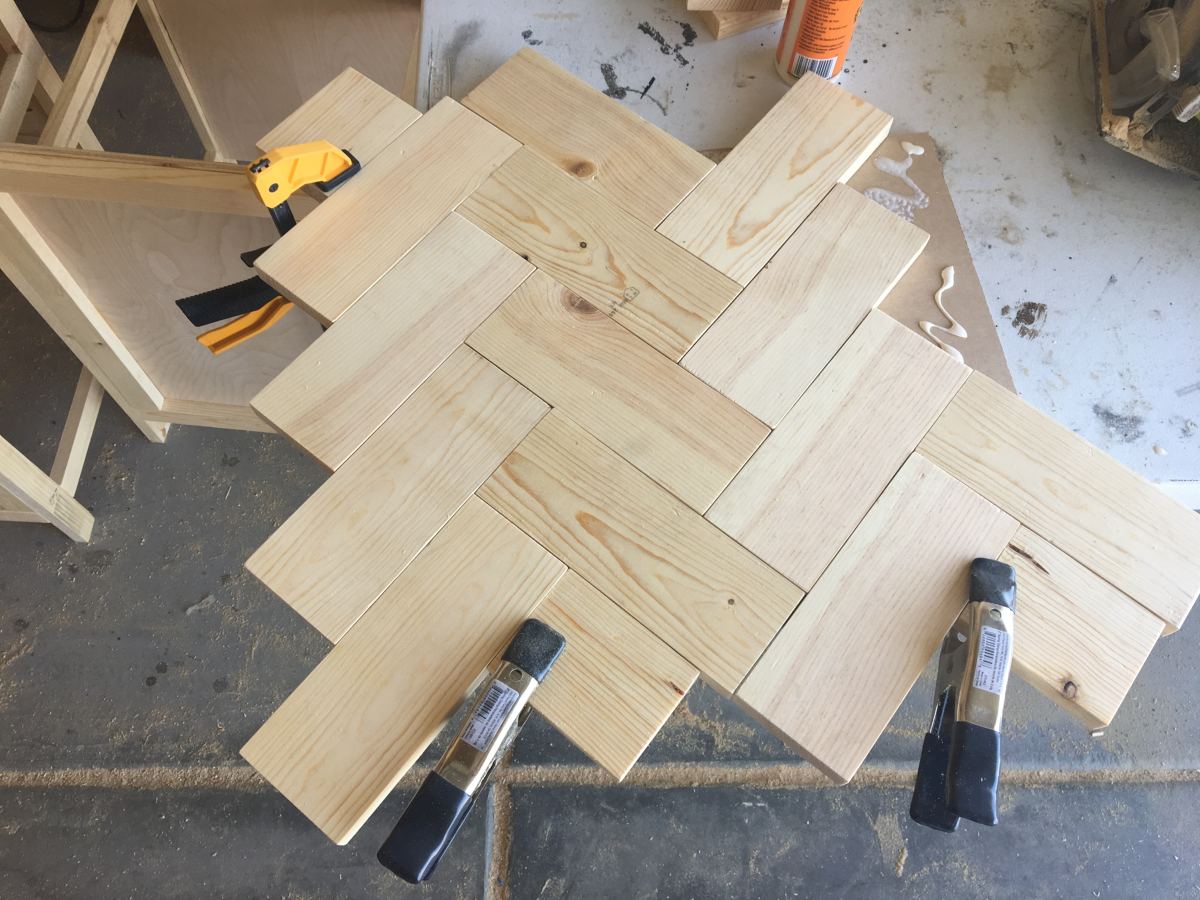
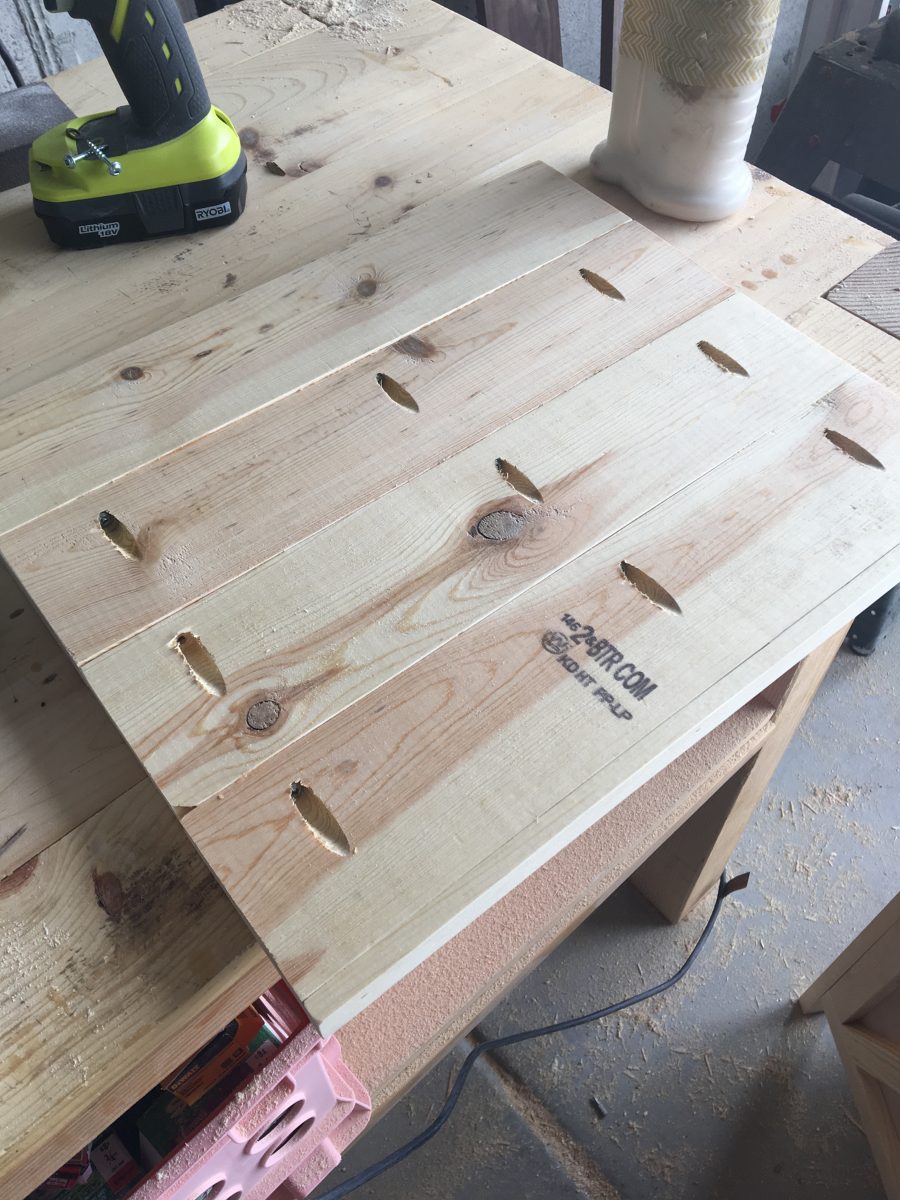
Grab your MDF panel. It will be the base of the herringbone top.
Line up your two starter pieces and make sure the left corner and top corner are flush with the sides of the MDF.
The script under the boards totally says “Britt Built”.
Anyone else “mark their territory” on pieces that won’t be seen?? 😉
Lay out the next couple of rows to make sure they follow suit
with the corners lining up flush on the sides of the panel.
When you know they’re totally straight, glue down your first two pieces and wait a good 20 minutes for them to be solid.
This way they won’t move and the rest of your pattern can fall into place!
I like to use these little dollar clamps you can find at Home Depot or Harbor Freight to hold the smaller edge pieces into place.
Once all of your pieces are glued into place and dry,
flip the board over and trim all the excess.
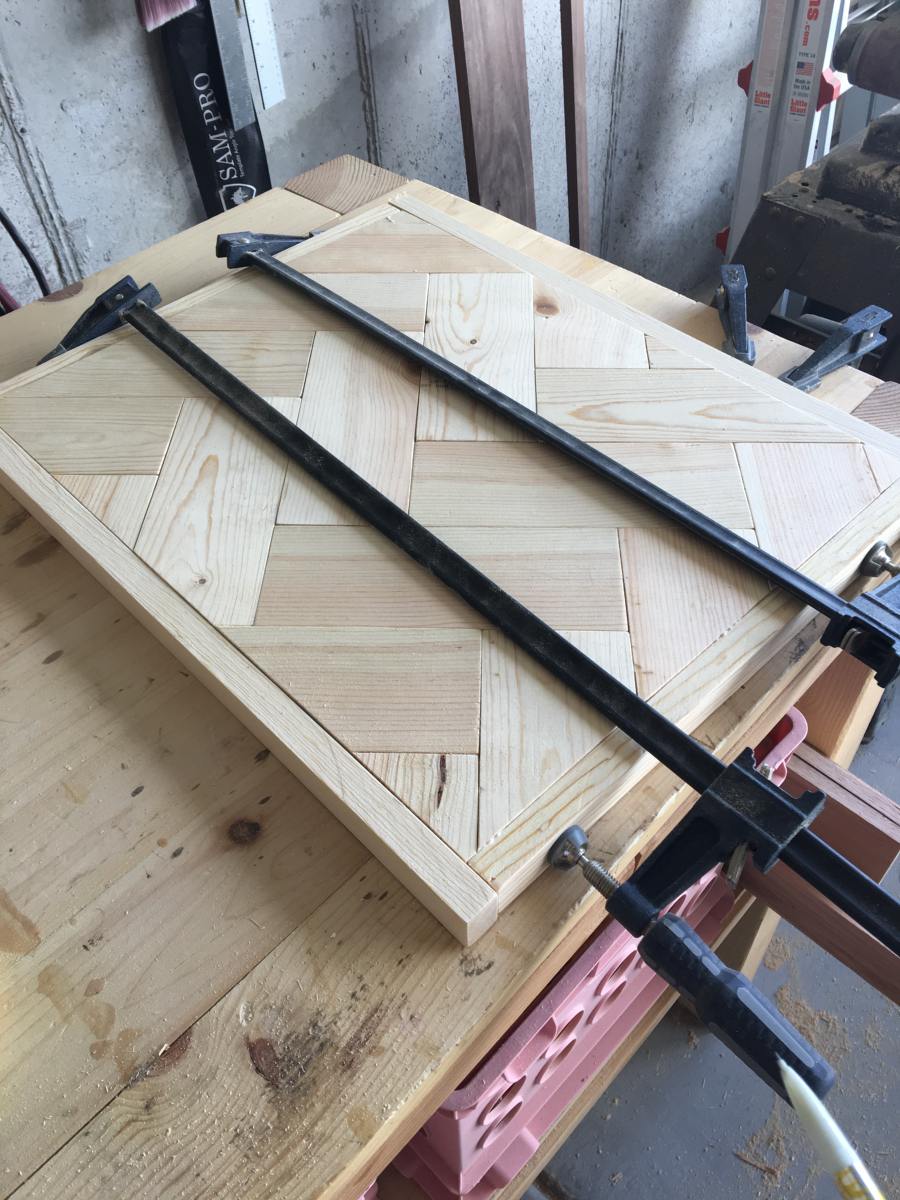
Step 6
Frame the top.
This is where your 1″ cutoffs from your 1×8 come in.
I personally think the best way to frame ANYTHING is to just line up your frame with the board,
mark the length and cut.
I think it’s the easiest and most accurate way to get a perfect frame.
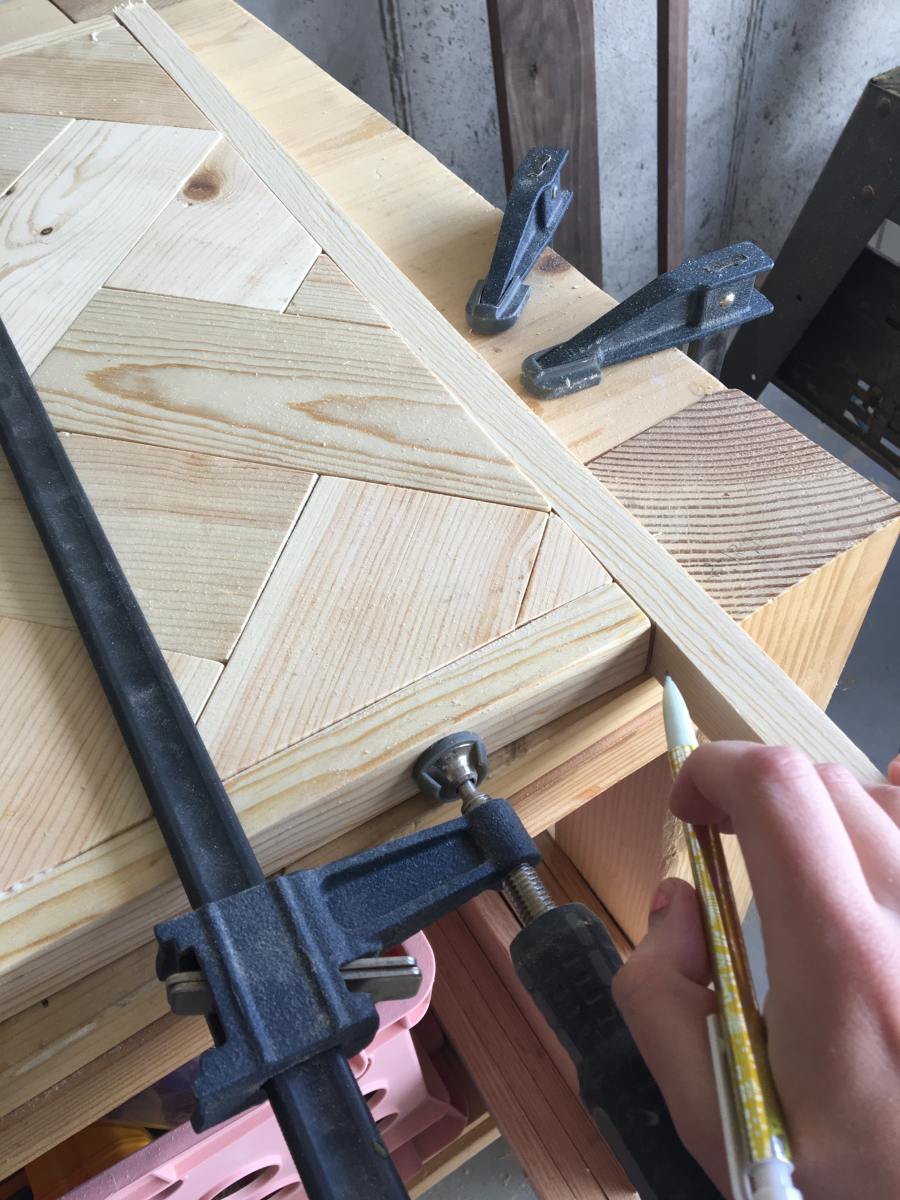
Glue and clamp your frame pieces into place and then use 1 1/4″ brad nails to nail them into place.
Step 7
Lay your top upside down on a flat surface and line up the nightstand on top of it.
The back of the nightstand should be flush with the back edge of the top.
The other three sides should have a 1/2″ hangover.
Use 1 1/4″ pocket hole screws to attach the top.

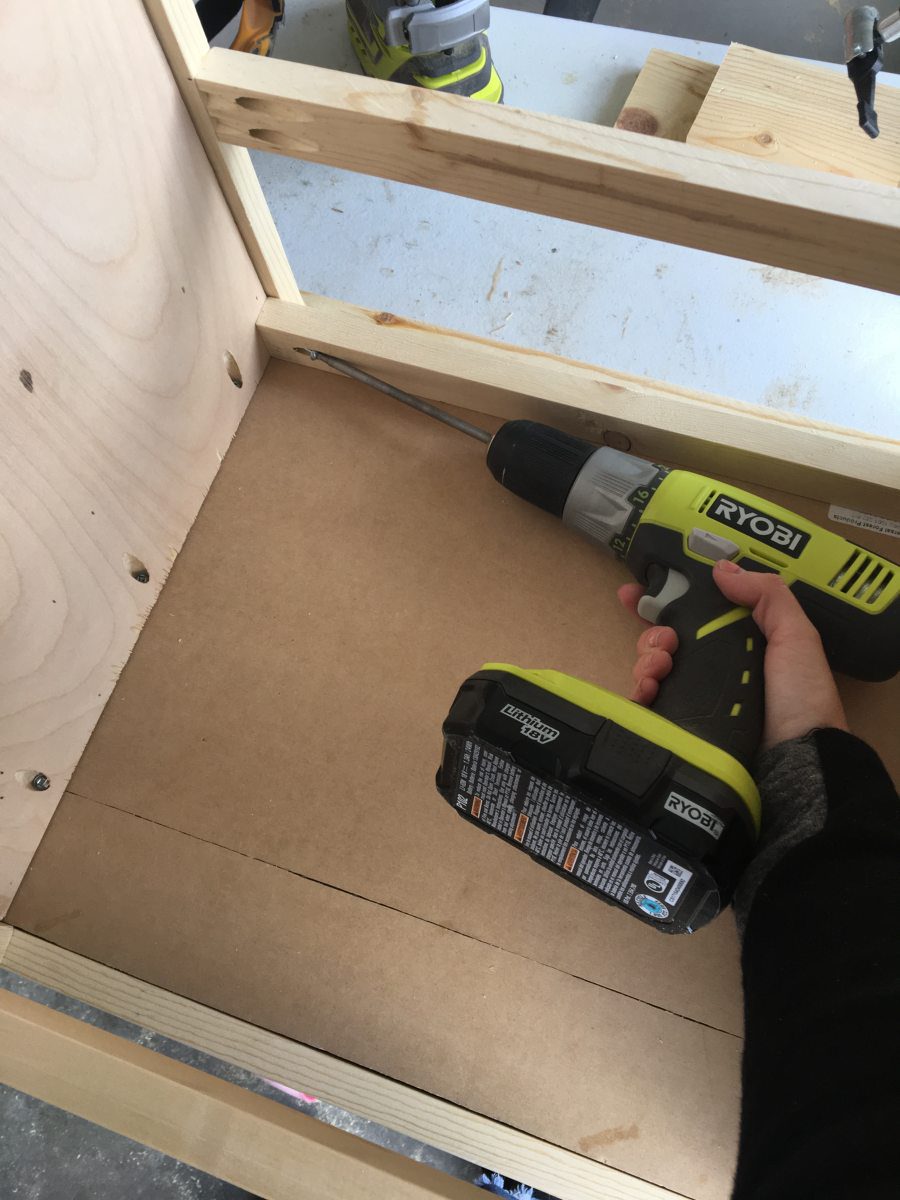
You can find this Ryobi drill, and most other tools shown in this tutorial on the Tools I Use page.
Step 7
Line up your 1x2x16 1/2″ piece flush with the top and butted up against the front frame.
This is the piece your drawer front will hit when it closes
so make sure there is a gap in the front big enough for the drawer face to fit flush.
Step 8
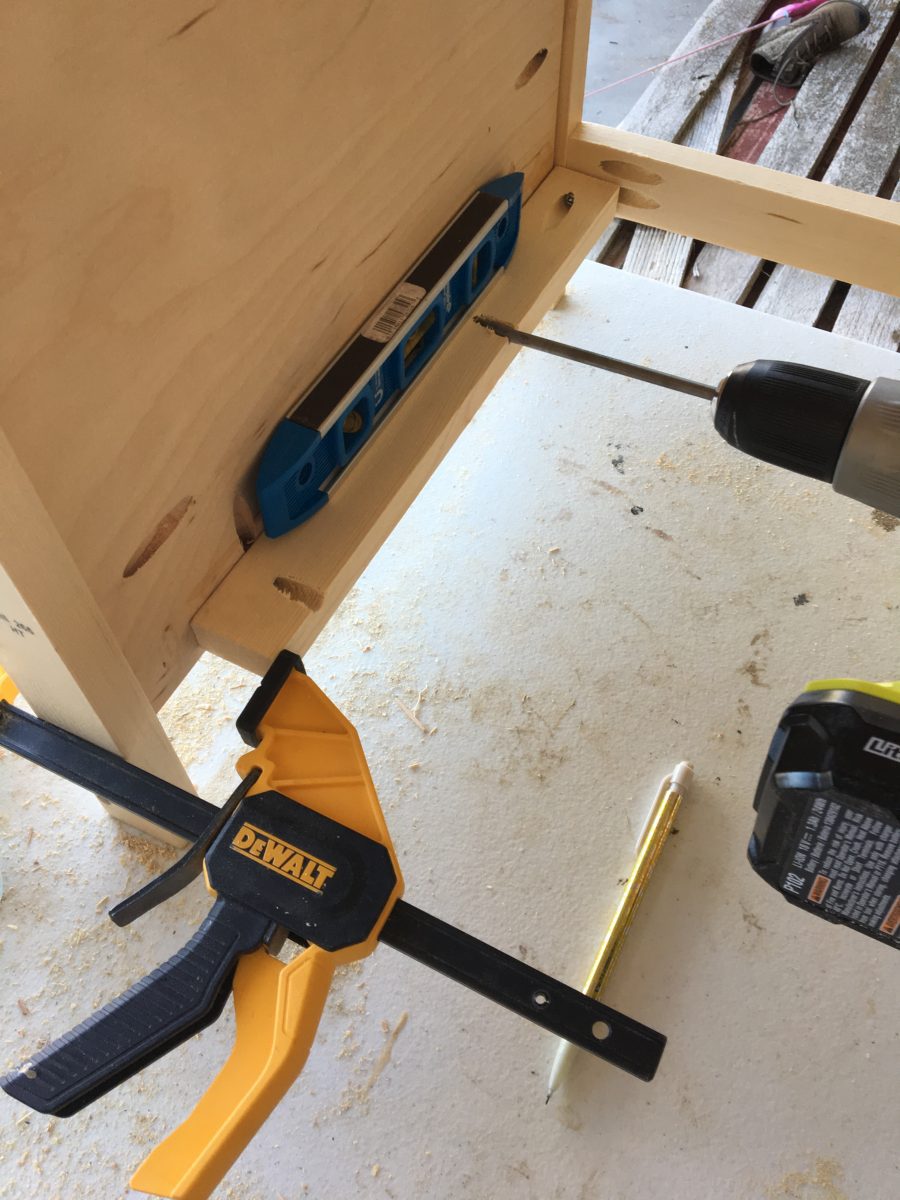
The 16 1/2″ x 14 1/2″ ply is your drawer support.
Kreg it and line it up at the base of where your drawer will go, but flush with the front support brace.
You will need a level to make sure this sits in there evenly.
You can go ahead and ignore all the excess kreg holes on that side panel. The first nightstand was a learning experience
and I figured out that gluing the panels on would prevent seeing all these extra holes! 🙂
This is why I build first and get all the mistakes out, and then
make these super professional plans for you guys 😉
Step 9
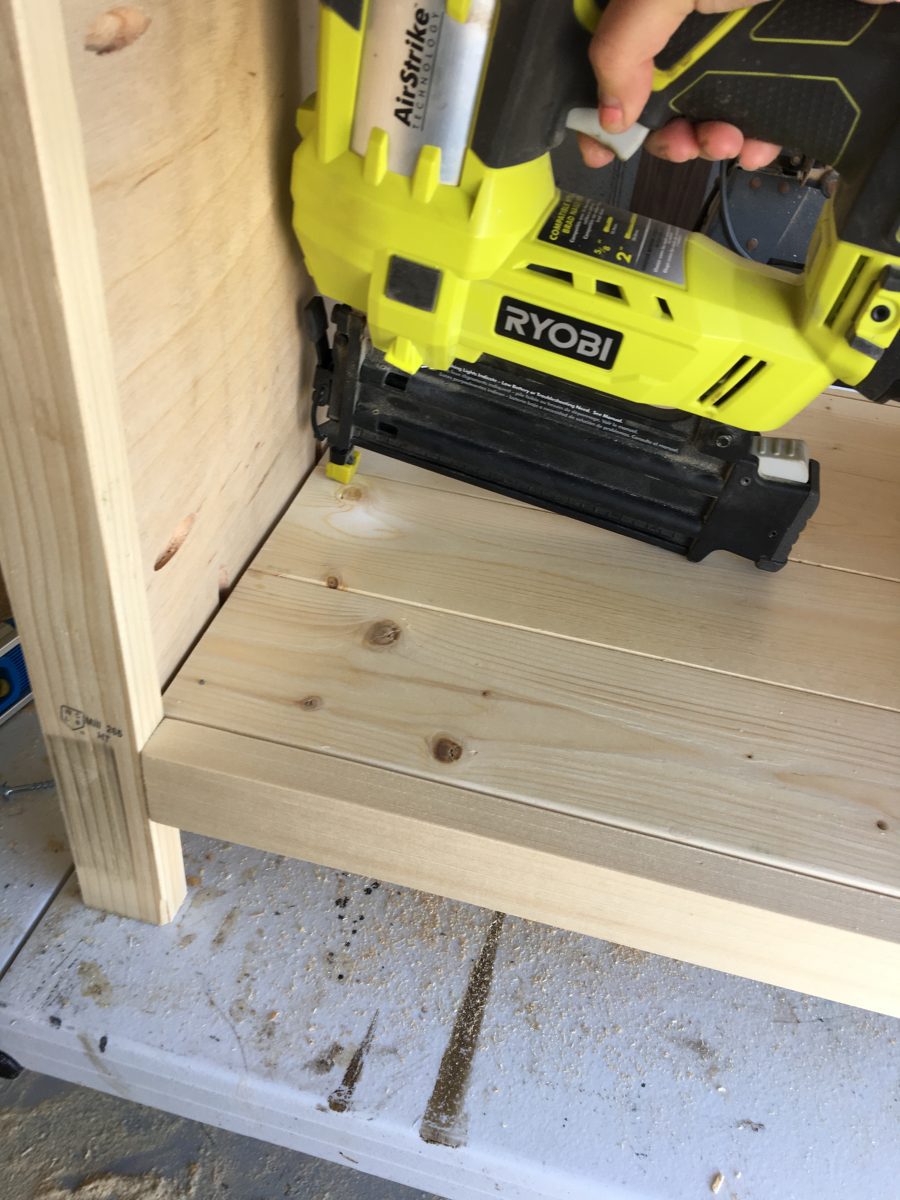
Kreg your 1x3x16 1/2″ board and assemble to form the shelf.
With JUST the 1×3’s attached, there’s a little 1″ gap at the back of the shelf.
Which I don’t think is a huge deal, but if it bugs you, you can nail a little
1″ piece of scrap to the edge of your shelf like I did.
You can see it on the side closest to the bottom of the photo.
Step 10
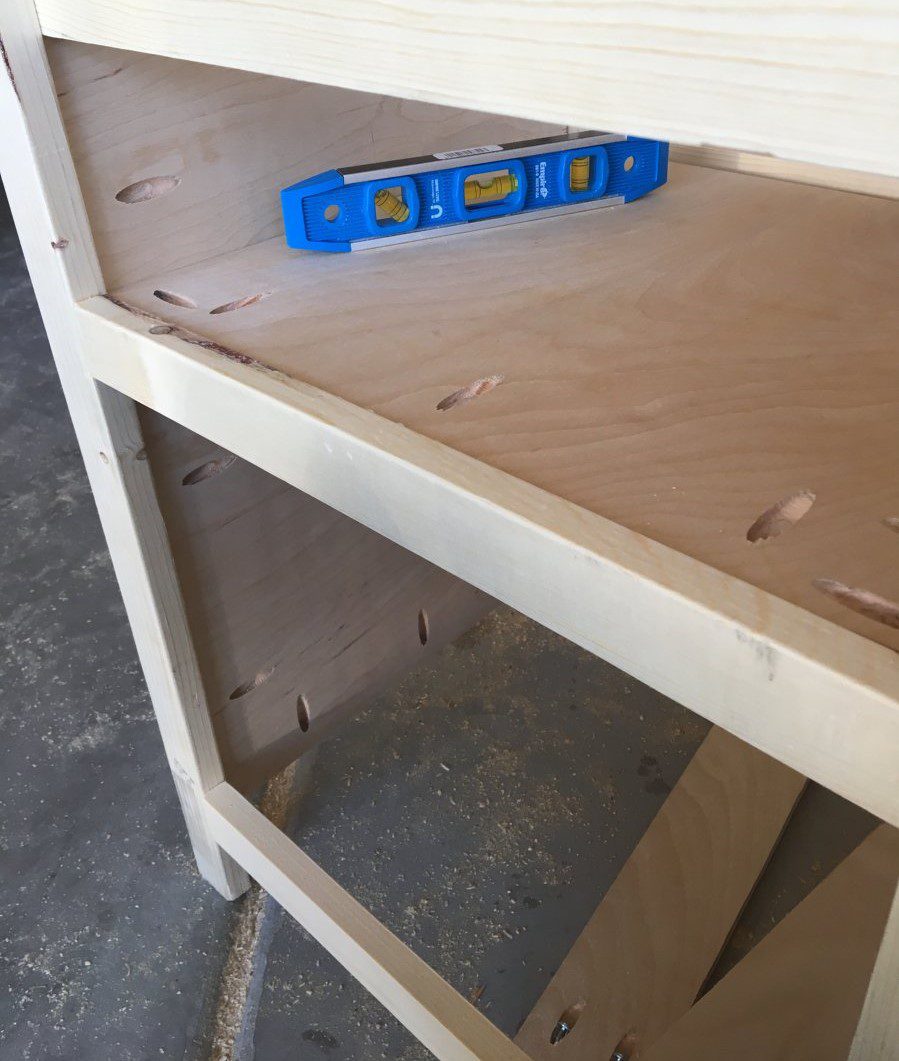
Attach your 1x2x13″ boards to the left and right sides of where the shelf will sit.
These are your shelf supports.
They will lay flush with the bottom of the side panel.
Use a level to be sure these are “level”. haha 🙂
Step 11
Lay the shelf on the supports and use 1 1/4″ brad nails to nail it in place.
Step 12
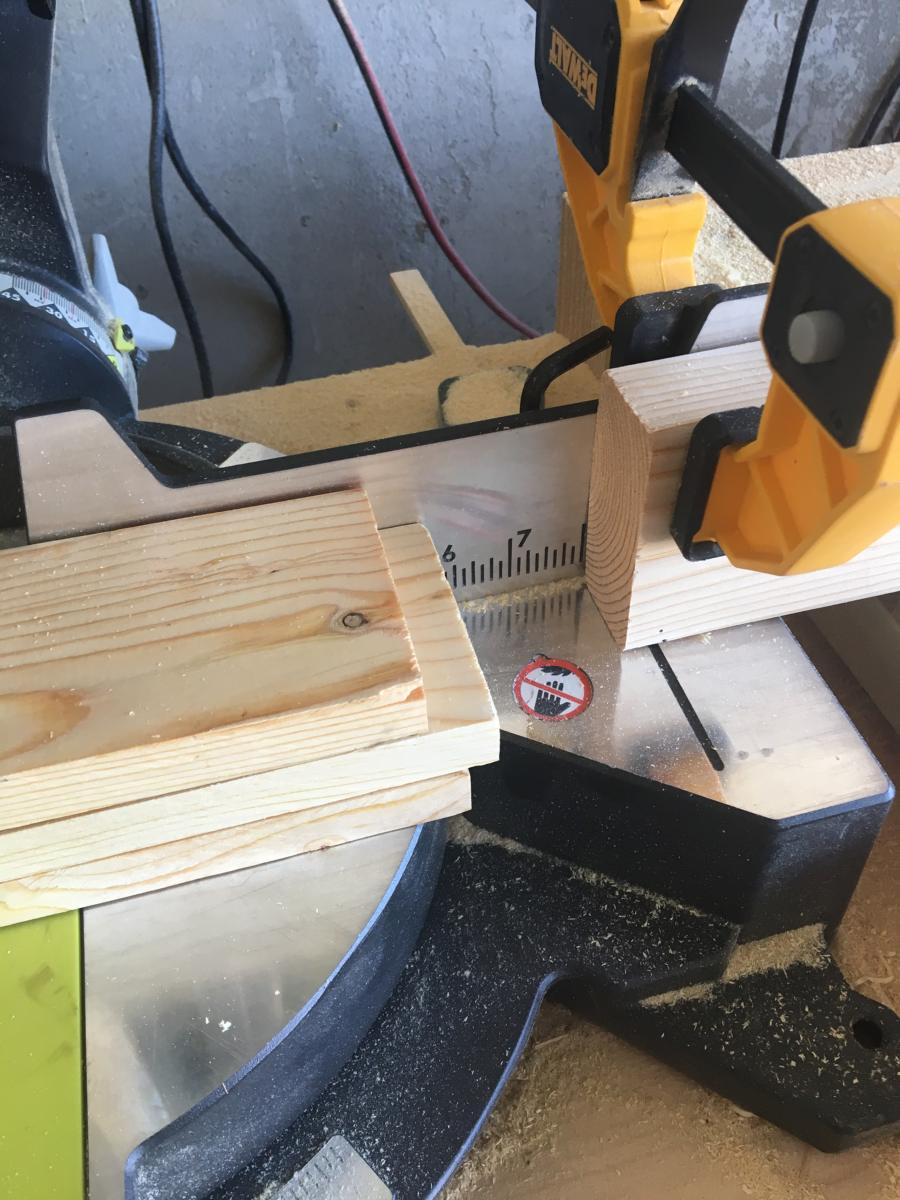
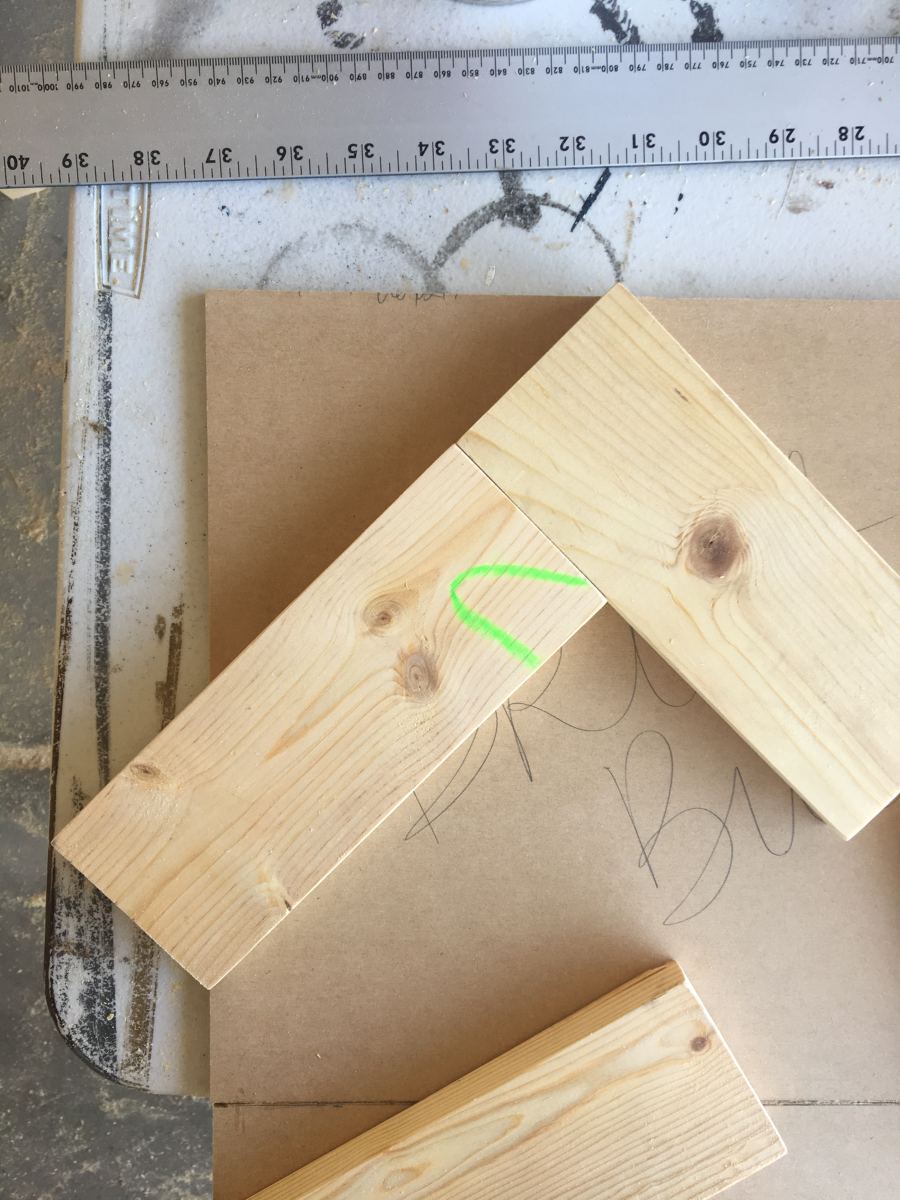
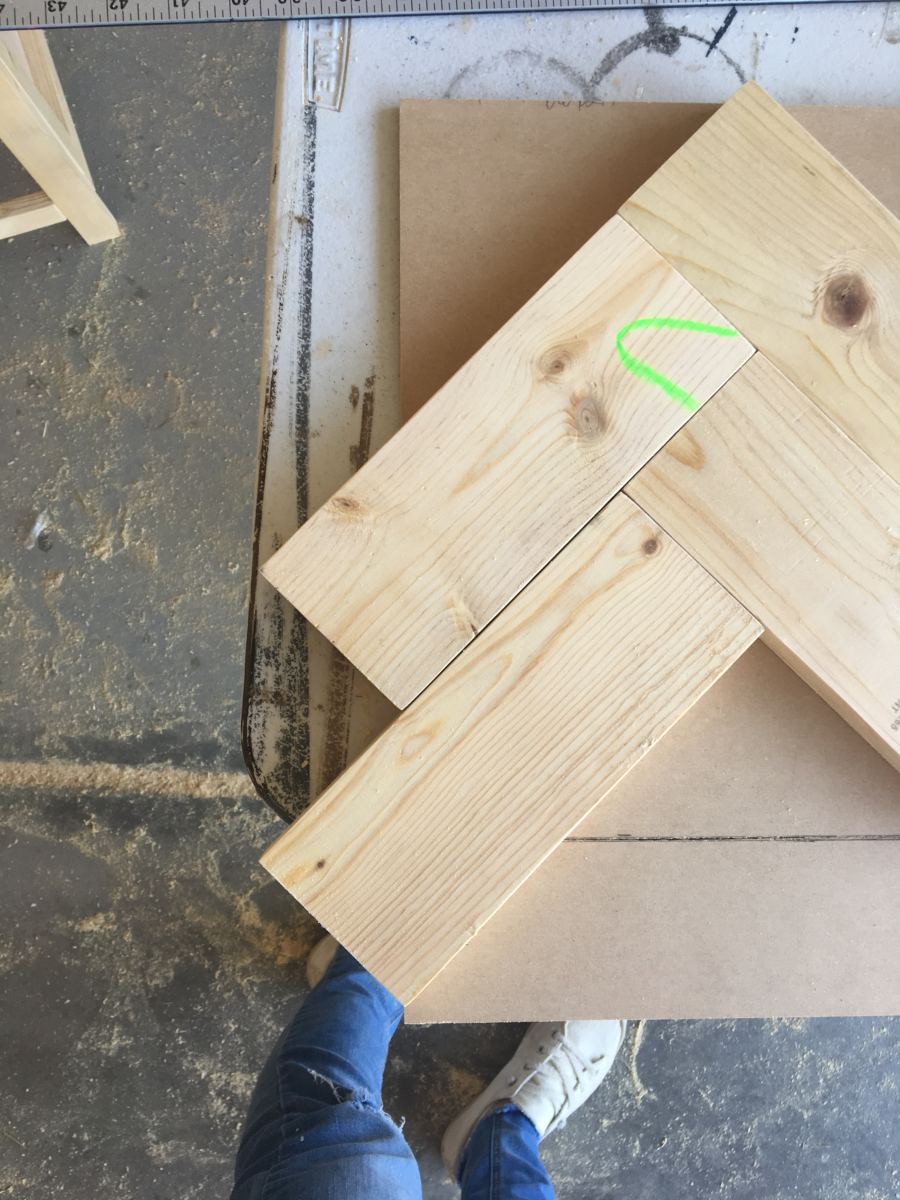
Add your X’s! Start by attaching one of your 20 1/2″ pieces.
I nailed into the from the inside so there wouldn’t be nail holes in my X’s.
This was tricky. I had to kind of guess where it was. If you can afford to have the nail holes,
I would nail it in from the front.
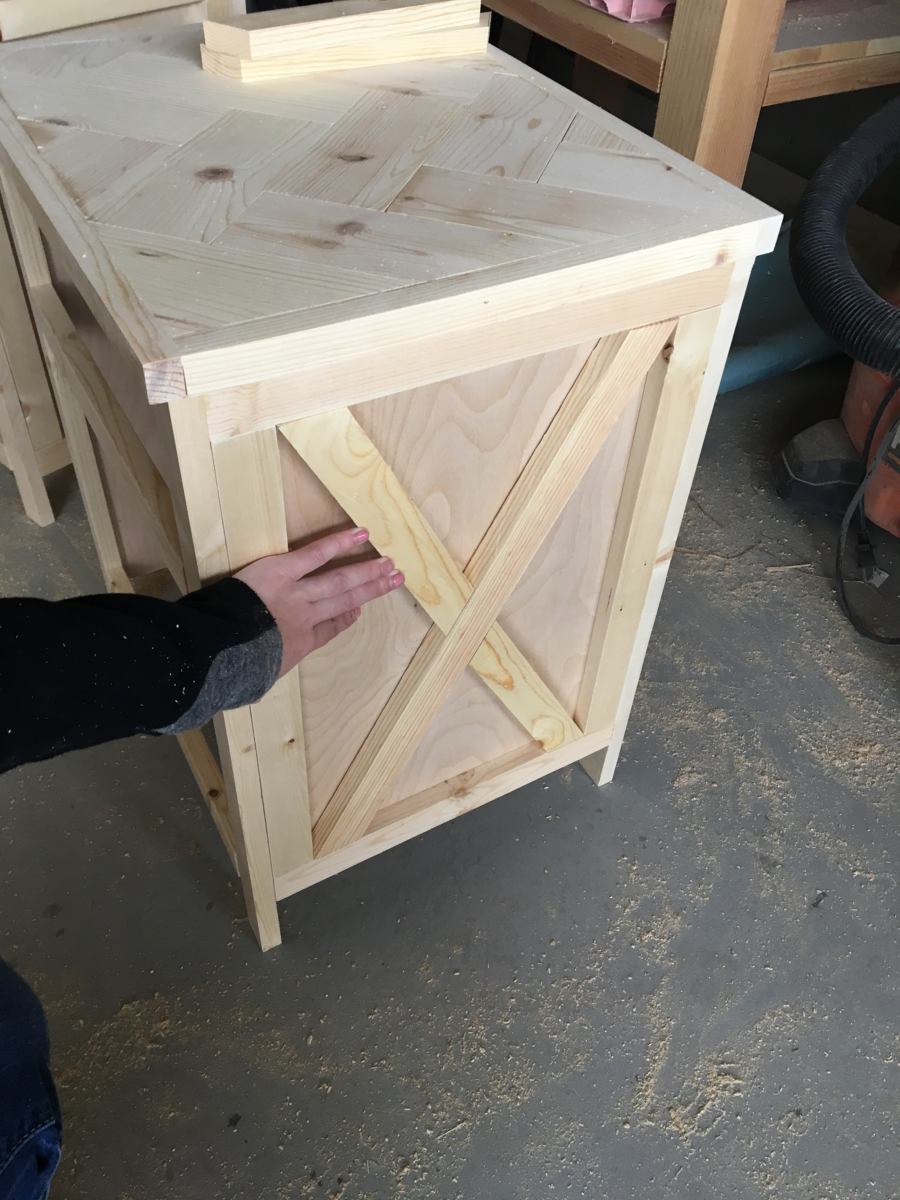
For the second part of my X, I held the strip up where it would go and marked the cuts I would need to make in the middle.
I find this to be easier and more accurate than trying to figure out angles.
And geometry.
Who needs geometry?
Step 13
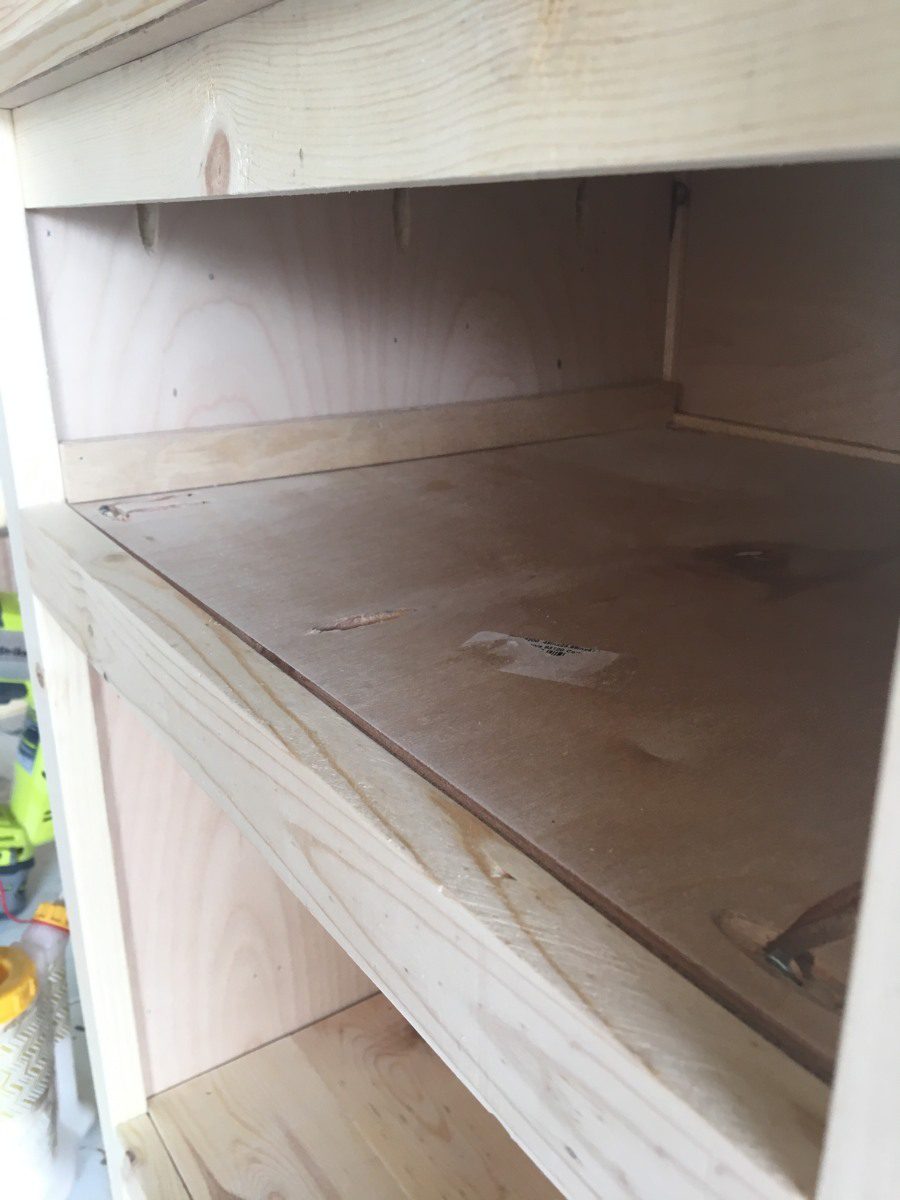
So this was a step that wasn’t originally in my plans, but I added this after I built my drawer.
I realized there was a little wiggle room in there and the drawer didn’t slide in and out straight.
I cut down these little scrap pieces of ply and nailed them into the drawer space to help align the drawer
and now it slides in and out beautifully!
Line up your 1×14″ plywood on the left and right sides of the drawer space and flush with the drawer support.
Glue and nail into place.

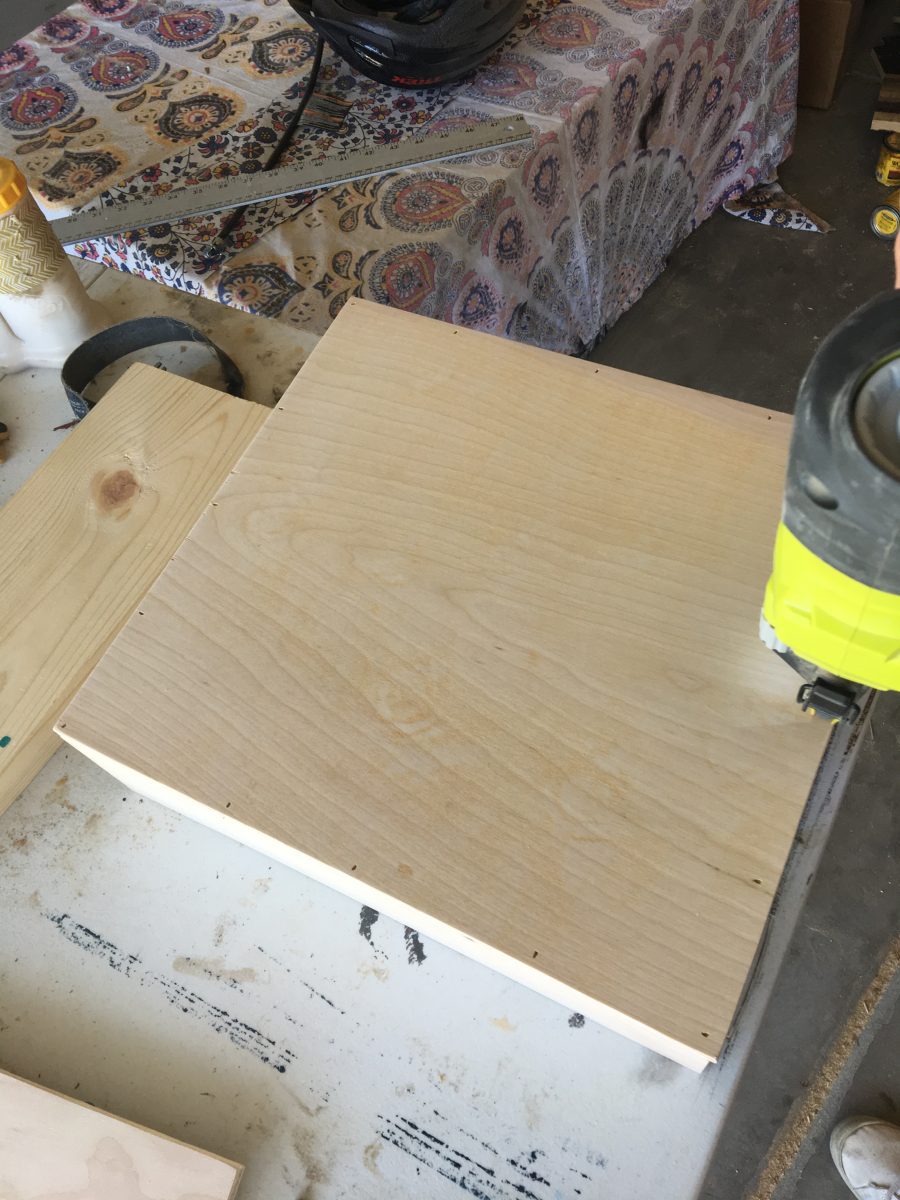
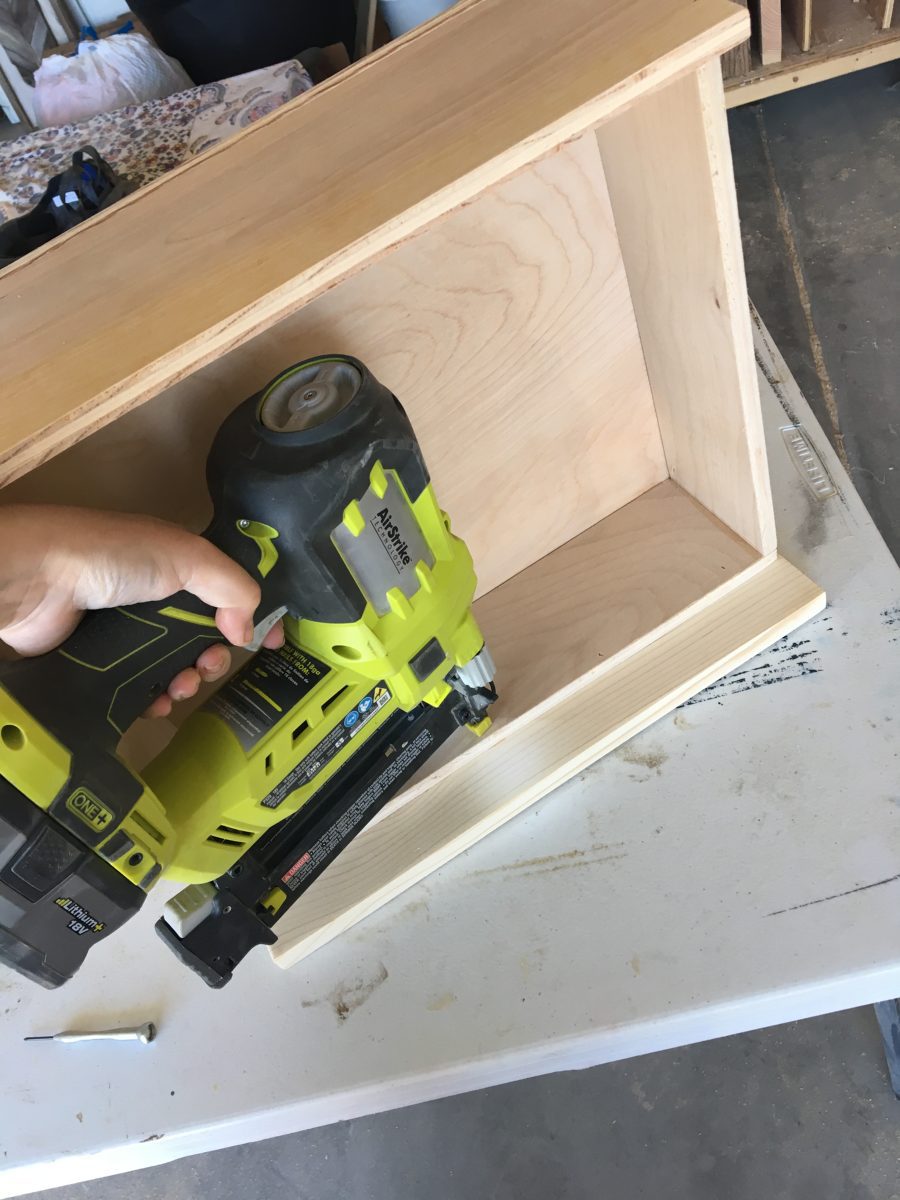
Step 14
Using your remaining ply pieces, assemble the drawer box
with glue and 1″ brad nails.
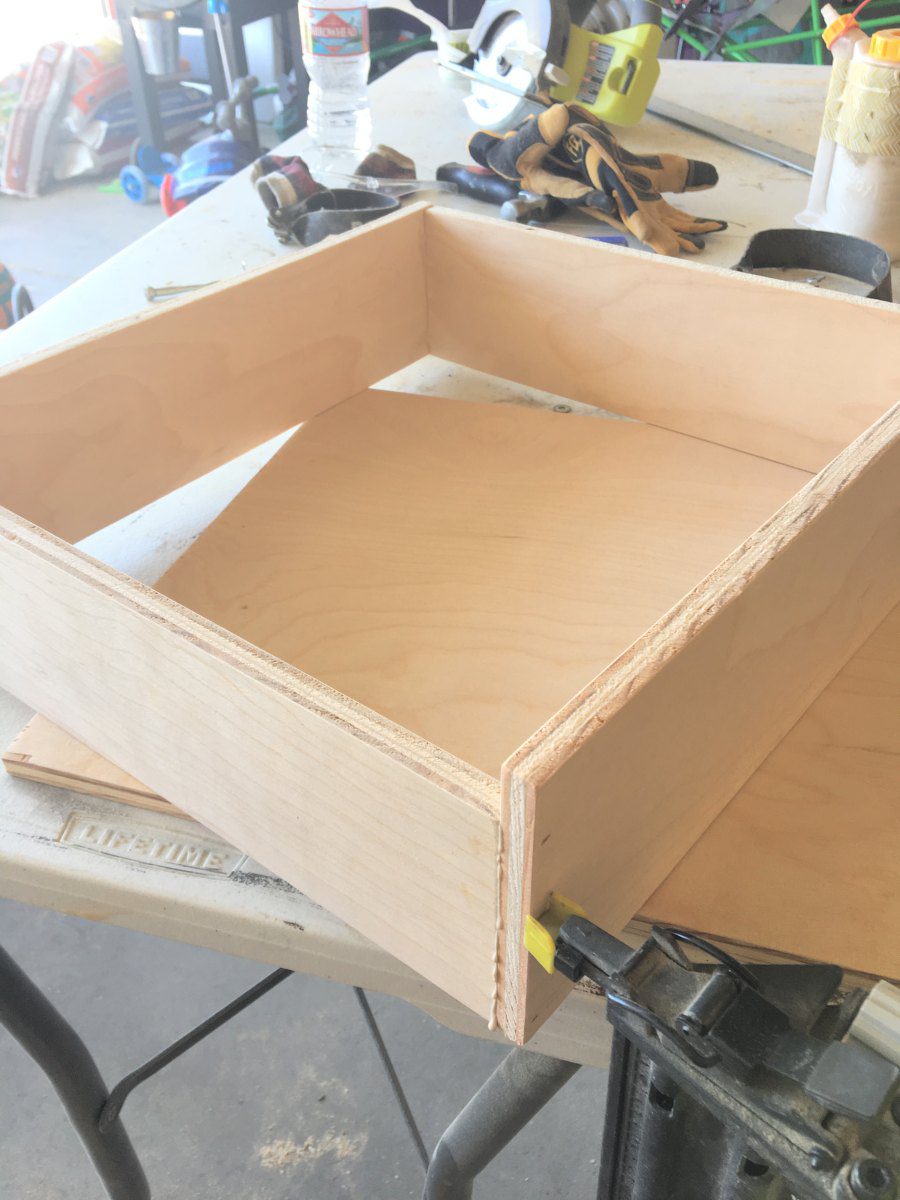
Step 15
Attach the drawer bottom on the flush side
with glue and 1″ brad nails.
At this point go ahead and test it out with a dry fit.
The taller side is the back of the drawer so you’ll have to put it in at an angle.
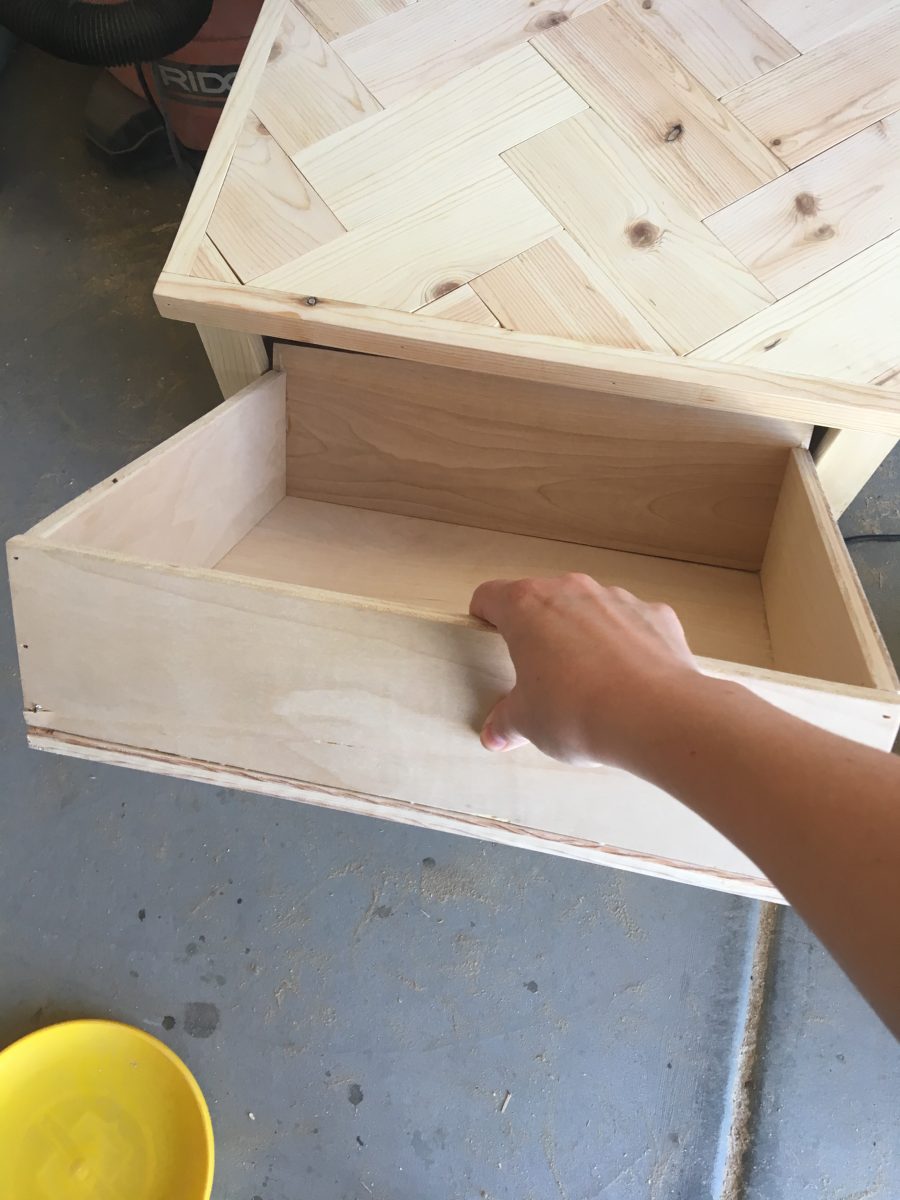
Don’t mind the frisbee.
I can’t move a foot in my garage without tripping over a kid toy.
#momlife

Step 16
Glue and clamp your drawer front to the drawer box.
The bottom edge of the drawer front should sit flush with the bottom of the drawer.
I used brad nails to attach it from the inside of the drawer so I wouldn’t have nail holes on the front.
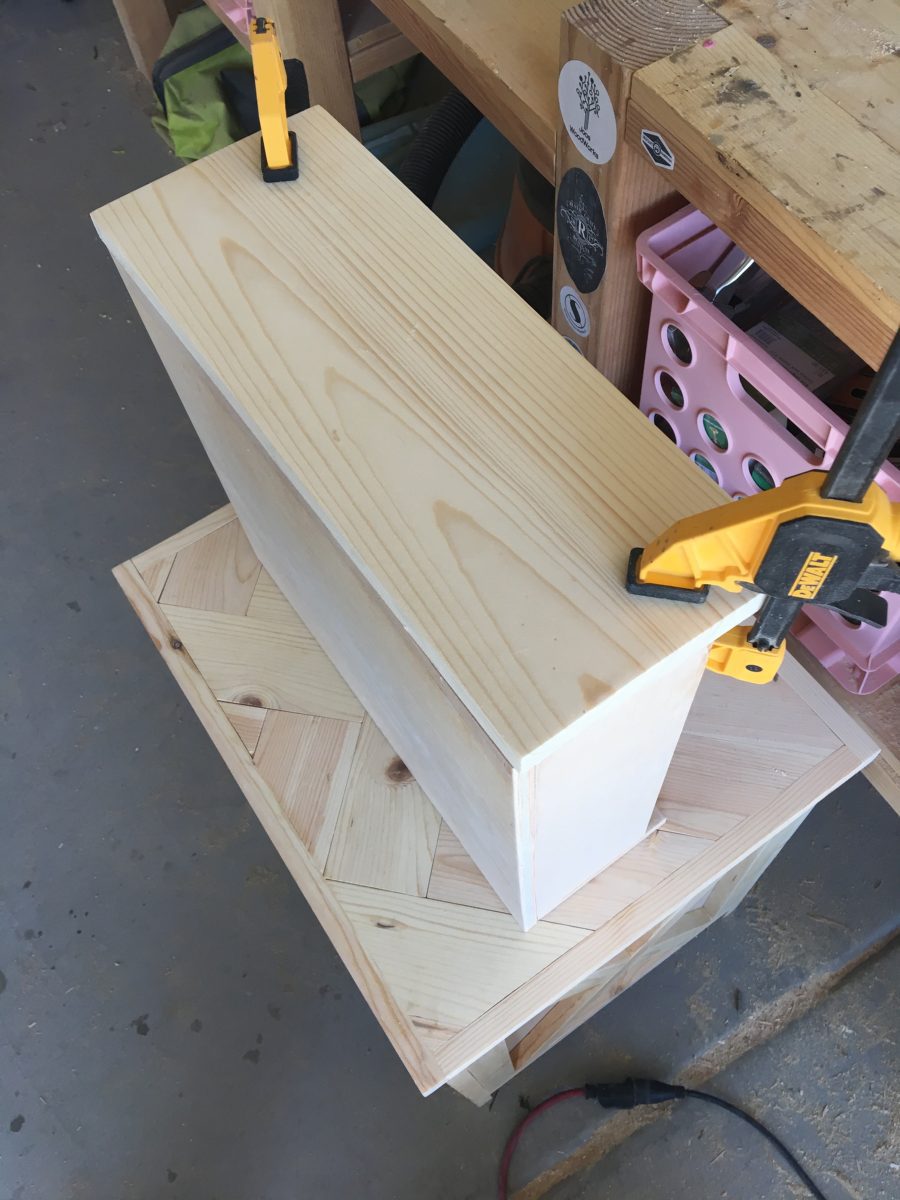
Don’t you love when your project gets to the point where it can become and additional workspace? 😉
That’s it! You’re done! At this point the client wanted a natural look so I only added Varathane triple thick poly as a clear protective coat
and chose the natural knob to keep with the look.

But I would LOVE to see how you decide to finish yours!!
So, as always, don’t forget to POST your pics, PIN this project, and tell your friends!!