Home Decor, Tutorials
Easy DIY Couch Table

Hey friends! I’m not gonna lie,
I’m pretty excited to share this next project with you.
And it started out as just a little scrap wood “project between projects”
and I was definitely not expecting it to get the attention it did
but I’m so honored by all the love this little project got
and how many of you asked for plans!
Since you asked, I will deliver!
It may be a couple of months later… 😉
but summer’s always crazy so now that
this mama is back in the swing of the
school routine I will start cranking
out posts for you guys again!
This easy DIY couch table is exactly that – EASY.
Keep in mind, though, that the dimensions for this
work for MY couch and that you will need to measure
the height of your own couch and adjust the measurements
as needed.
Also, one other quick note before we get started…
You’ll notice in the pictures that you can see my pocket holes.
This was a design choice, but also a necessity for added strength.
I made pocket holes all the way around the 2×2’s so that
if my kids sat on this table (which they have many times!)
the top wouldn’t snap off.
Plus I liked the look of the plugged holes.
This is an option you don’t necessarily have to do.
The two pocket holes on the inside might be enough.
BUT.. I am not guaranteeing that it will be.
If you want the strength of a 125 lb woman sitting on the table
without it snapping, do the pocket holes all around.
Yes, I sat on my table. Haha 🙂
Ok, last thing I swear,
don’t forget to follow along on
Pinterest and Instagram
to stay updated on new posts and tutorials!
Easy DIY Couch Table
Dimensions: 25″ tall x 7 1/2″ wide x 12″ deep
Materials:
- 2x2x8 – 1 (you only need 4 feet but I’m pretty sure they only sell these in 8 ft lengths)
- 1x8x4 – 1 (my Lowe’s sells these in 4 ft lengths but if yours doesn’t, just buy a 6 ft)
- 2×2 sheet of 1/4″ plywood
- 1x2x6 – 2
- 1 1/4″ pocket holes
- pocket hole plugs
Cut List:
- 2x2x23 1/2″ – 2
- 1x8x12 – 2
- It’s best if you wait to cut your ply until after Step 3 so you can measure the exact space between your 2×2’s
- 1x2x4 – 26
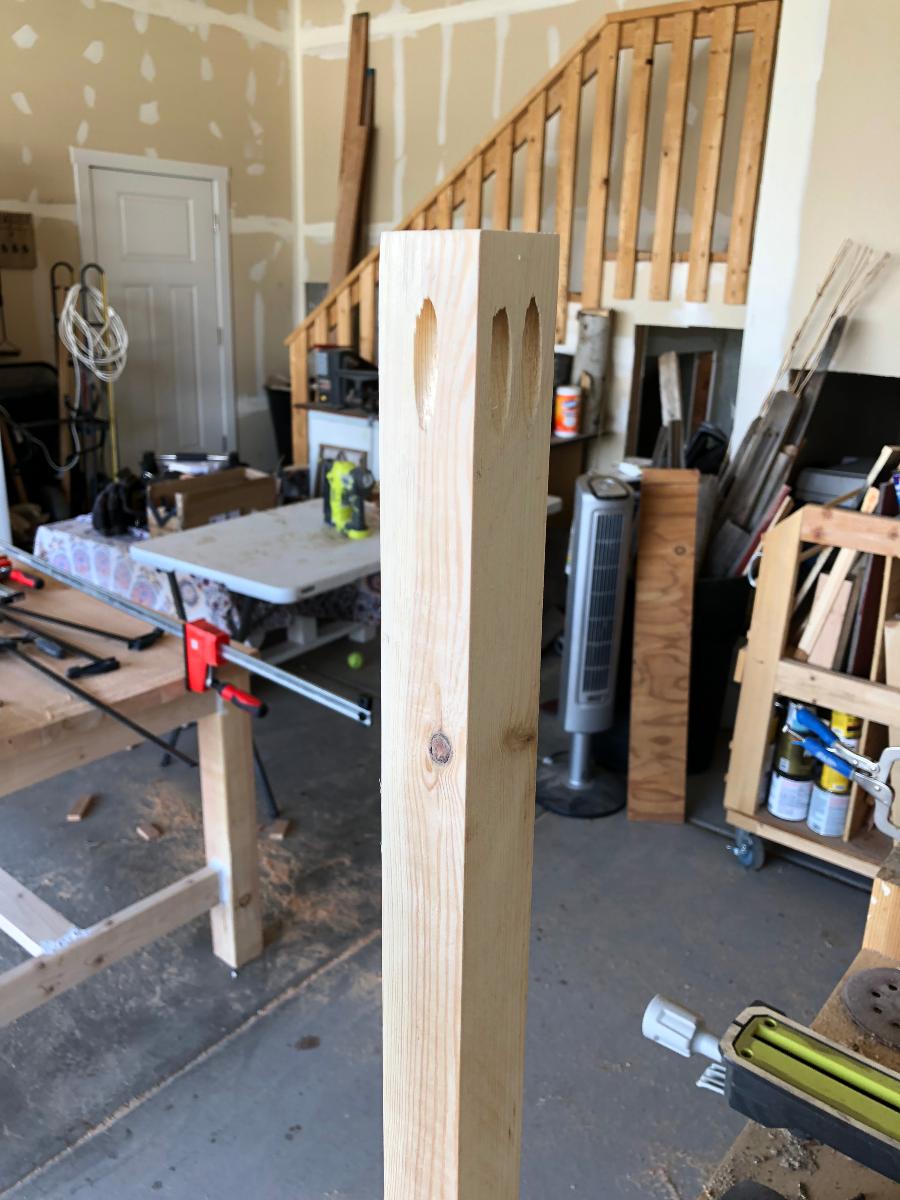
Step 1
Make two Kreg pocket holes on one side of your 2×2’s on the top and the bottom.
Make one Kreg pocket hole on each of the other sides of your 2×2’s on the top and bottom.
Step 2
Attach one 2×2 in the corner of your 1×8 with the 2 pocket holes facing in.
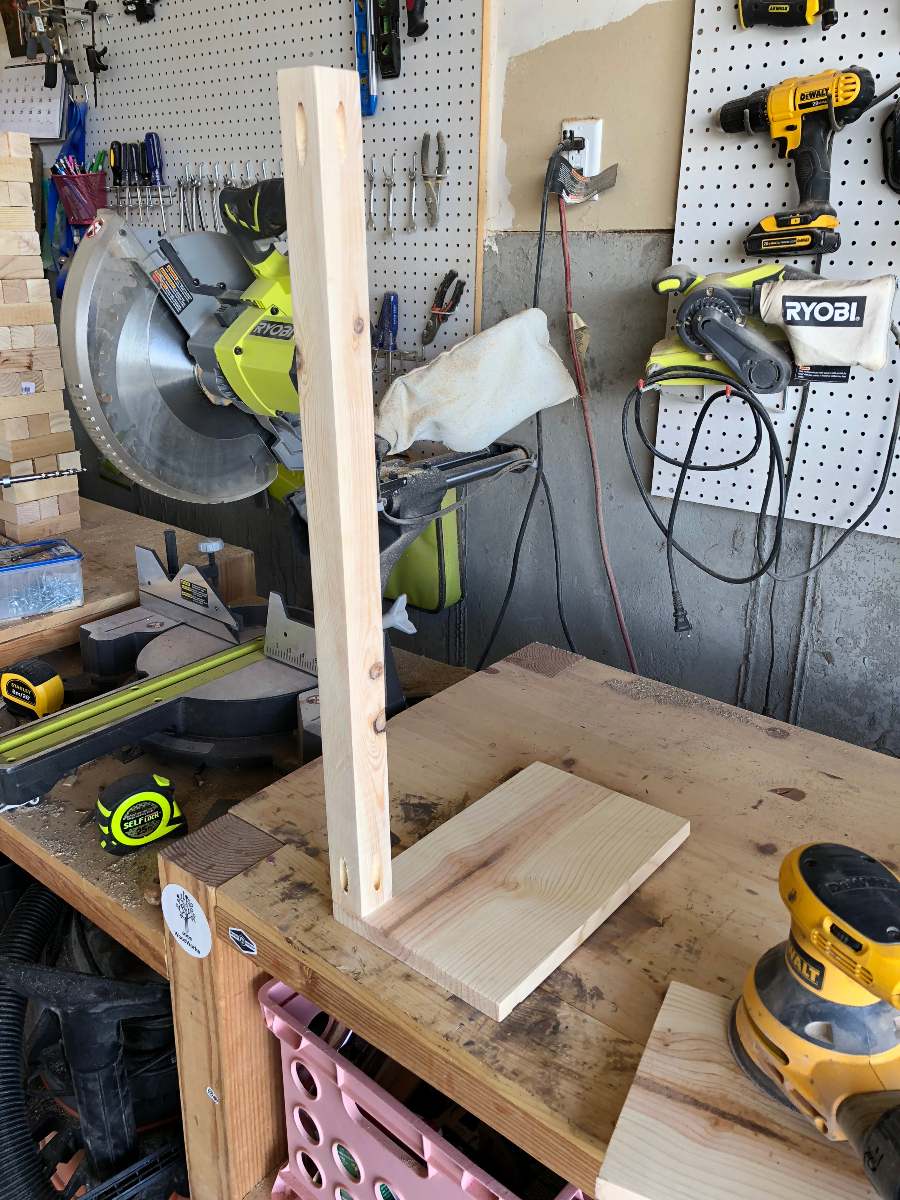
Attach your second 2×2 the same way.
Flip it over and attach your second 1×8 on the opposite side.

Step 3
Place glue in your pocket holes and plug them with the wooden pocket hole plugs.
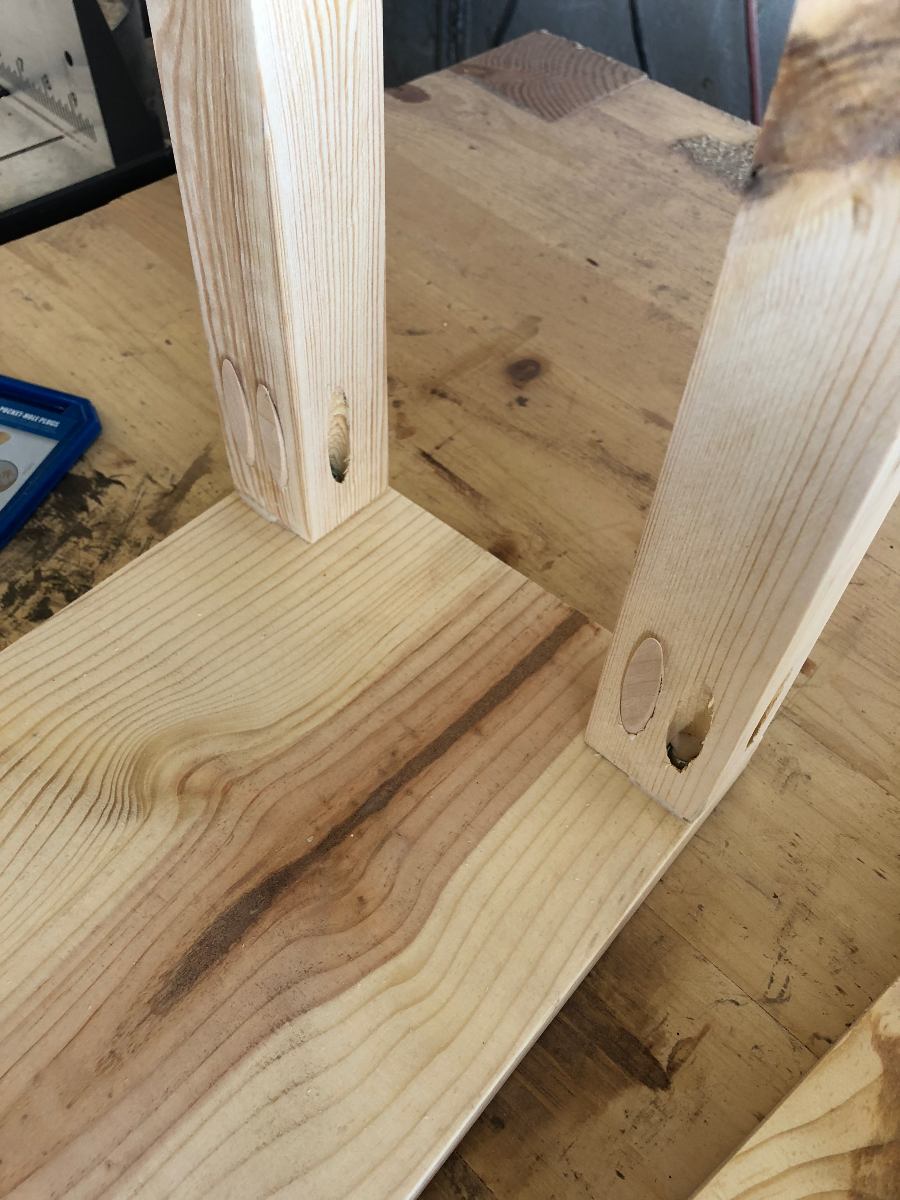
Some of mine stuck out so I just grabbed my orbital sander and sanded them flush.

Step 4
Measure the space between the 2×2’s and cut your ply to fit that space exactly.
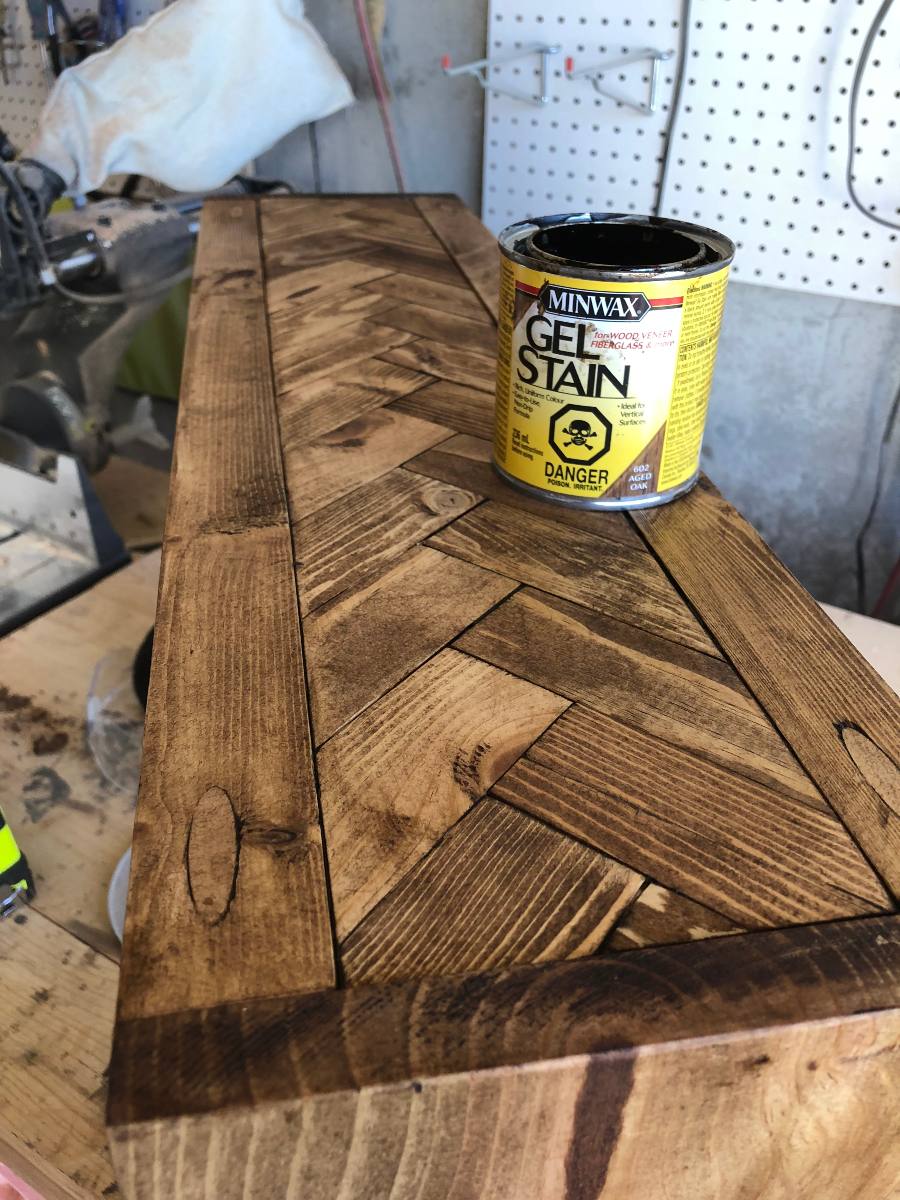
Line up your 1×2’s in a herringbone pattern and glue into place.
I don’t have a pic of this step but I have an in depth herringbone tutorial on
this entryway table post
or a step by step video on my YouTube channel!
Once all of your pieces are glued into place, flip your board over
and trim all of your edges with a circular saw to make them flush.
I’m a huge fan of this Mini Plunge Circular Saw from VonHaus 🙂
You can also go to the Tools I Use page to check
out other tools I recommend.
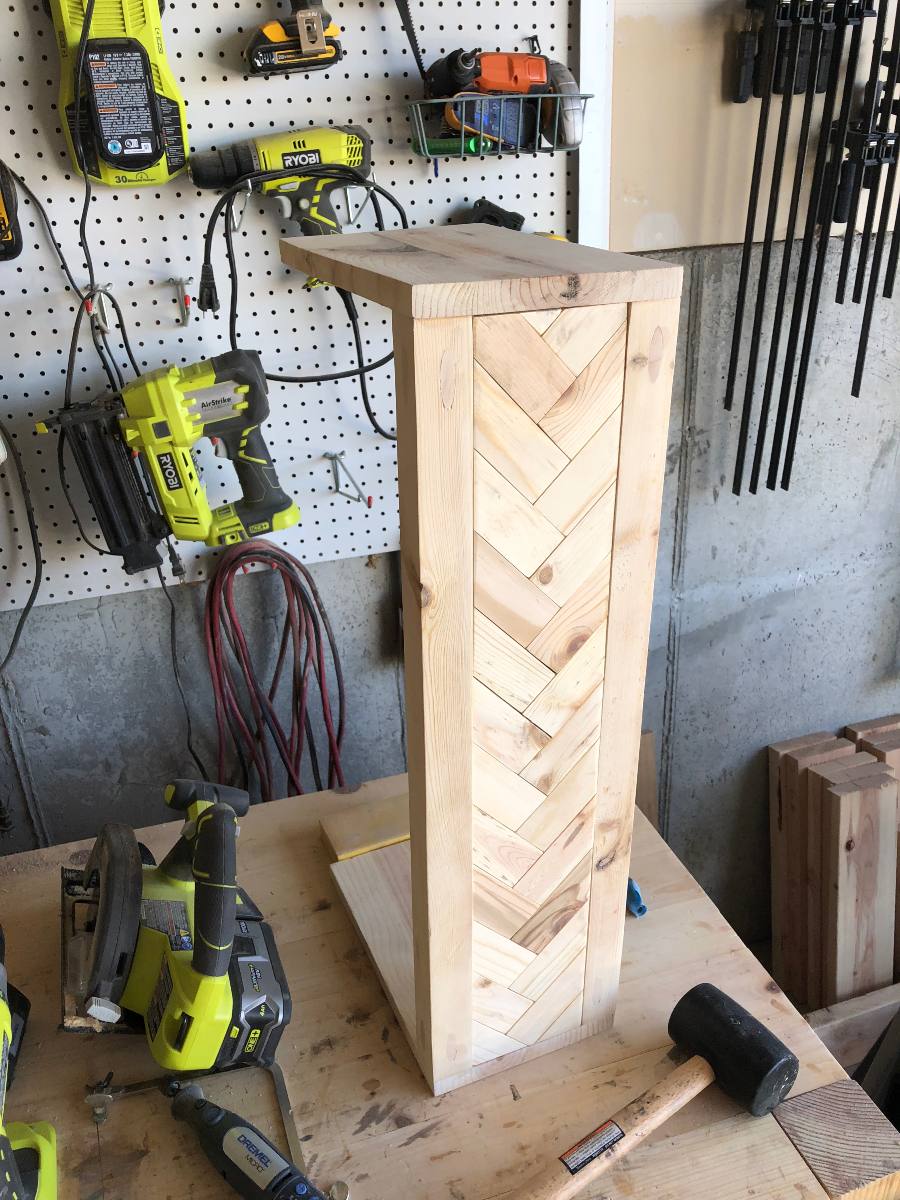
Step 5
Run a bead of glue along all four edges of the herringbone board.
Take a wooden mallet and tap it into place between the 2×2’s.
This was enough to hold mine into place but if you feel like you need
more security, you can add a couple of pocket holes on the back
side of the herringbone and drill it into the 2×2’s.
I also accidentally tapped it in upside down, and didn’t realize that until it was dry.
But it turns out I liked it that way so mistake? Or happy accident?
You tell me 😉
Step 6
Add a finish. I used this Minwax Aged Oak Gel Stain. It’s been my go-to color lately.
I love the way it makes the grain pop!
All finished! Thanks for following along,
and as always, PIN this project, post your photos,
and tell your friends!