Home Decor, Tutorials
Wooden Porch Pumpkin

Happy Fall Y’all!
This little wooden porch pumpkin, or “Jack”, as I call him,
is one of my very favorite decorations I’ve ever made!
The best part is that it is a super quick,
super easy build.
Only three tools are required and you can
get this assembled in about an hour!
So let’s get started!
But first, be sure you’re following along
on Instagram and Pinterest to stay updated
on all the latest builds and tutorials!
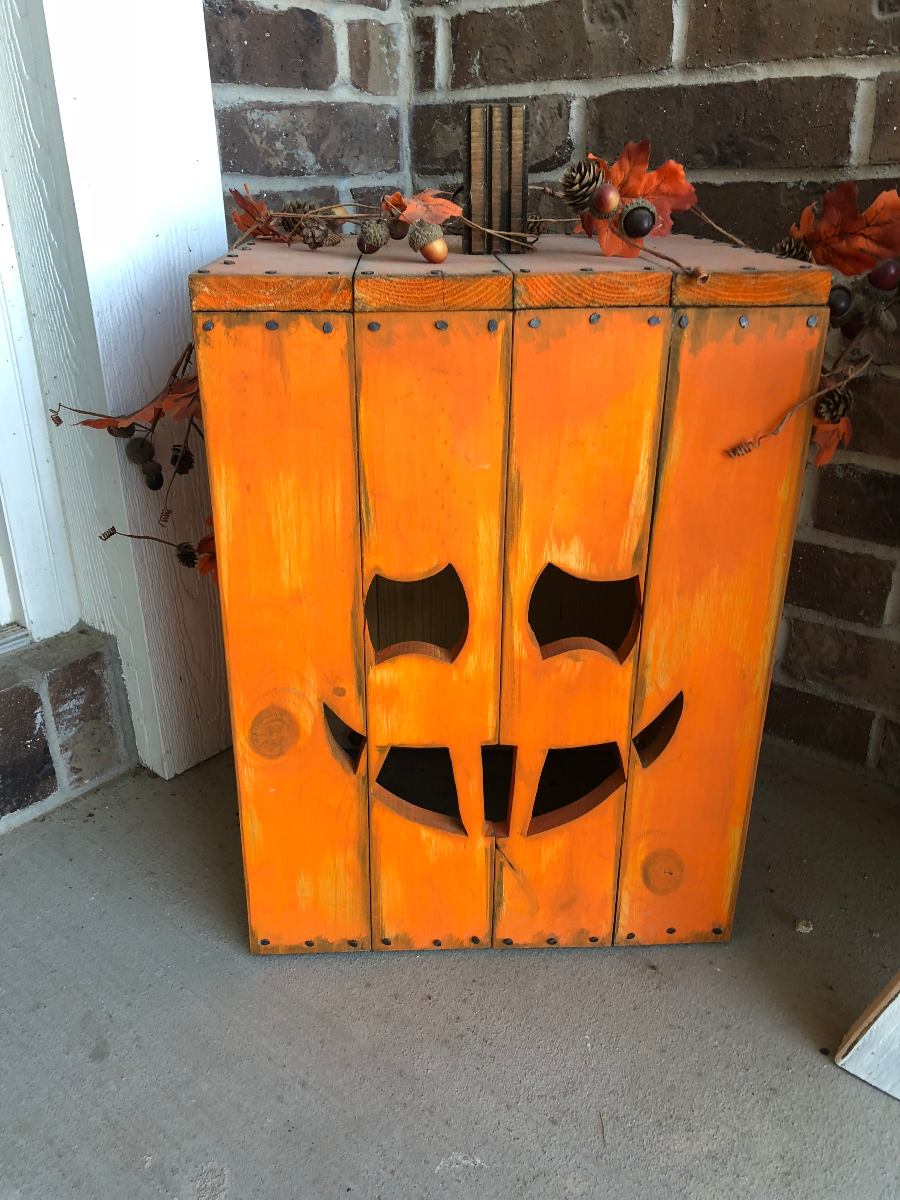
Wooden Porch Pumpkin
Dimensions: 18″ tall x 14″ wide x 12″ deep
Materials:
- 1x4x6 – 2
- 1x4x8 – 2
- 1x2x4 – 2
- 4″ of a 2×2 – for the stem
- Brad nailer
- 1 1/4″ brad nails
- bandsaw or jigsaw to cut the face – face is optional so if you don’t have either of those tools you can still build a pumpkin
- miter saw
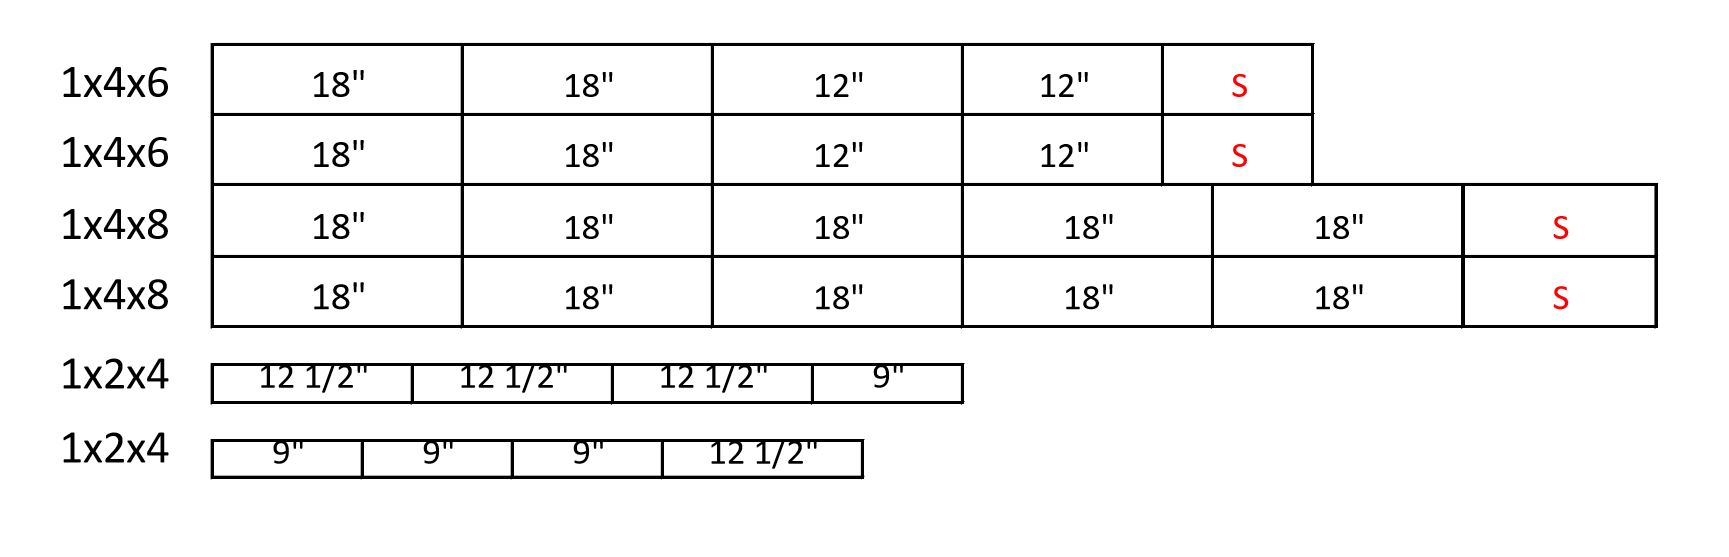
Cut List
- 1x4x12″ – 4
- 1x4x18″ – 14
- 1x2x9″ – 4
- 1x2x12 1/2″ – 4
- 2x2x4″ – 1
Step 1
Cut your 1×2’s and assemble two frames with the shorter pieces inside of the longer pieces, like so…
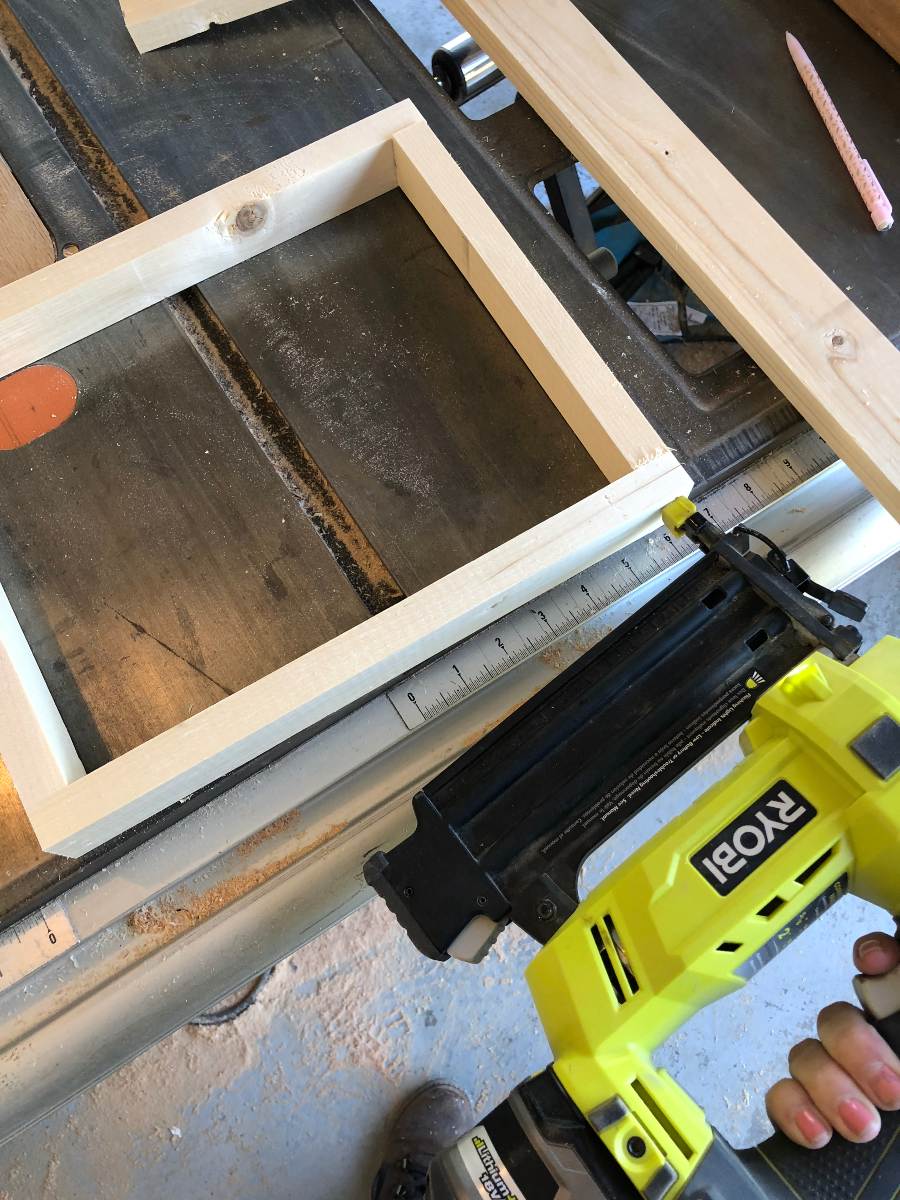
and nail into the corner pieces to form the frames.
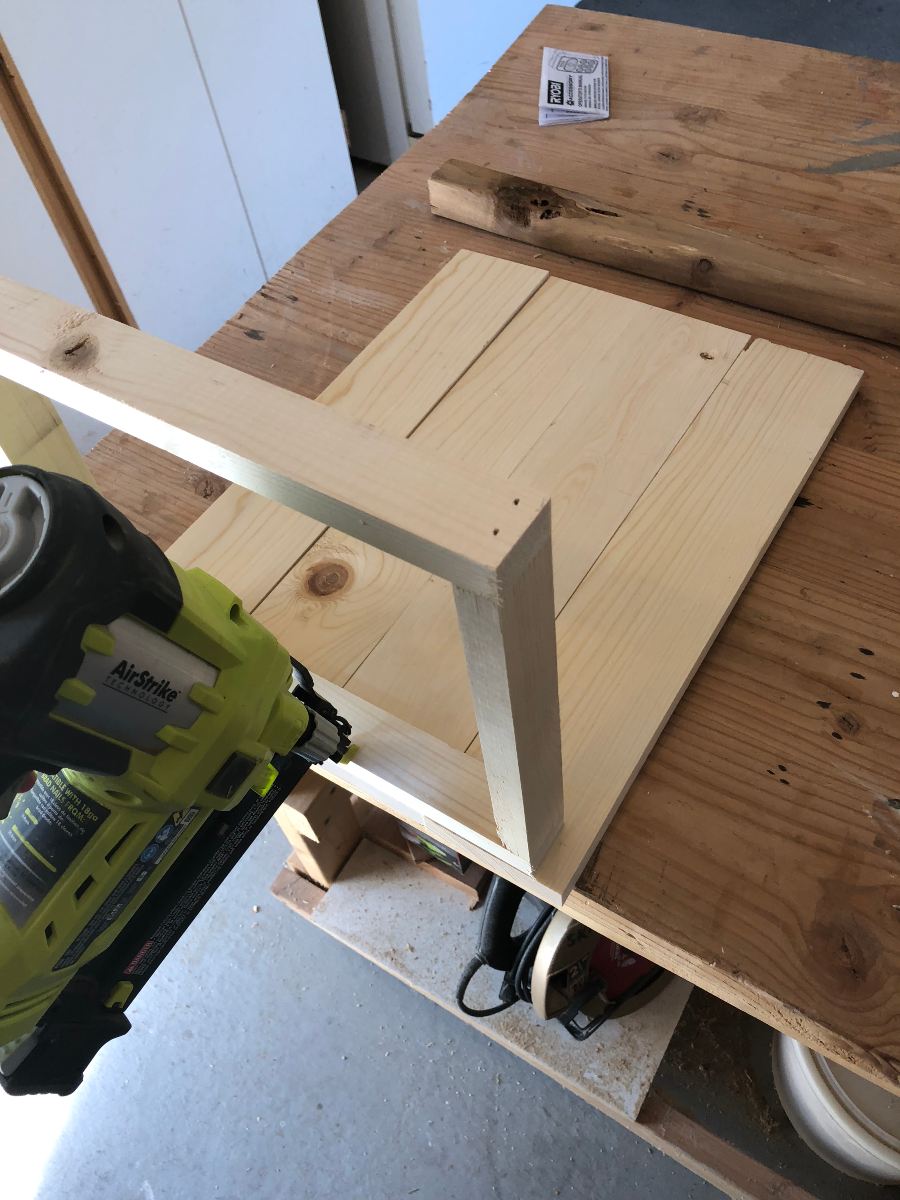
Step 2
Lay out four 18″ pieces and line up one of the frames flush with the bottom
and with a 3/4″ hangover on either side.
Nail into the frame.
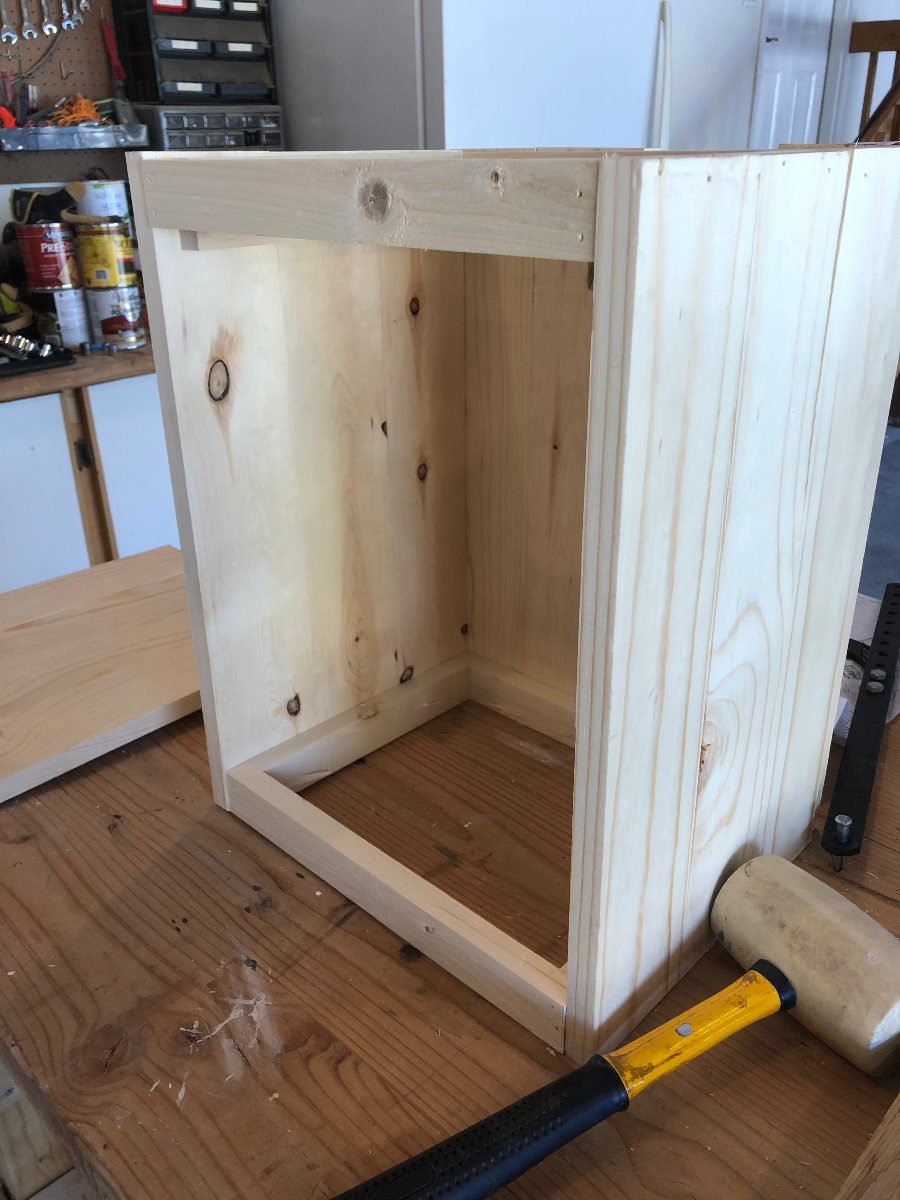
Step 3
Stand it up and line up three 18″ pieces along the side and nail them into place,
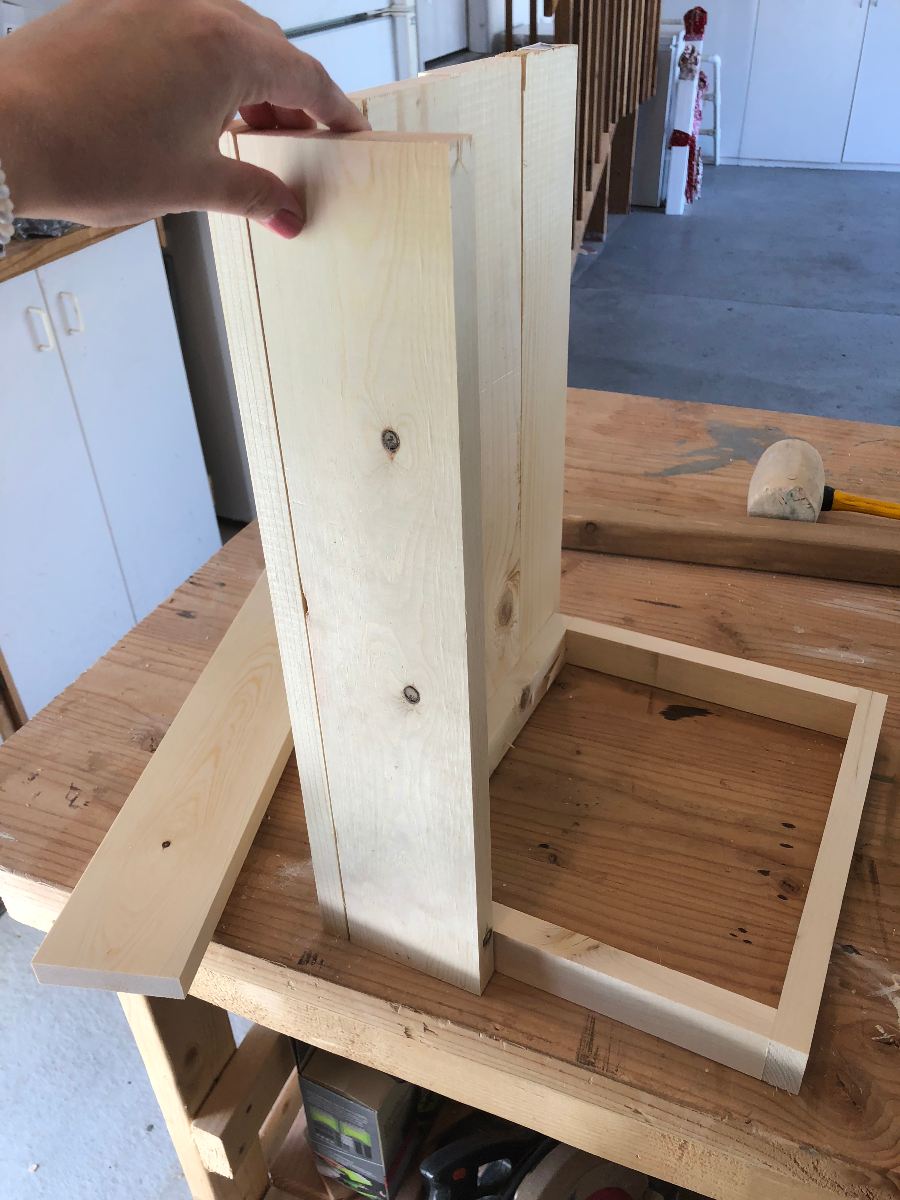
Do the same for the other side.
Step 4
Line up the other frame with the top of the pumpkin and nail it into the three sides.
 Ignore the mallet… you’re still using a brad nailer. It just happened to be sitting there.
I don’t always clean up after myself, ok? 🙂
Step 5
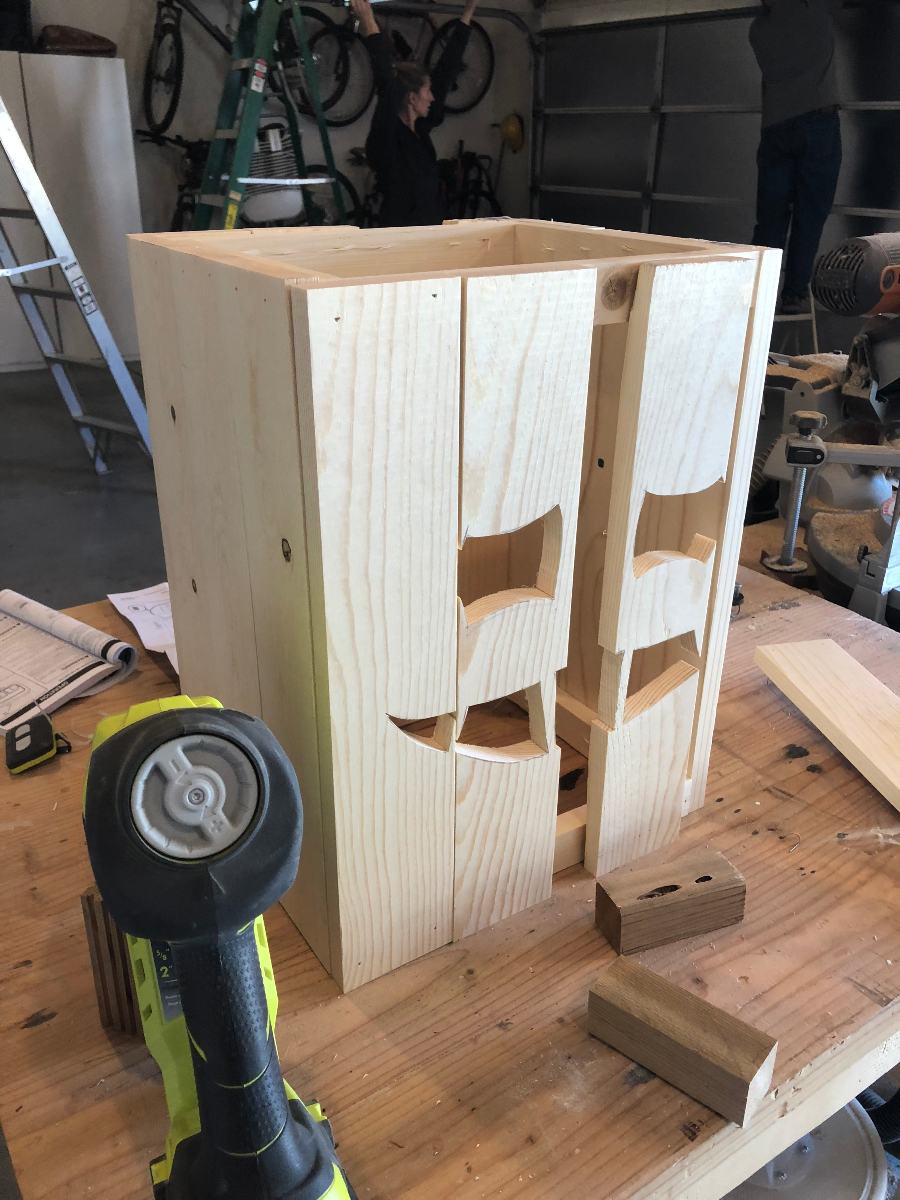
Line up the remaining four 18″ pieces flat on your work surface.
Trace the pumpkin face onto your pieces.
Make sure to line up the edges of the face pieces with the
edges of your boards so that they are
easy to cut into with the bandsaw or jigsaw.
**So sorry, but I didn’t get a pic of this step!**
Print out the PDF below. You will need to blow it up to 150% to get the correct size.
Cut out the pieces, and arrange them onto the pumpkin however you’d like.
If you need to, refer to the next photo. You can tell from there
how I lined up the face pieces along the edges of the boards so you could just cut straight into them.
Step 6
Line up your face boards onto your remaining side
and nail into place.
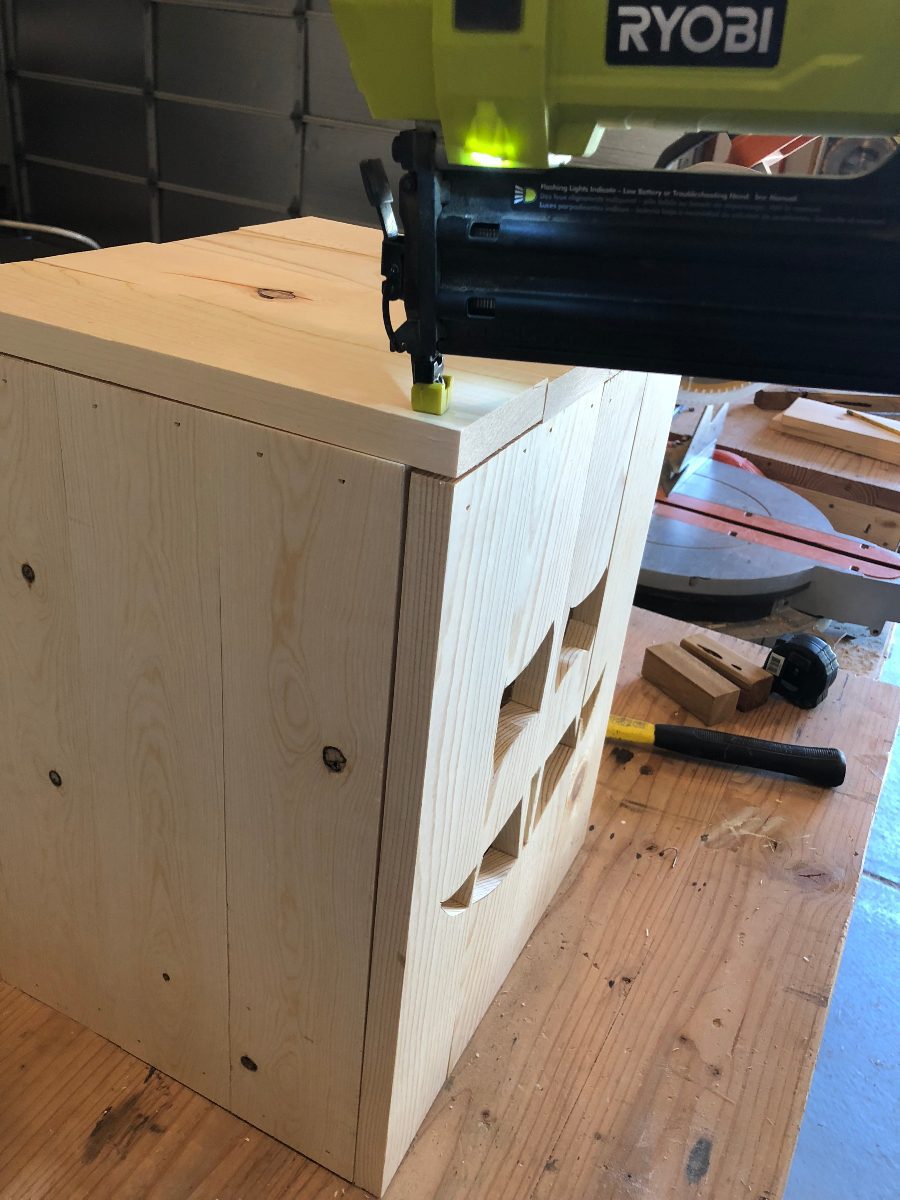
Step 7
Take your 12″ pieces and line them up along the top of the box
and nail down into them.
Step 8
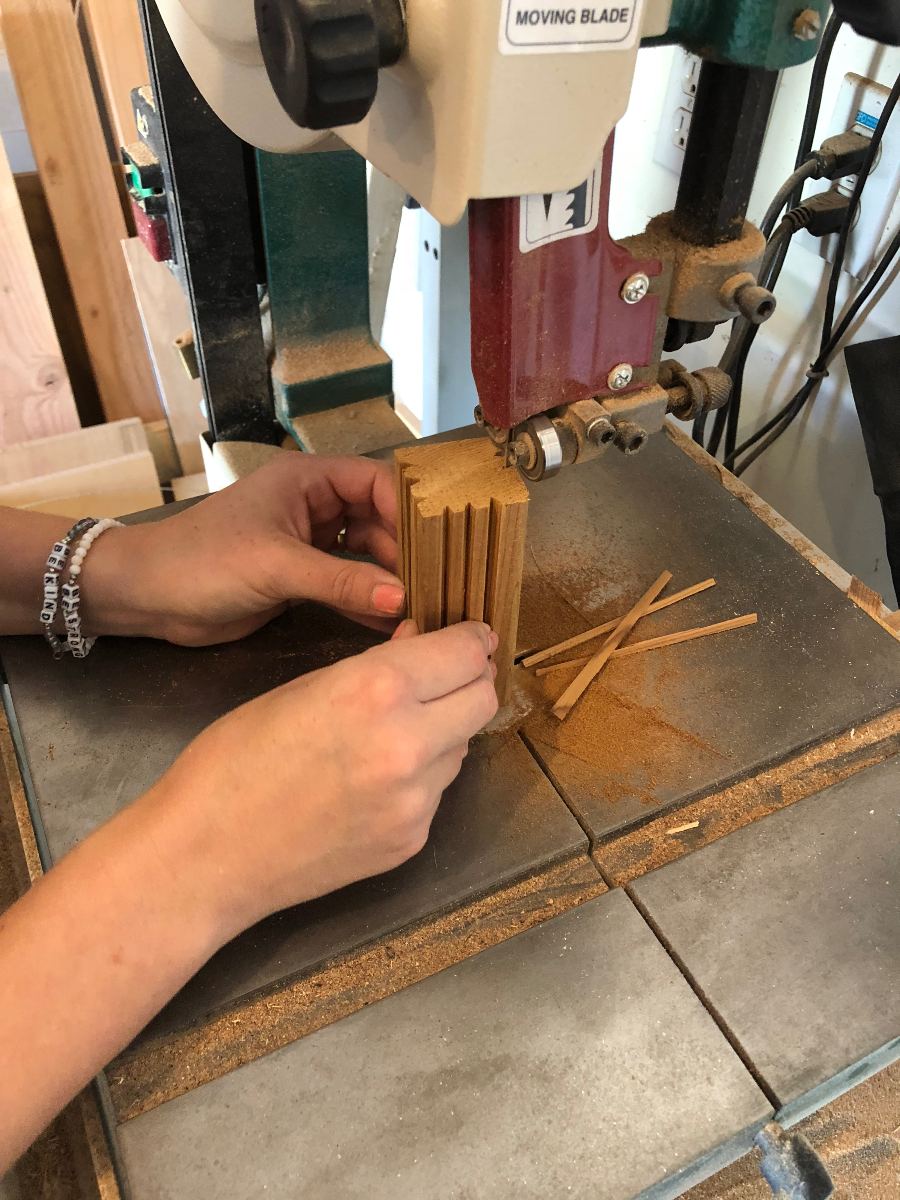
(Optional) Cut grooves into your 2×2 stem to add dimension.
You can do this by standing the stem up on the bandsaw
and cutting little V shapes into the sides like this…
Step 9
Paint your pumpkin! I stained all of my seams first
and then painted the whole thing with a single layer of
orange acrylic paint to give it a more distressed look.
Then use hot glue to attach the stem.
I bought little black tacks from
Lowe’s and added them for character,
and also a “fall” vine from Michael’s
and added that to the top as well.
Hope you all have an amazing fall filled with sweaters,
leaves, and pumpkin flavored everything!
Thanks for following along and, as always,
post your pics, PIN this project, and tell your friends!