Home Decor, Tutorials
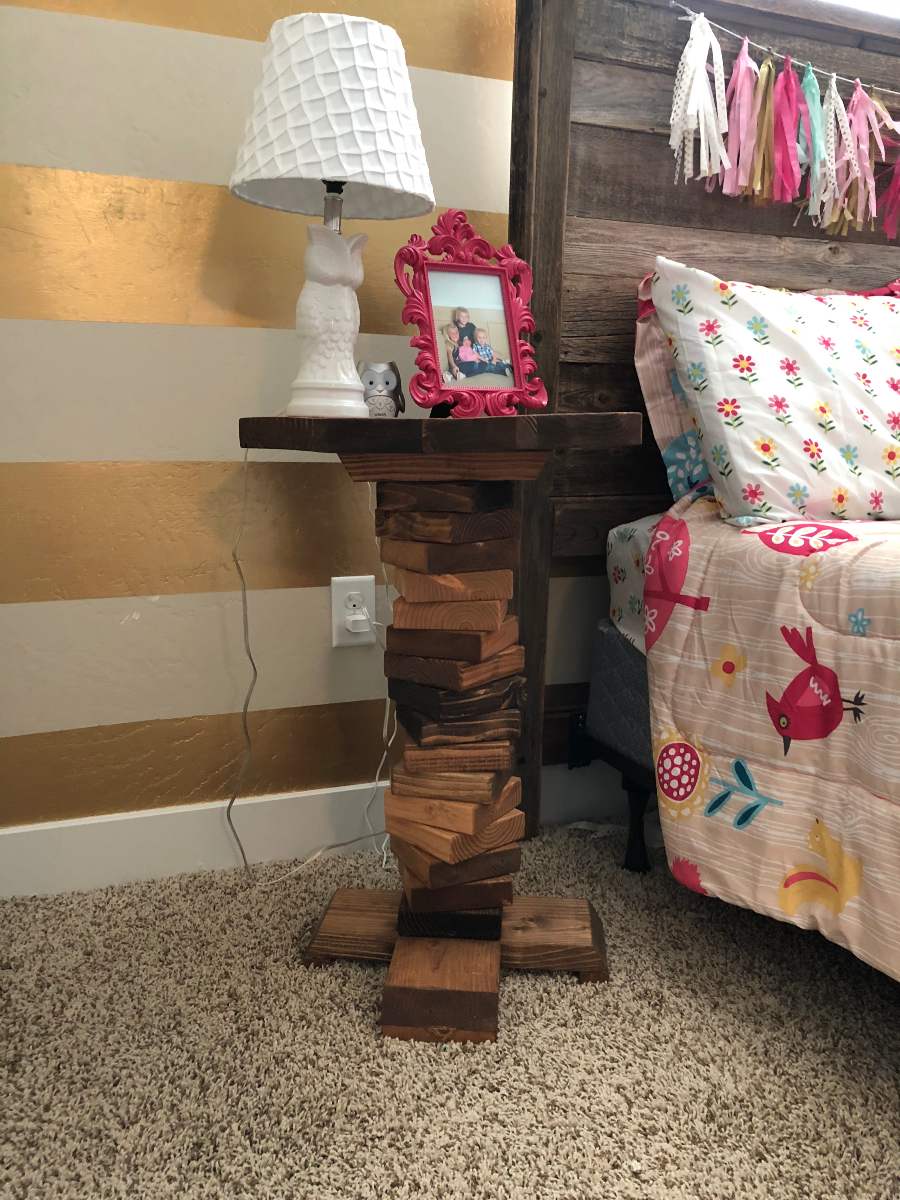
Modern Octagon Nightstand

Hey friends!! It’s been a little while
since I’ve done an original furniture piece
so I’m super excited to share this modern octagon nightstand with you!
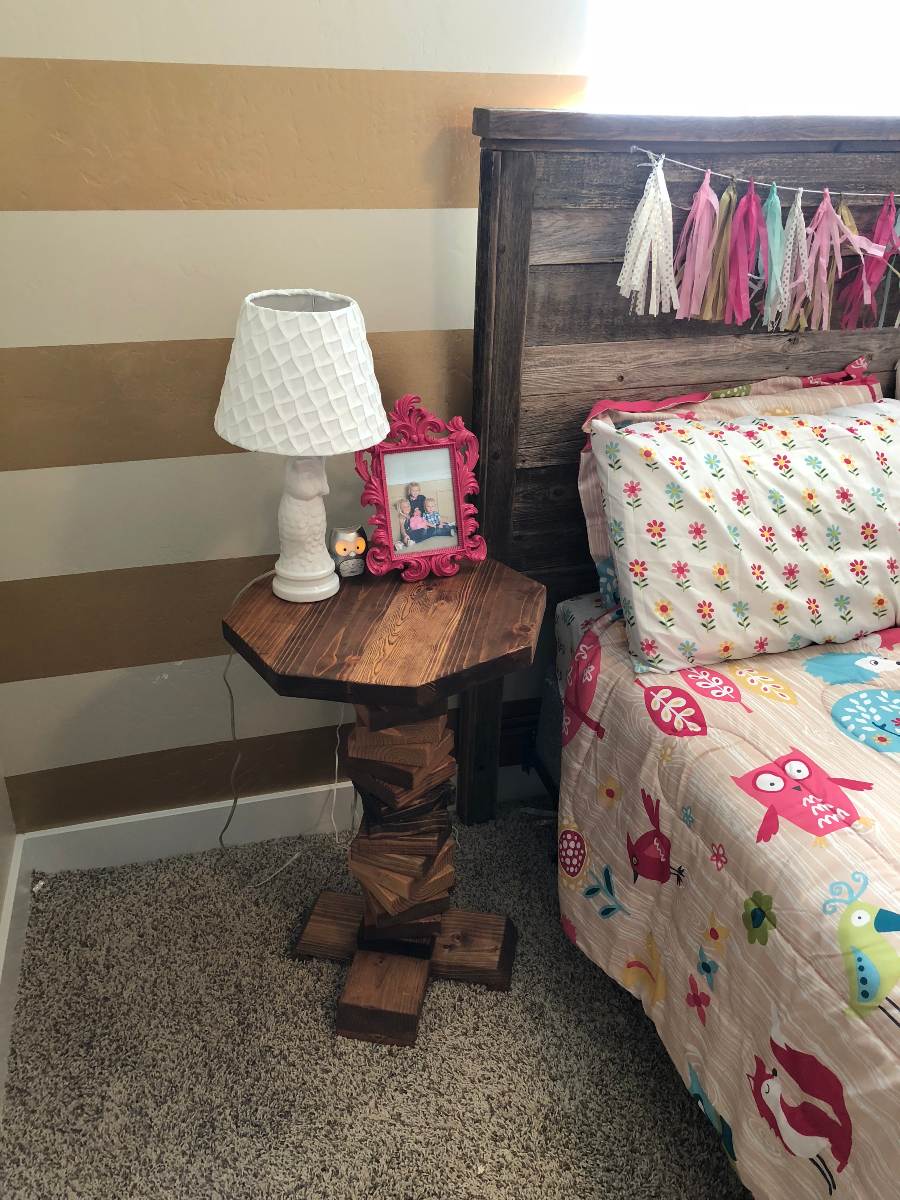
My daughter needed a nightstand for her room
and I had all these 2×6 scraps left over from other projects
I’d done earlier in the year.
My goal with this project was to use
ALL scraps and spend ZERO dollars.
This required me to get a little creative with
what I had on hand,
so I came up with this modern
twisty design and crushed my goal
and spent NO money!
Nothing like free furniture! 🙂
One of the big reasons I love doing
what I do is creating my own pieces that fit
my space, and occasionally
using up scraps to make things for FREE!
The cool thing is that this could be used
as a nightstand, like I did for my daughter,
or an end table for your living room.
This is a quick and relatively easy little project
and only costs around $20 in lumber!
So let’s get started!
Modern Octagon Nightstand
Materials:
- 2x6x10 – 2
- 2 1/2″ pocket hole screws
- wood glue
- 2 1/2″ Spax screws
- 3/4″ spax screws
- 1″ brad nails
- 2 1/2″ brad nails – if you can. I used 2″ because that’s the biggest my 18g nailer will go.
- poster board
- circular saw
- stain or paint
Cut List:
- 2x6x19 – 4 – ripped to 4 3/4″
- 2x6x18 – 2 – half lapped and beveled at 30 degrees (I’ll explain this in Step 1)
- 2x6x1/2″ – 4 – these are the feet
- 2x6x5 1/2 – 16
- 2x6x16 1/2″ – beveled at 30 degrees


Step 1
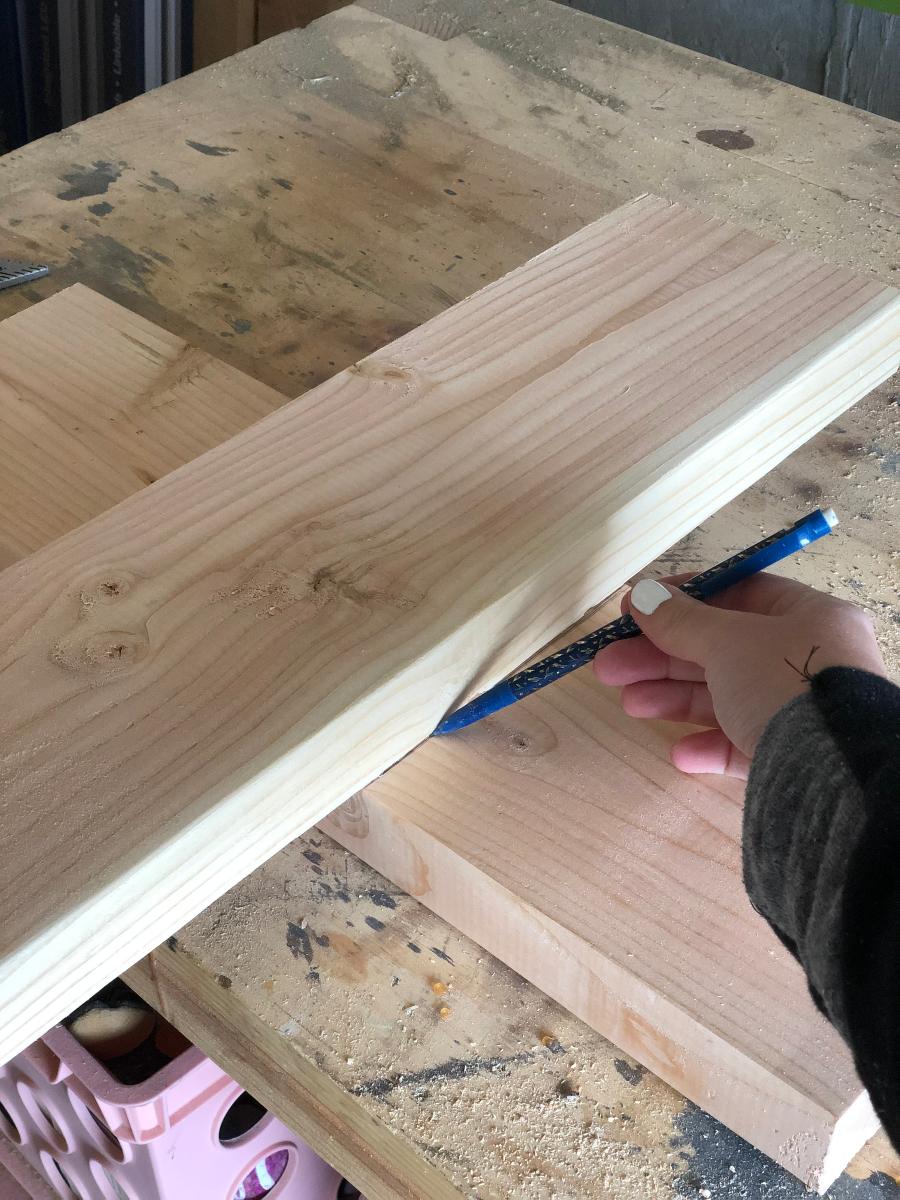
You will need your two 18″ pieces for this.
Start by finding the center of your board.
Line up the other board on the center and mark the width.
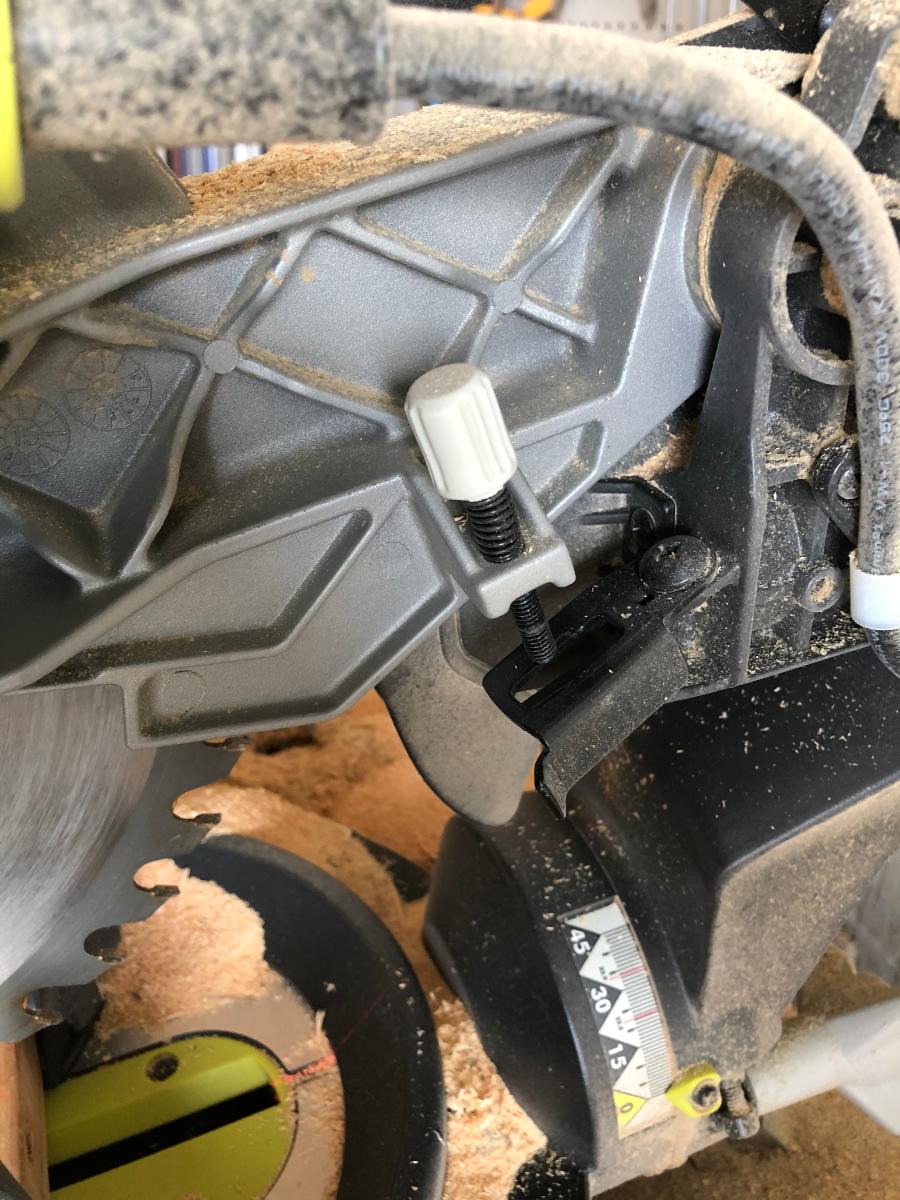
Find your stop on your miter saw. I have the
Ryobi 12″ sliding miter saw and this is the screw for the stop.
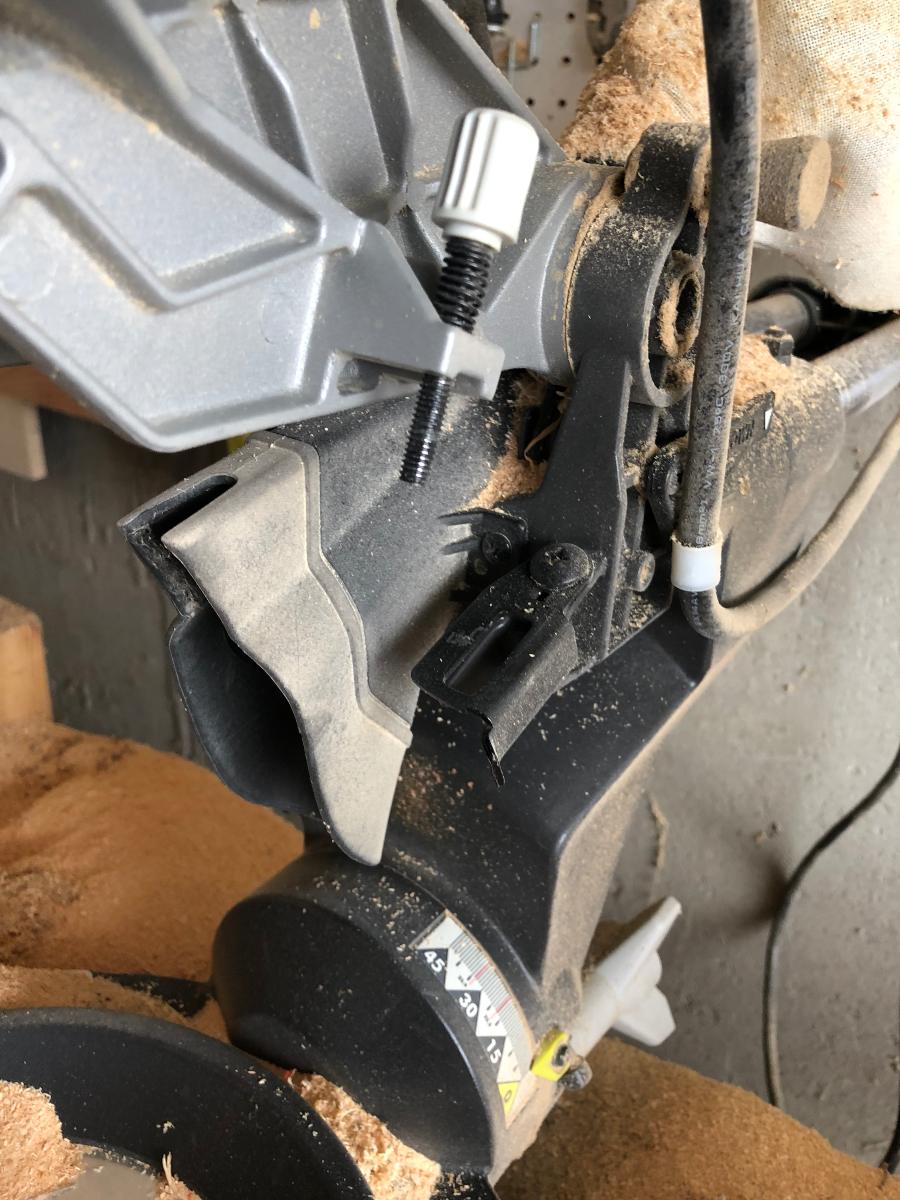
In this position, the screw will go right through the bracket.
But if you pull the bracket out…
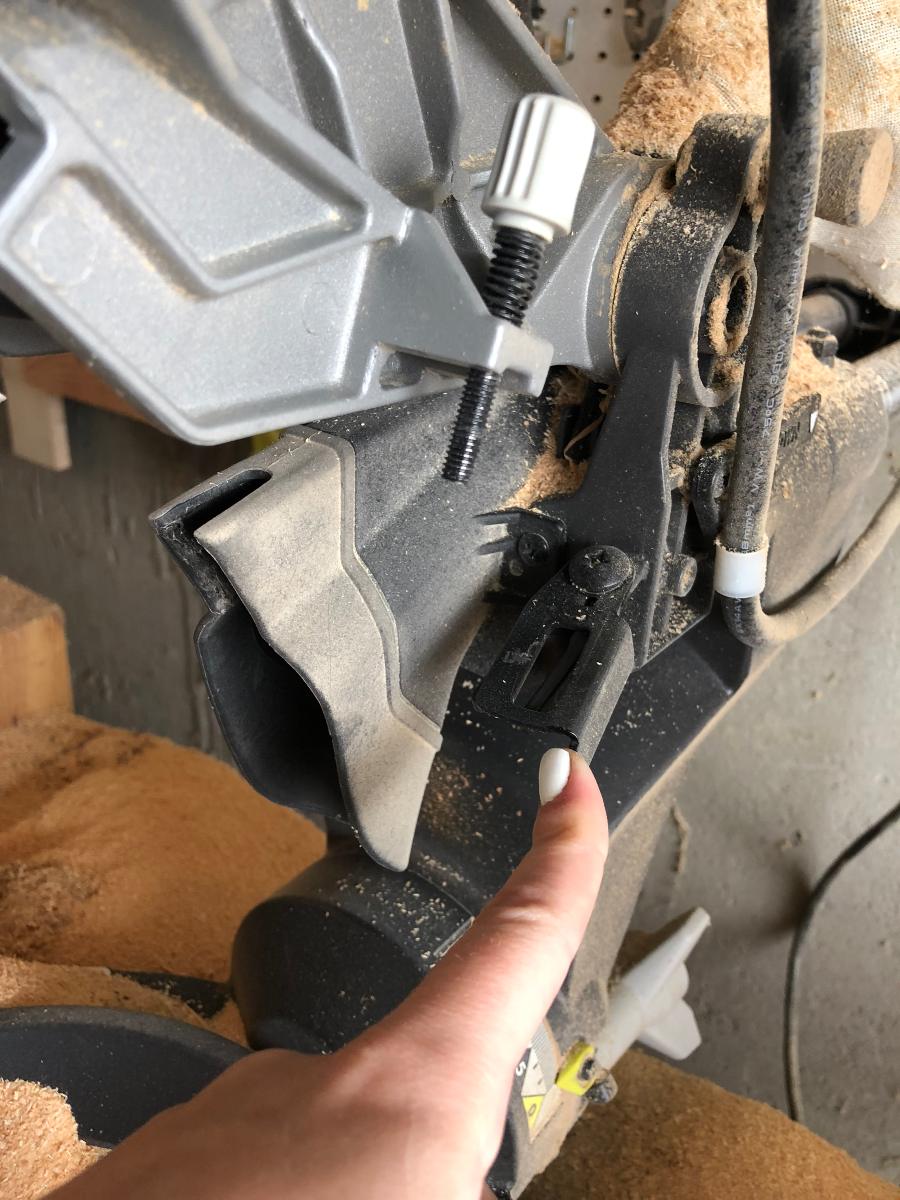
the screw will hit it, stopping the miter saw at that depth.
Since there’s no measurement with this screw, it’s kind
of a guessing game. Start with a piece of scrap 2×4 and find the center
of the width of the board.
Make sample cuts to check your depth
and then adjust the screw as needed.
Once you have the depth set, clamp the scrap piece of 2×4
in place as a space for your board.
The reason you keep the scrap there is because the miter saw won’t cut
all the way through at this depth. You will end up with a curved edge.
With the spacer in place you can make straight cuts all
the way through your board.
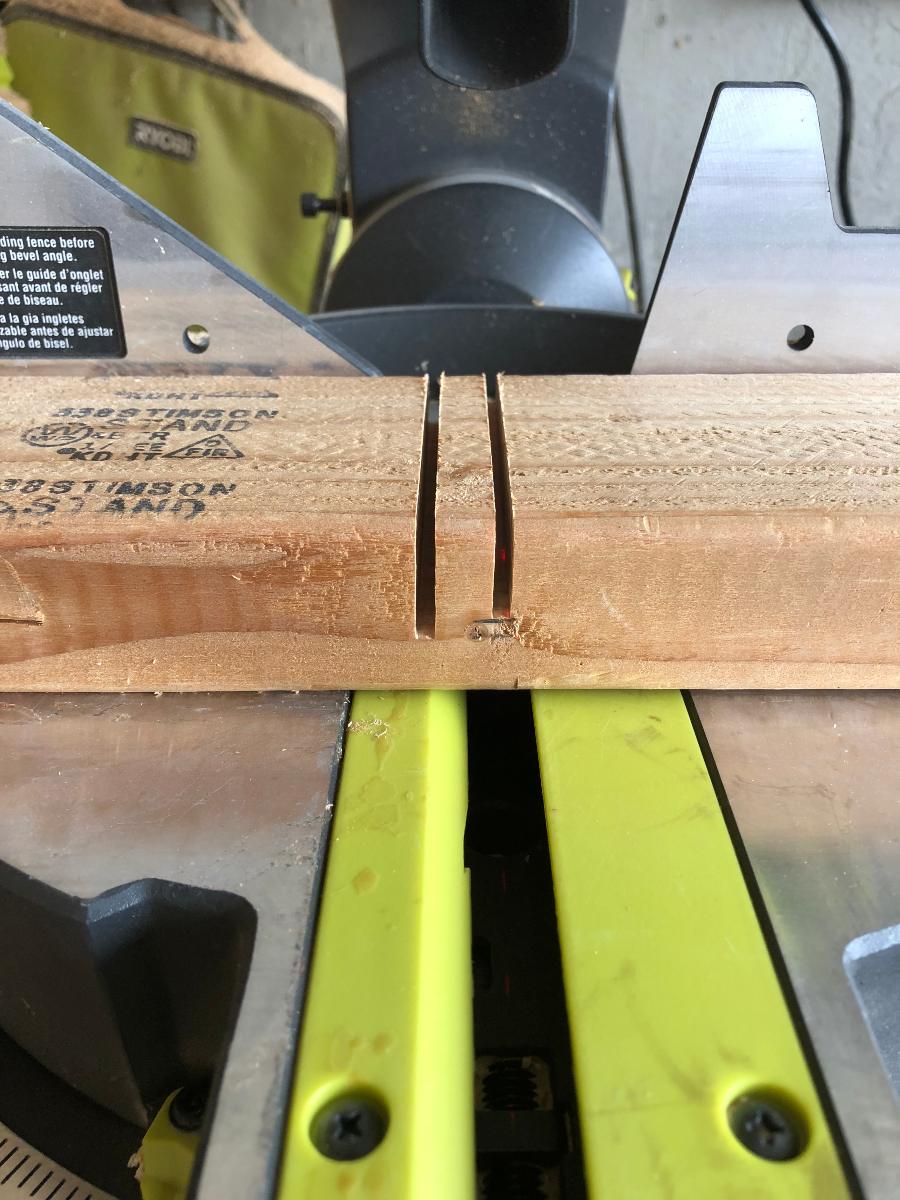
Line up one edge mark of your board with the cut you made on the scrap piece.
Slide your board over 1/4″ and make another cut.
There should be a 1/8″ gap between your cuts.
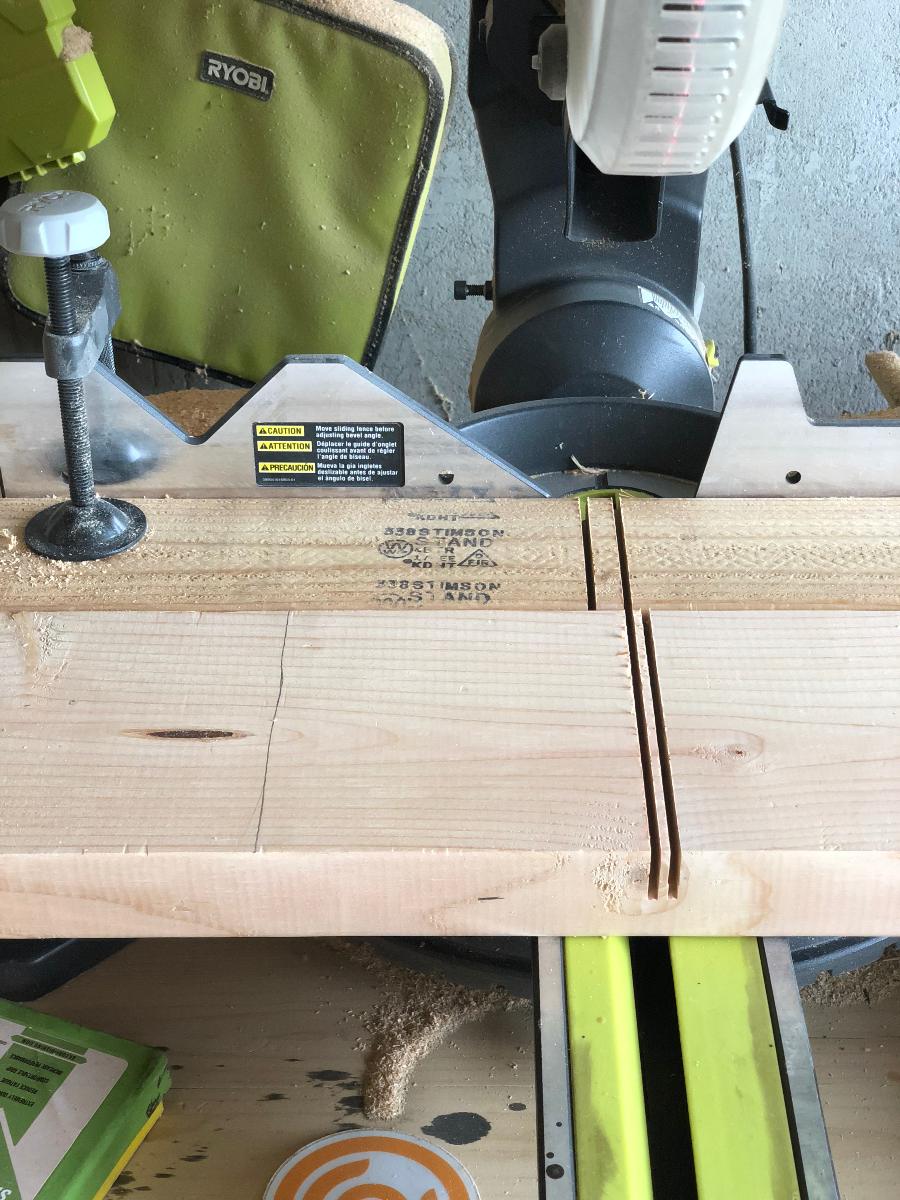
Continue to slide the board and make cuts until
you reach the other edge mark.
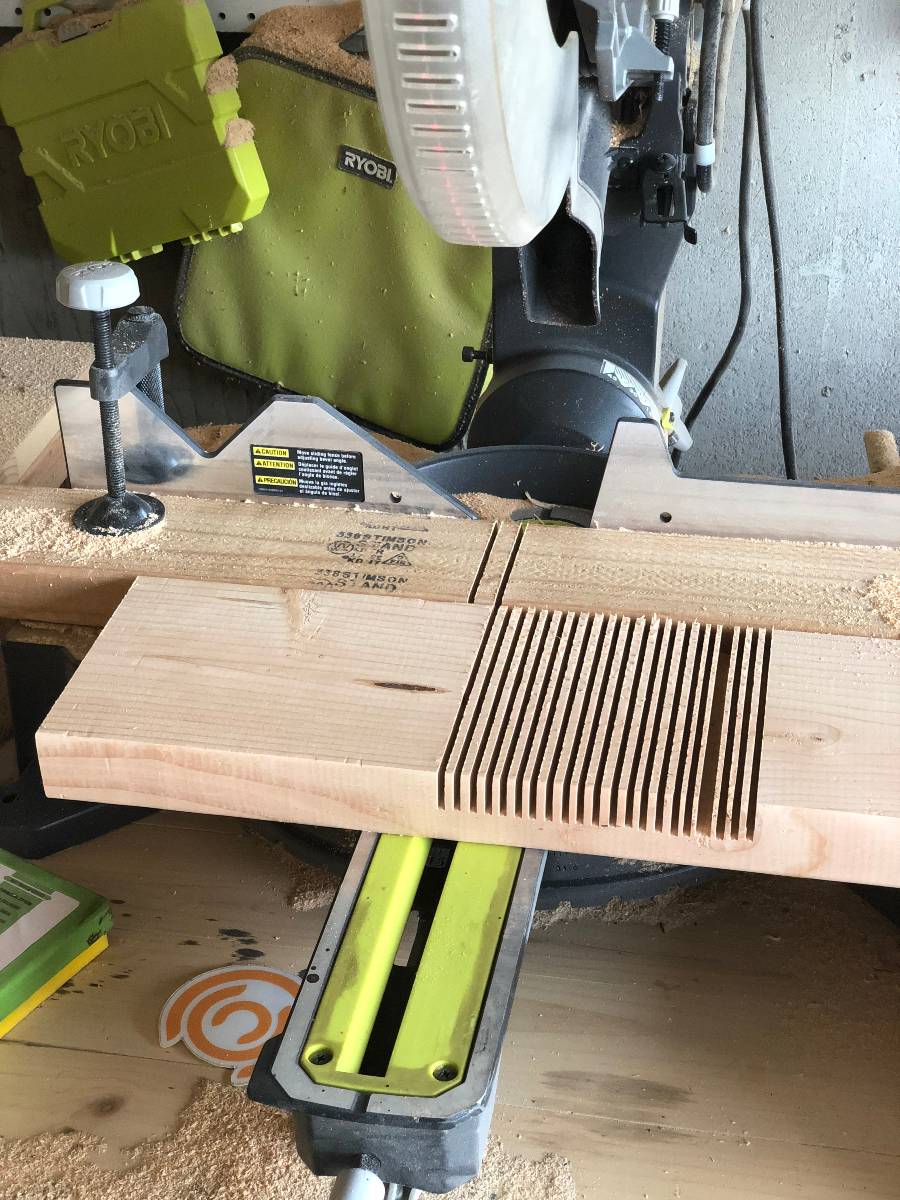
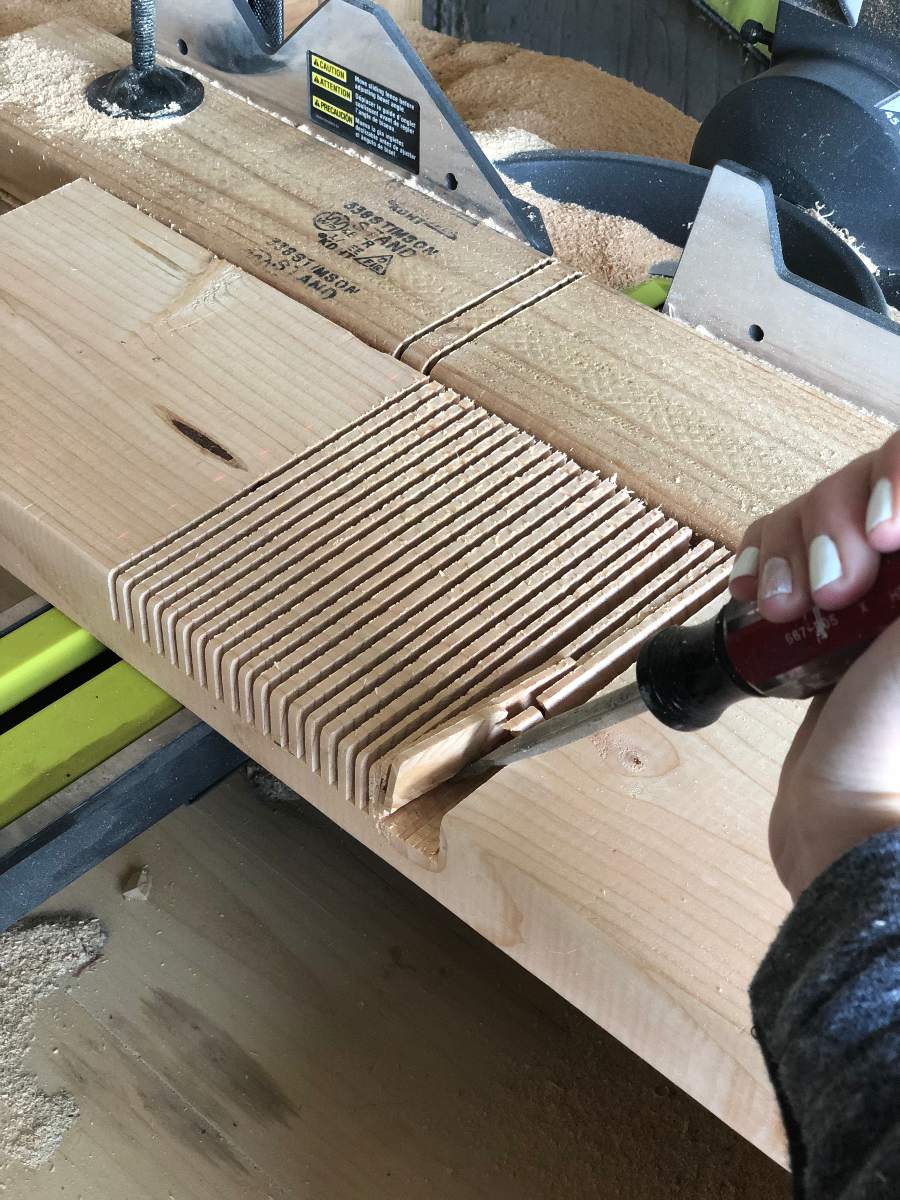
Once you have all your cuts made,
grab a flat head screwdriver or
paint scraper and wedge it between the cuts
to pop out the excess wood.
Once you have as much of the excess out as you can get,
go back with the miter saw and cut over the pieces that are left…
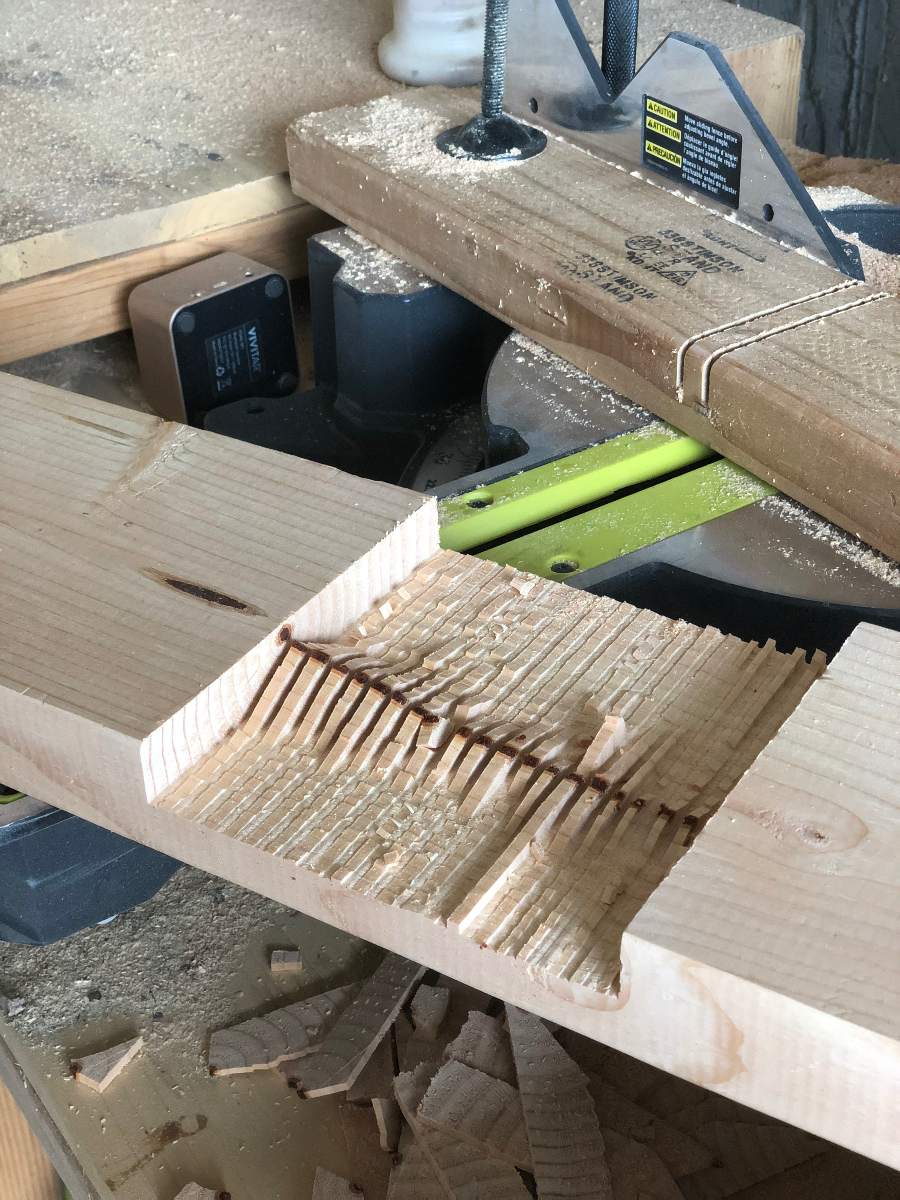
So that it’s smoother like this…
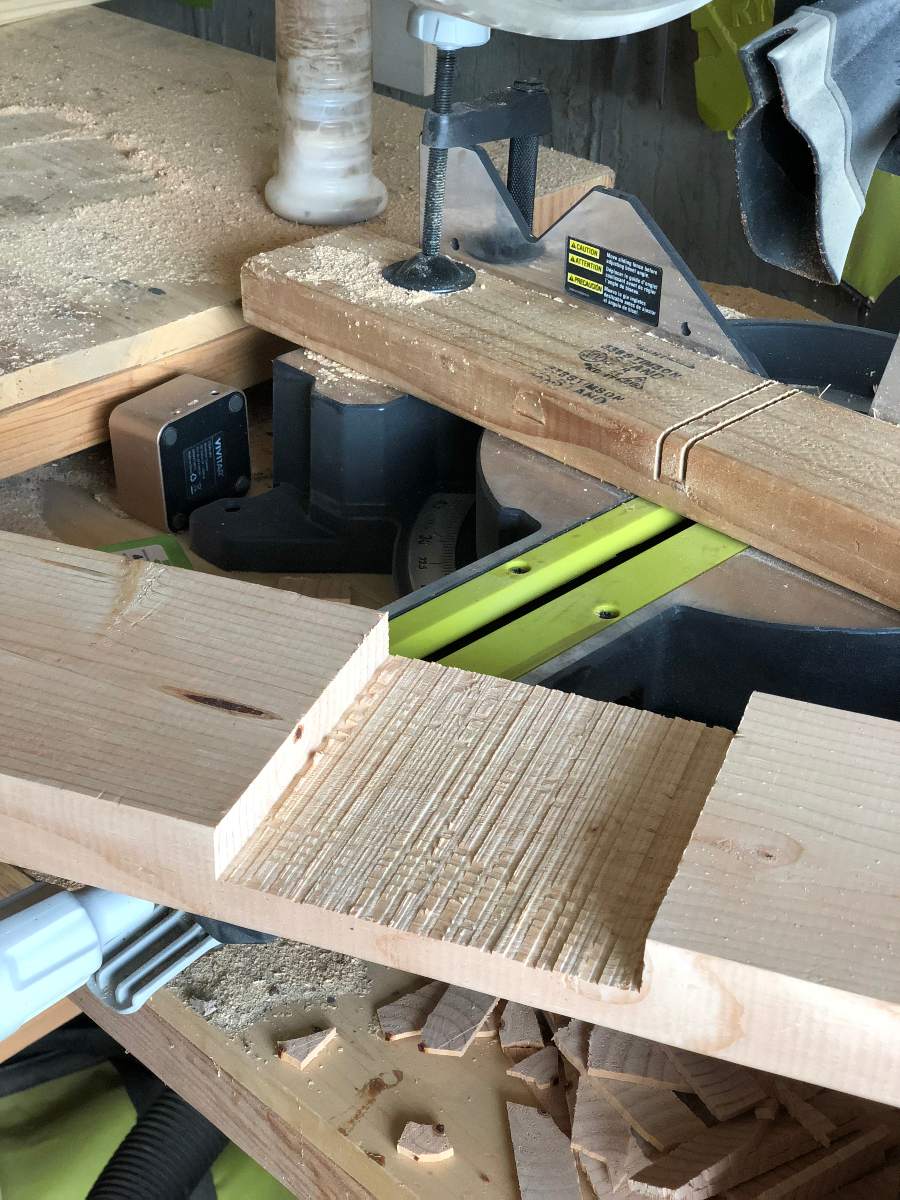
Most of the time, at this point you can turn on the miter saw
and while it’s running, slide the board slowly back and forth across the blade
to smooth out the tiny little pieces.
BUT.. since this is a wider space, and I can fit my orbital sander
in there, I chose to sand it smooth to be a little safer.
Then you’re going to take your second board
and do that whole process over again.
Now you’re going to set your bevel on your miter saw to 30 degrees
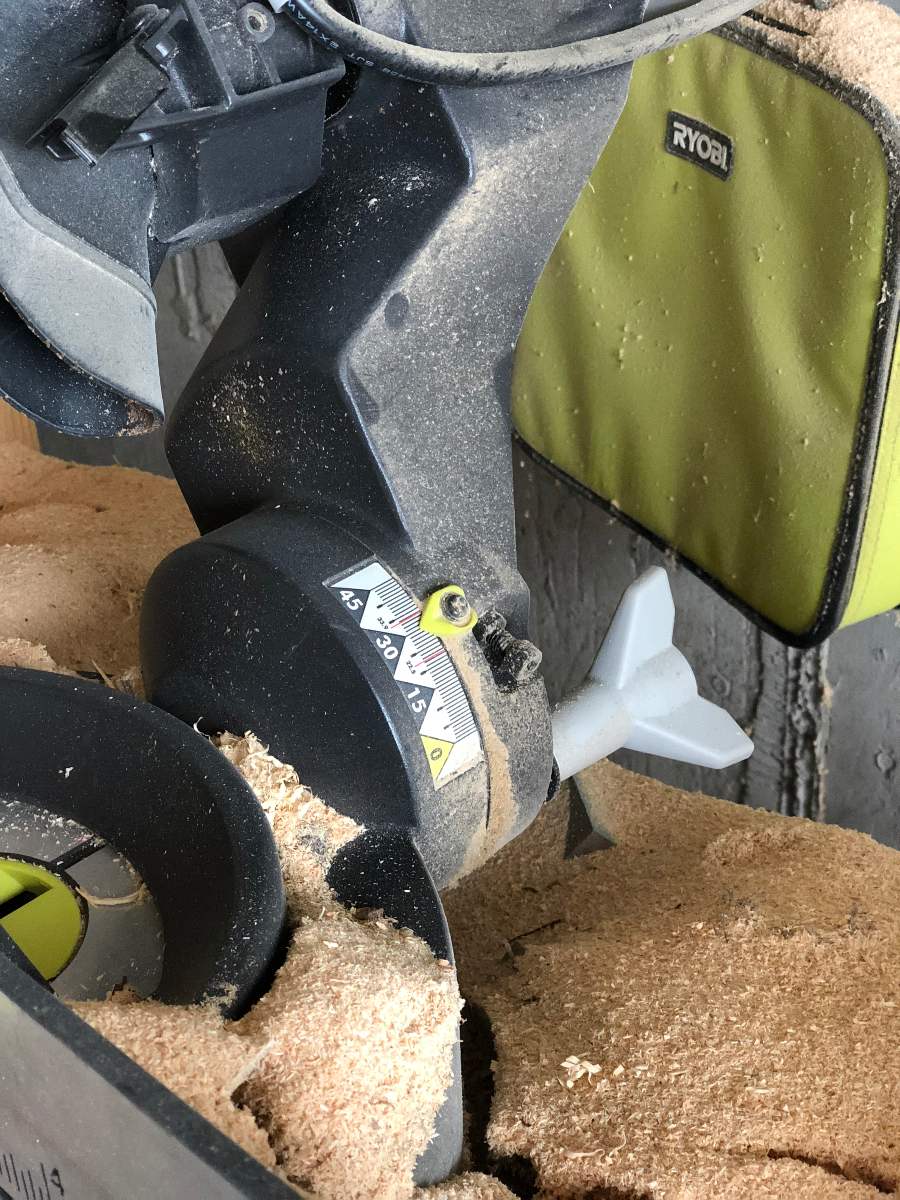
and ignore my copious amounts of
sawdust behind my saw.
Be better than me..
clean between projects 😉
Then you’re going to make perpendicular
bevel cuts on either end of the board
with the long point to long point measuring 18″.
NOTE: One board will be facing up and one will be facing down to make the halflap fit so when you make your bevel cuts
be sure to cut one with the groove facing up and one with the groove facing down.
At this point, since the miter saw is already beveled, you can go ahead and cut your
16 1/2″ board as well, also in the perpendicular fashion.
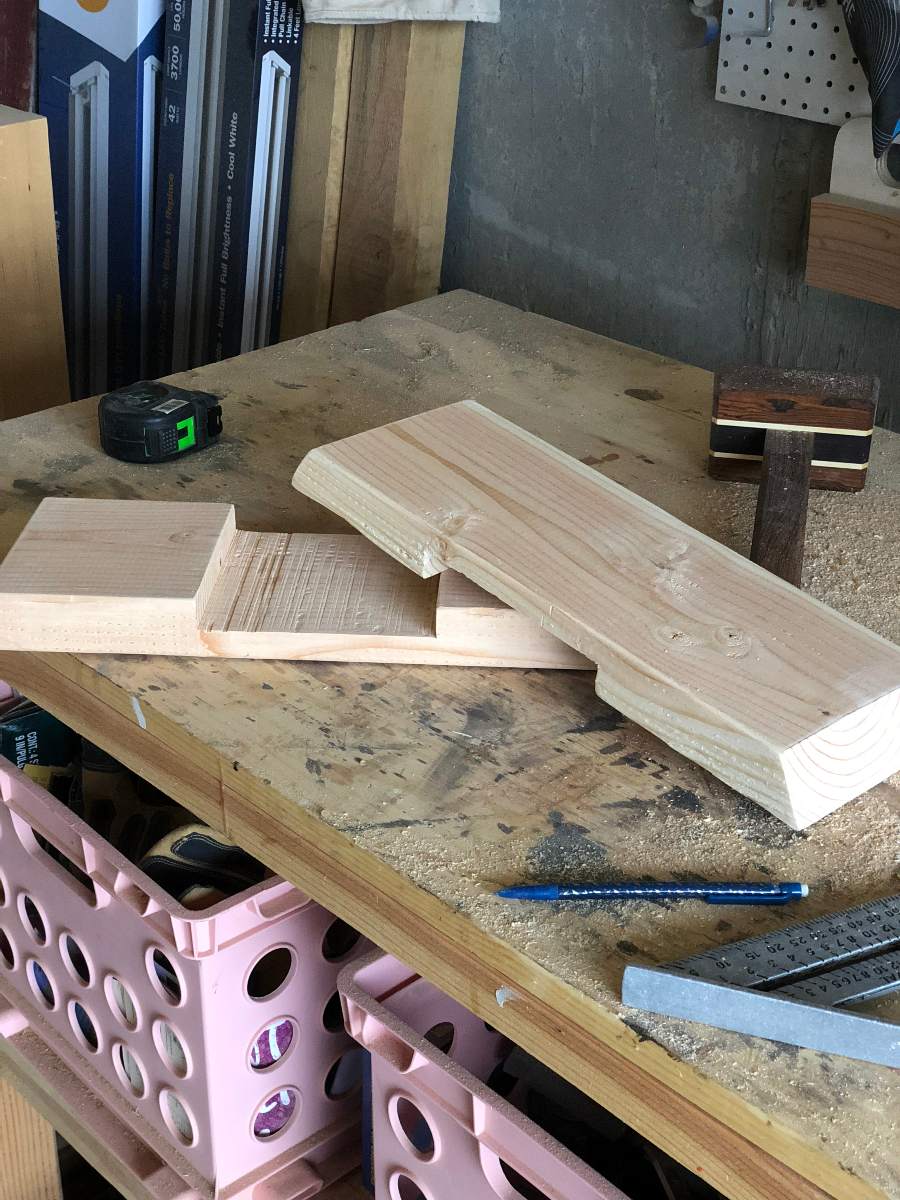
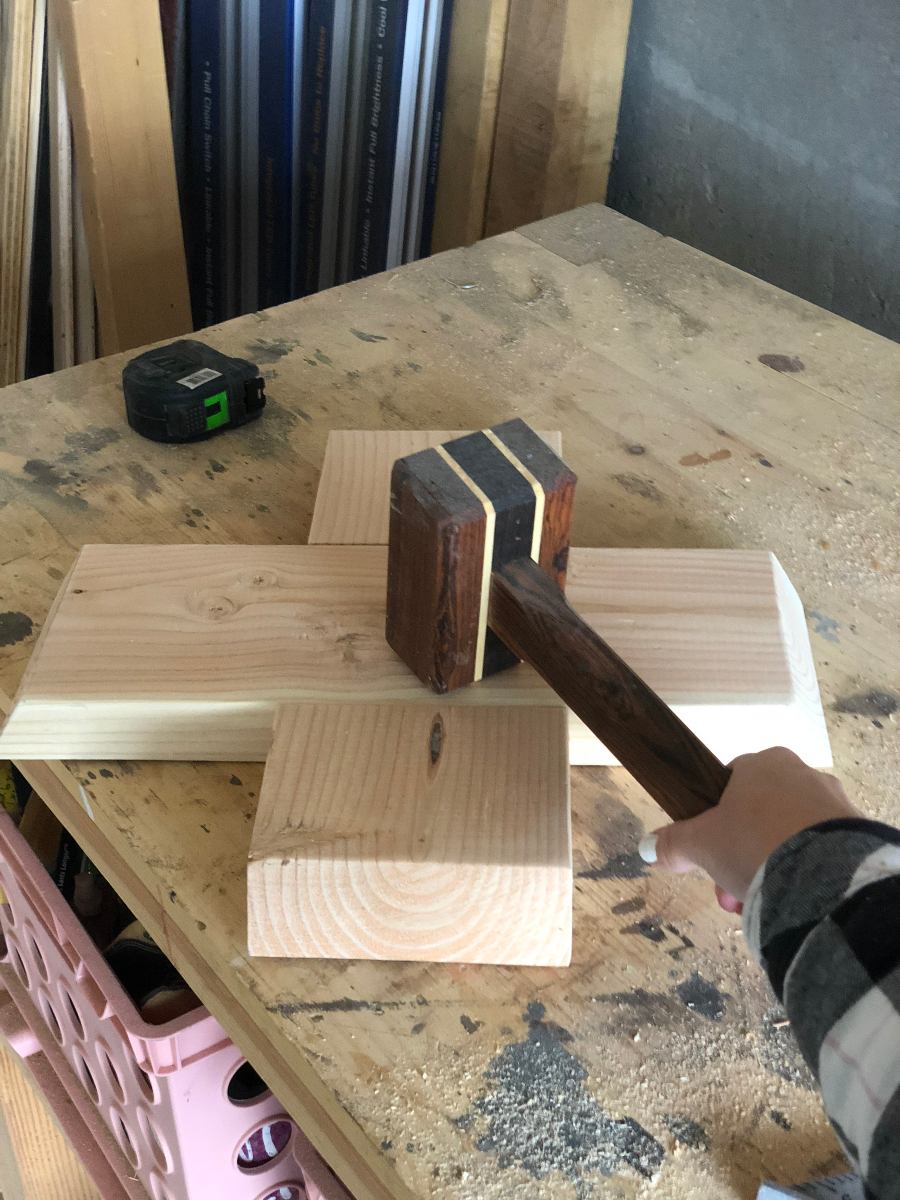
Then you’re going to lay your boards together in a “+”
and tap them into place.
Cut your 1/2″ pieces and glue them to the bottom of the base
and nail into place.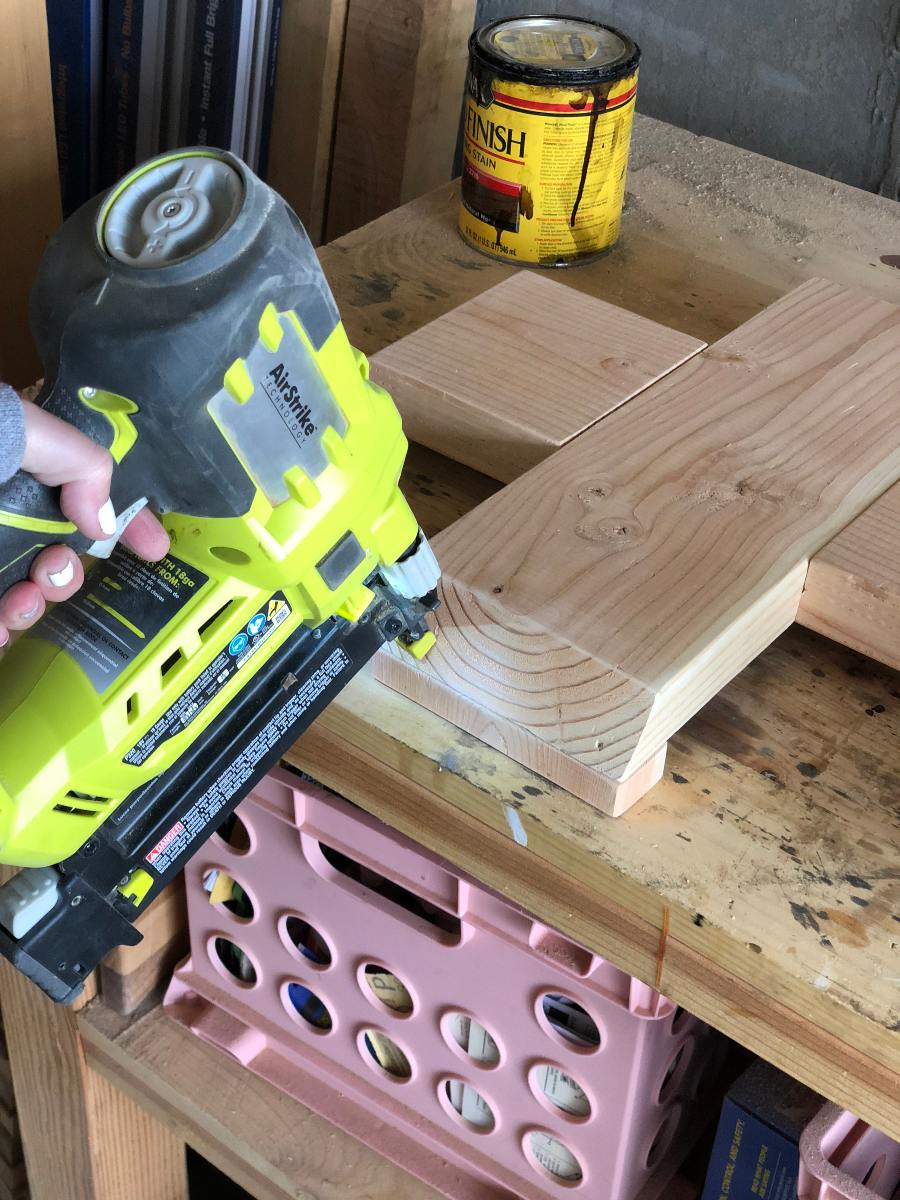
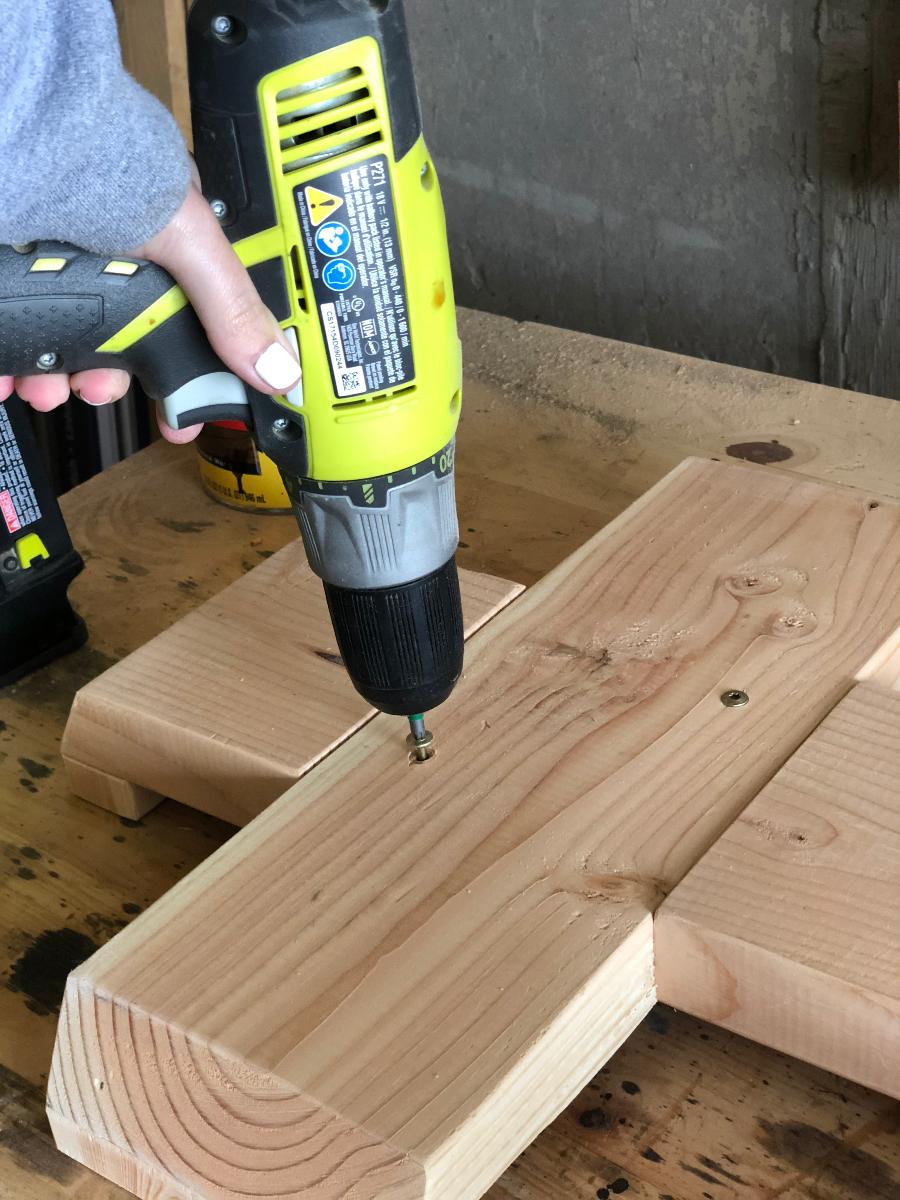
Using two 3/4″ spax screws, attach the two base boards together.
Step 2
Whew! We are DONE with Step 1!
Feels like about 100 mini steps in step 1 🙂
Still with me?
Good.
Let’s start that twisty pedestal.
I used my 5 1/2″ marker on my miter saw so I wouldn’t
have to use the tape measure each time.
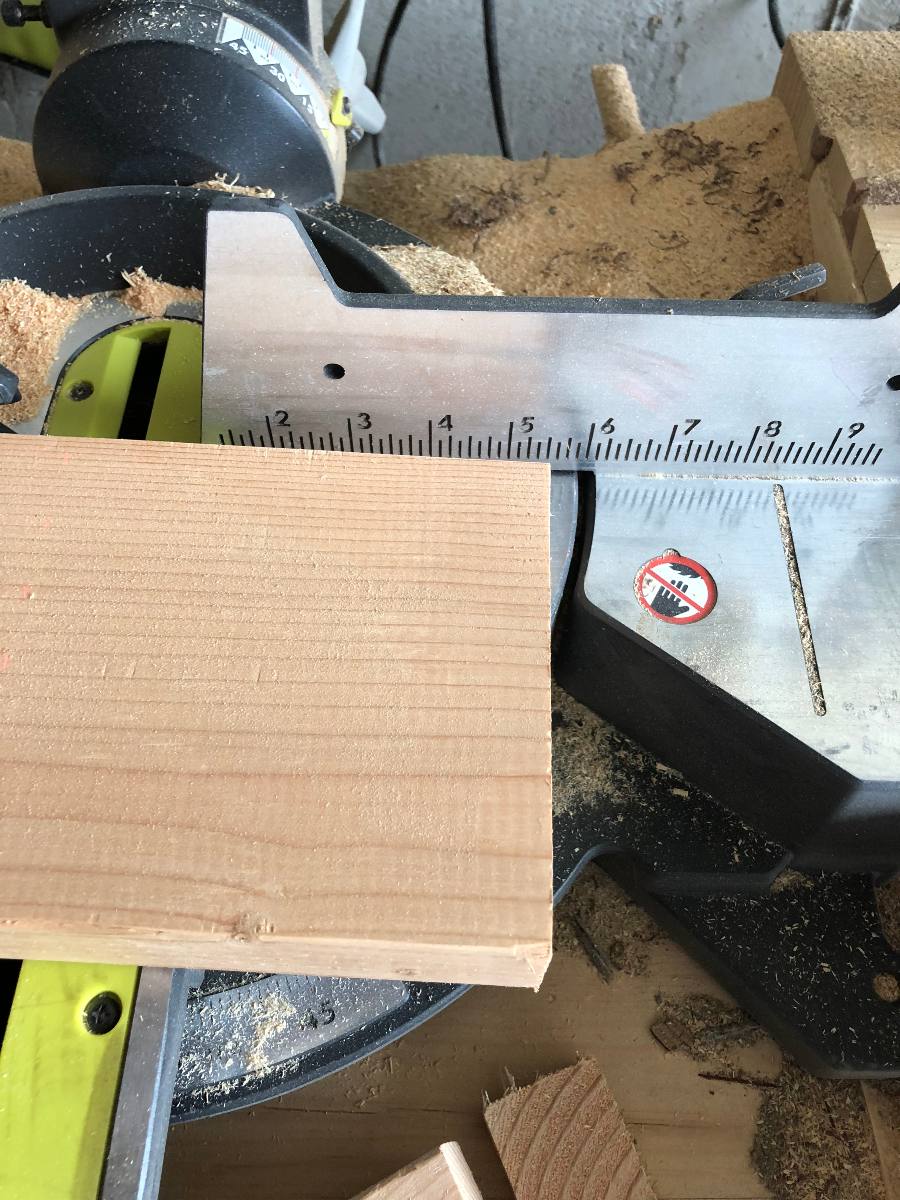
Cut 16 pieces at the 5 1/2″ mark.
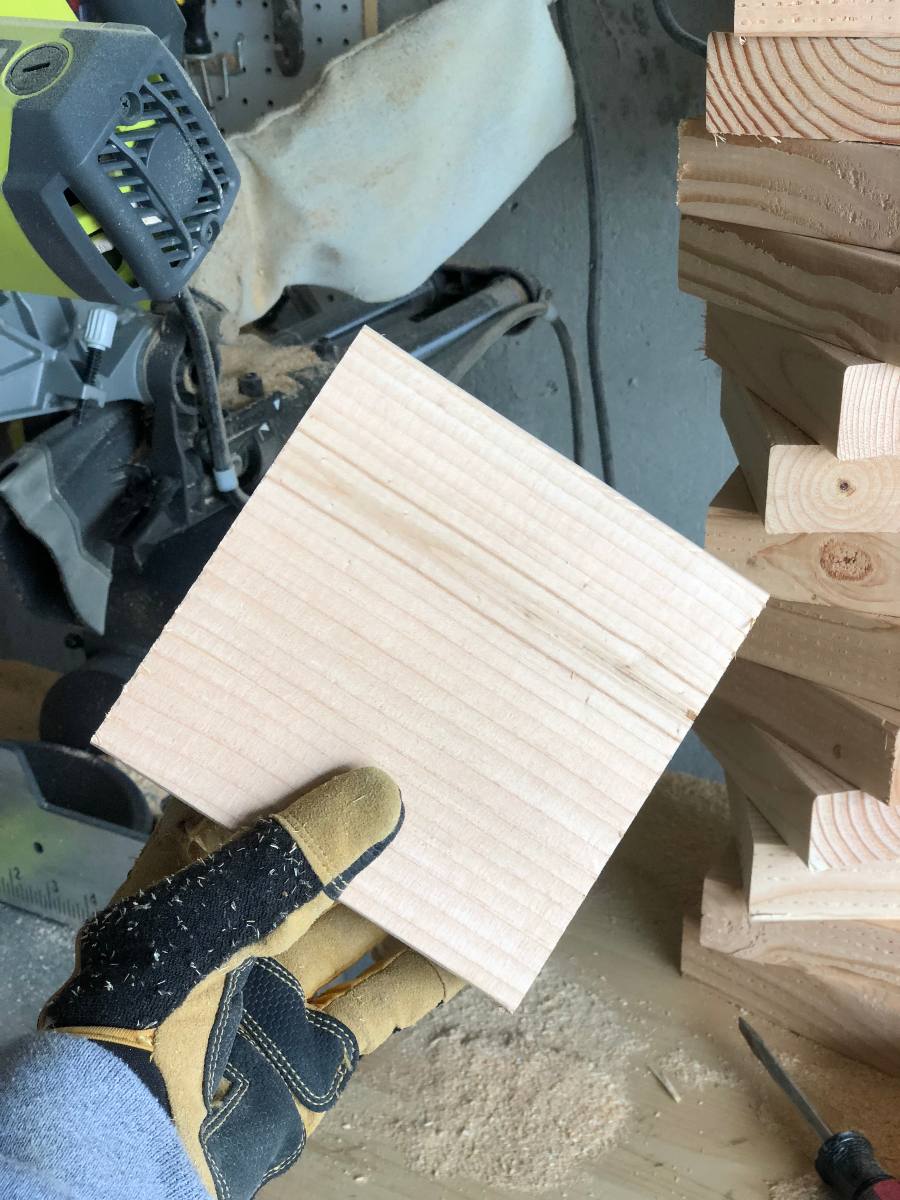
I waited until after they were all cut to sand them
so that I could round the straight edges with my sander
to match the rounded edges that 2 by’s come with.
On the top you can see it’s straight on two sides. On the bottom I rounded them.

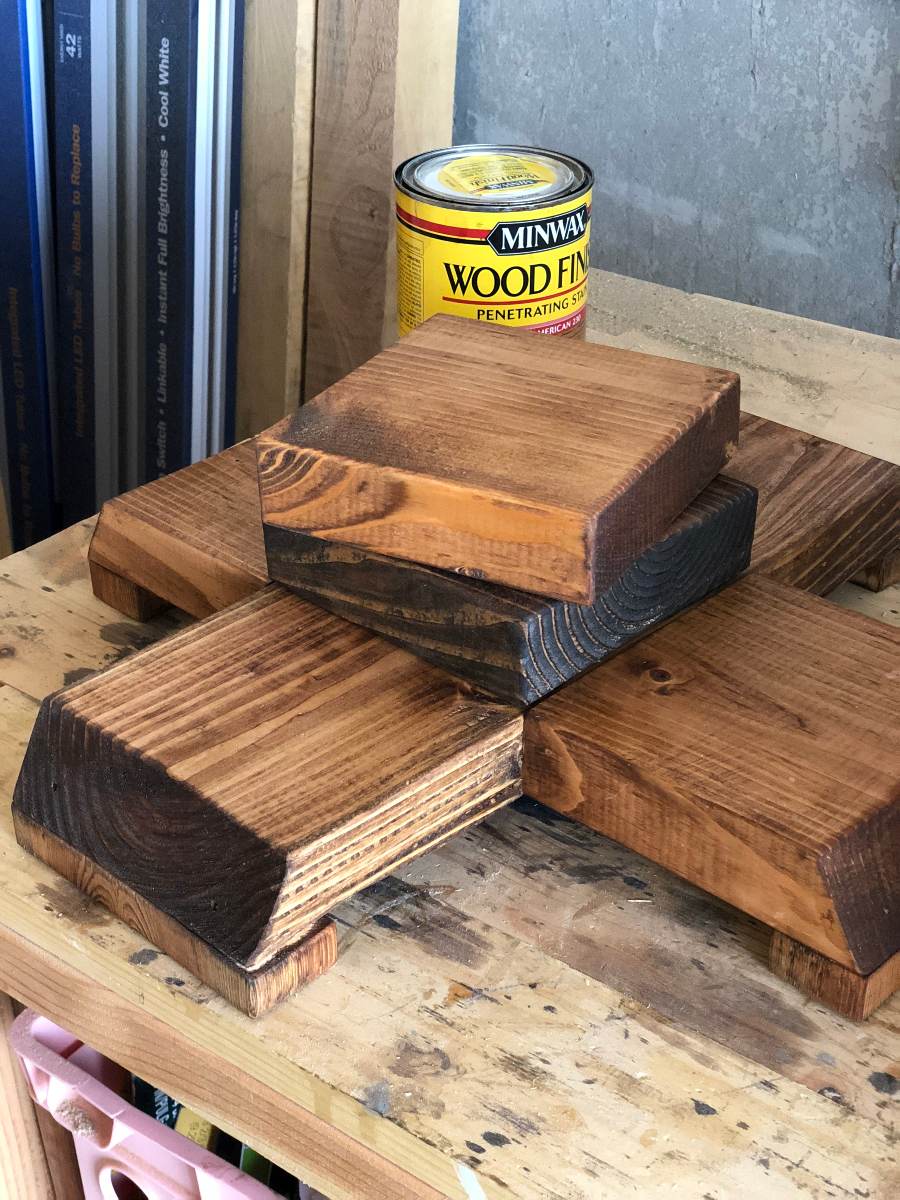
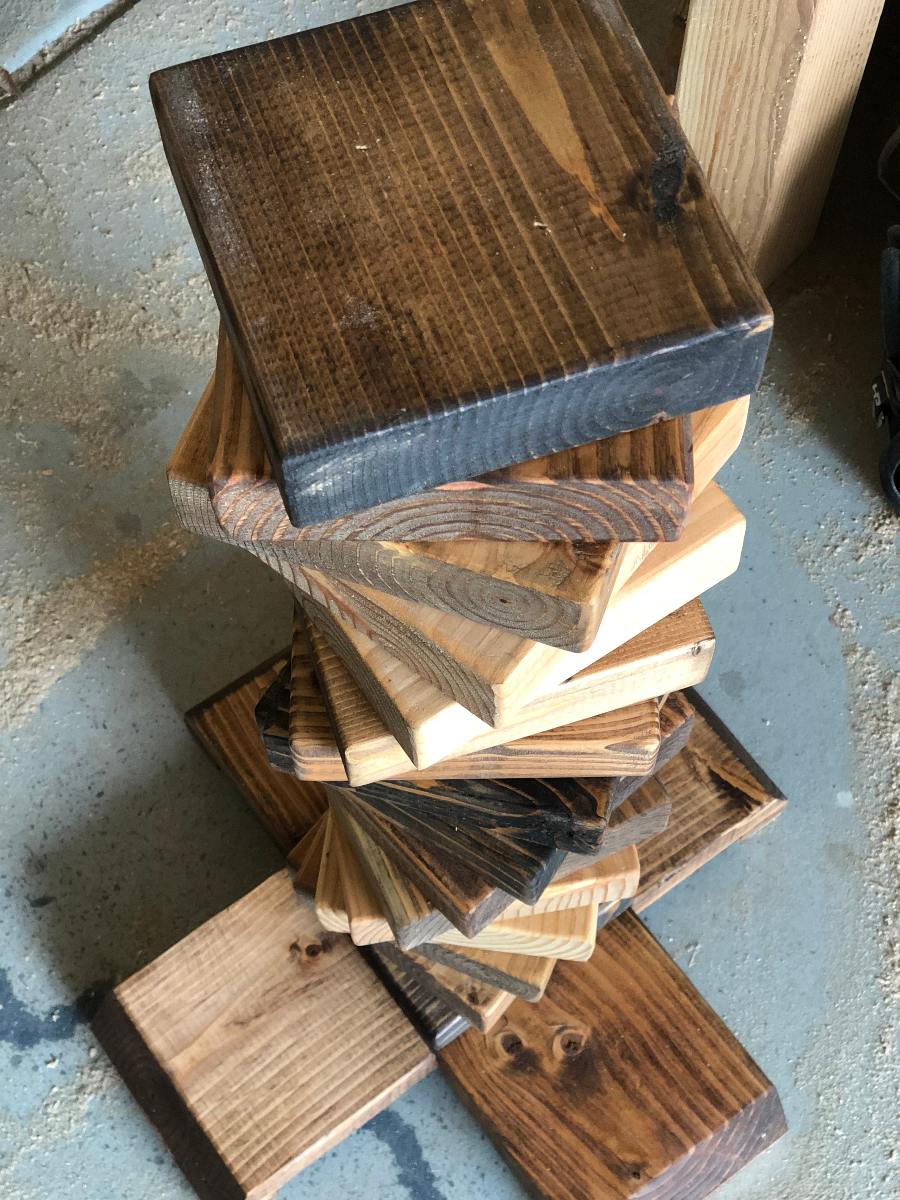
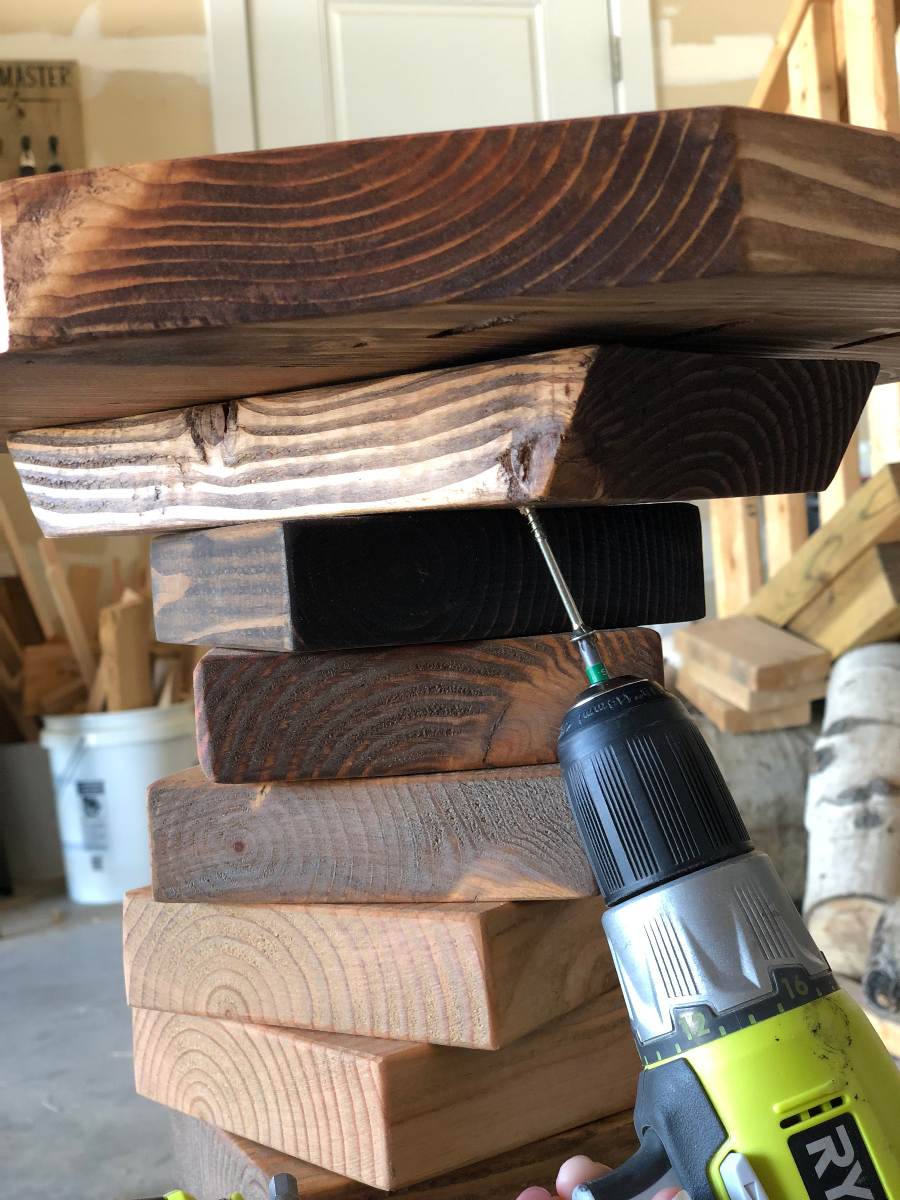
Step 3
Before stacking all my blocks I stained them.
The reason I did this is that I was attempting
to go for an “ombre” look up the pedistal.
It’s not exactly how it looked it my head.
I don’t know if I love it yet.
It may still get painted pink. Who knows? 😉
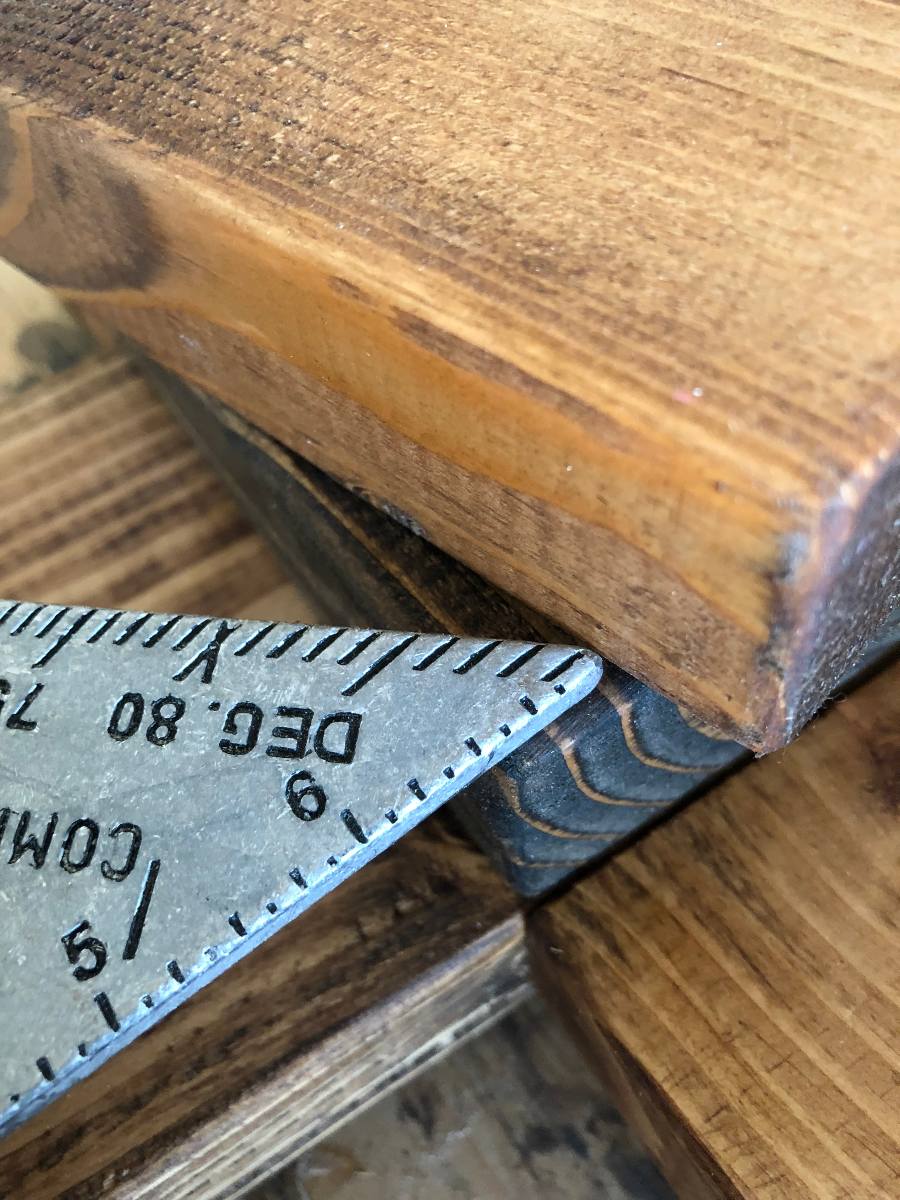
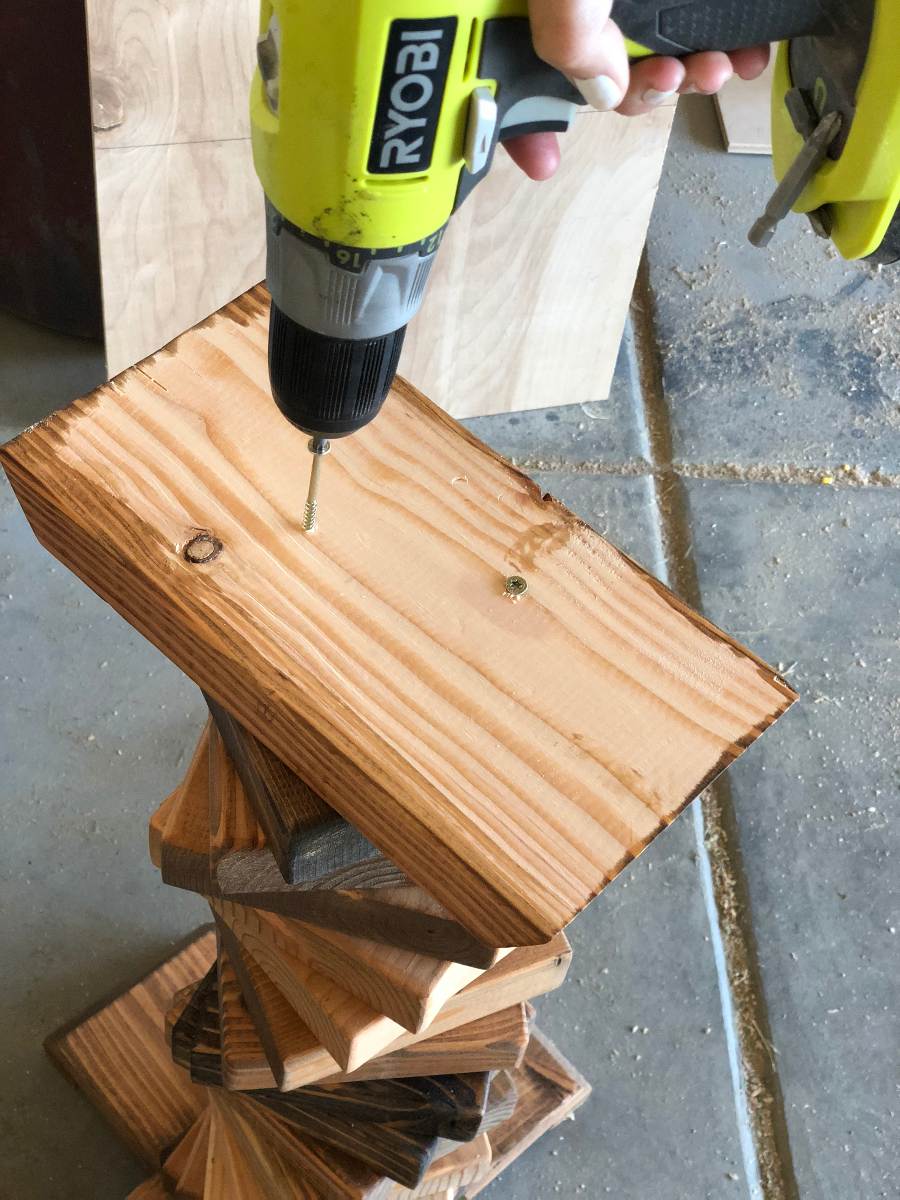
Start stacking your blocks on the base.
I started by lining the first one up completely square.
You’re going to use wood glue and 2 1/2″ brad nails
to attach the blocks.
I only used 2″ brad nails
because that’s how big my 18g nailer allows,
but 2 1/2″ would be more secure.
The next one I shifted a half inch.
This gave me a tighter spiral
but really, its up to you how wide you want the space
between the blocks.
Continue to glue and nail and shift each block
as you stack them on top of each other
until you have stacked all 16 blocks.
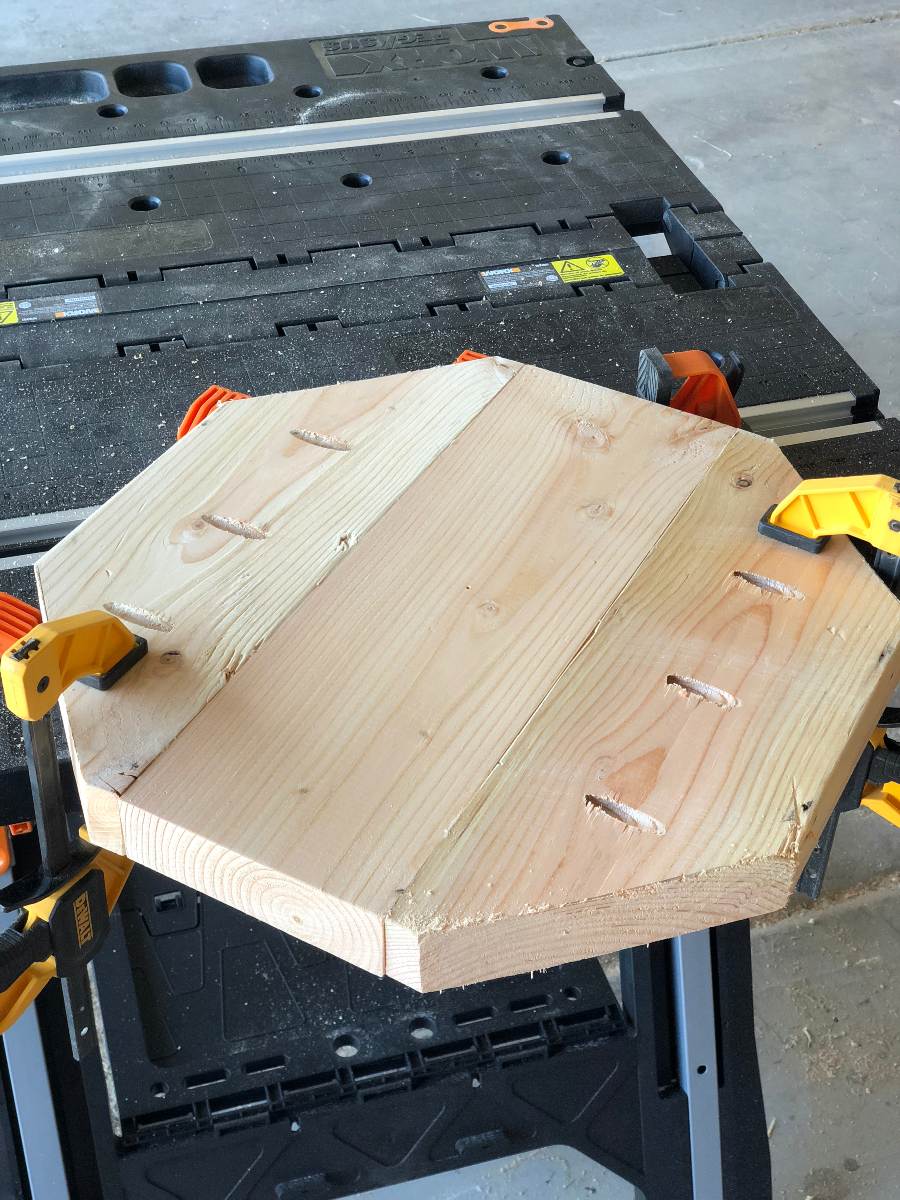
Step 4
Attach the four 19″ pieces using pocket holes.
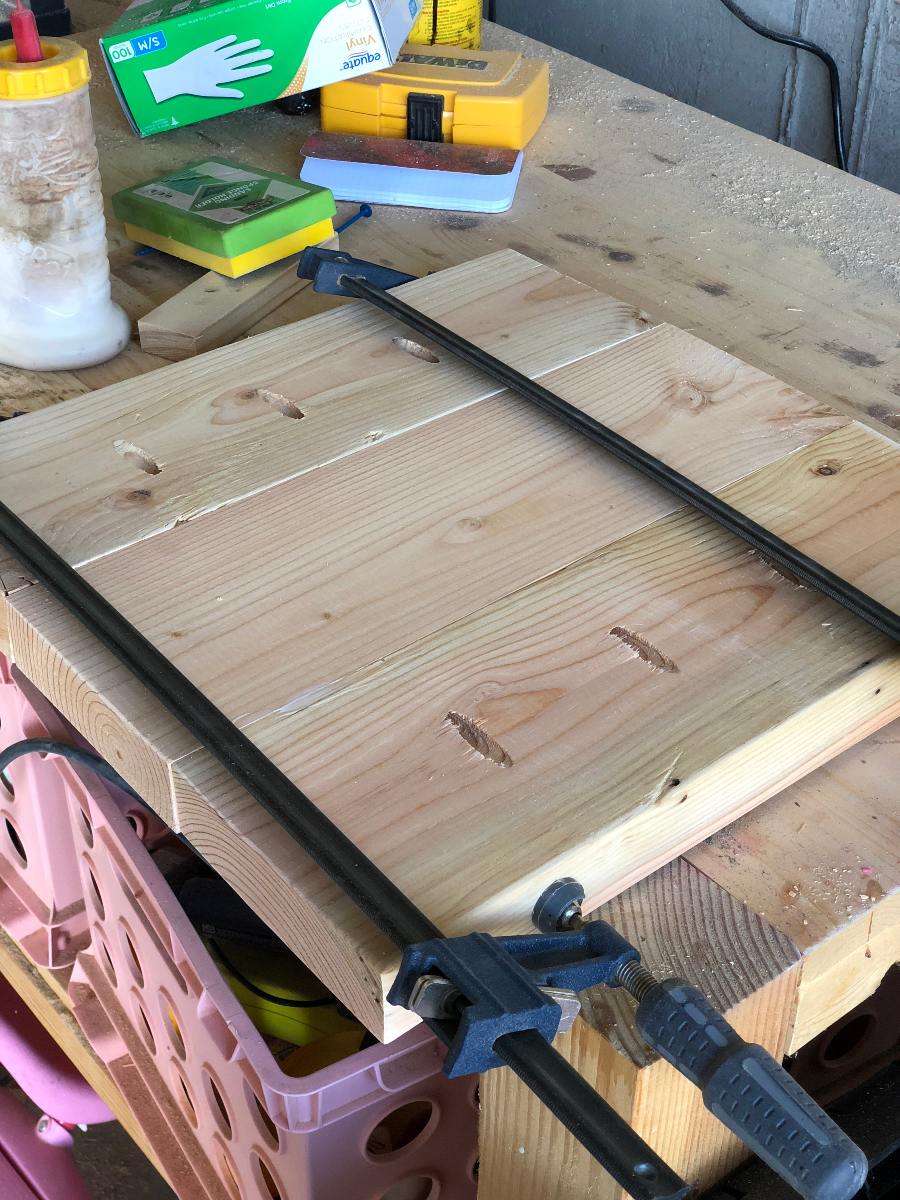
You’ll notice in this photo I only have 3 boards.
That’s because I screwed up and made the top too small.
I later fixed it but I’m still using the old photos.
It’s a real “Do As I Say, Not As I Do” situation.
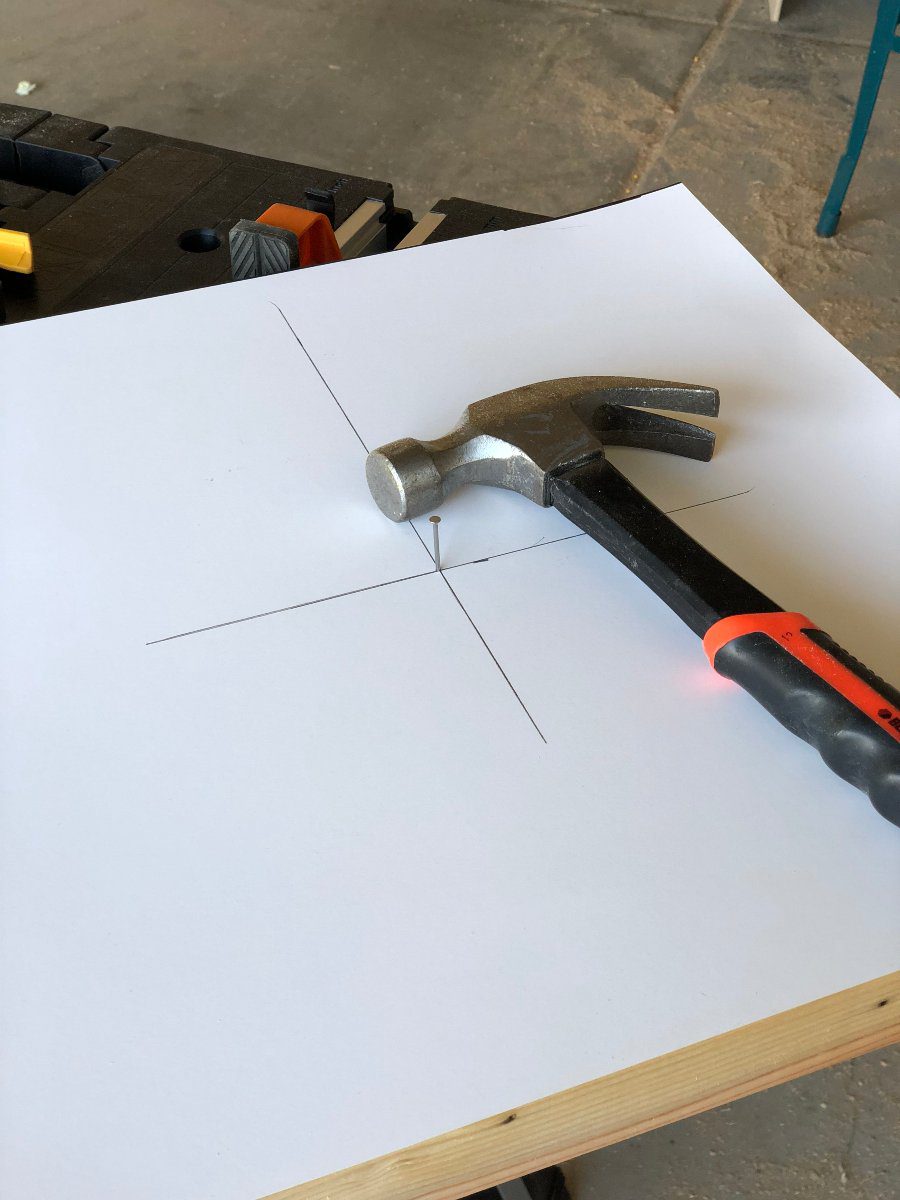
Step 5
Cut a 19″ x 19″ square out of poster board.
Find the center of the poster board square
and line it up on your wooden square.
Take a hammer and place a nail at the center
to attach the poster to the wood.
I did this from the bottom so there wouldn’t
be a tiny hole on the top of my piece.
Twist your poster 45 degrees.
Use a square to line it up evenly.
Then draw lines on each side.
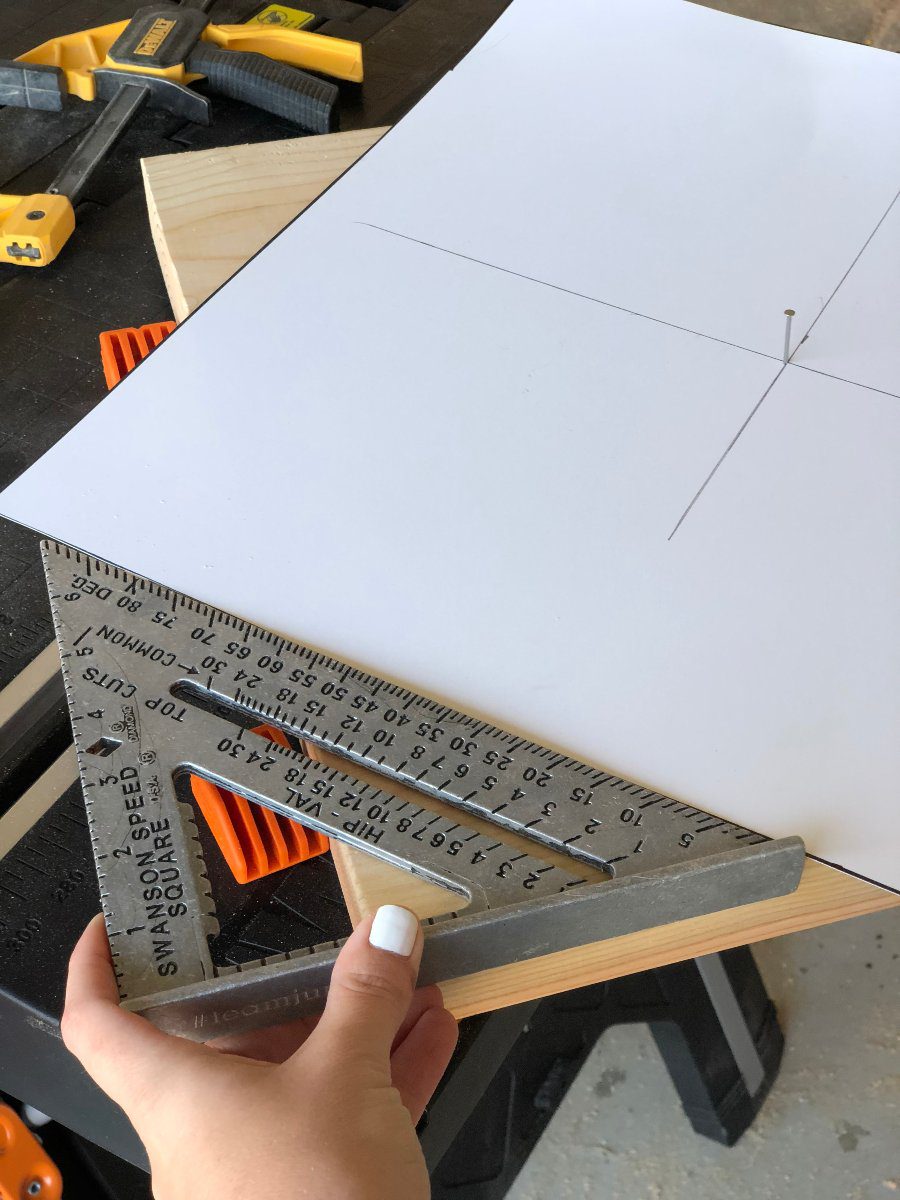
Remove the poster and clamp the
wood to the edge of your work surface.
Using a circular saw,
cut off the marked edge.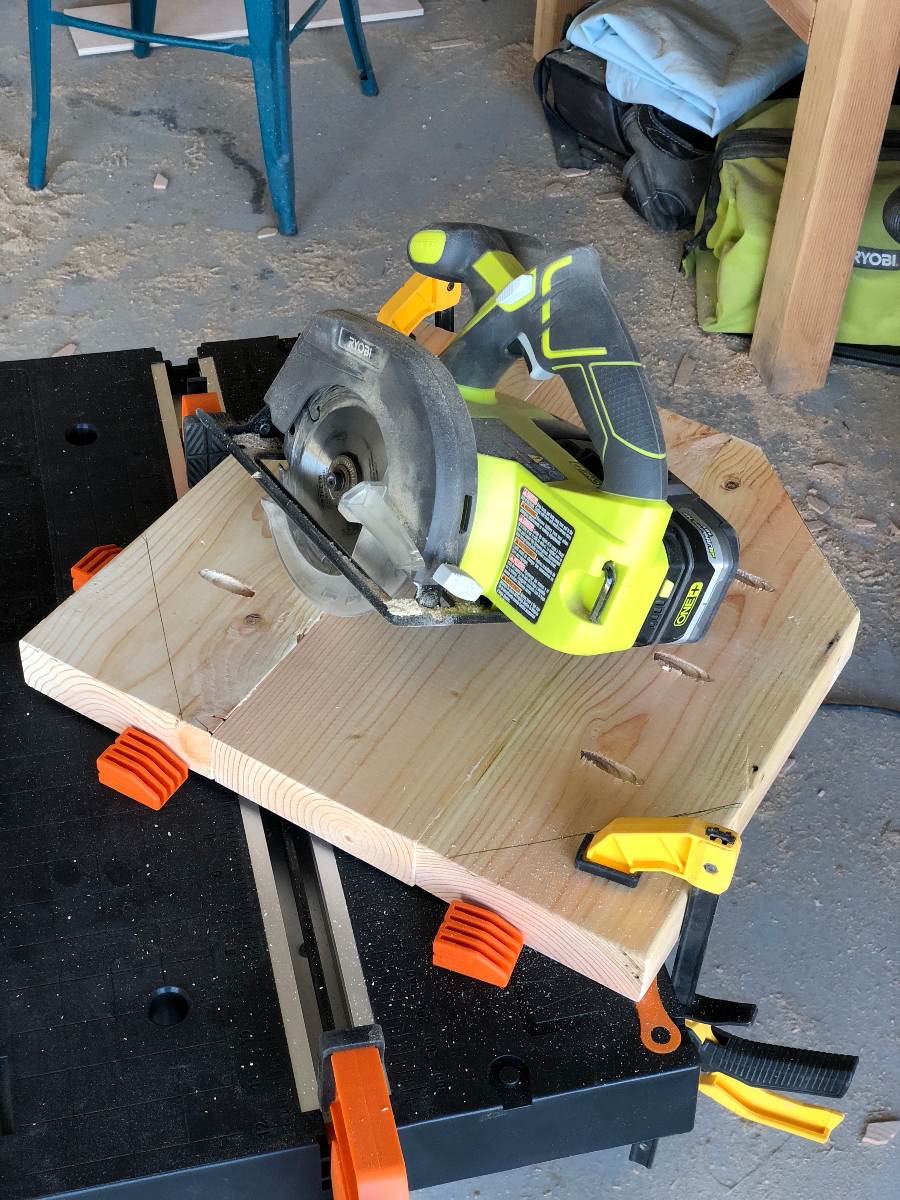
Continue to rotate your piece
cutting off each marked edge
until you have an octagon.
Step 6
This is where your 16 1/2″ beveled piece comes back in to play.
Center it on top of the twisty pedestal.
Use the 2 1/2″ spax screws to attach it.
Center the octagon on top of that.
Again, using 2 1/2″ spax screws,
drill up from underneath through
the 16 1/2″ piece into the octagon
to attach it.
And you’re DONE!
I know the steps seem longer than
I promised, but I got it all built in less than
two naptimes 🙂
Translation: less than 4 hours.

Thanks for following along, guys!!
And, as always, don’t forget to post pics,
PIN this project, and tell your friends!!
Such a perfect tutorial!!! Perfect pics for beginners like me!
Thanks Joy!! I’m glad you like it and it’s nice to hear that it’s user-friendly 🙂