Home Decor, Tutorials
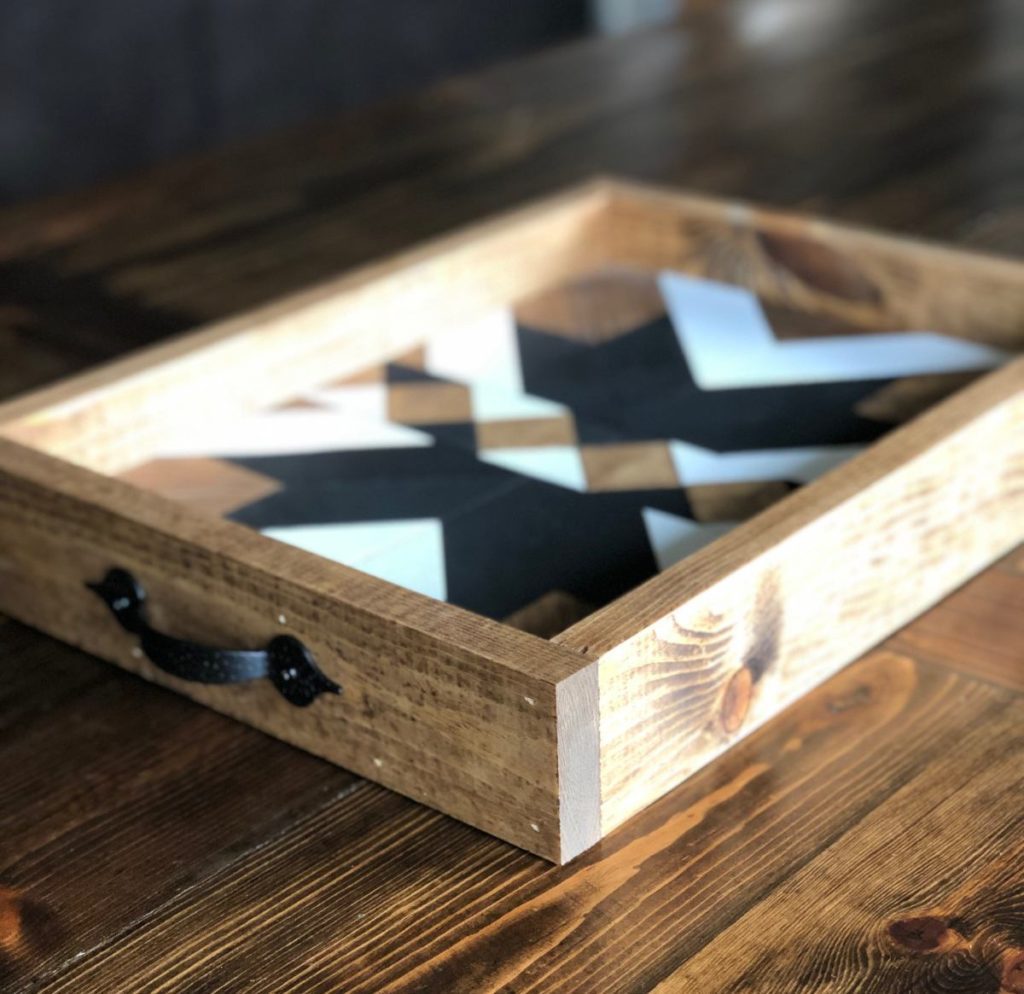
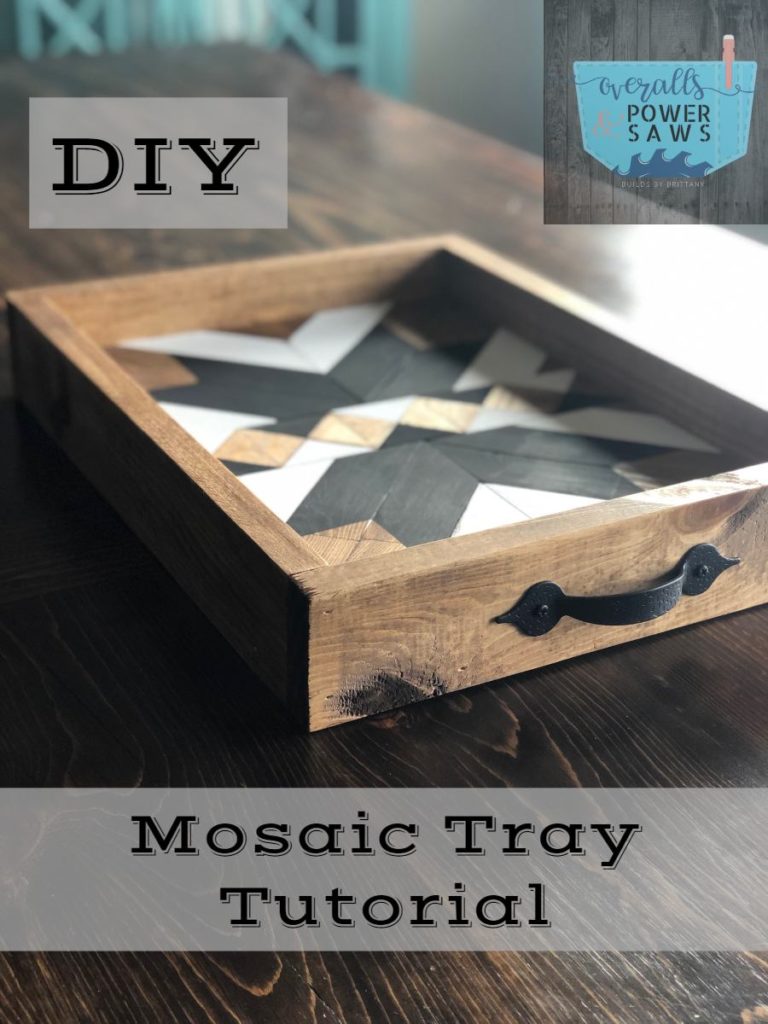
Mosaic Tray
Hi friends!! I am suuuuuper excited to share
this next mosaic project with you. Do you want to know why?
I’ll tell you why.
Two reasons:
1. It’s a scrap wood projects and scrap wood projects
are the beeeeest because you get rid of scraps, and the
project is essentially FREE!
2. It’s a mosaic project and I have been a little
obsessed with all the different patterns and color
combos you can come up with when creating a mosaic!
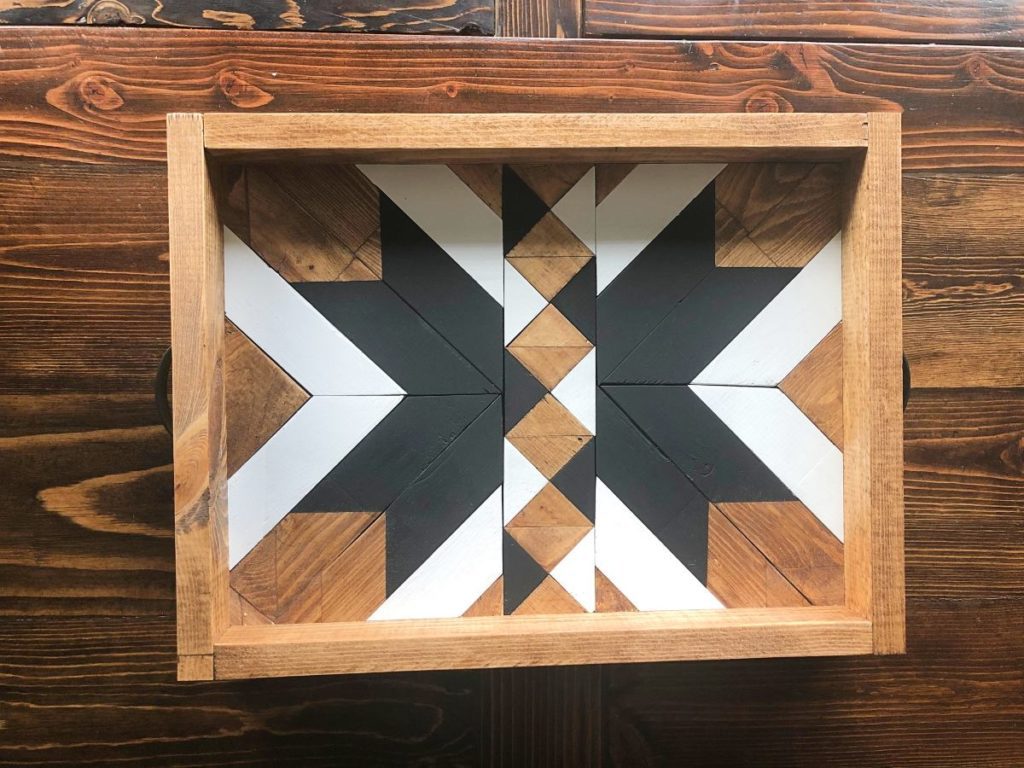
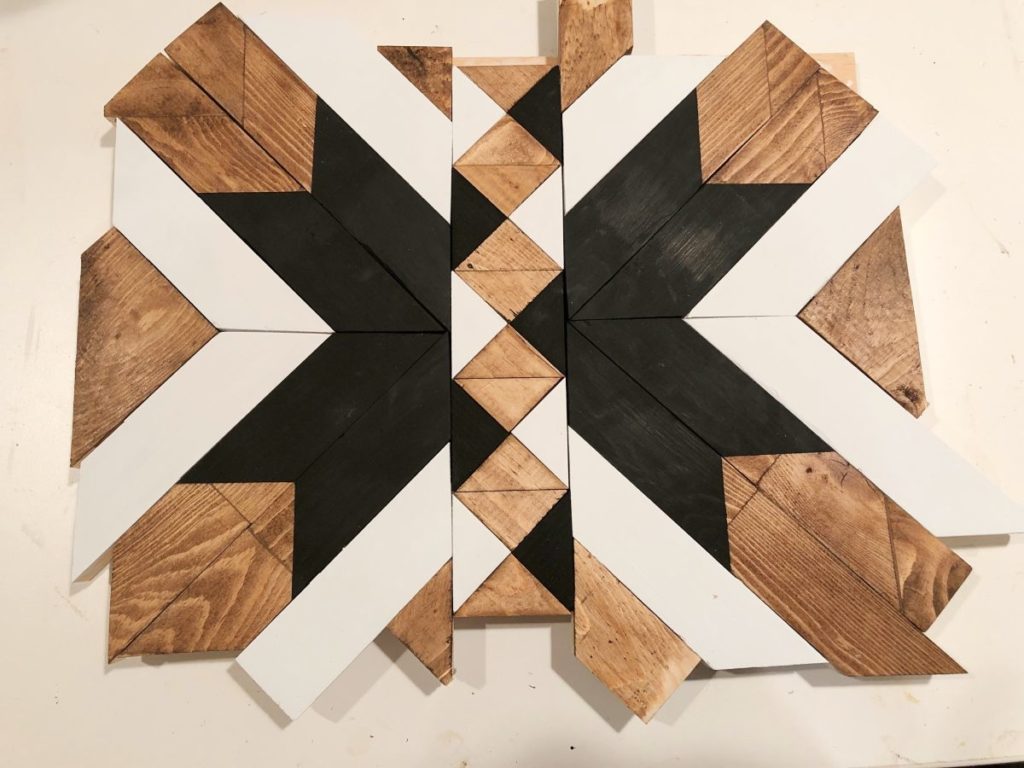
I mean, really though, just look at that mix of geometric patterns.
*insert ALLL the heart eyes emojis here*
Ok, so here’s what I’m gonna do. Basically I will give you
the rundown of how I built the tray, including how I
made this exact pattern. You are welcome to use it 😉
However, you are also welcome to choose your own entirely
different shapes and colors. The really fun part about mosaics is that
pretty much no two look exactly the same and I loooove seeing
all of your creativity come to light so let’s see ’em!
Before we jump into it, be sure you’re following along
with Overalls and Power Saws on Instagram and Pinterest!
Mosaic Tray
Dimensions: 12 1/4″ wide x 16 1/4″ long x 2 1/2″ tall
Materials:
- 2×2 sheet 3/8″ plywood
- 1x4x4 – 2
- 1x4x6 – 1
- tray handles
- wood glue
- paint
- stain
- 1 1/4″ brad nails
- painters tape
Cut List:
- Cut plywood to 10 3/4″ x 14 3/4″
- 1x4x14 3/4″ – 2 – Rip to 2 1/2″ – check out step 6 before making these cuts
- 1x4x12 1/4″ – 2 – Rip to 2 1/2″
- Rip both 1x4x4’s into 1 1/2″ strips
- take your 1 1/2″ strips and cut
- 8 @ 10″
- 4 @ 7″
- 4 @ 6″
- all of which will have one end cut at 45 degrees
- 24 triangles – which basically you just make a 45 degree cut, and then you make a straight cut at the edge of your 45 degree cut, and it makes a tiny triangle.
- 1x4x3″ – 2 – Rip to 3″
**If you are making a different mosaic pattern and just want the cut list for the tray, only make the first three cuts on the list. That is the base and frame for the tray.
Step 1
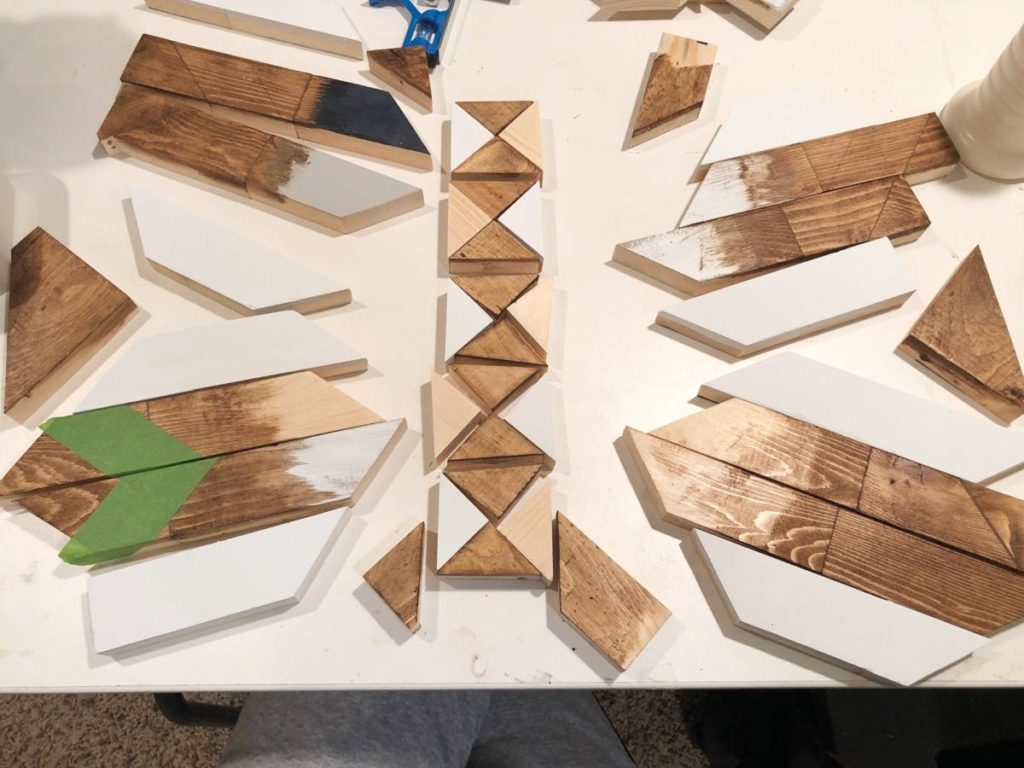
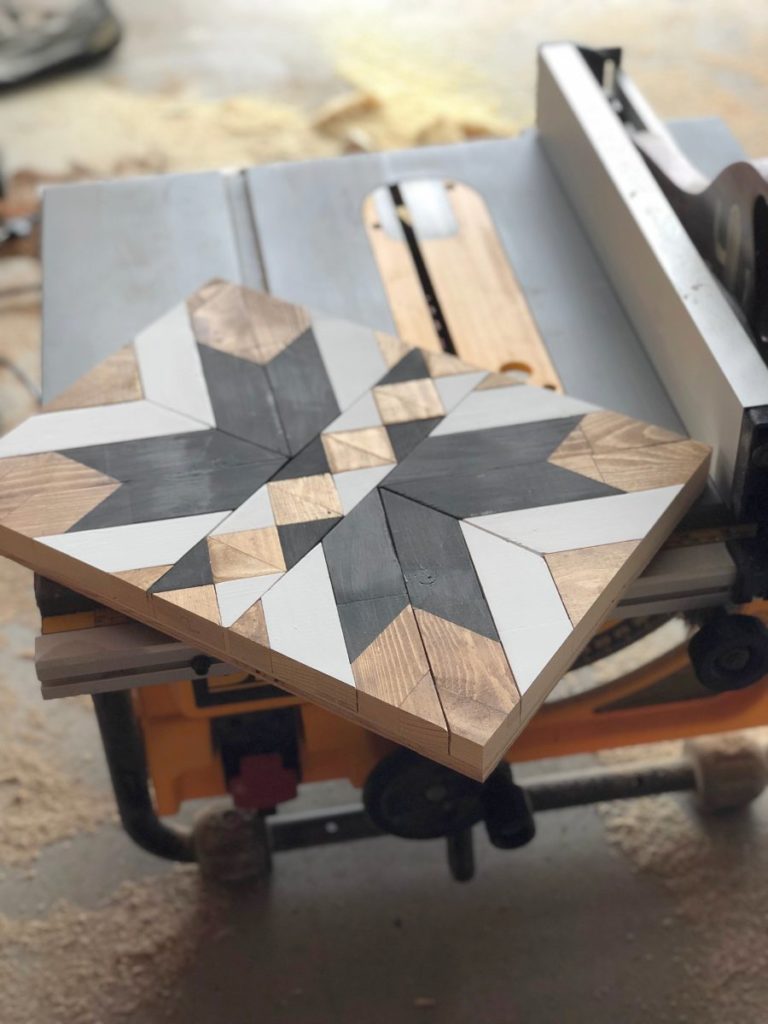
Cut the plywood to size, and cut all of your strips and triangles.
Step 2
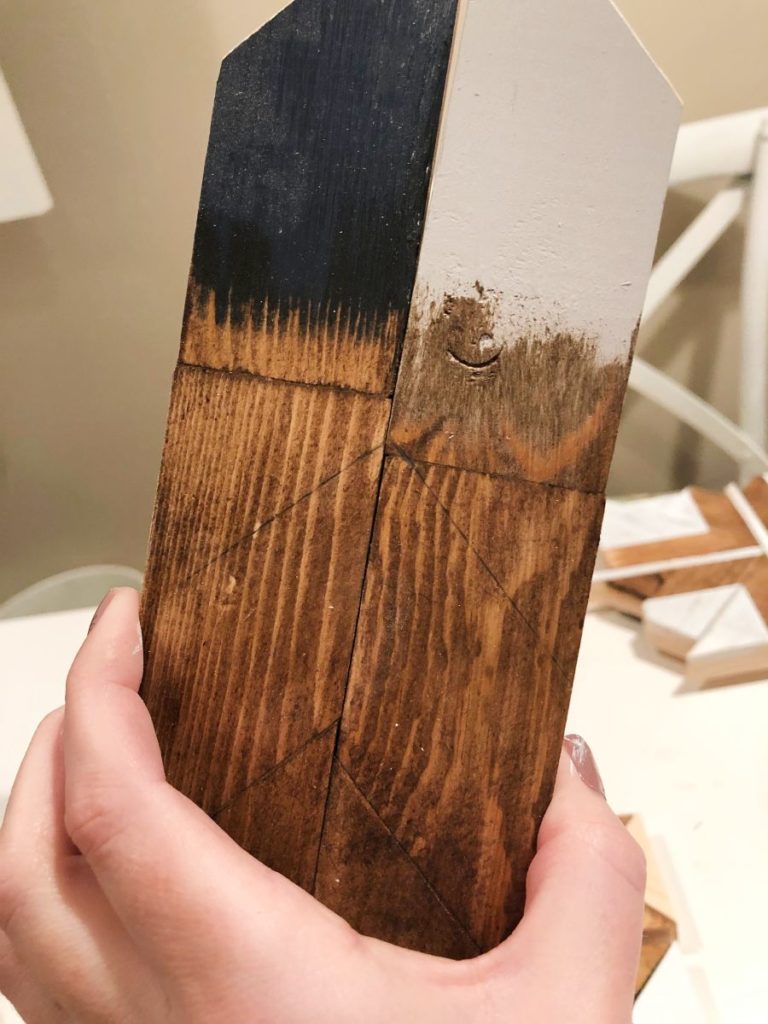
Stain 14 of your triangles and your 3×3″ pieces. I used Aged Oak by Minwax.
Then you’ll stain all 8 of your 10″ pieces as well.
Once the stain is dry, measure down 4″ from the top of one of your 8″ pieces, then using a square, draw a 45 degree line.
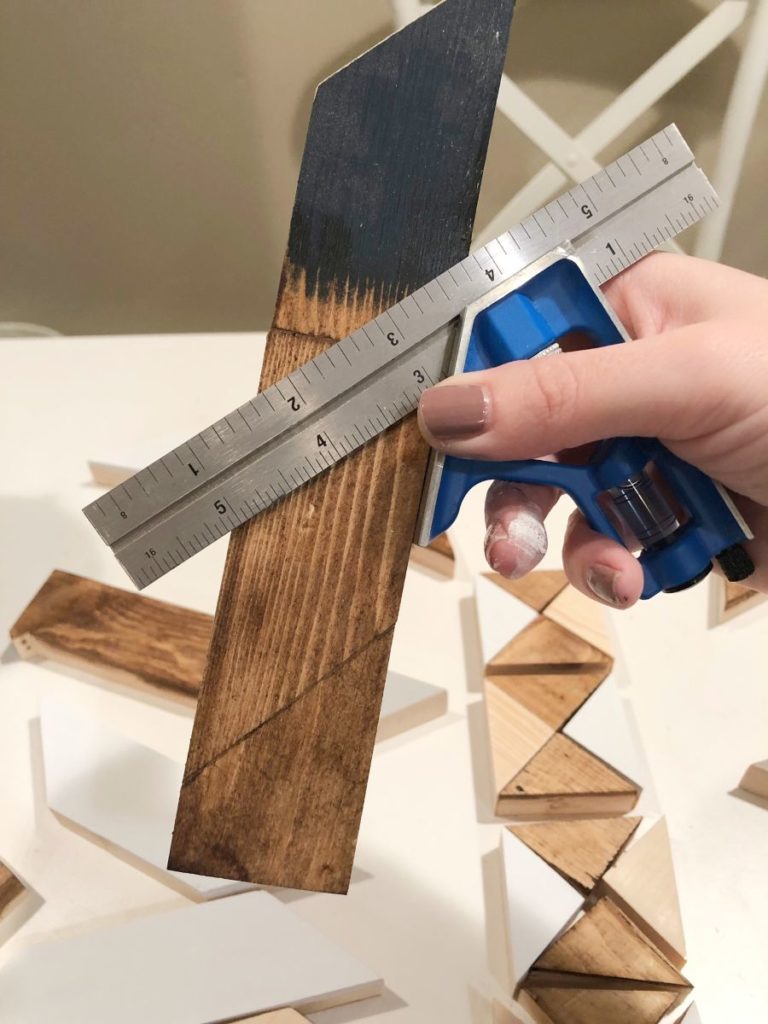
because I glued together a bunch of scraps so pay no
attention to the other lines on my pieces.
Then using that piece as a guide, line up another 8″ piece next to it
and make a 45 degree mark in the opposite direction.
just under the silver paint? 🙂
Use these two pieces to mark the rest of the 8″ pieces.
Then place painters tape along all of these lines.
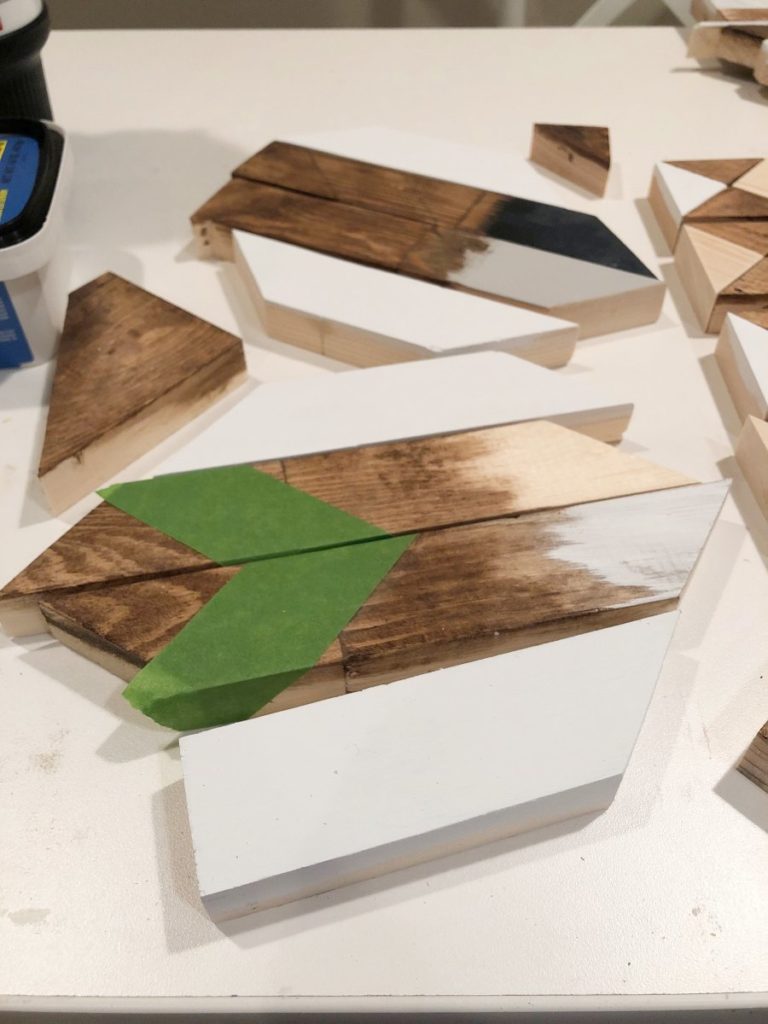
At this point, I painted 5 of my triangles white,
and all of my 7″ and 6″ pieces white.
They will dry while you paint the black pieces,
and then need a second coat for a clean white look.
Step 3
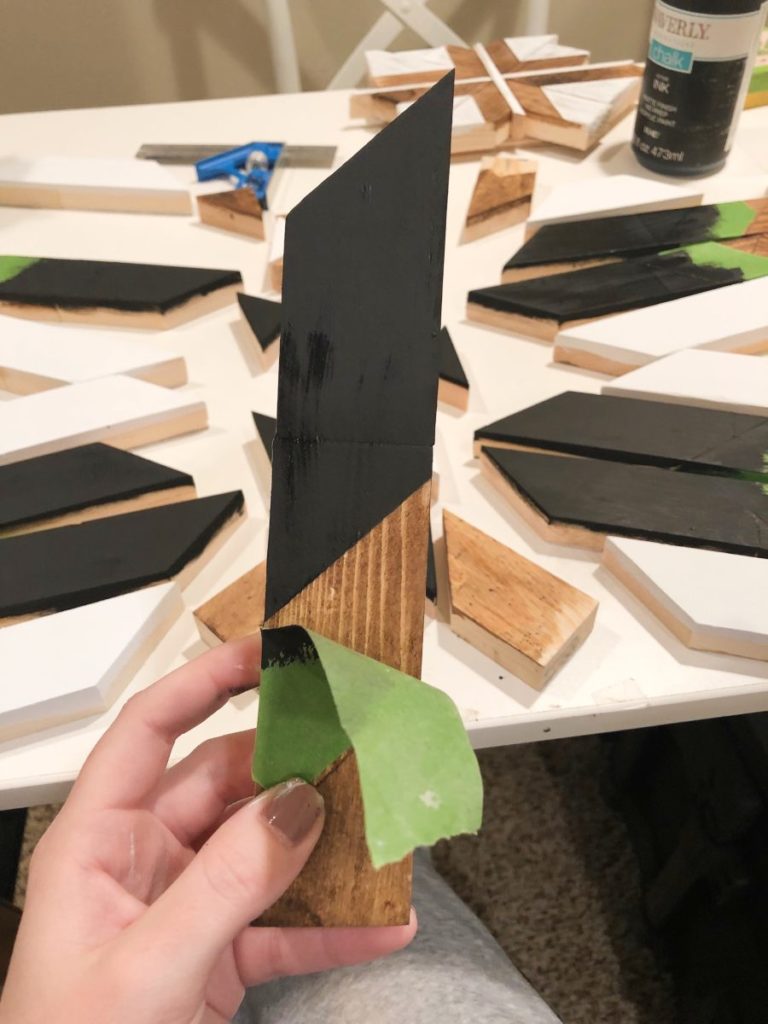
Paint 5 of your triangles, and the top half of your painters tape pieces black.
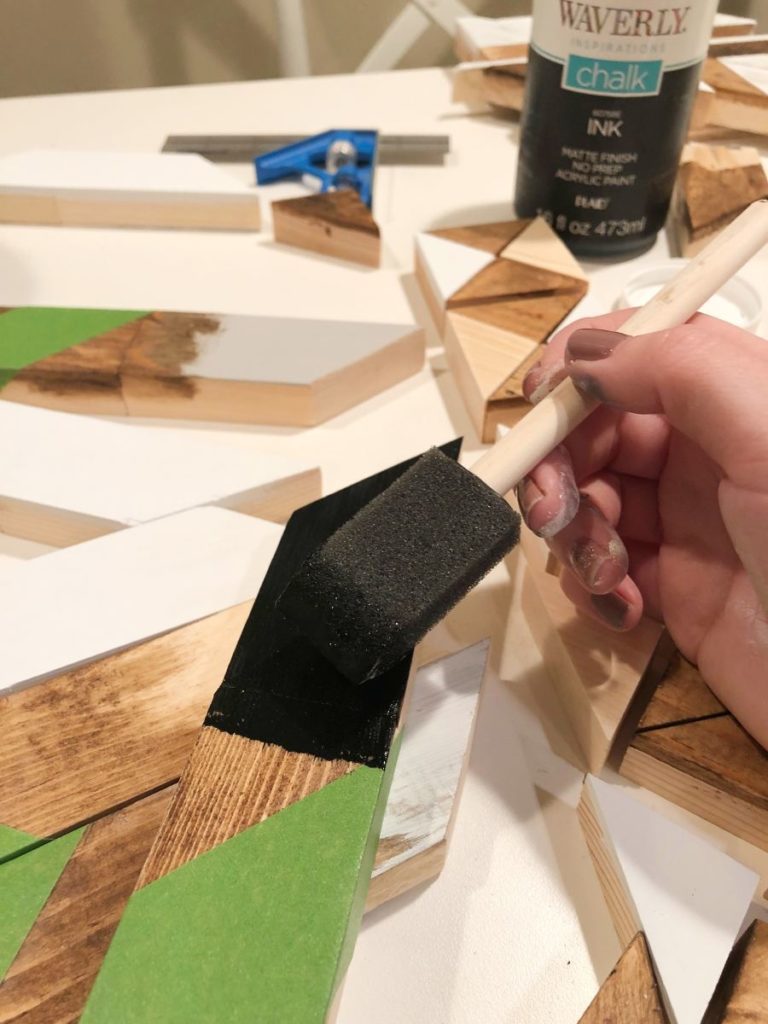
Once they’re dry, peel your tape, and you’re ready for glue-up!
Step 4
Find the center of your plywood and mark
along the length and width for reference.

Start gluing down the middle.
like to spread it out with a foam brush so it’s even.
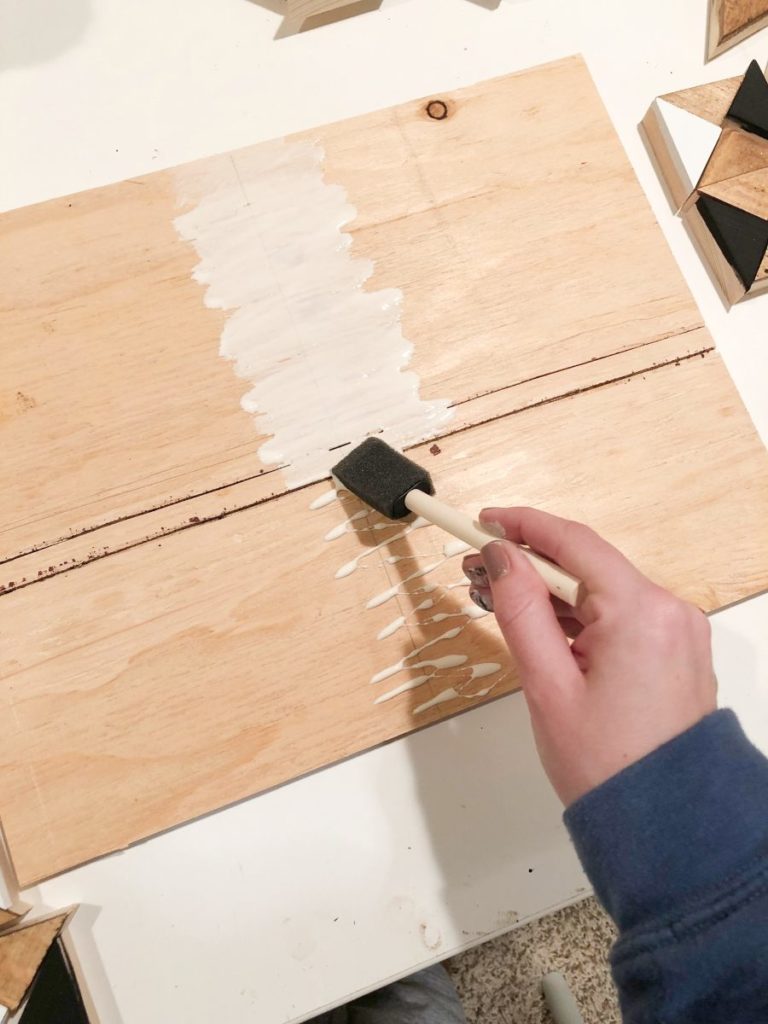
Align your triangles down the center of the plywood.
Then glue and align your pieces one section at a time.
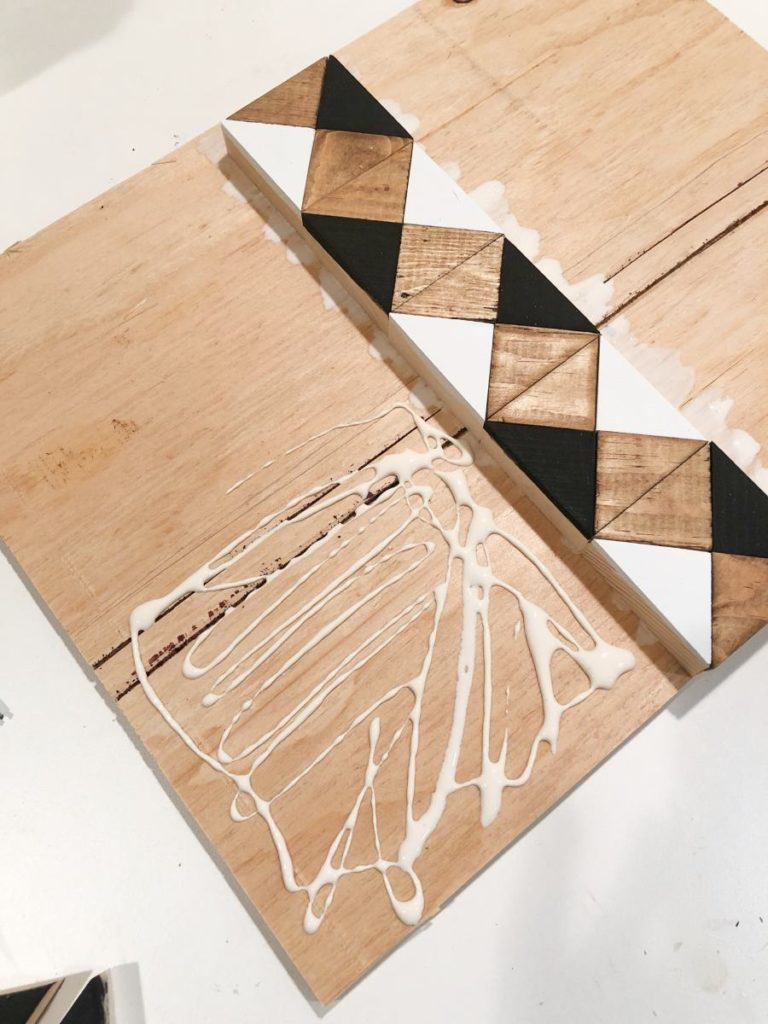
The 3×3″ pieces make up the triangles on the left and right of the mosaic.
I like to put a line of glue on the sides of these pieces as well
so they will stay in place when you trim it down.
Sit back and admire the beauty of your mosaic 🙂
Step 5
Give your mosaic piece a good couple of hours to dry
so the pieces are solid,
then trim the sides using a table saw
or circular saw.
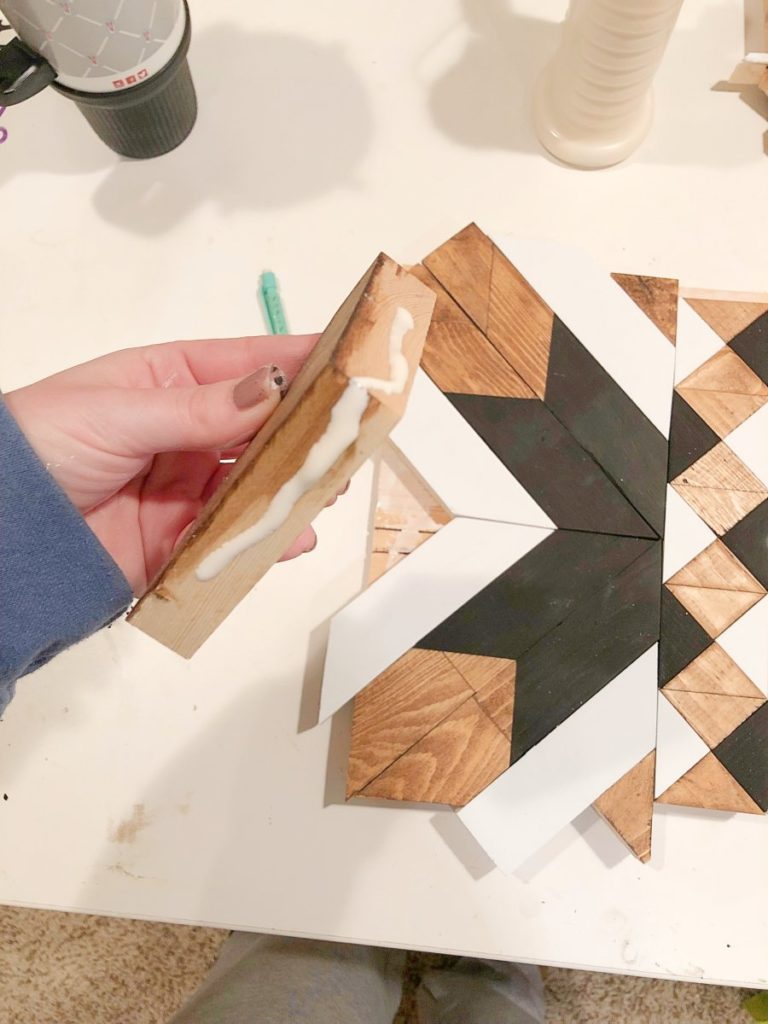
Step 6
I like to cut my frame pieces an inch or two longer
than I need them to be so that I can measure them
up against the piece to get an accurate cut.
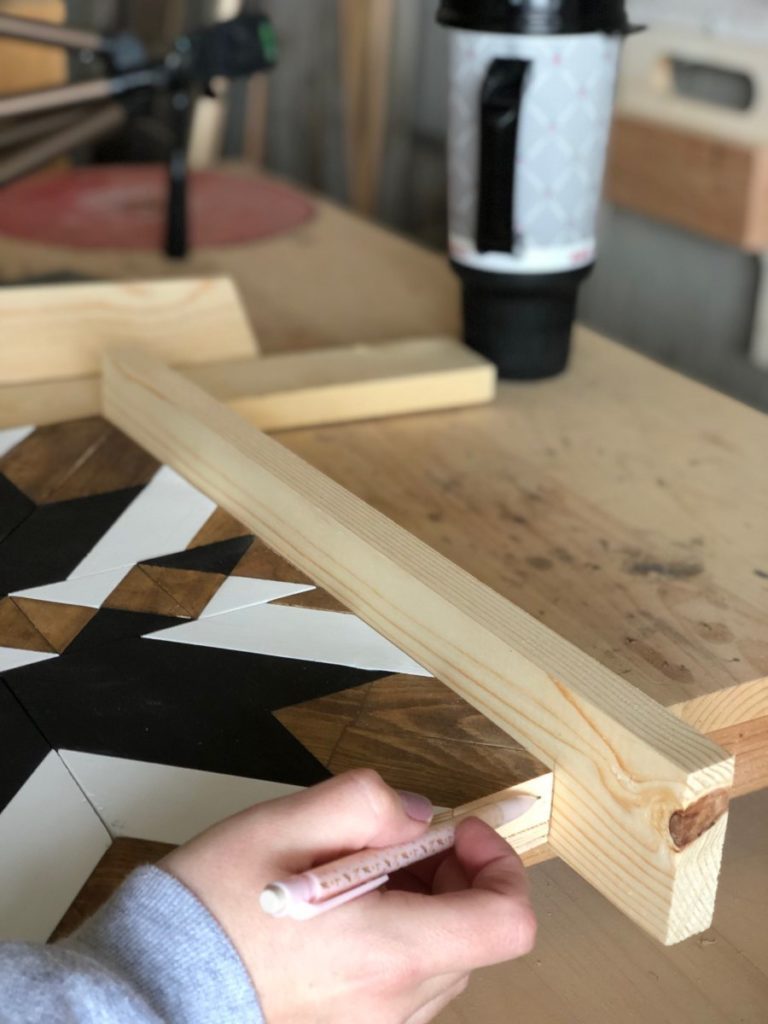
I always cut the longer pieces to fit the exact length of the
piece I’m framing out, and the shorter pieces hang over.
Once the longer sides are cut to length,
use a clamp to hold them in place and measure
out the shorter sides.
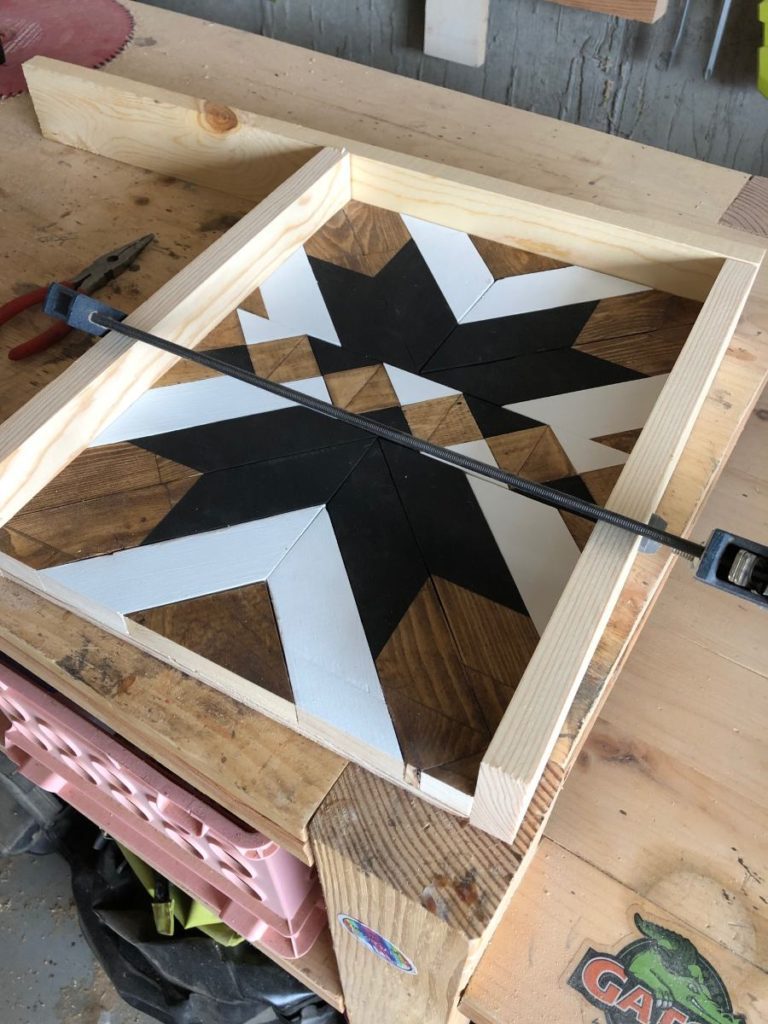
Step 7
Now that your pieces are cut to size,
stain them the same color as the mosaic,
then glue and brad nail them into place.
My Ryobi Airstrike 18g Nailer is
my faaaavorite tool 🙂
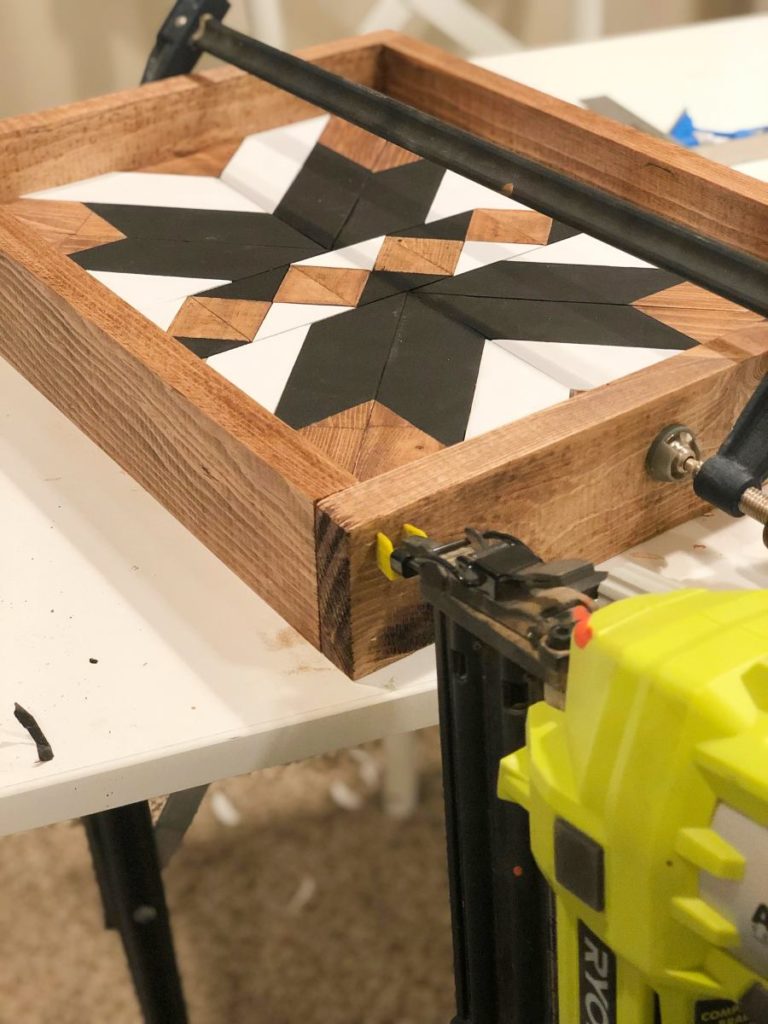
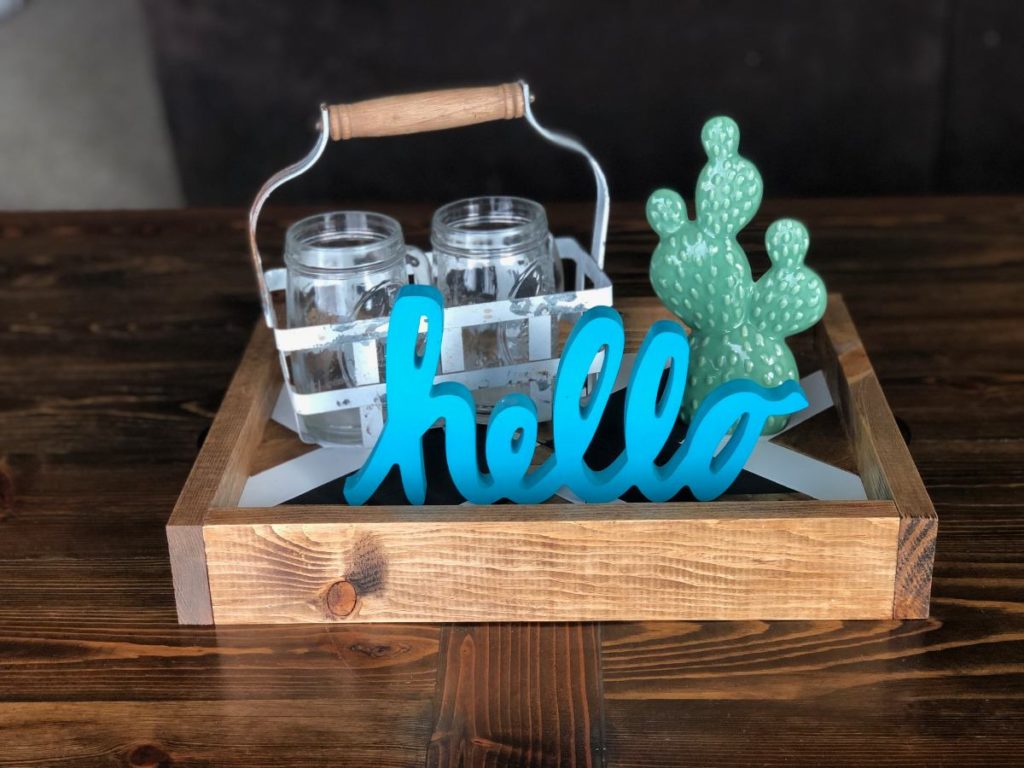
Attach the handles, and that’s it!!
The nice thing about a mosaic tray is that it’s
enough of an art piece on its own that you wouldn’t
even have to decorate it if you don’t want to.
Or you can add a few cute pieces to spice it up 🙂
Thanks for following along!
As always, don’t forget to post your pics,
PIN this project, and tell your friends!