How To's
How-To: Barnwood Frame
Hey guys! We all know about my love affair with barn wood…
ALLLLLL that character, and ALLLLL that natural color, and ALLLLL that history make the best combination for unique pieces!
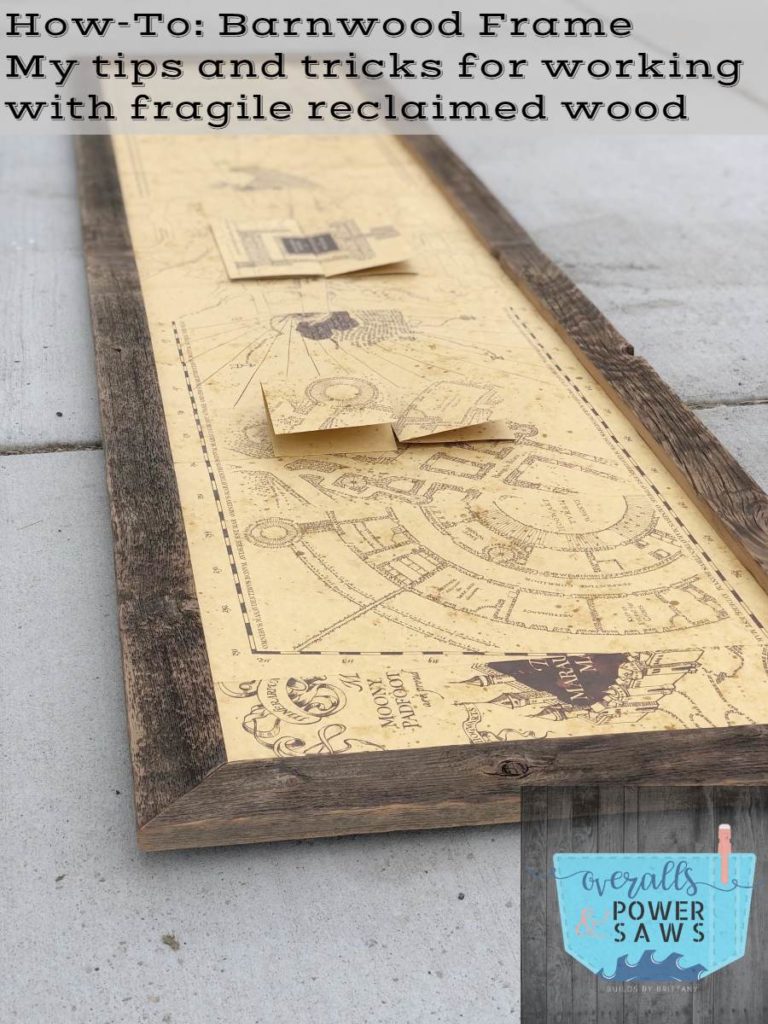
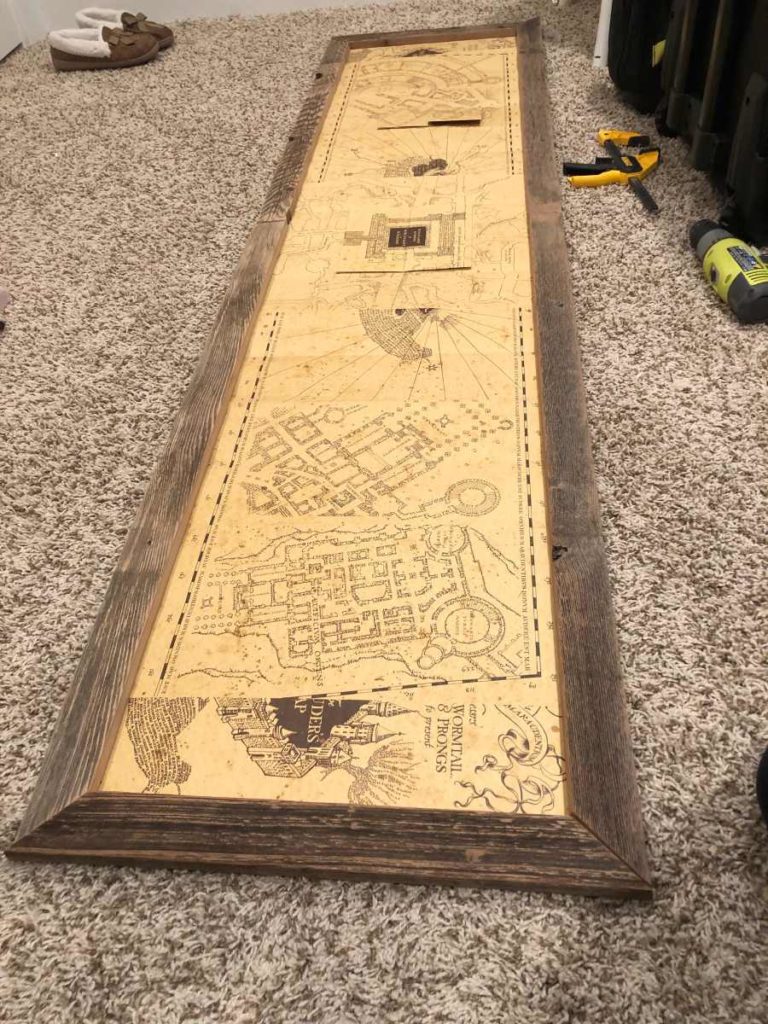
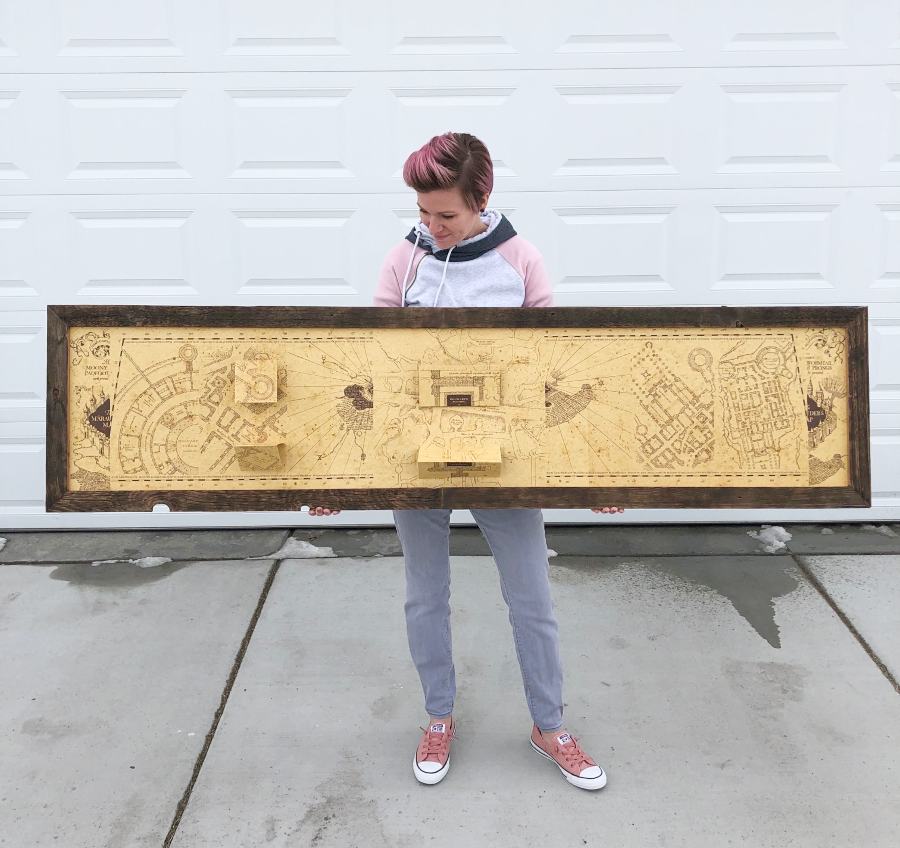
So when my friend came to me a while back wanting a frame for his Harry Potter Marauder’s Map, I immediately knew I wanted to frame it out in barn wood!
The only problem is… barn wood is a little tricky to work with.
It’s dirty, messy, spliter-y, fragile, and filled with nails.
So I wanted to throw together a quick tutorial filled with some of my favorite tips and tricks when working with barn wood so that no matter what project you are going to attempt, you will have a little extra knowledge on your side. 🙂
My first tip – and this one is a straight up game changer – is to get yourself some Starbond Adhesives CA glue and Accelerator.
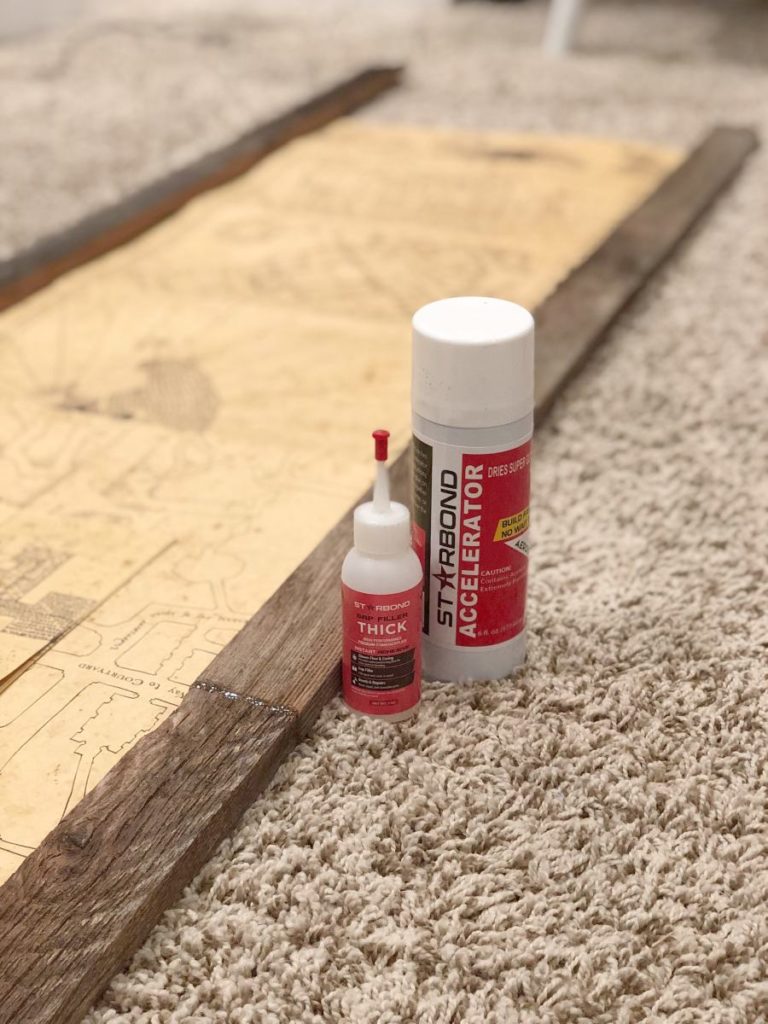
With the fragility of reclaimed wood you often can’t drill into it and use traditional joinery so having the instant bond and strength of the CA glue makes all the difference!
Alright, let’s get right into it.
With the map being six feet long, and my longest piece of barn wood also being six feet, I decided to cut two boards down to 4 feet, ripped them to 2″ wide and glue them together in the middle to reach the length I needed.
Instead of measuring it all out ahead of time, I find it easier to measure as I go when doing custom frames.
I laid out the map and placed the two boards on top and bottom and marked in 1/4″ on either end, then mitered them.
The height of the map was 18″ so I cut a piece to 24″ and ripped it to 2″ wide and mitered one end. I lined it up with the side of the frame and marked where it needed to be cut.
Then I brought the pieces back in for a dry fit.
Yes, I said back IN. To my craft room.
Because, let’s be real, when it’s 20 degrees outside
I’m gonna do whatever I can do stay warm.
Including woodworking in my craft room 🙂
Once I knew the pieces fit nicely, I took them all
back out to the garage for a good sanding. And now here comes a good
old fashioned barn wood tip!
Tip: Sand barn wood with a high grit – 220 or 320. Higher grit will remove the dirt and splinters without removing the color or character.
When it was all smooth and the dry fit looked perfect,
I used the Starbond to glue the miters together.
Since it dries so quickly, you have to use a generous amount of glue on one piece, and spray the other piece and stick them together. The spray will cause the glue to react and create a quick and strong bond so it’s super important to be accurate.
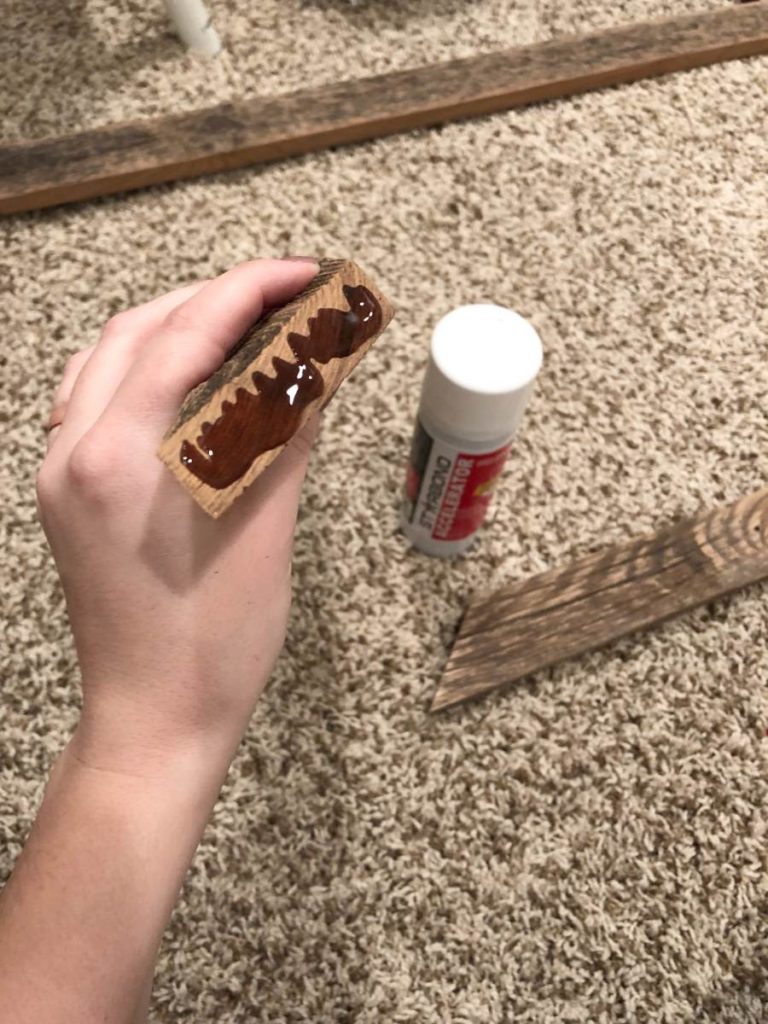
Since it only takes about 20 seconds to set, I just use my hands to press it together firmly.
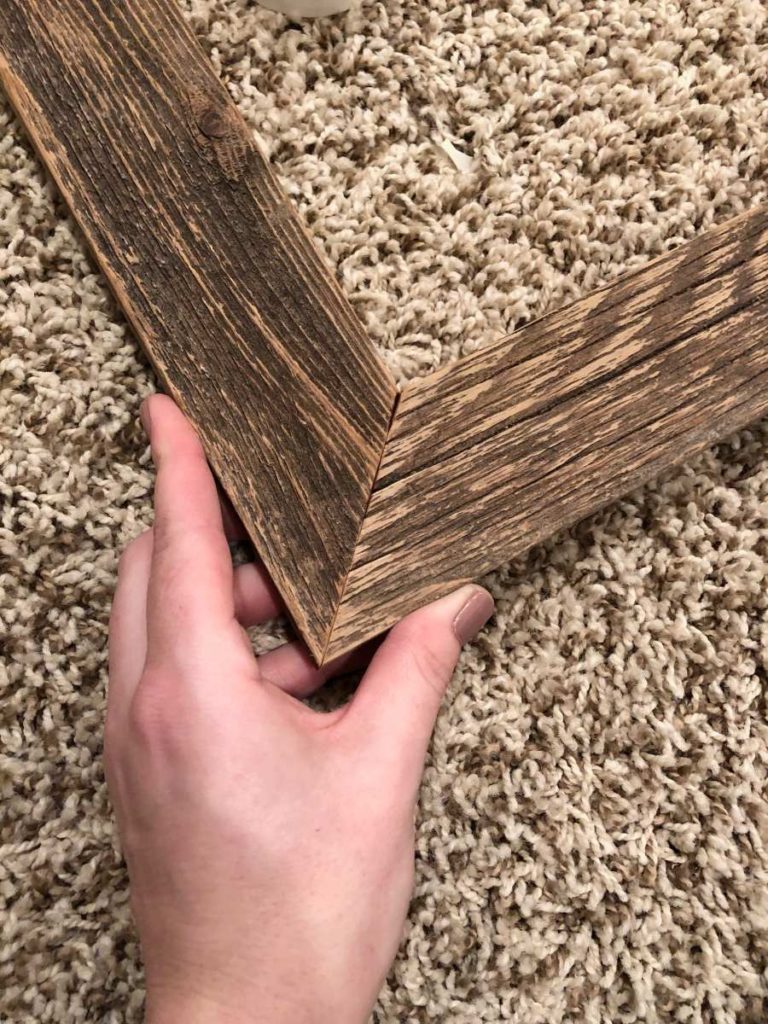
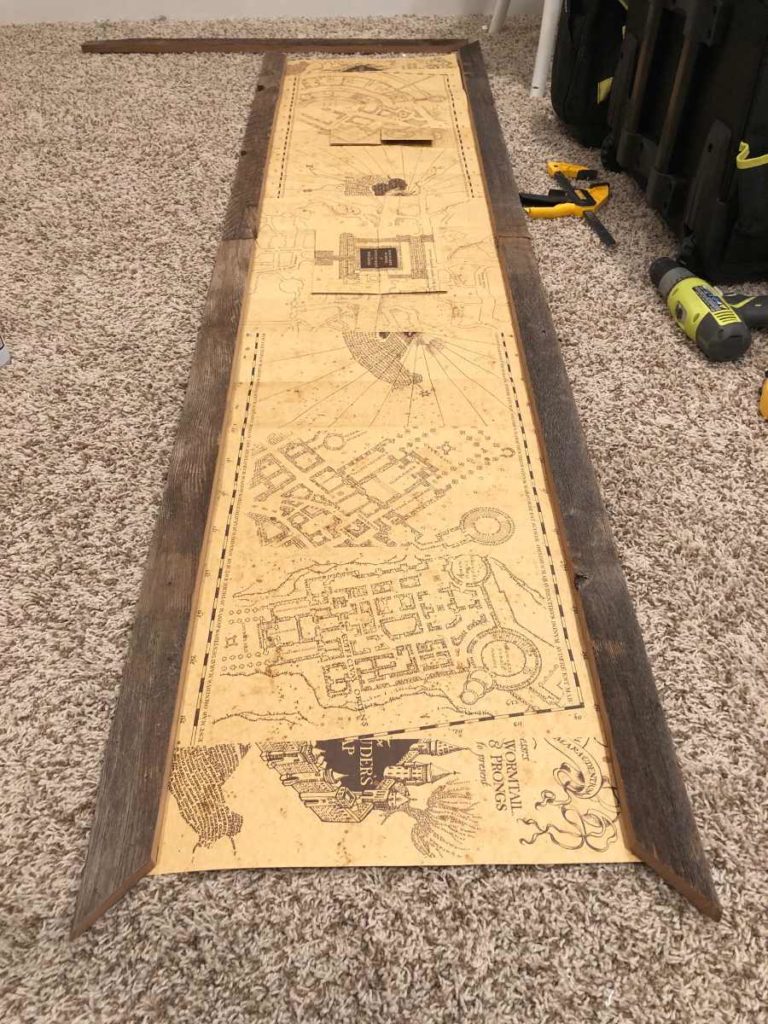
Look at those tight miters!
Ahhh the satisfaction of tight miters 🙂
Once I glued all the corners I took the frame back outside and sanded down the CA glue in the seams.
For this step I definitely had to go 80 grit. I wanted to be rid of any excess glue. Since I sanded so hard in these spots,
they were pretty bare compared to the rest
of the frame.
Tip: If you sand off too much of the character from the barn wood and would like some back, lightly burn the wood with a torch.
(I was trying to hurry because it was cold
so I totally didn’t get a pic of this part)
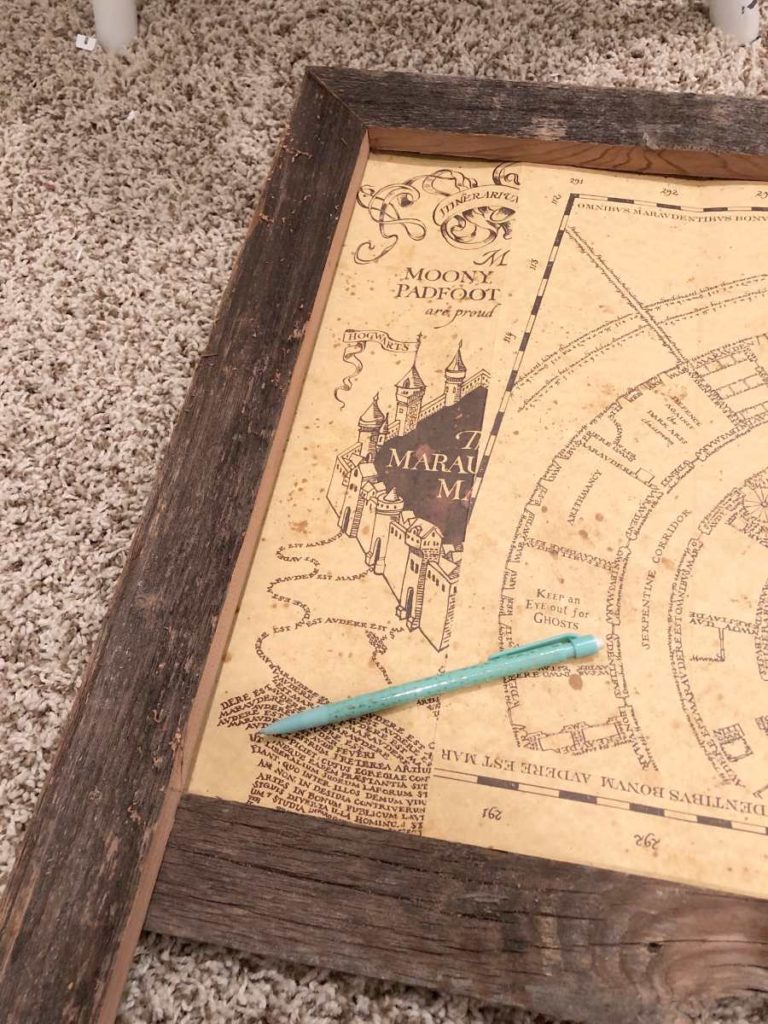
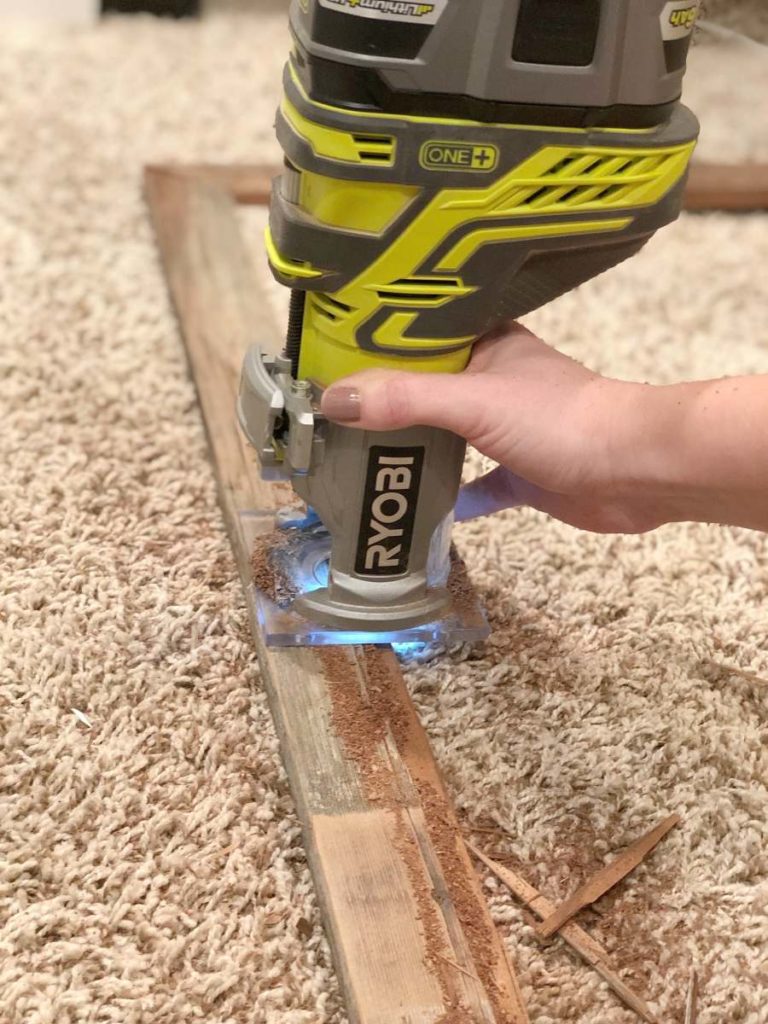
After I brought it back in, I flipped the frame over to cut out
the rabbet for the inlaid map.
I used my palm router and flush trim bit set to 1/8″ to cut the rabbet.
It can be done on your table saw as well
but, again, I wanted to do as much inside as possible.
Sawdust in my carpet?
Yes.
Because vacuuming beats frozen fingers.
As you can see from the picture, my plastic casing on my router
sat flush with the outside of the frame so following along the outside of the frame to get a consistent width worked out nicely for this project.
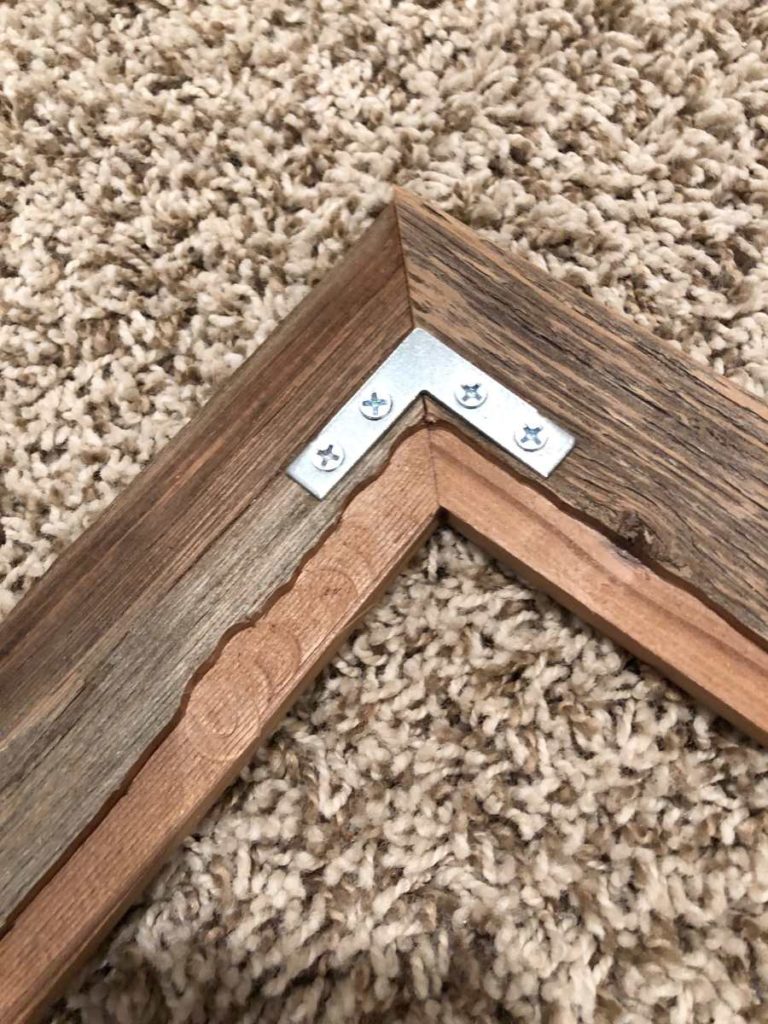
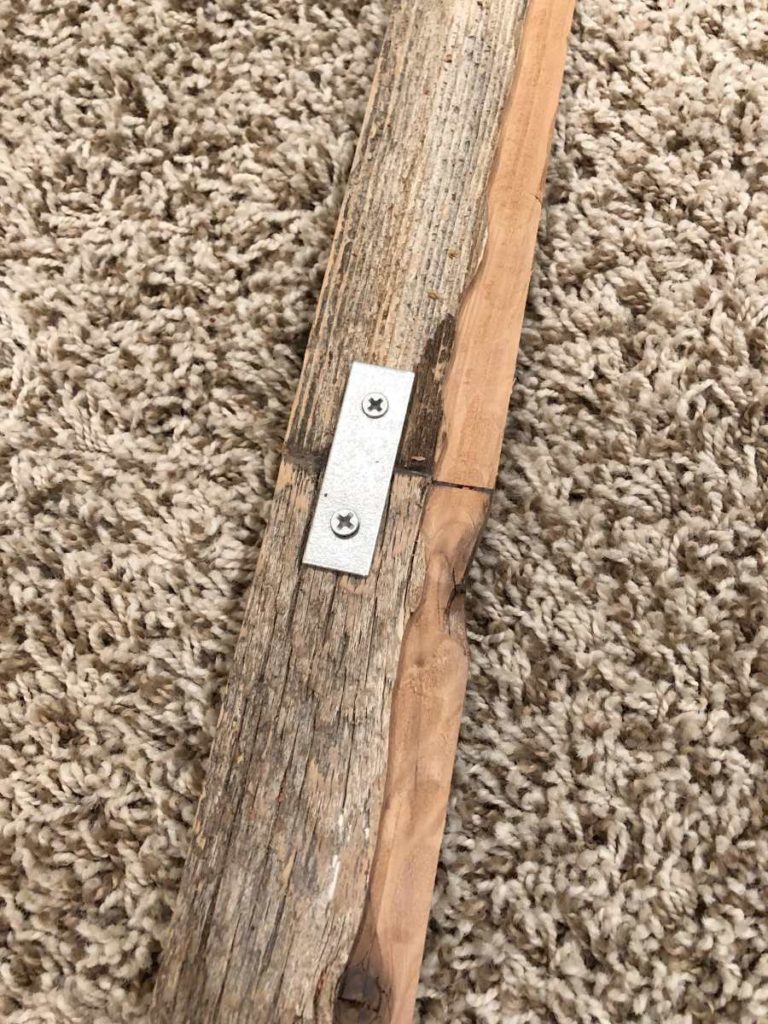
This next step wasn’t TOTALLY necessary but since barnwood is fragile, I wanted the added security and reinforcement of brackets. I found these at Home Depot.
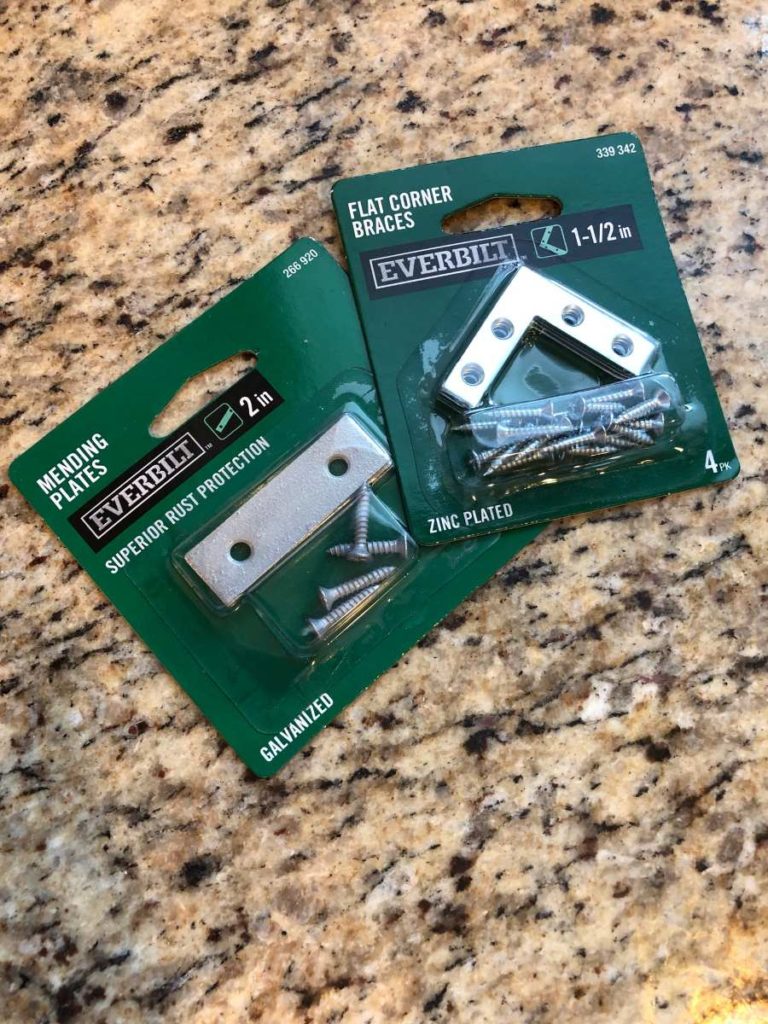
I used the L brackets in the corners, obviously 😉
And I used the straight brackets for my seams in the middle.
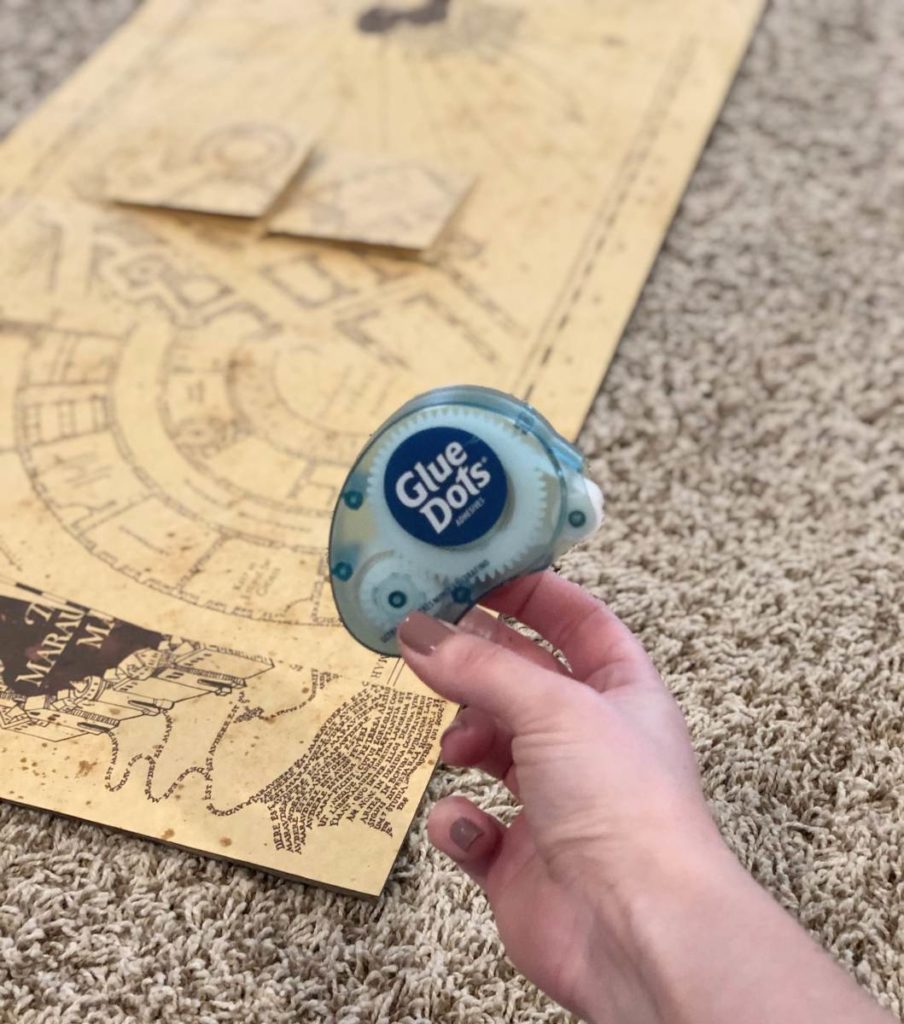
I cut an 1/8″ piece of hardboard as the backing for the frame and
attached the map to the front of it with Glue Dots.
I wanted to use something semi-permanent so that he could take the map out of the frame if he ever wanted to.
I didn’t use glass in the front of the frame since the map
has these neat little flaps you can pull open on the front.
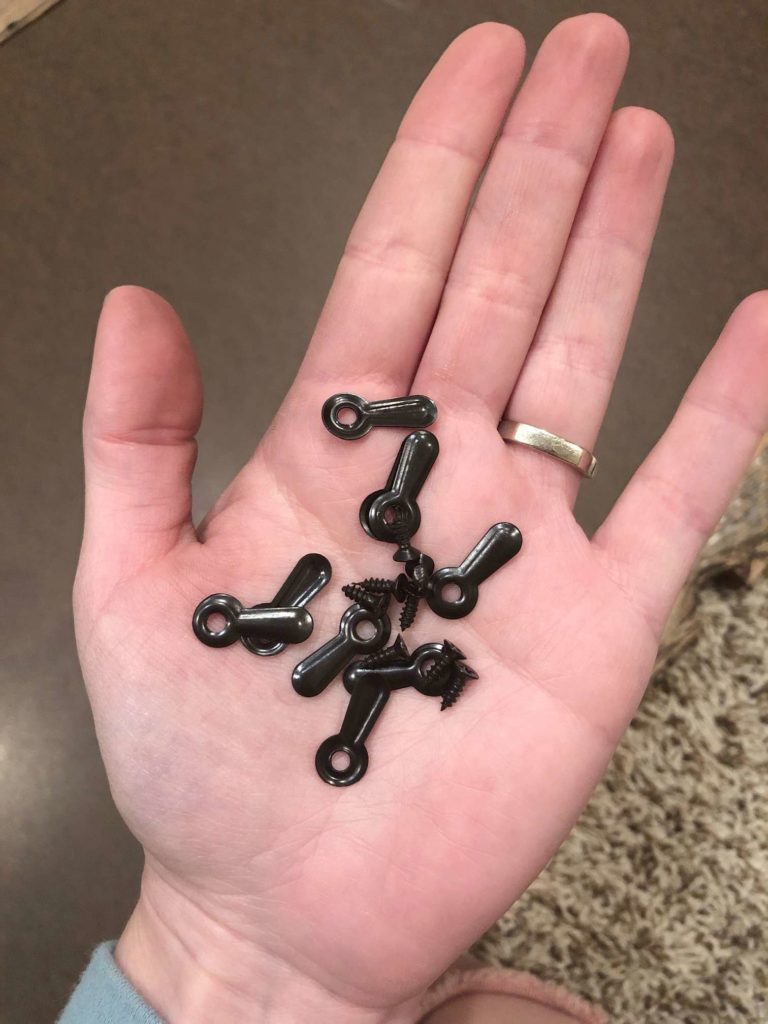
To attach the backing I used these little picture frame
clips you can find on Amazon here.
Aaaaaand I didn’t get a picture of them actually attached.
Of course.
But basically you want to screw it onto the edge of the back of the frame where you routed out the rabbet, and the long part will lay over the backing of the frame, holding it in place.
Hopefully that made sense 🙂
And I hope that maybe you learned a thing or two about working with reclaimed wood!

As always, don’t forget to post your pics, PIN this project, and follow me on Instagram and Pinterest for more tips and inspiration!