How To's, Wood Working
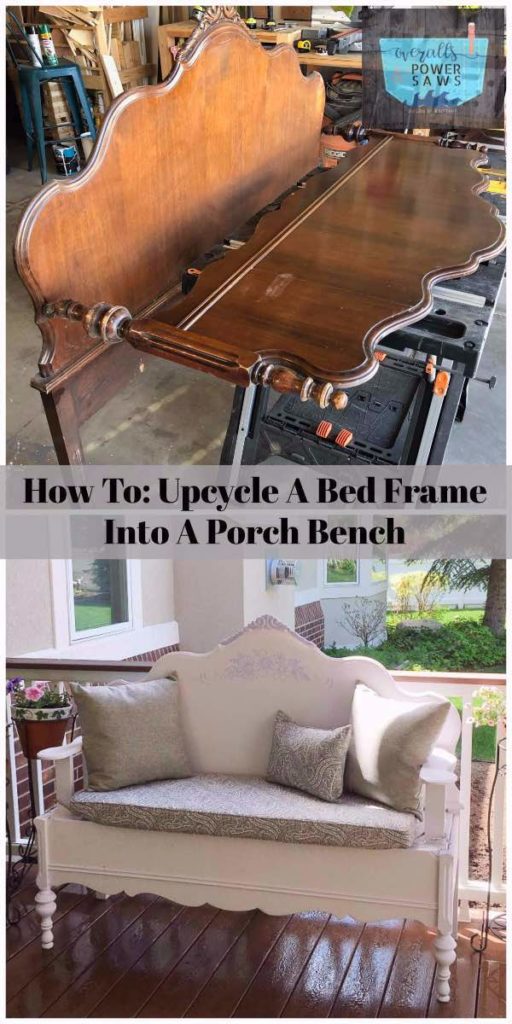
How-To: Bed Frame Bench
Hey friends!! I’m really excited to share this next project with you.
Not only because it’s something I’ve personally never attempted
before, which is always fun, but because it has a very special and
sentimental attachment to it.
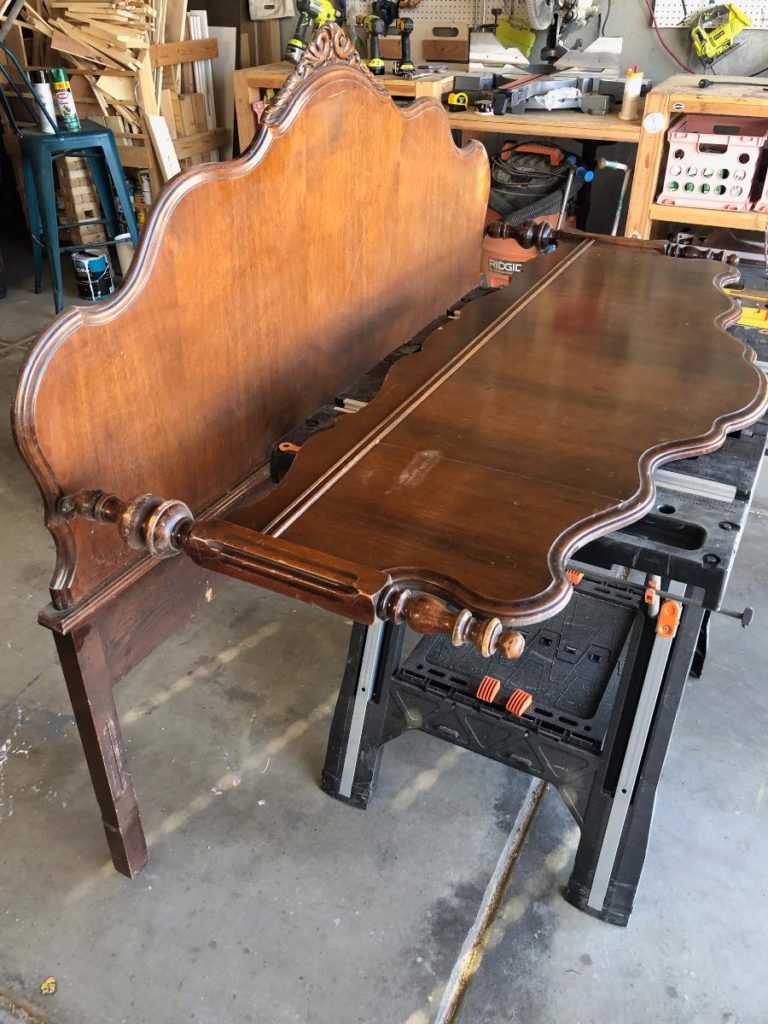
This headboard, footboard, and runner belonged to my husband’s great grandmother. It’s from the early 1900’s, and I was pleasantly surprised to find out when I cut into it, that it’s made from Cherry!
They just made furniture so much better back then didn’t they?
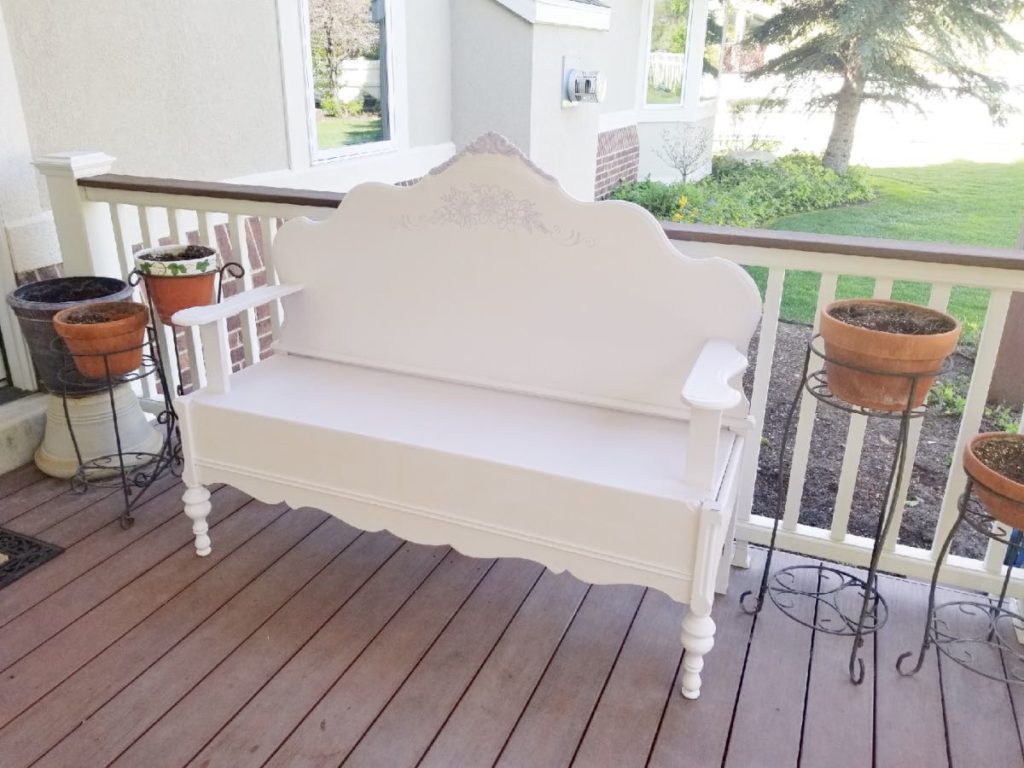
For the past year or so these have just been sitting, collecting dust in my MIL’s garage because no one in the family had a use for them. I finally realized that they would make a great porch bench for her back deck!
Perfect family heirloom for the grandkids to sit on.
I’d seen this done before and figured it couldn’t be too
tricky to figure it out, right? 😉
I was happy to discover that I was right! This was one of the easier and quicker projects I’ve tackled recently. And fairly cost effective, since the only lumber I had to buy was for the seat!
Alright, let’s dive in. Over the next few steps (or 20 :)) I’ll be showing you how I transformed this bed frame into a porch bench. Since it will literally be completely different for every different headboard, I won’t be giving specifics, as far as lengths and widths of things go. It won’t be the same for you as it was for me, so that wouldn’t be helpful to you.
Here are the steps, with some tips and tricks I learned along the way!
- Antique Headboard, foot board, and side runners (preferably solid wood. It would be really tricky to do this with a hollow headboard)
- Pocket hole jig and pocket hole screws
- jig saw
- circular saw
- 3/4″ plywood
- 1 x 4 (you will need five 1×4 pieces for supports. The lengths of these will vary depending on your style of headboard and bench. Refer to Step 6 to get an idea)
- sander (LOTS and lots of sanding!!)
- paint
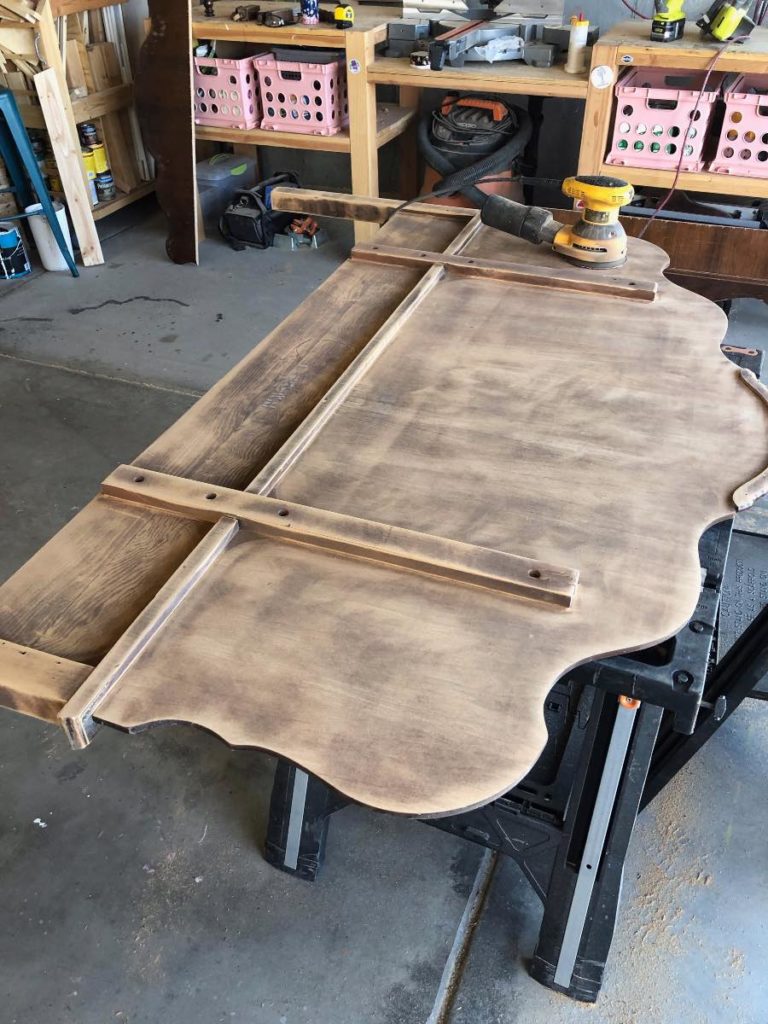
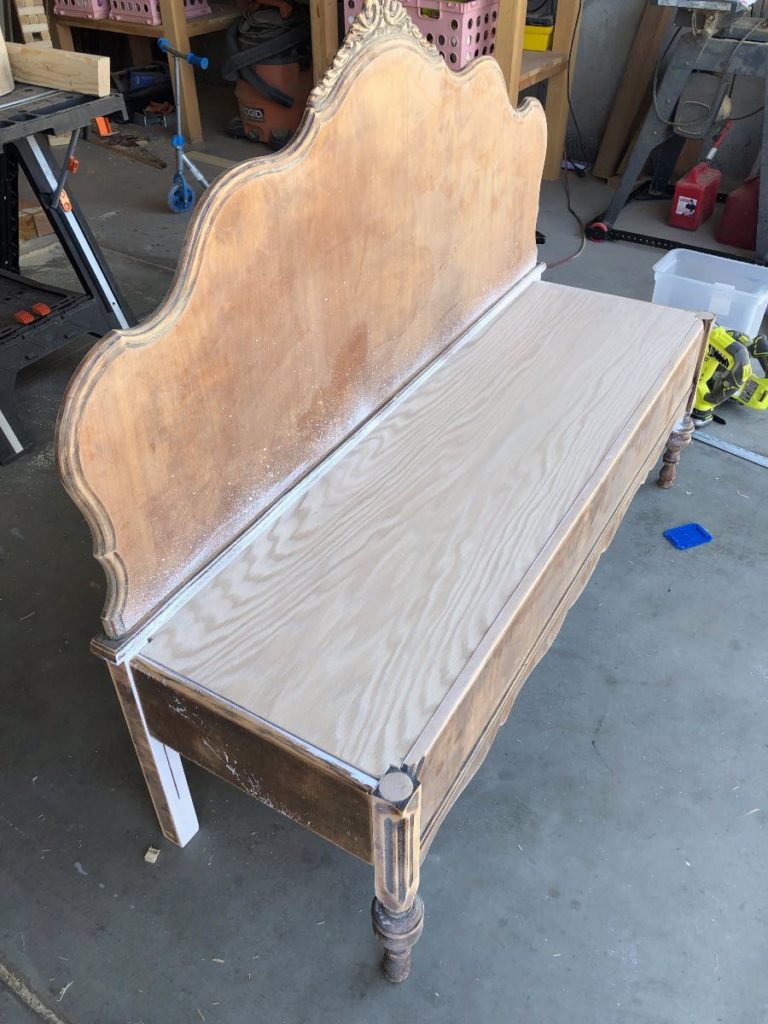
Step 1
Trim off the top of the headboard to create a flat
surface for the front of the bench.
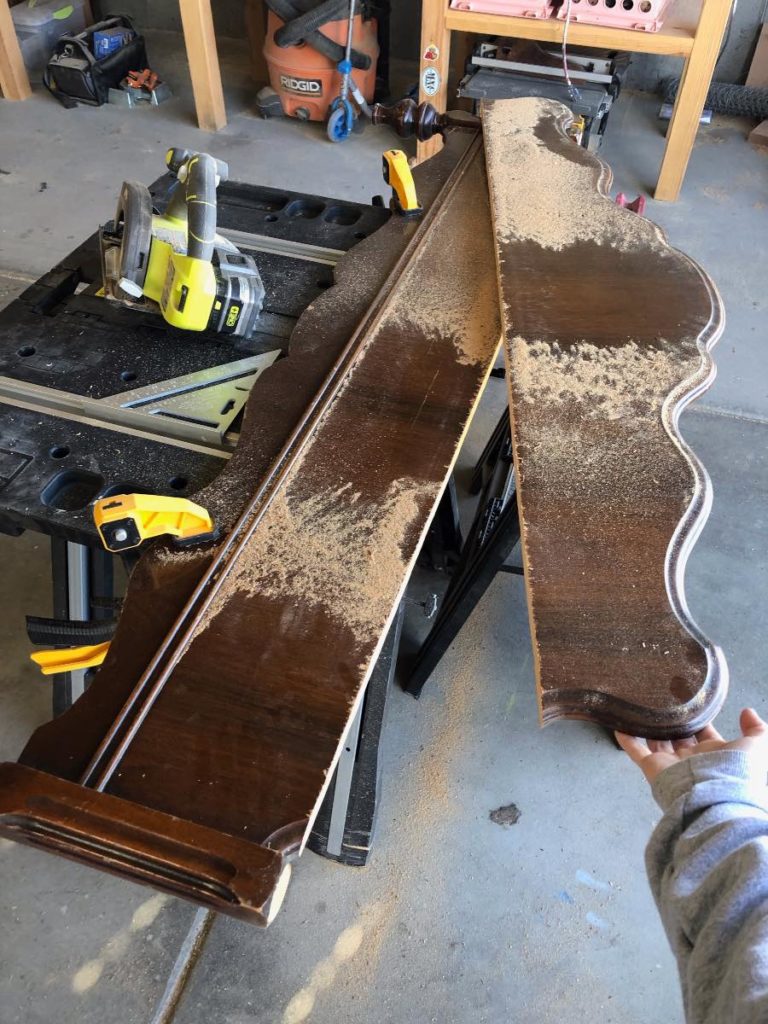
Step 2
Sand the headboard and footboard
until 80% of the old finish is removed.
Basically you just want to make sure
the top coat is gone so the paint
will adhere to the wood.
Step 3
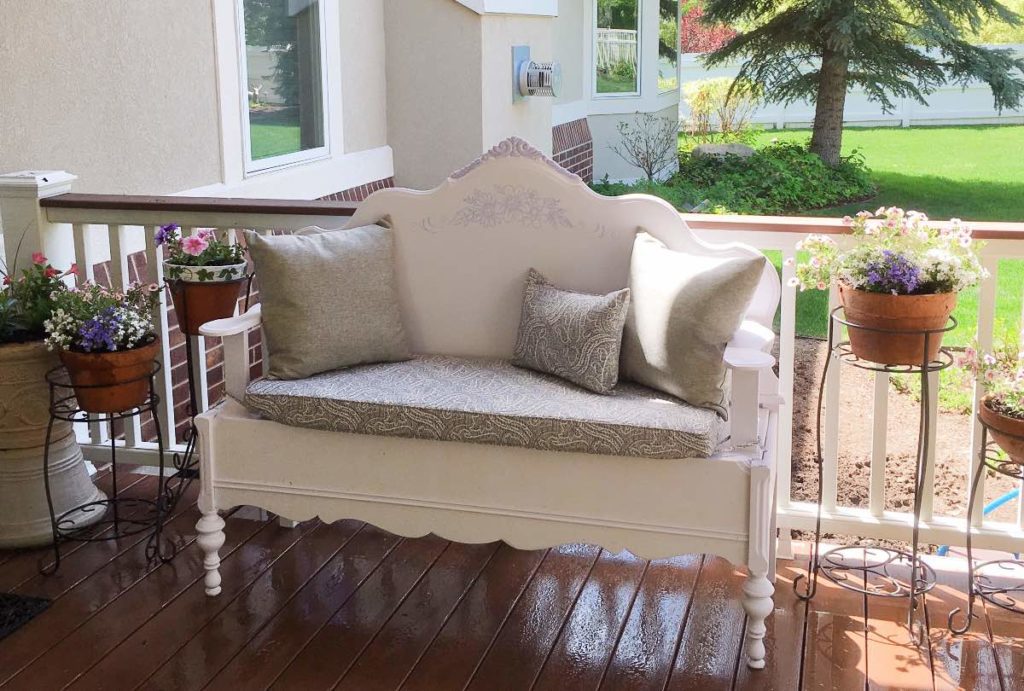
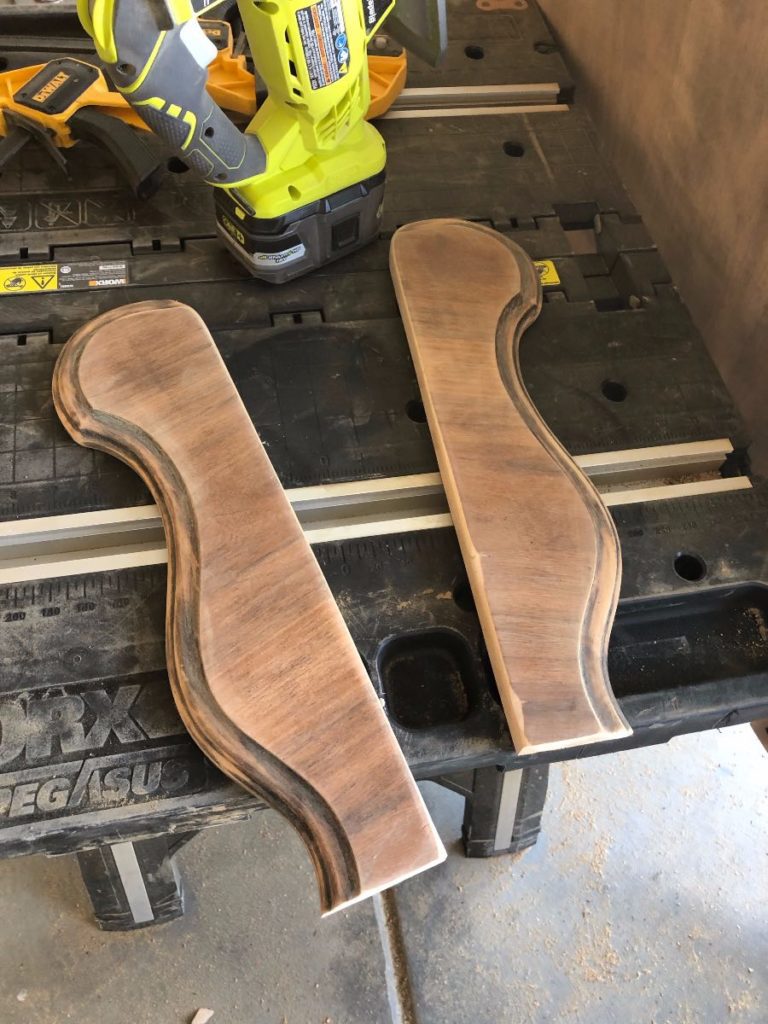
Decide how wide you want your bench to be. I went with 17″.
Then cut your side pieces out of your runners.
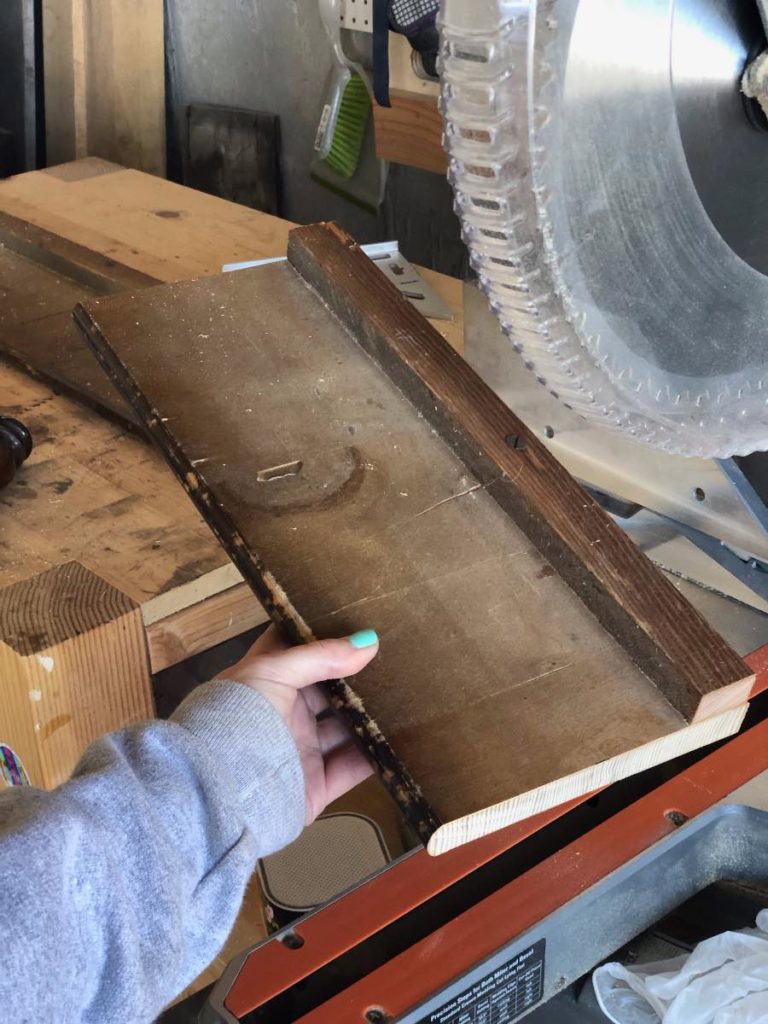
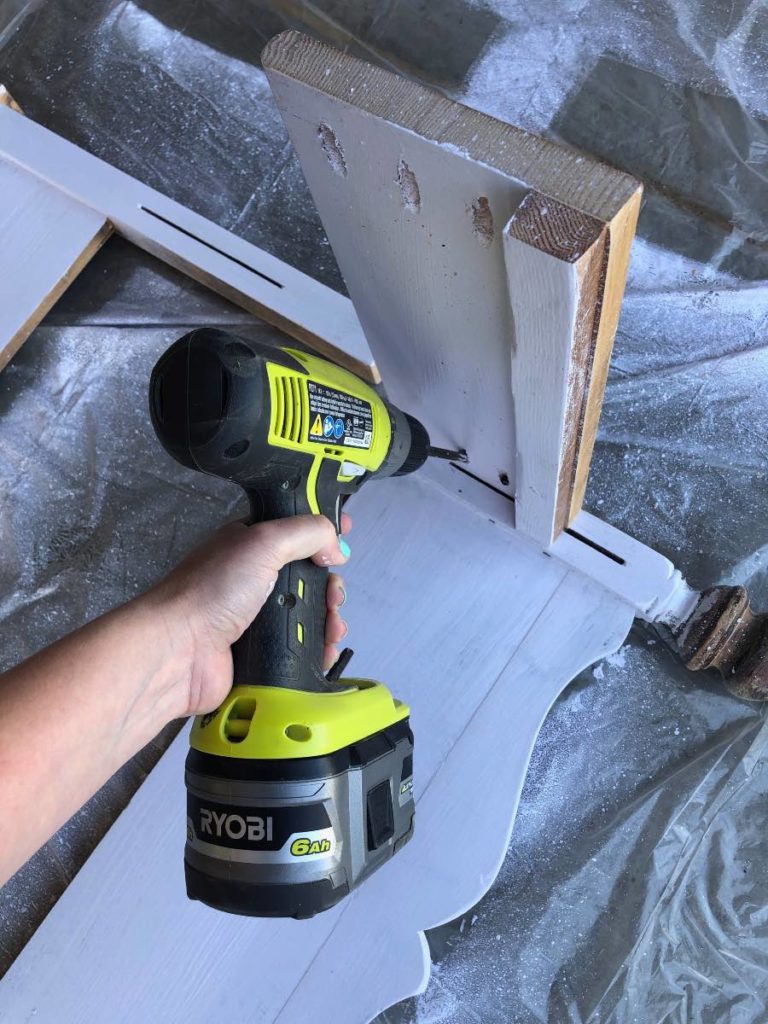
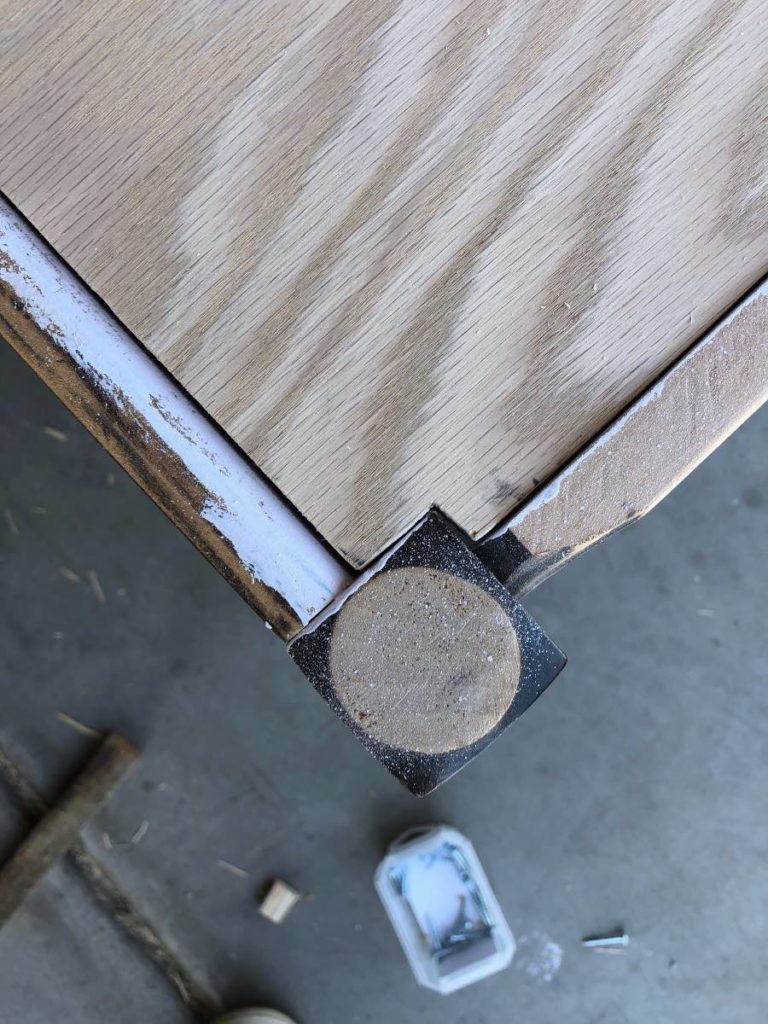
Add pocket holes to both side pieces.
Make sure you’re sanding everything smooth as you go.
Step 4
At this point I laid out all of my pieces and sprayed the parts that would face the inside under the seat. I figured it would be easier to spray and then assemble, rather than trying to spray up under it after assembly.
Step 5
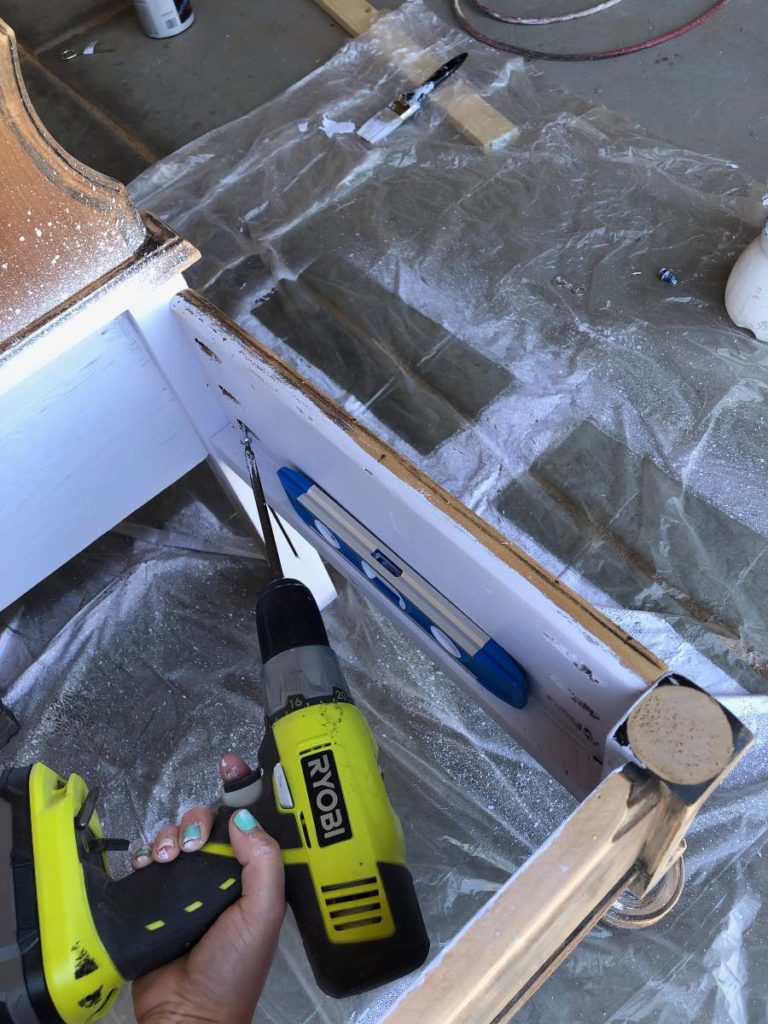
Attach your side runners to the footboard with Kreg screws…
then, using a level, attach them to the headboard, creating the frame of the bench.

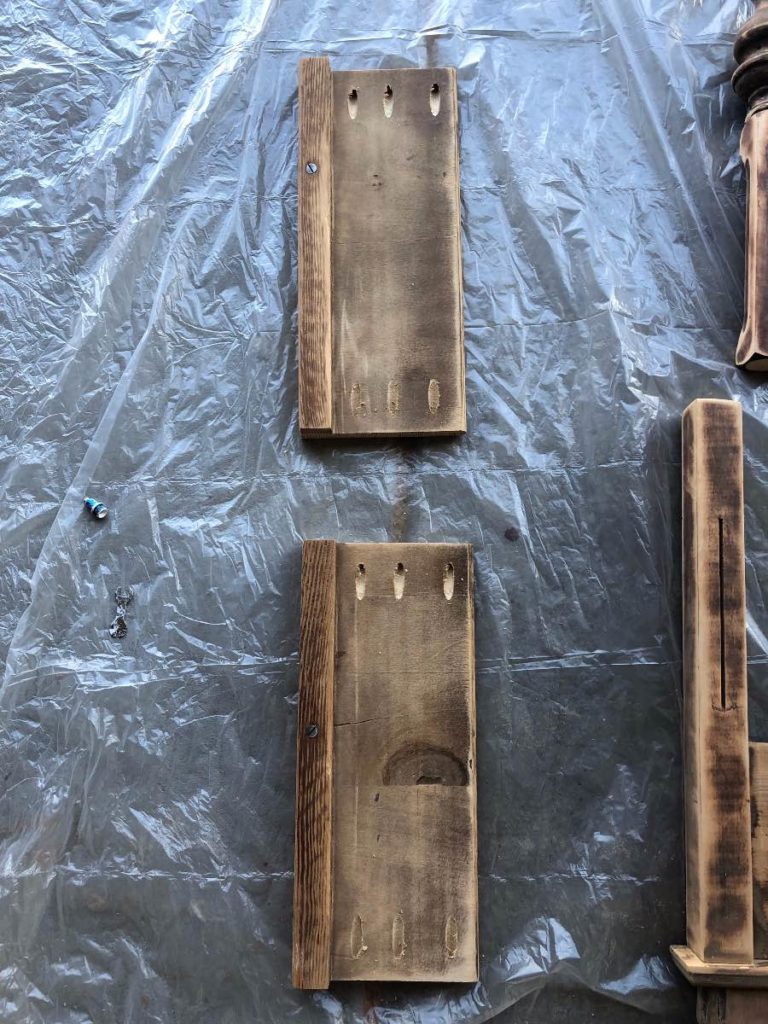
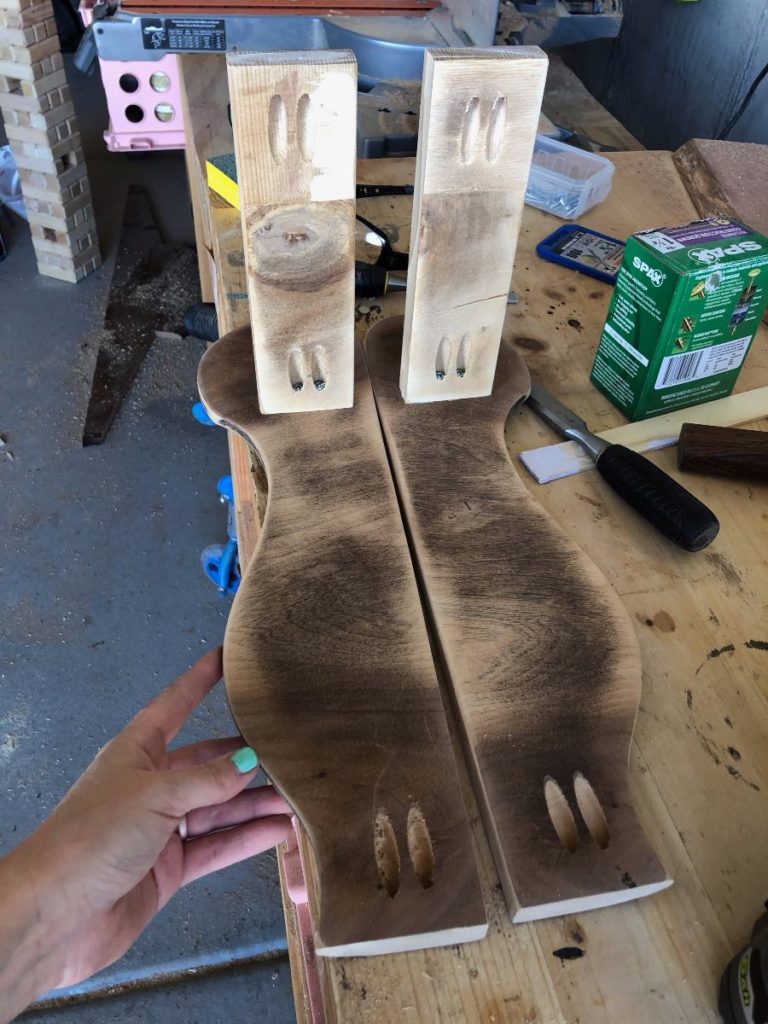
Step 6
Measure the width of the seat of the bench and cut supports out of 1×4’s.
Attach them to either side, using a level the entire time.
*BE sure to attach them sitting 3/4″ down from the top
so that the seat will sit down into the bench
on top of the supports.*
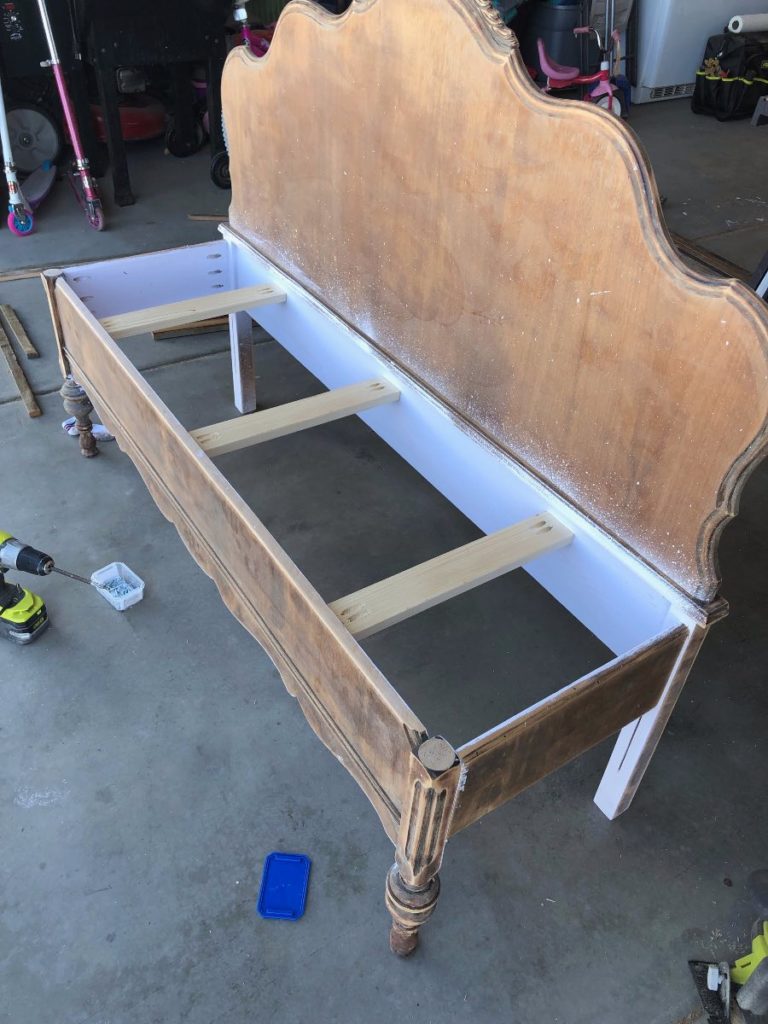
Cut two more supports, but this time measure the length of the inside of the sides, and then attach them to either side.
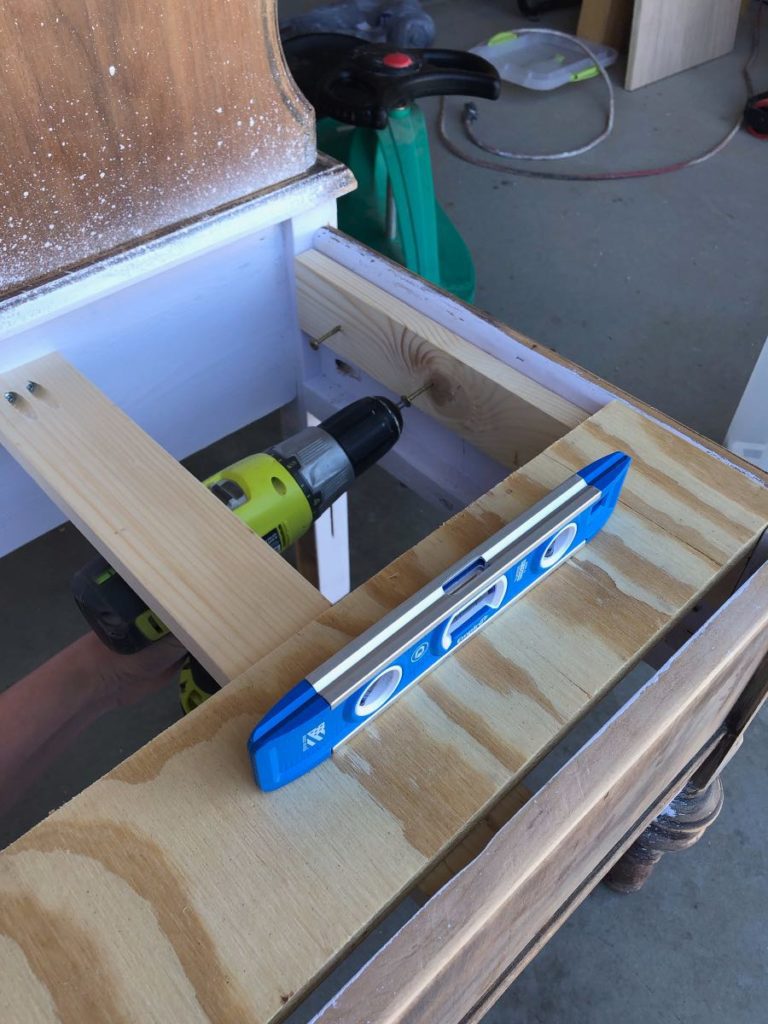
I used a scrap piece of 3/4″ ply wood to be sure the sides were level
and sat flush with the top.
Step 7
Rip your plywood down to the size of the seat.
I had to cut little notches in mine for it to work around the
legs of the bench.
Step 8
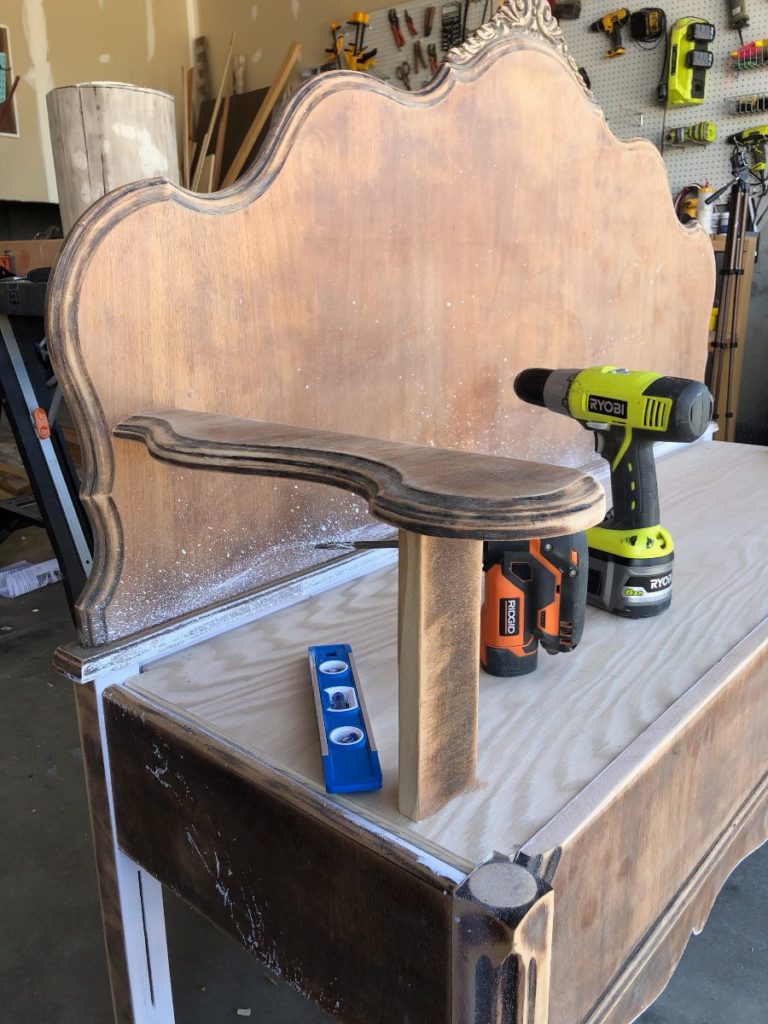
Time for the arms!
I was fortunate enough to have a decorative top to my foot board, so I used the part I cut off for the arms. I measured how long and wide I wanted them and cut them out of using my jigsaw.
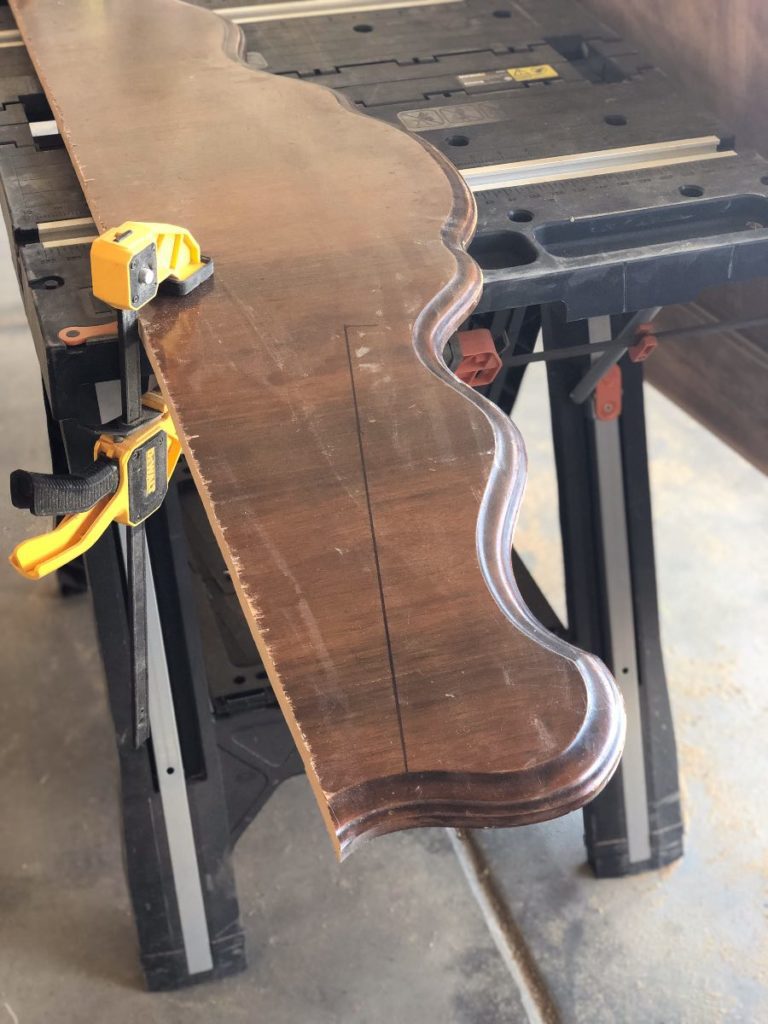
Once I had my first arm, I flipped it over onto the other side of the footboard and used it as a template to cut out the second one.
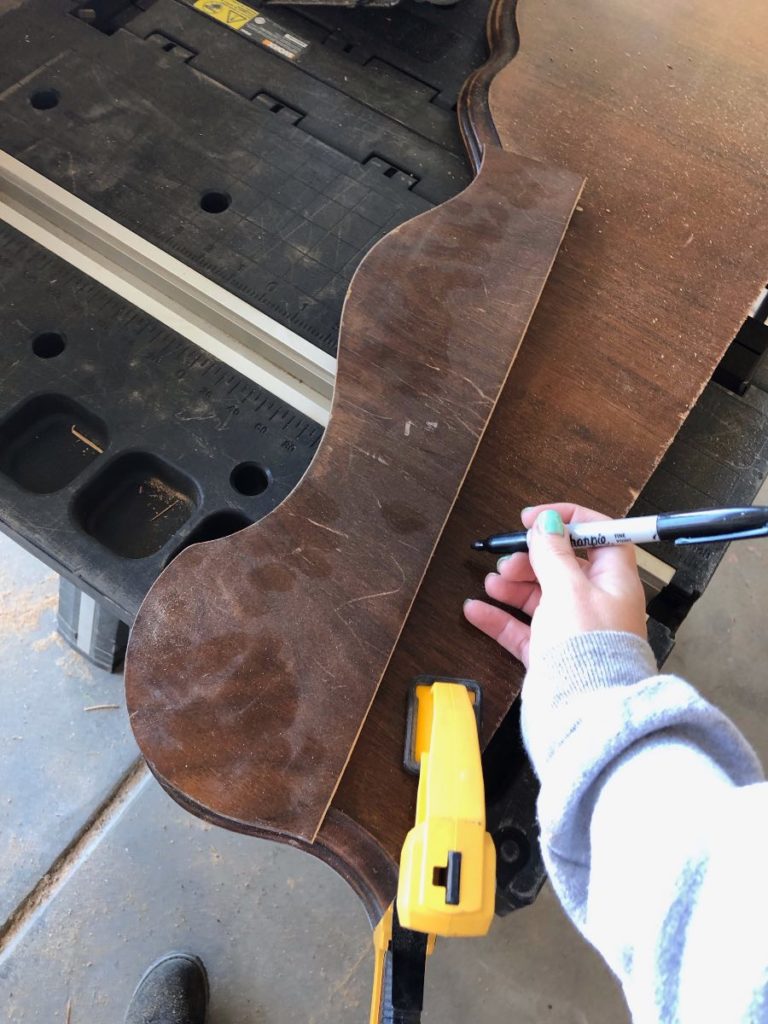
We have decorative arm rests!!
Step 9
Use the scrap you have left from your runners to cut the supports for the arm rests. I literally just sat on the bench and held my arm out where it felt comfortable, and measured how high my arm was. That’s how I get my super professional and super accurate measurements 😉
Drill pocket holes into the support, and the arm rest to attach
them together…
and then to the bench.
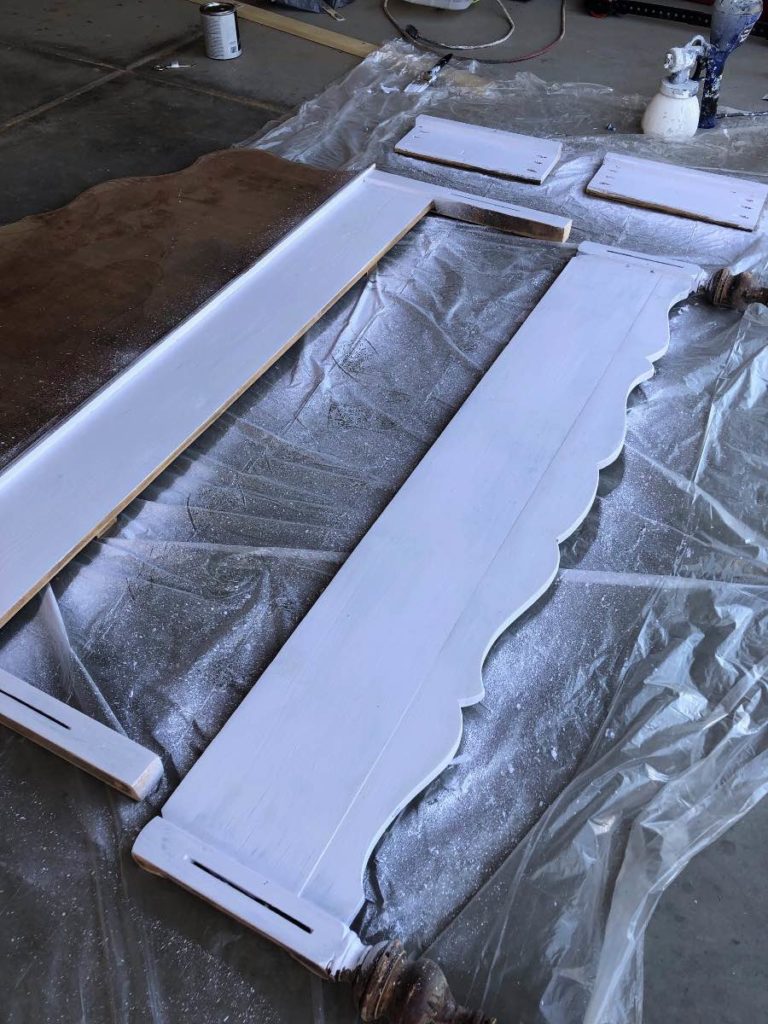
Step 10
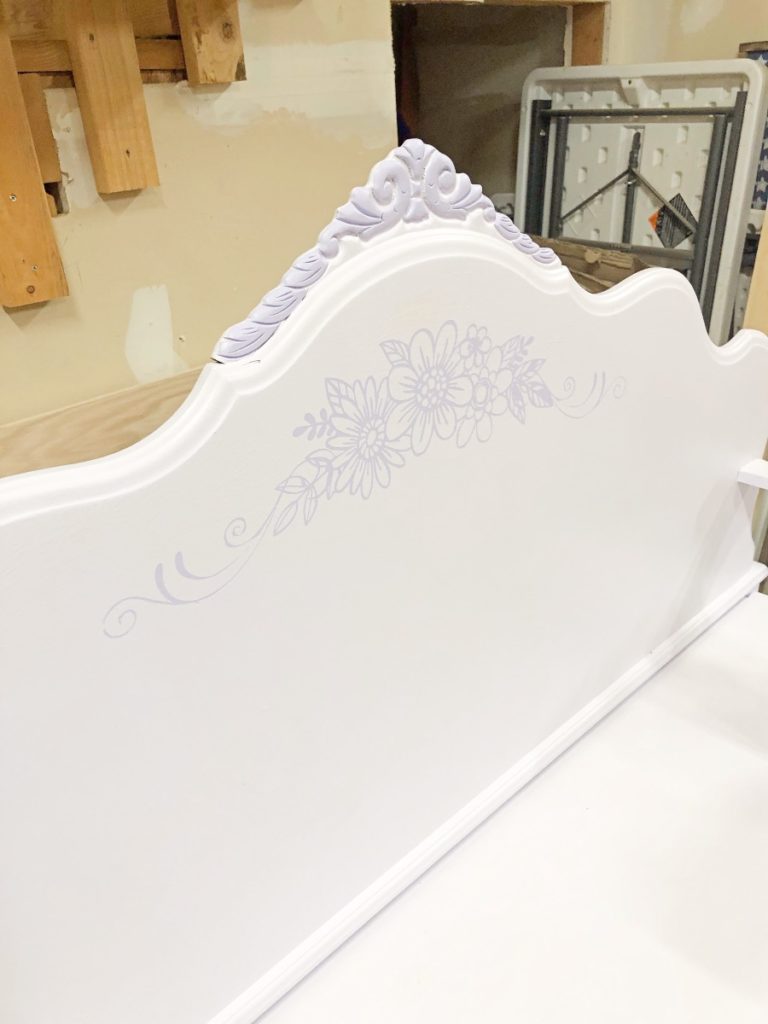
Paint! I had fun with this. The color I chose is a very very light lilac, and then I painted the details a light lavender
and stenciled some flowers onto it.
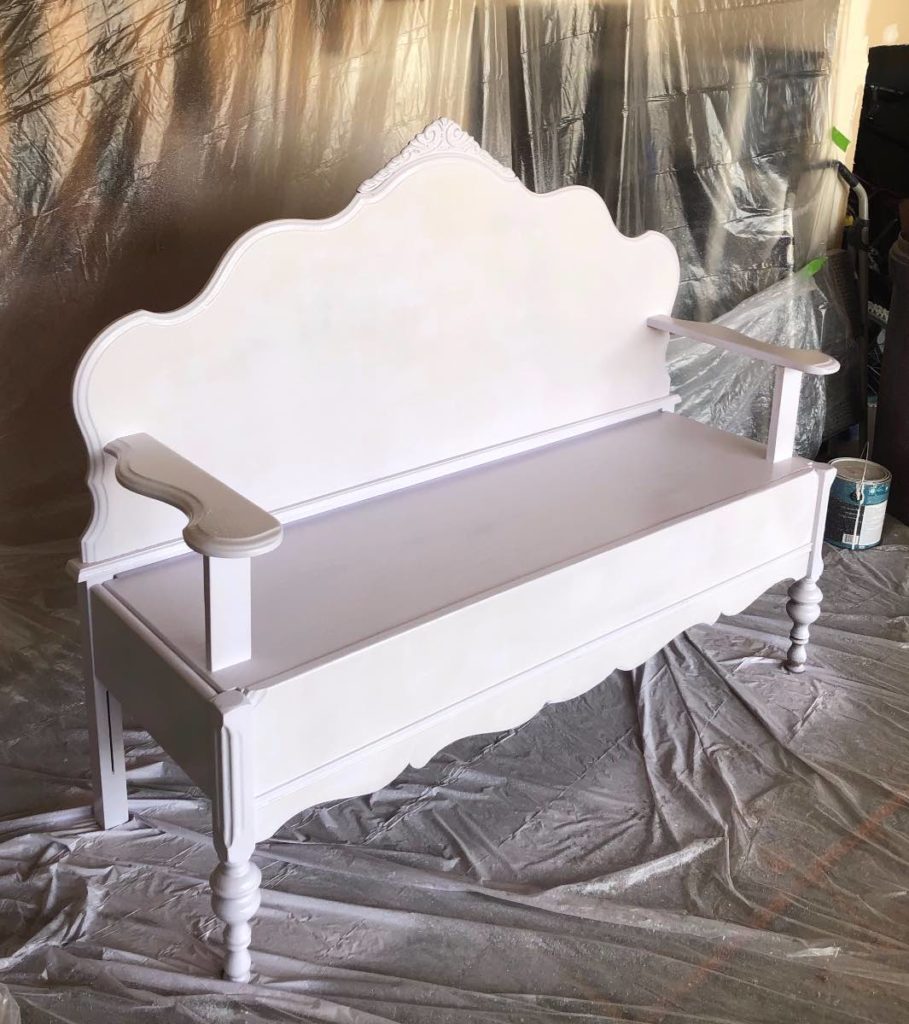
I used exterior paint since I knew this would be sitting on her back deck.
And done! The really fun thing about this project, is that my MIL had NO idea. I told her I’d take them off her hands a few weeks before Mother’s Day but didn’t say why. Keeping it a secret was super hard! But the surprise on her face when she realized it was her grandmother’s bed frame made it all worth it!
I hope you found this helpful. If you have ANY questions at all, leave a comment, or find me in the “Contact Me” section of the site. I am happy to help!
Thanks for following along, and as always, be sure to post your photos, PIN this project, and tell your friends!