Tutorials, Wood Working
DIY Lumber Storage Cart
Hey Friends!! Don’t forget to stay updated on current and future builds by following Overalls & Power Saws on Instagram and Pinterest!
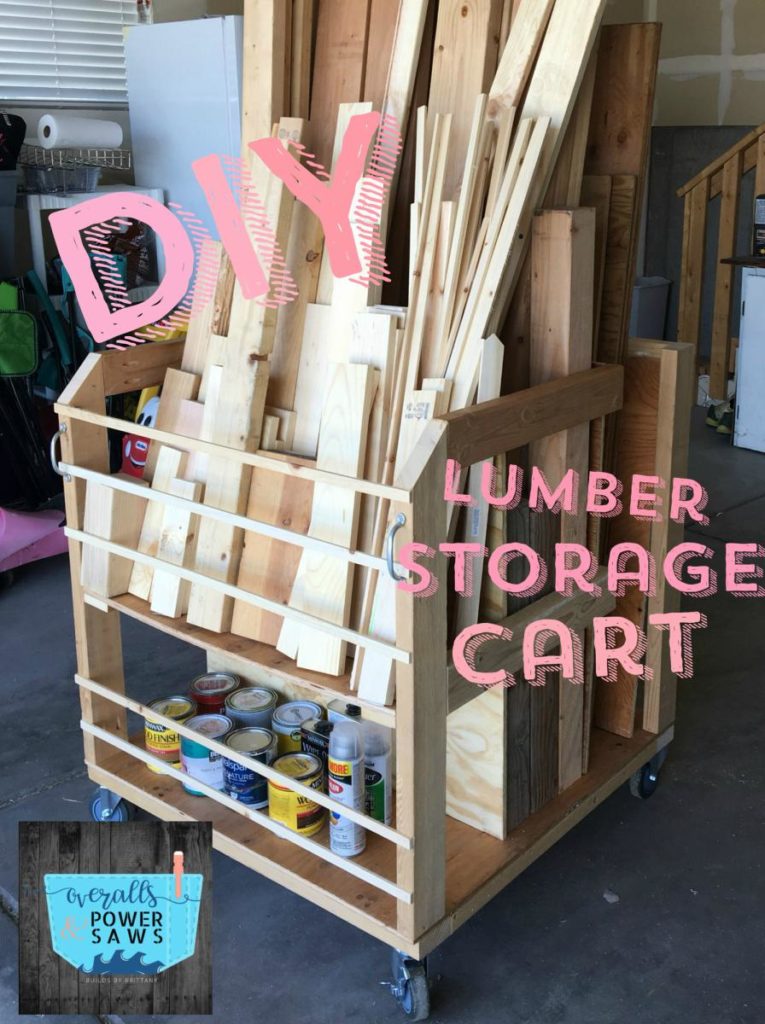
Help keep your shop organized with this DIY scrap wood/lumber storage cart!
Dimensions: 3 ft W x 34″ H* x 3 ft D
*not including the height of the wheels
If there’s one thing we as woodworkers have an abundance of… it’s SCRAP wood! And what do we all need? STORAGE! I came across this problem after setting up my shop in my garage and quickly took to the internet to find a solution. After carefully looking at all of my options I decided that the best solution would be to come up with my own. That way I could design it to fit my specific needs and my space.
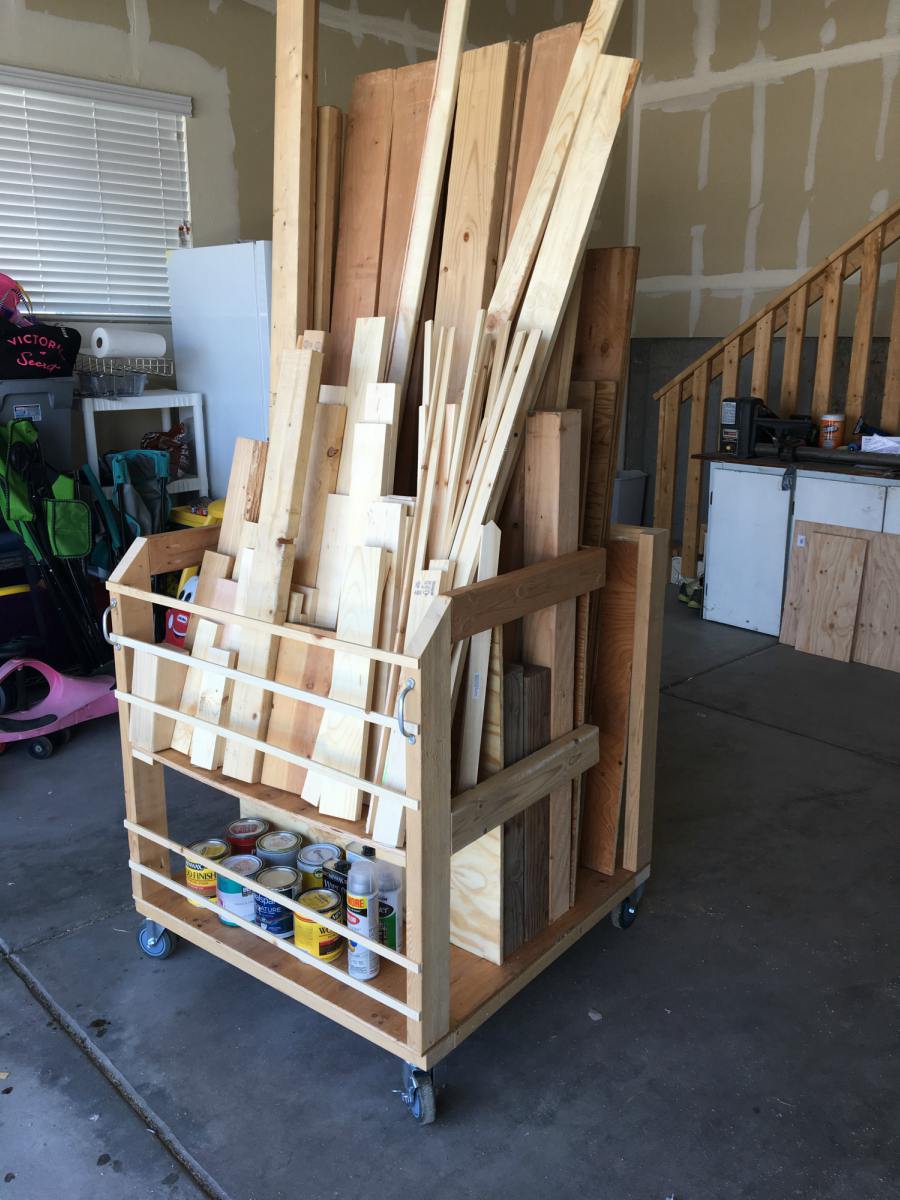
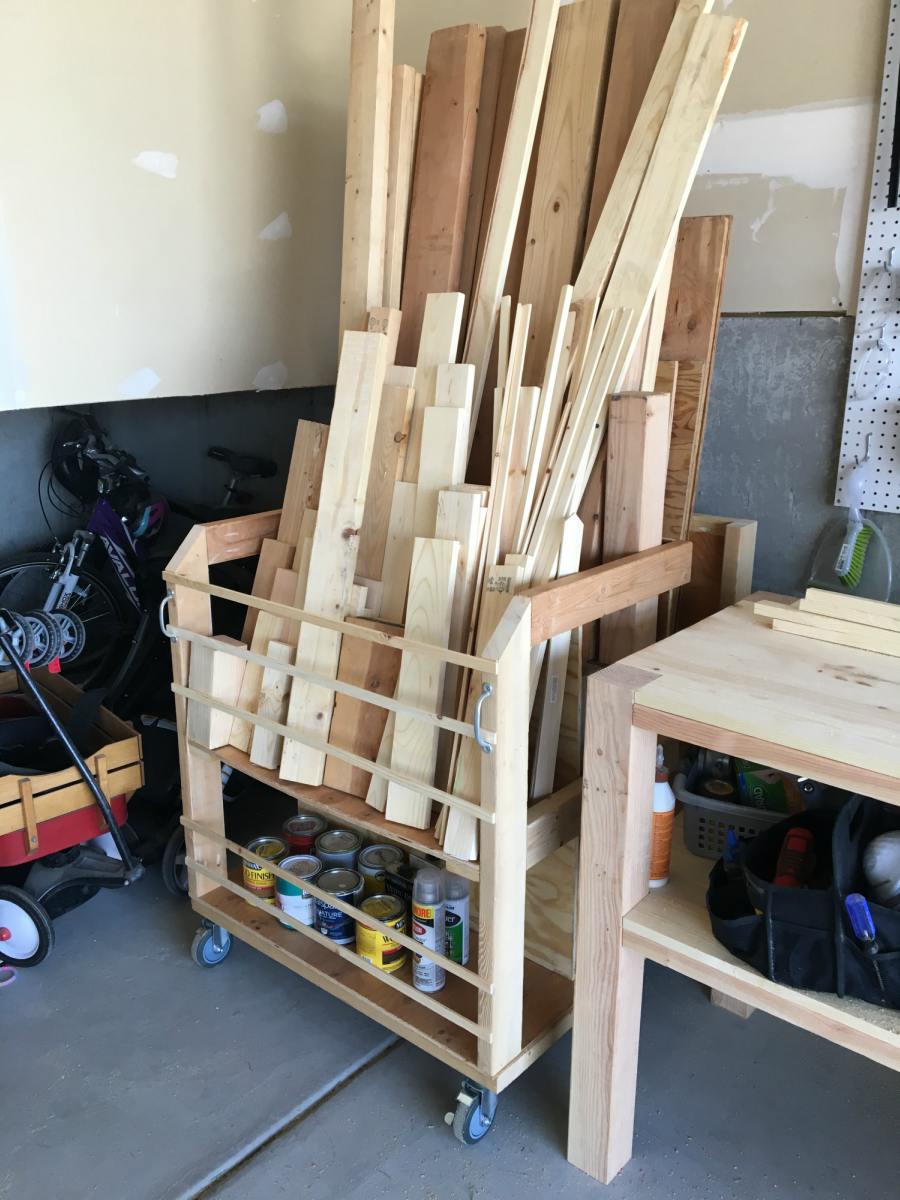
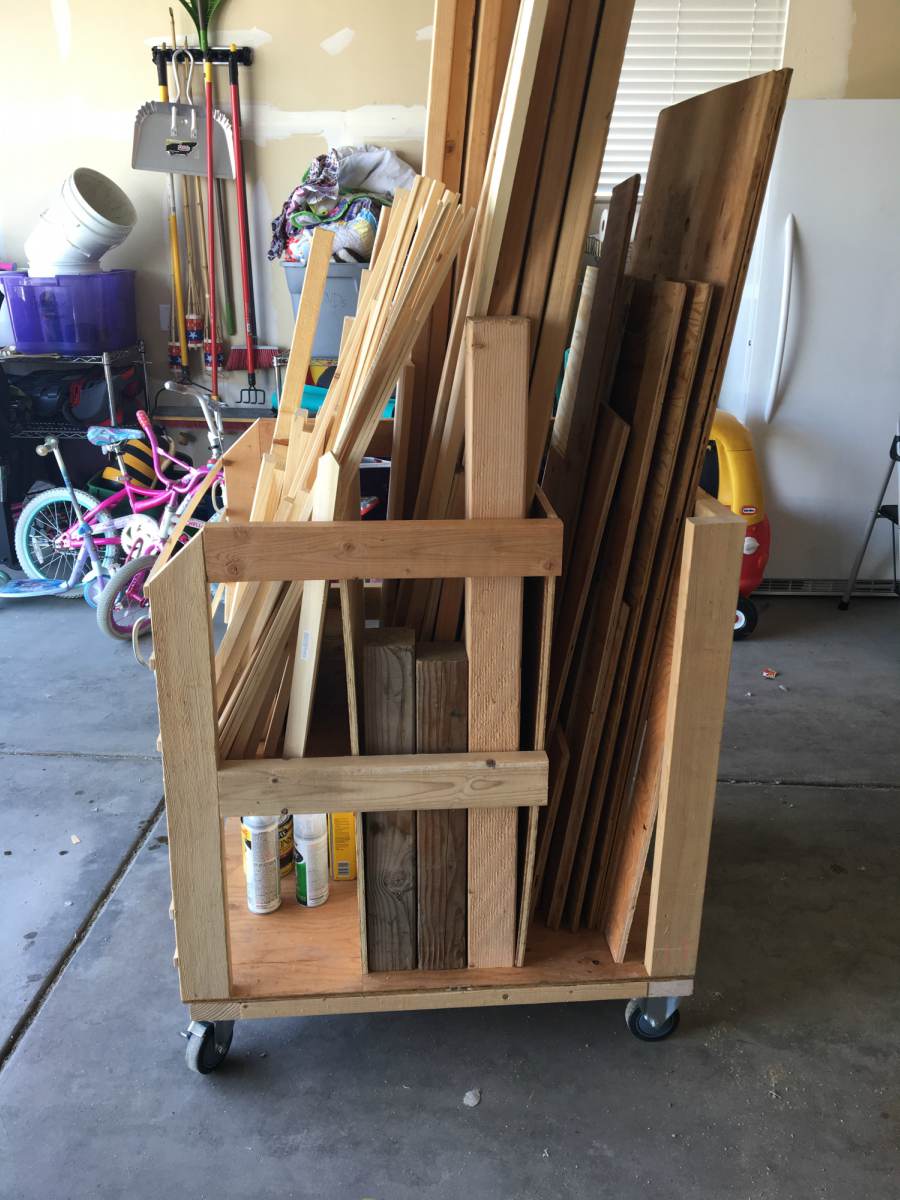
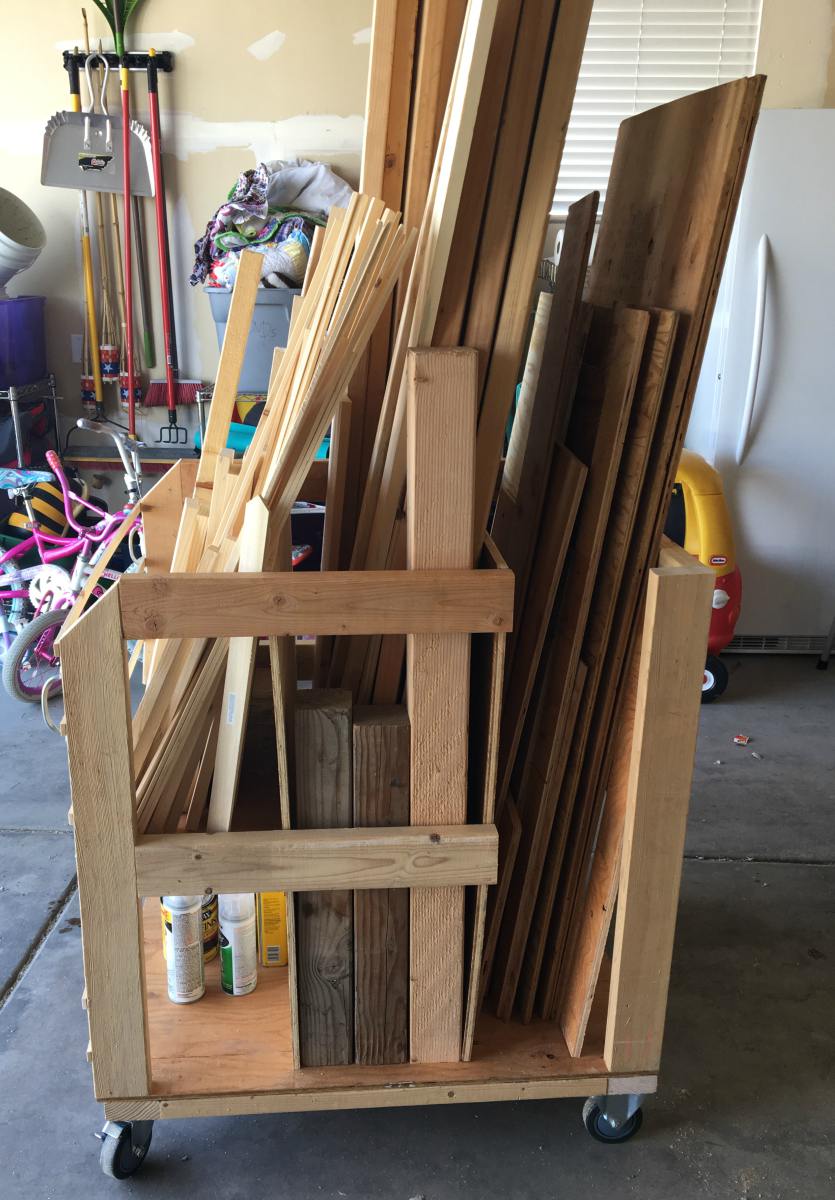
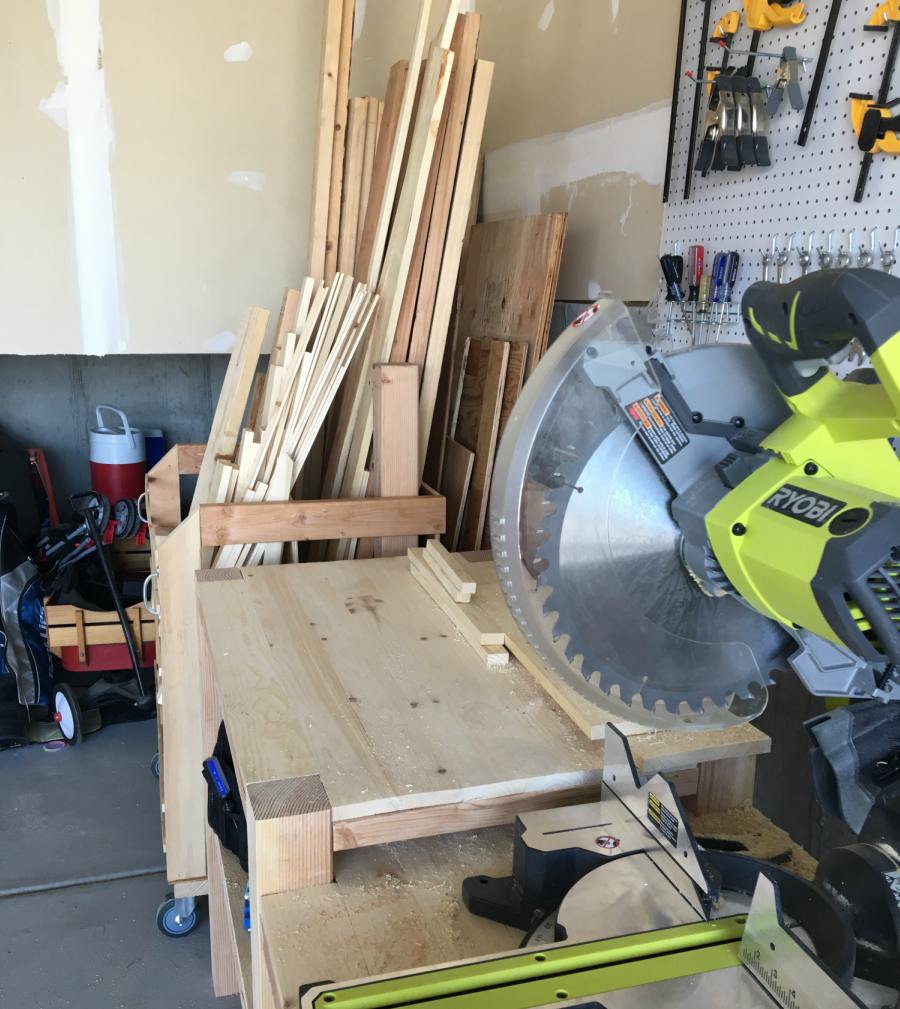
As you can see this cart slides perfectly between my miter saw bench and my bike storage.
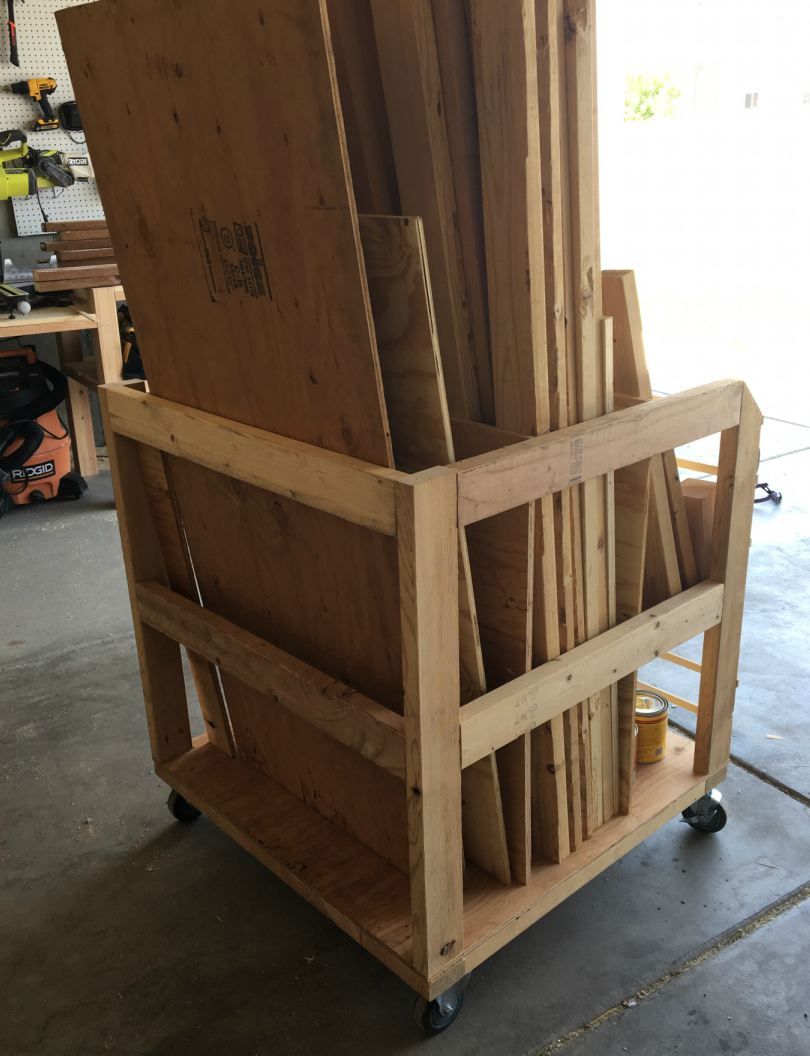
Since setting up my shop in my garage, my goal has always been to still be able to park my car in there too. No matter what. For that reason, I knew the cart needed wheels. I needed to be able to wheel it out to use it, and then tuck it back away to pull my car back in. I also knew I wanted an opening in my plywood section so I could easily slide it in and out of the cart. That’s how I ended up with this design.
Since the entire structure is 2×4’s and plywood, it’s sturdy. And the best part is I built most of it out of scrap wood I already had!
Scrap Wood Cart
Materials
- 2x4x8′ – 5
- 1x4x6′ – 1
- 4′ x 8′ sheet over 1/2″ plywood – you can buy this as a whole or as two 4×4 sheets. Whichever is cheaper/easier for you.
- 4’x4′ sheet of 1/2″ plywood
- 4 caster wheels – I would not recommend going cheap here. You’re going to want wheels that will support the weight of this cart. Two of mine are locking/swivel wheels and two are stationary wheels.
- 2 1/2″ pocket hole screws
- brad nailer and 1 1/4″ nails
- 1 1/2″ wood screws
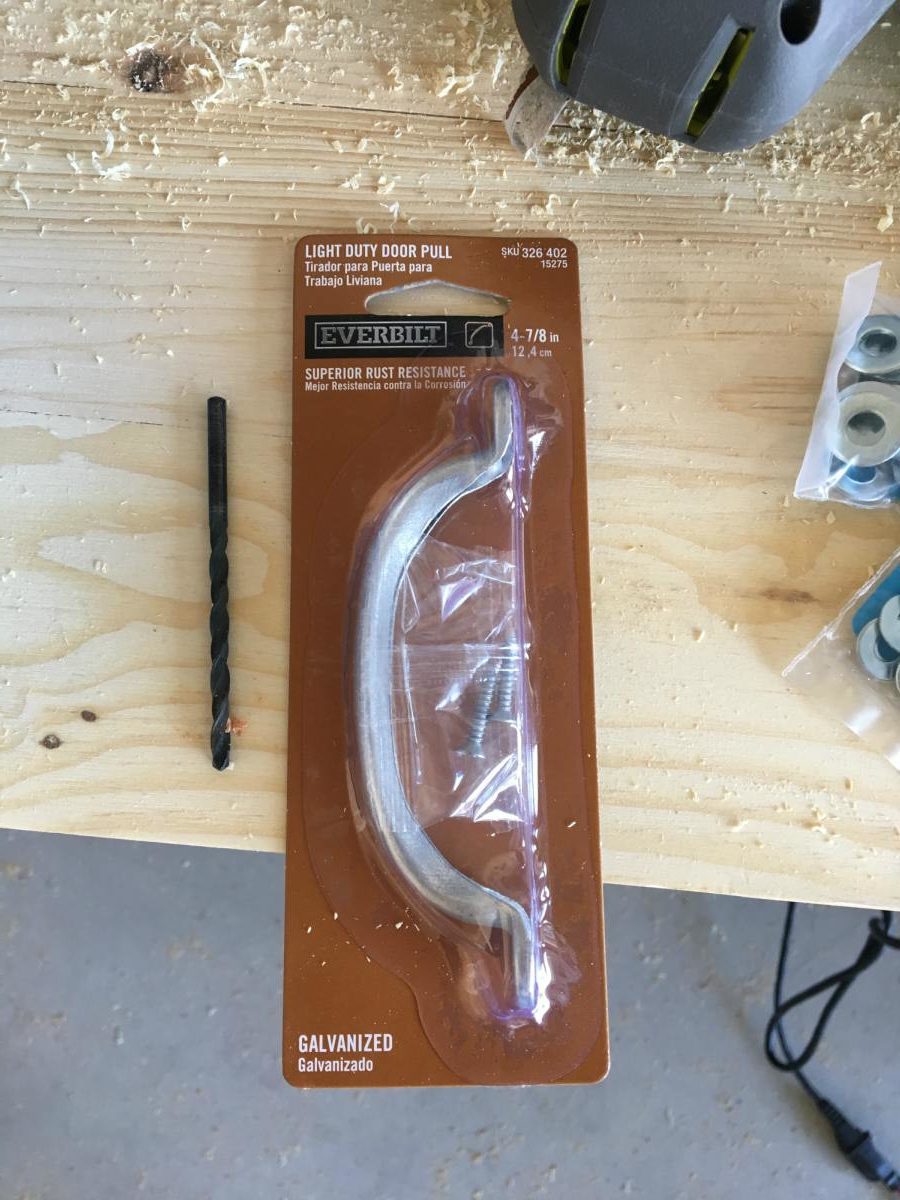
- two door pulls
- Optional: I had some 1/2″ scrap pieces I’d cut off of a 1×4 that I nailed to the front. You don’t have to do this but it helps keep the wood in place and I think it makes it look better. The strips are 1/2″x3/4″x36″
Cut List
- 2x4x36 – 2
- 2x4x33 – 2
- 2x4x34 – 4
- 2x4x21 1/2 – 2
- 2x4x29 – 5
- 36×36 plywood – 1
- 33×34 plywood – 2
- 12×33 plywood – 1
- 1x4x12 – 2
- 1x4x36 – 1

*Red S’s are for SCRAP! Arrows are for pocket holes*
Step 1:
Cut and Kreg all your 2×4’s. Wait to Kreg your plywood until later.
Step 2:
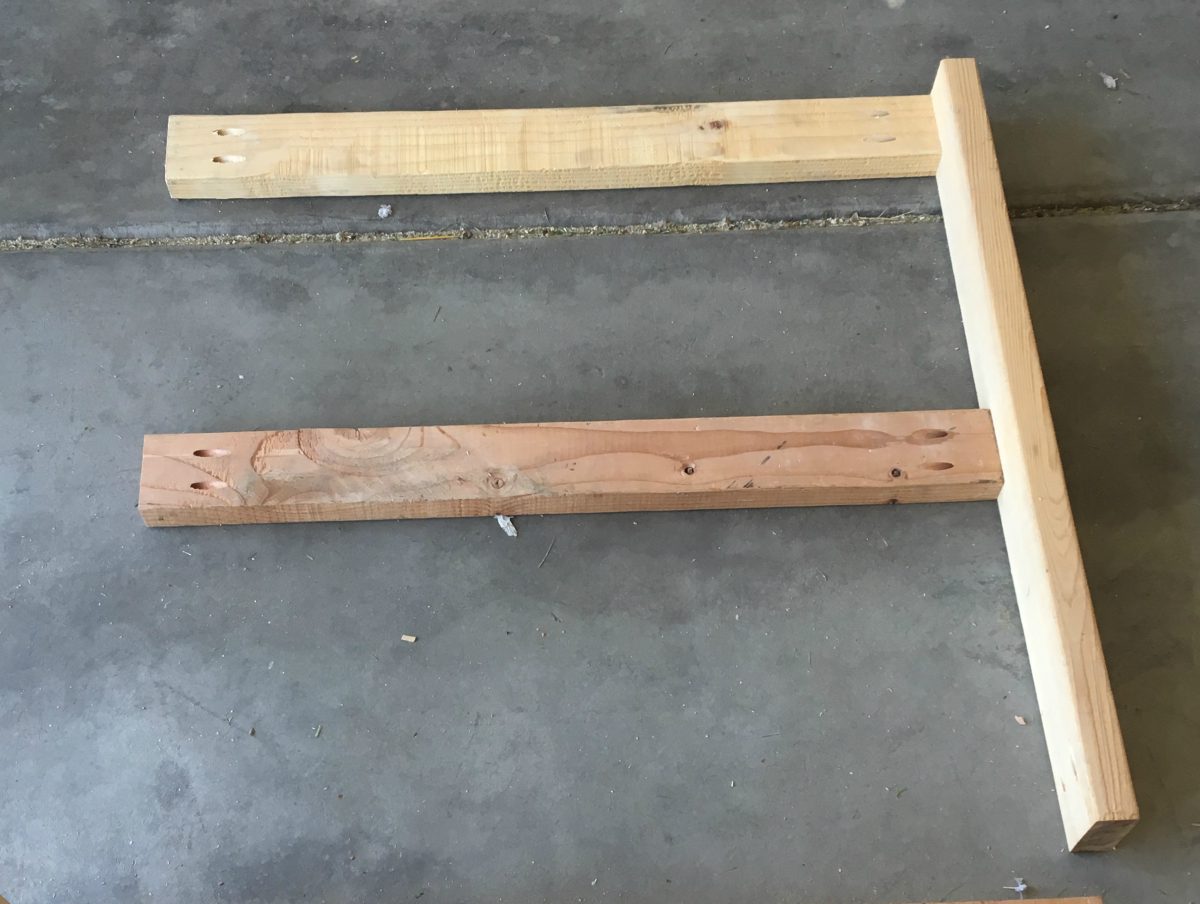
Build your base. Take your two 36” 2×4’s and three of your 29” 2×4’s and attach them in a rectangle with one of the 29” 2×4’s in the middle.
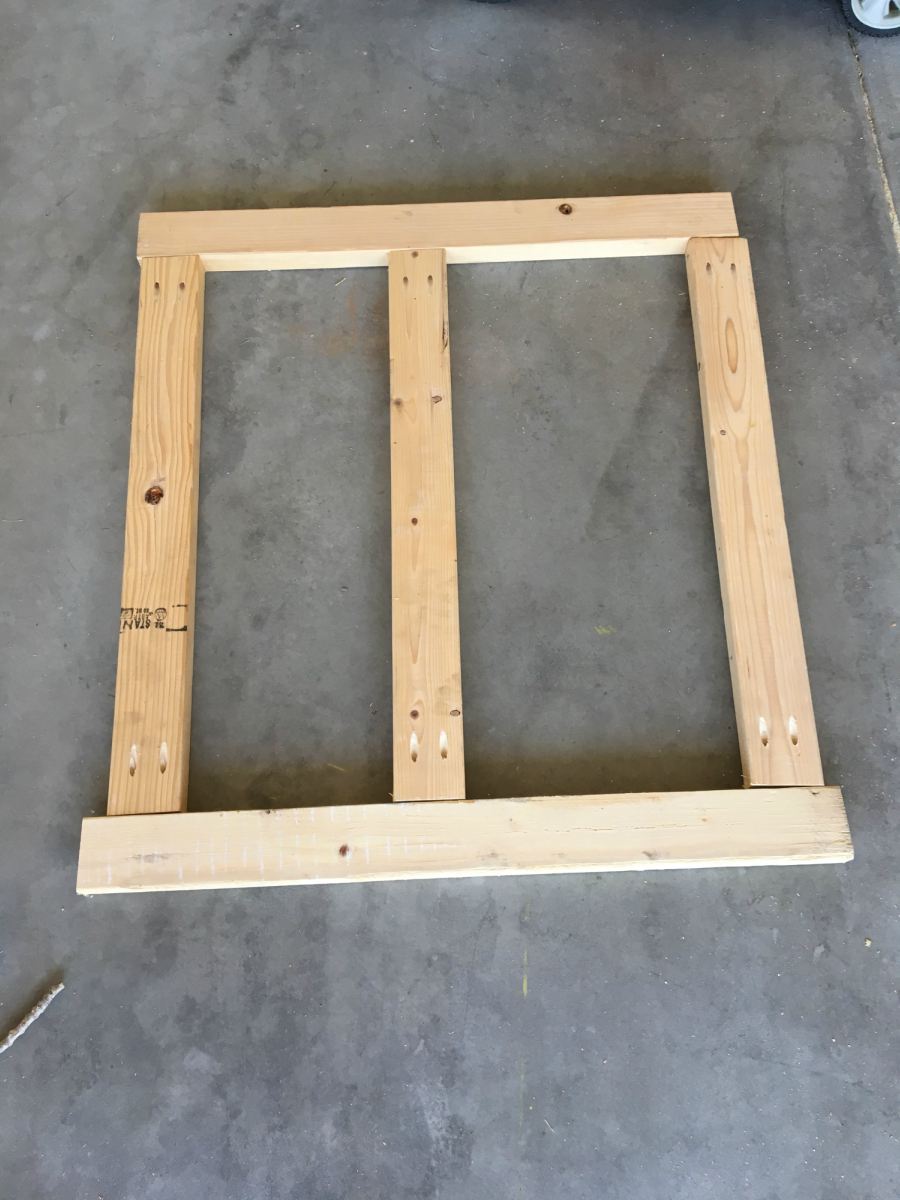
Only, do a better job of lining them up than I did here (yikes!)
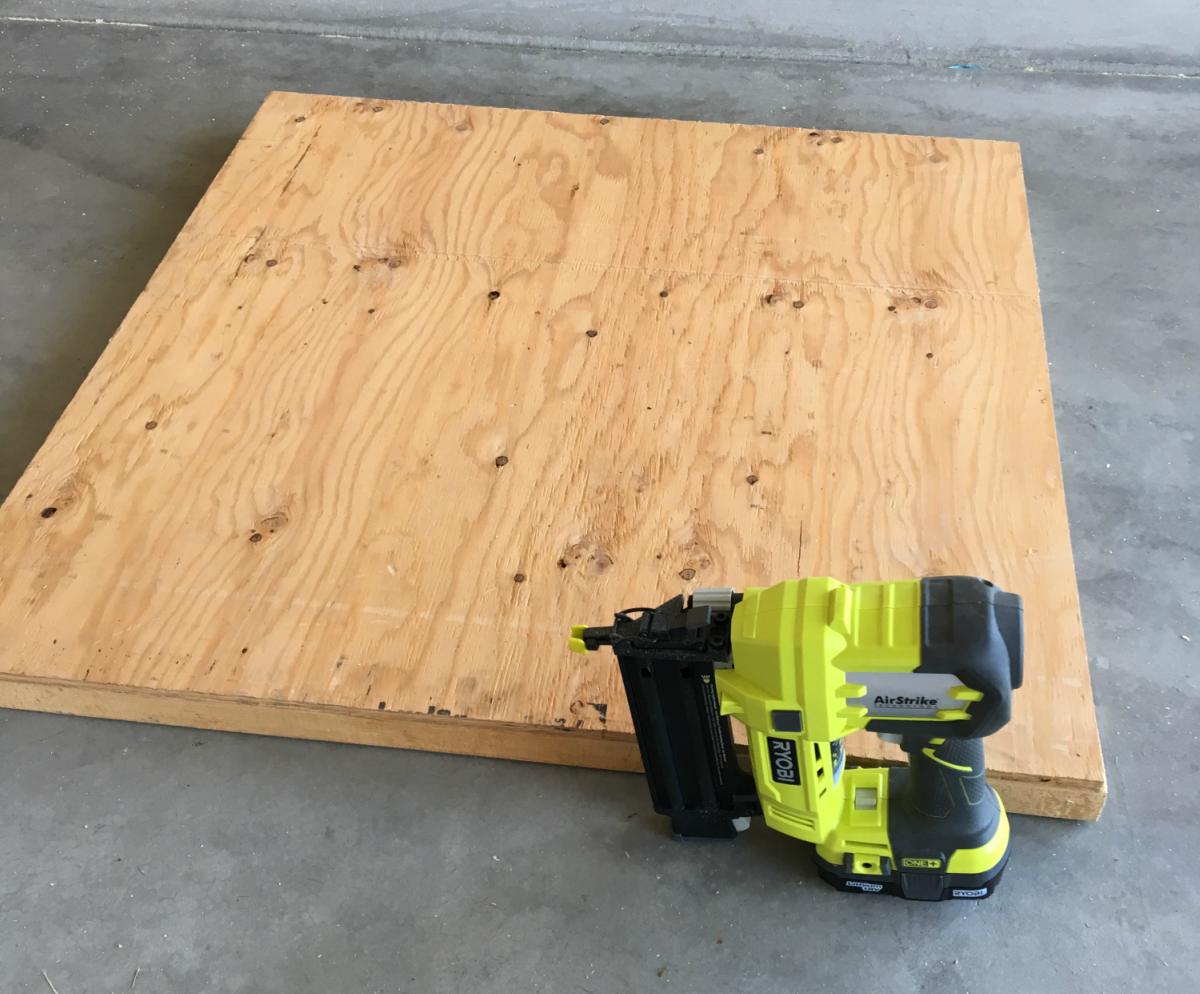
Step 3:
Lay the 36×36 plywood on top of your base, glue it down and nail all around it.
Step 4:
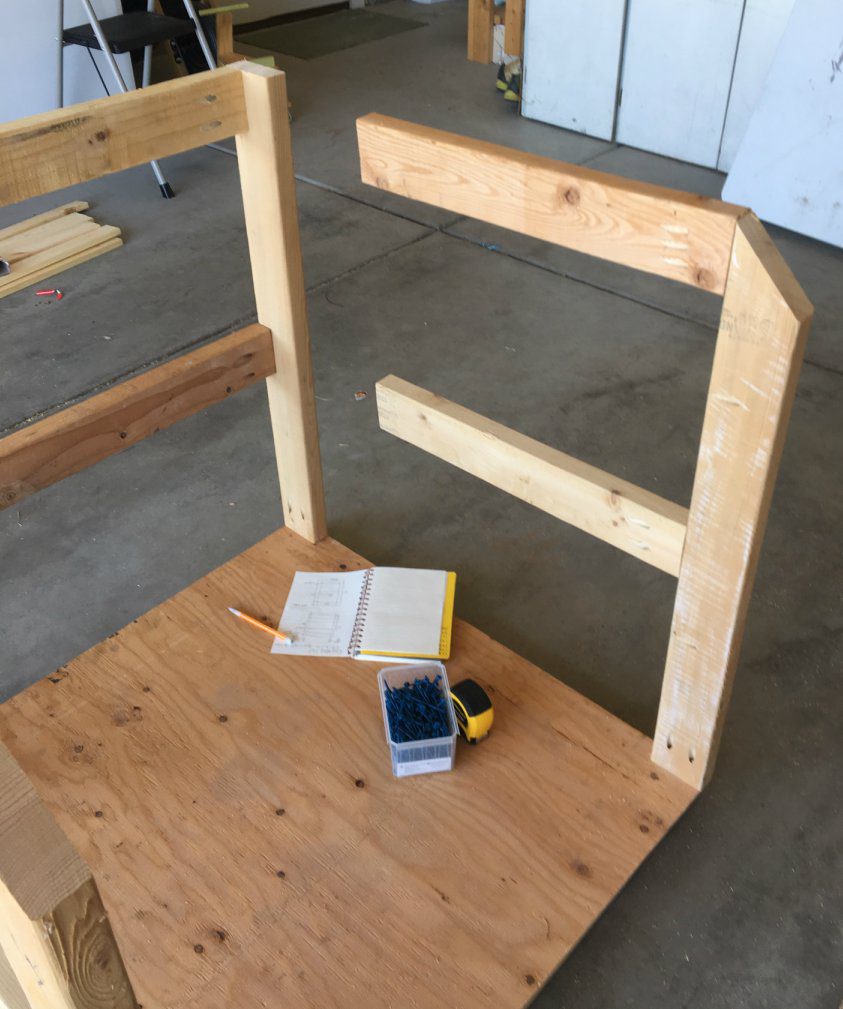
Take two of your 34” 2×4’s and cut one end at a 45 degree angle. These will be the two that face the front of the cart. (Refer to the photo after step 5 for the angle)
Step 5:
We’ll start with the left side of the cart. Attach your boards with the angled 34” board on the left, a normal 34” board on the right and two 29” boards horizontally between them. The top board, obviously, lines up with the top. The second board is 12 3/4” down from that one if you measure from the bottom of the top 2×4 to the top of the middle 2×4. Don’t attach to the base yet. It’s just there for reference.
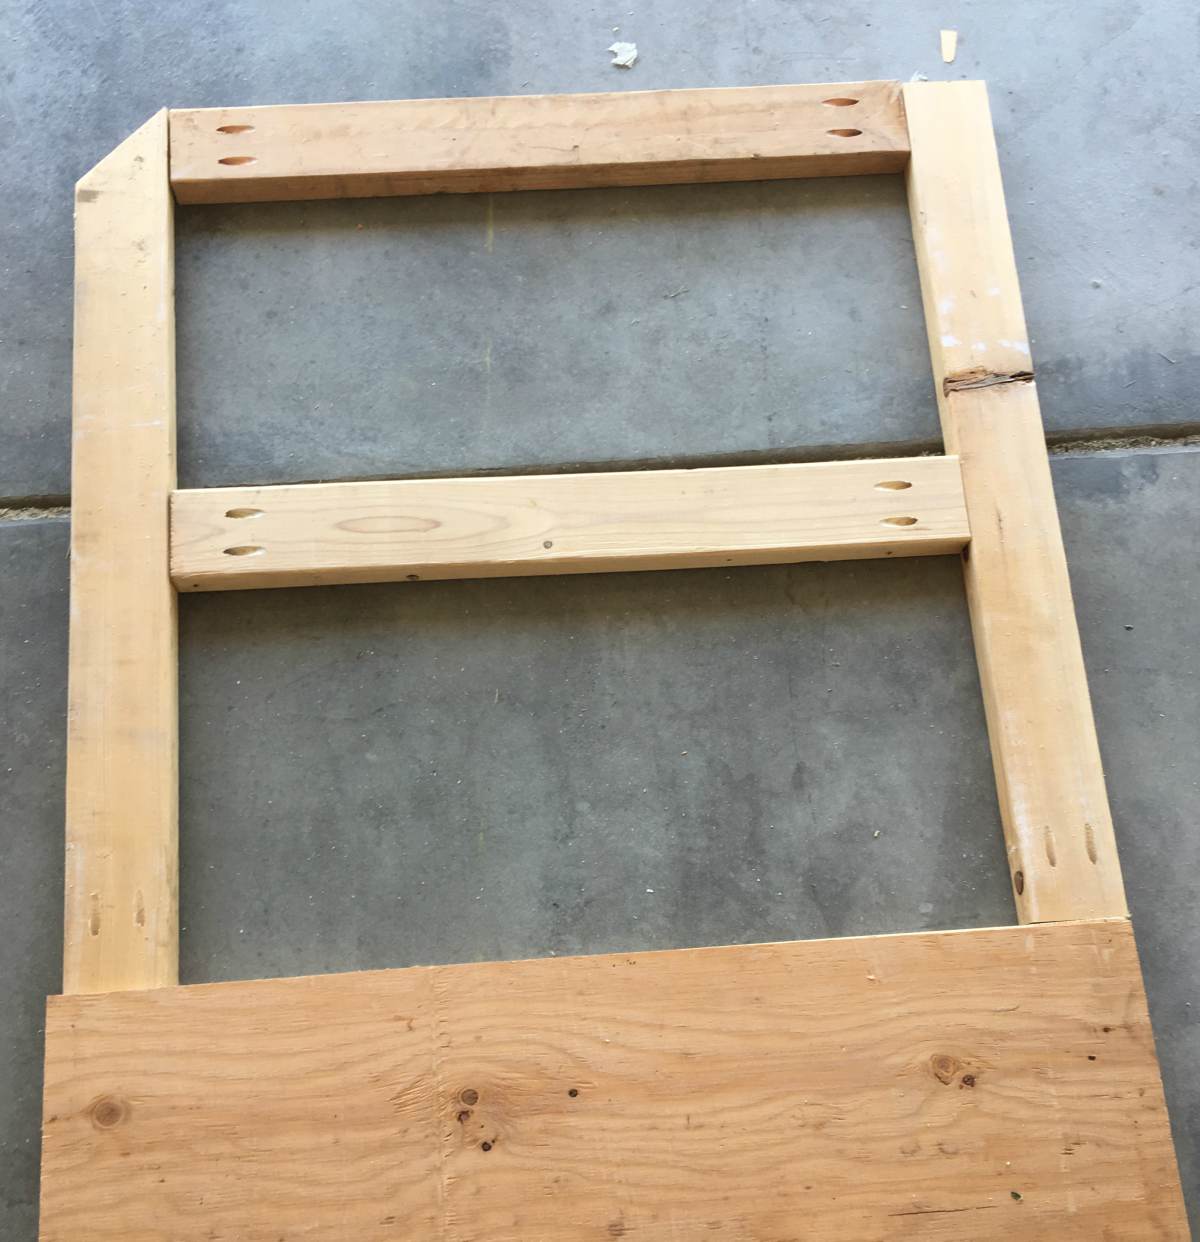
Step 6:
On to the right side. This side is a little different since we have to leave the opening for the plywood section. You’ll take your angled 34” board and attach one 21 ½” board to the top (the angled part) and attach the second one 12 ¾” down from that. Again, not attaching at the base yet.
Step 7:
Attach the back boards. Take your last 34” board and set it up on its side and attach your 33” boards at the top and 12 ¾” down from that.
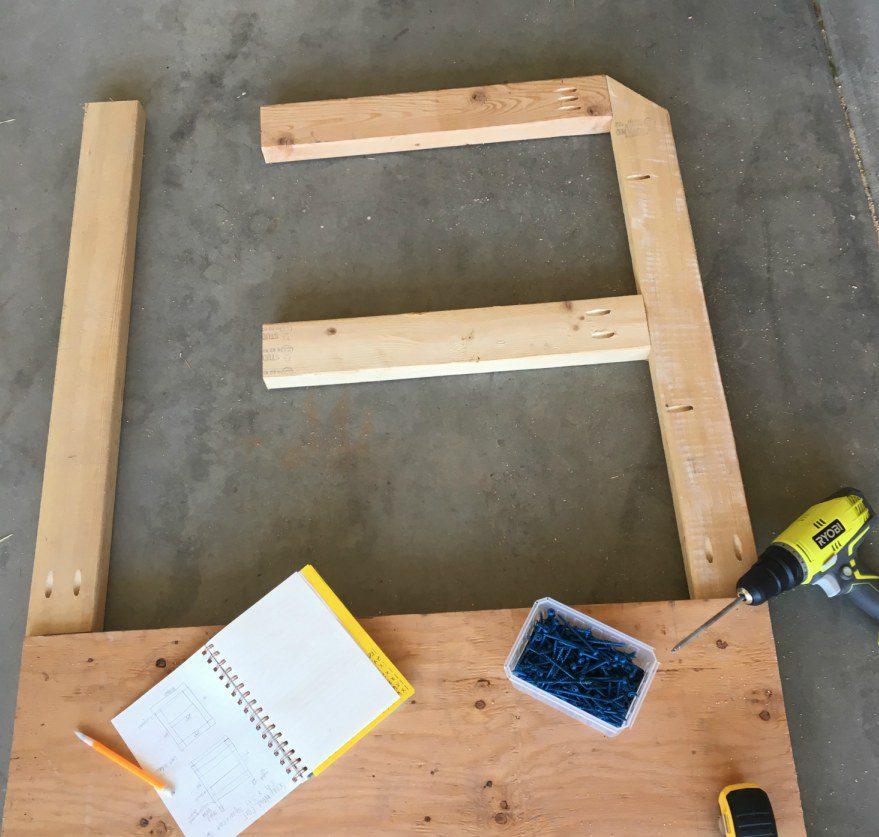
Step 8:
Stand each side up one at a time and attach them to the edges of the base. This is the left Side (Note: toys and stroller are not required to complete this build).
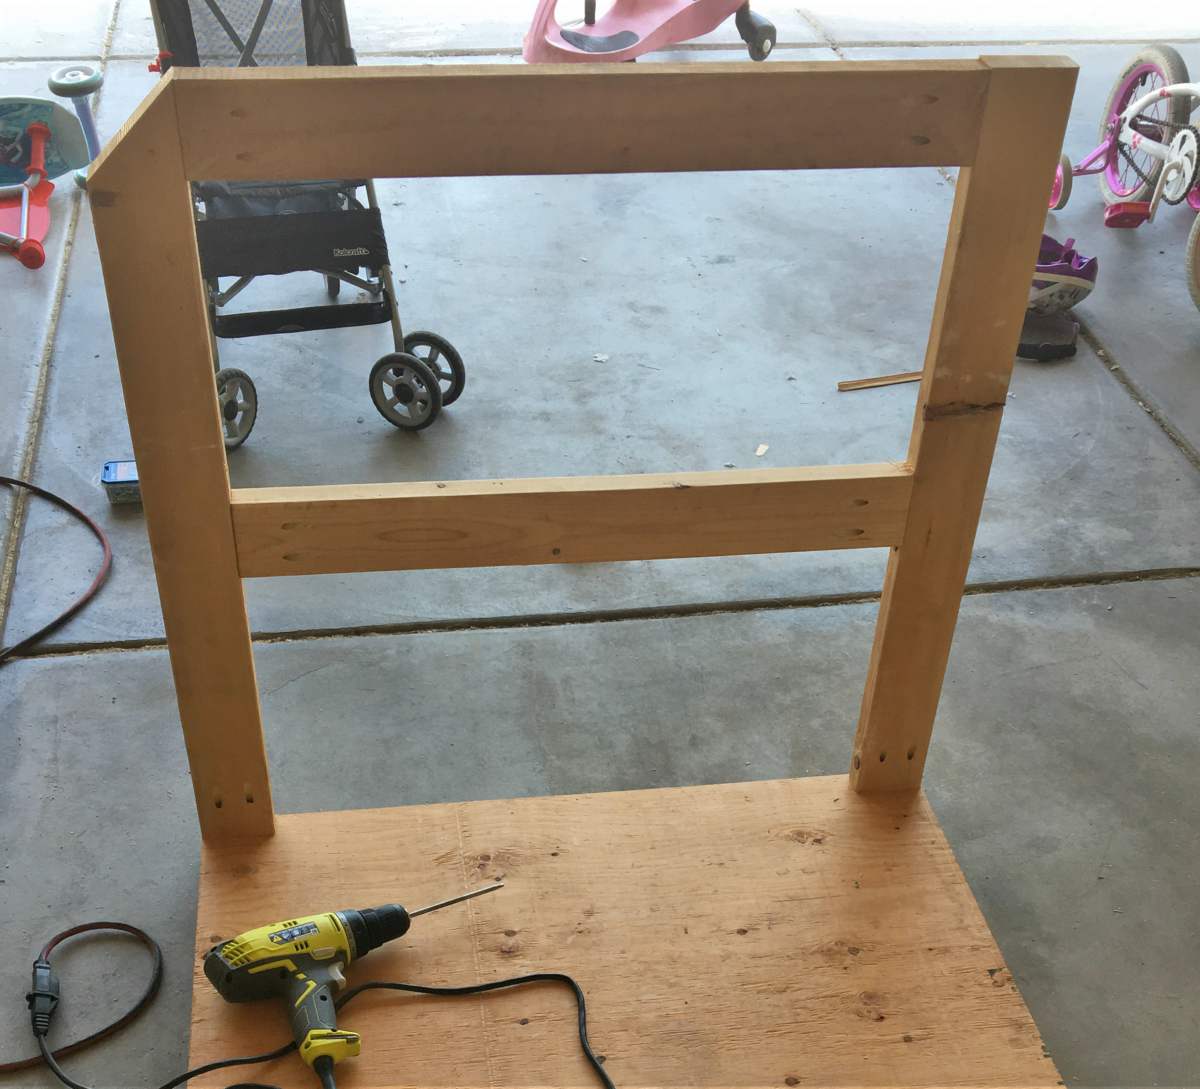
When you do the back, you’ll attach it to the base and to the left side

Right side.
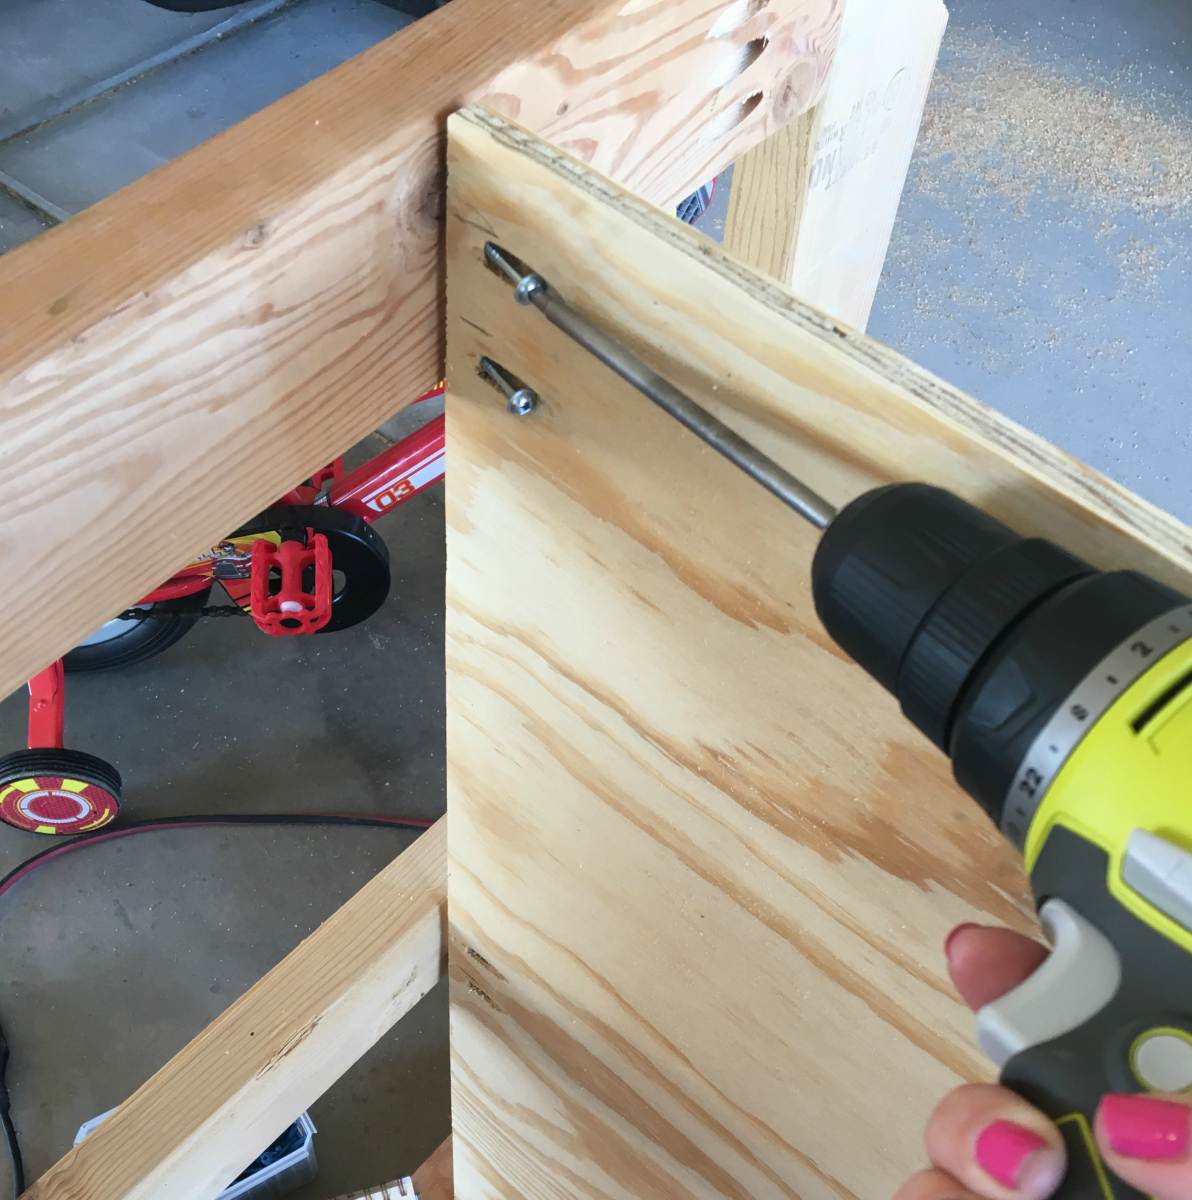
Step 9:
Now you need to Kreg your plywood. It’s easiest to do this if you just slide them into place and mark where they meet the 2×4’s. Then after you drill you holes you can slide them back into place and attach the screws. The first sheet is 12” back from the front, and the second sheet will meet up with the opening, which should be 12” back from the first sheet.
Step 10:
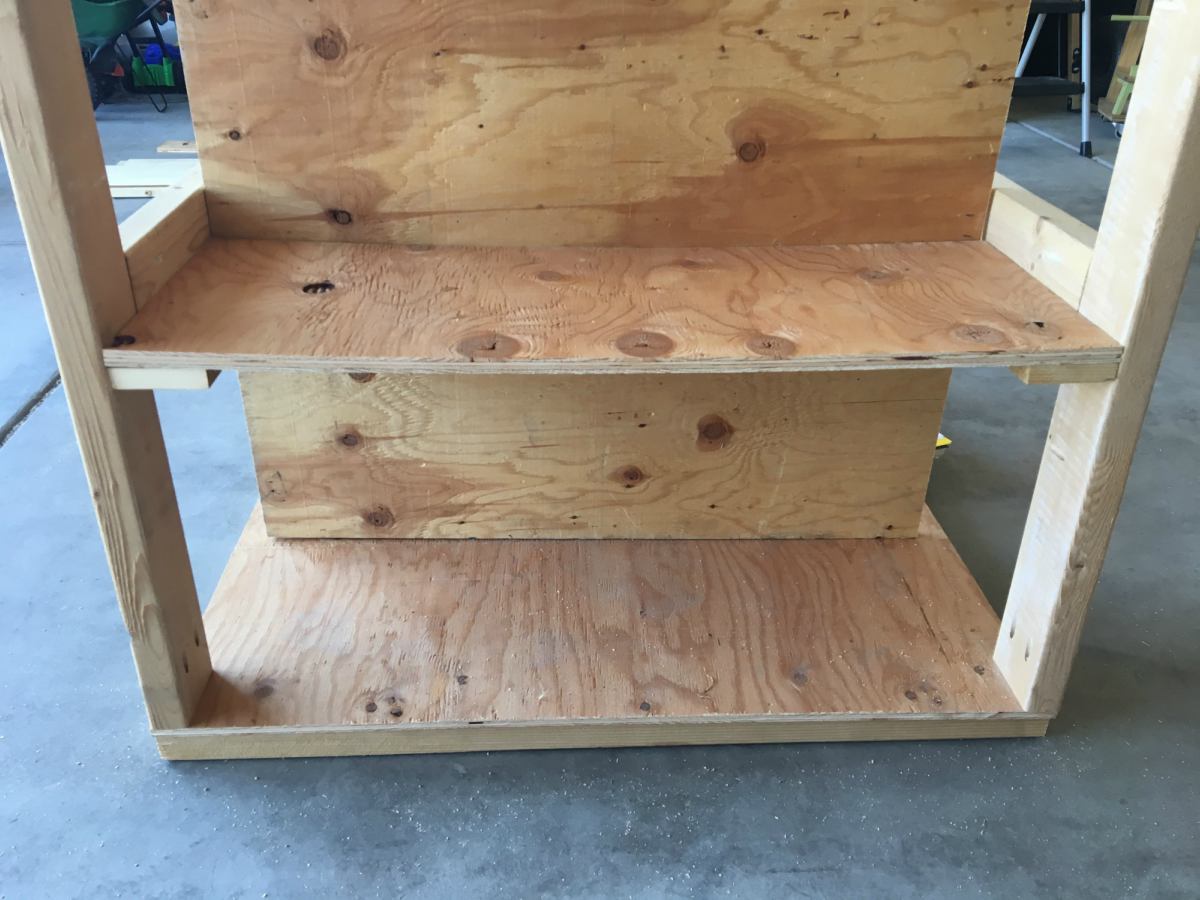
Take your 1x4x12 and attach it at the front on the middle 2×4. This is your shelf support.
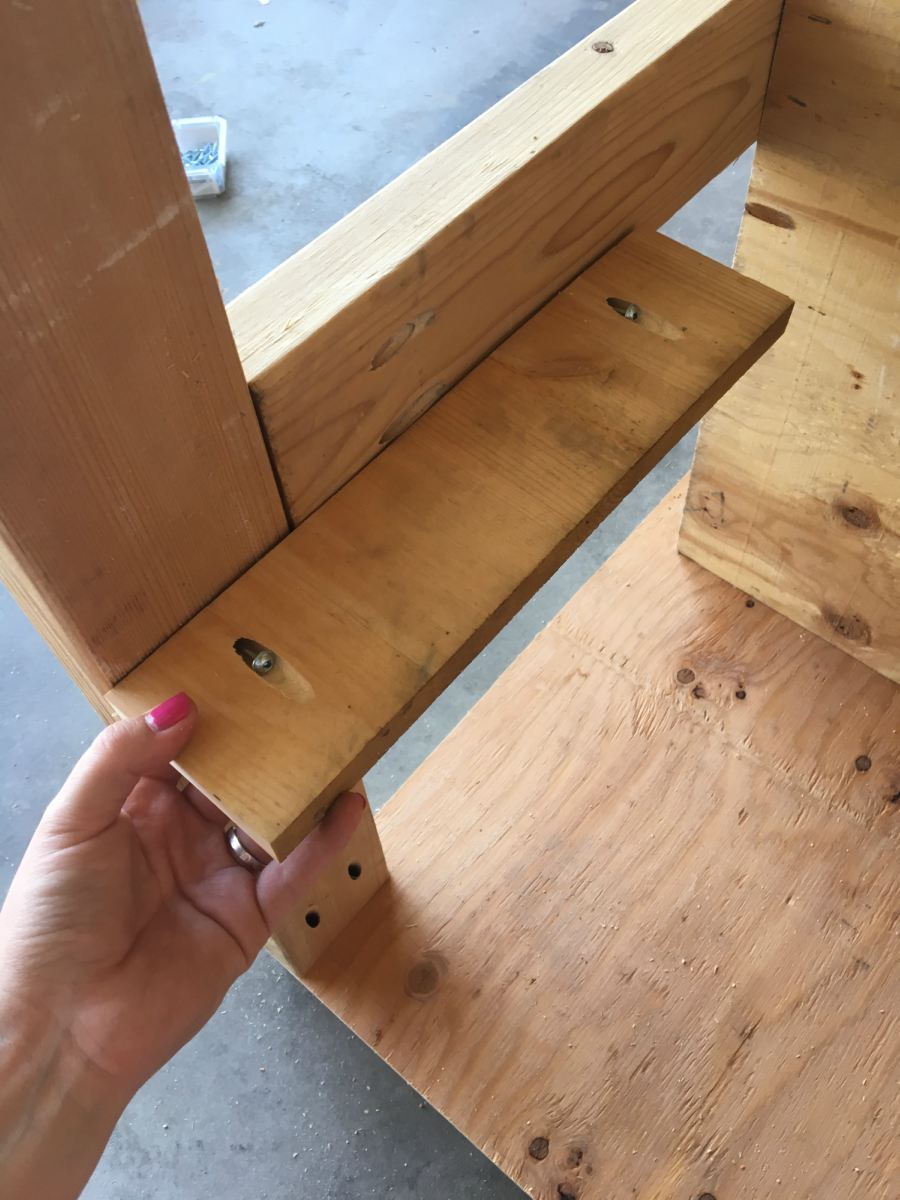
You’ll do this on the right side and then left side. Then slide your shelf onto the 1×4’s and use your brad nailer to nail it into place.
Step 11:
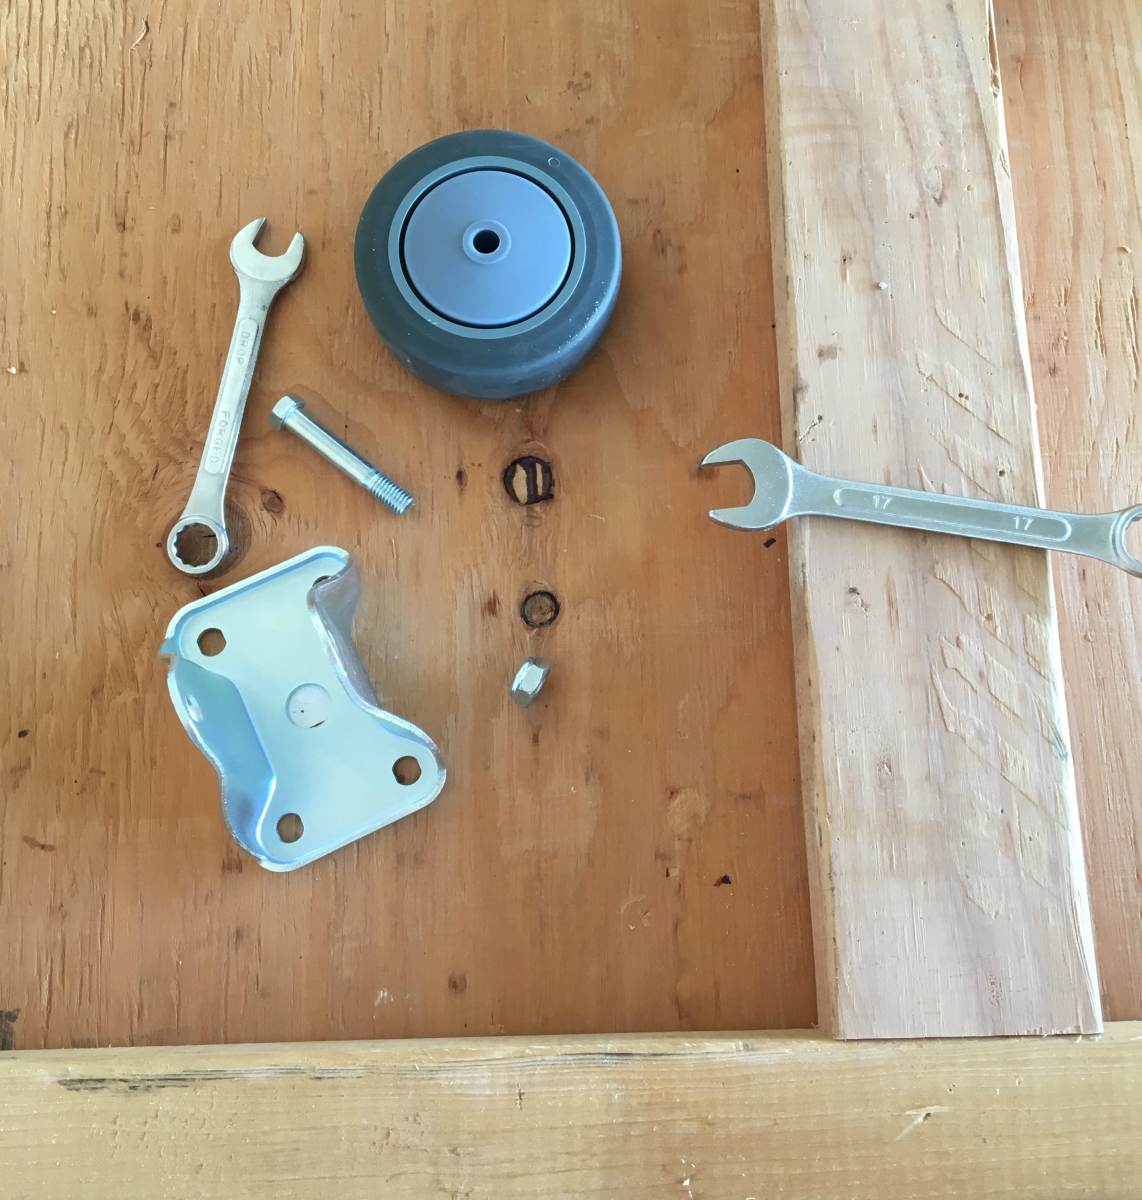
Flip the whole lumber storage cart upside down and install your caster wheels. My two swivel wheels are on the front. Since they move, they are easy peasy to install.
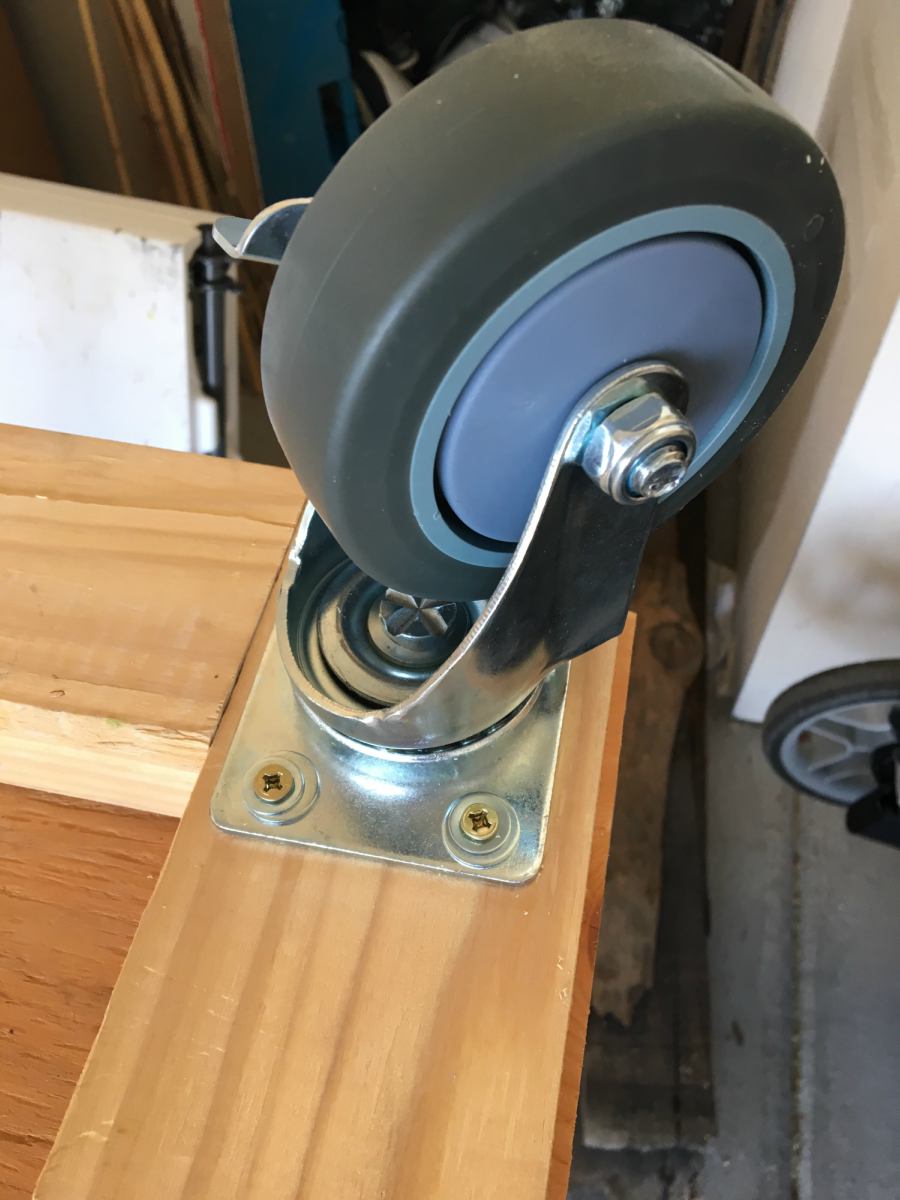
The stationary wheels on the back are a different story. In order to screw those in, I had to take them apart.
Step 12:
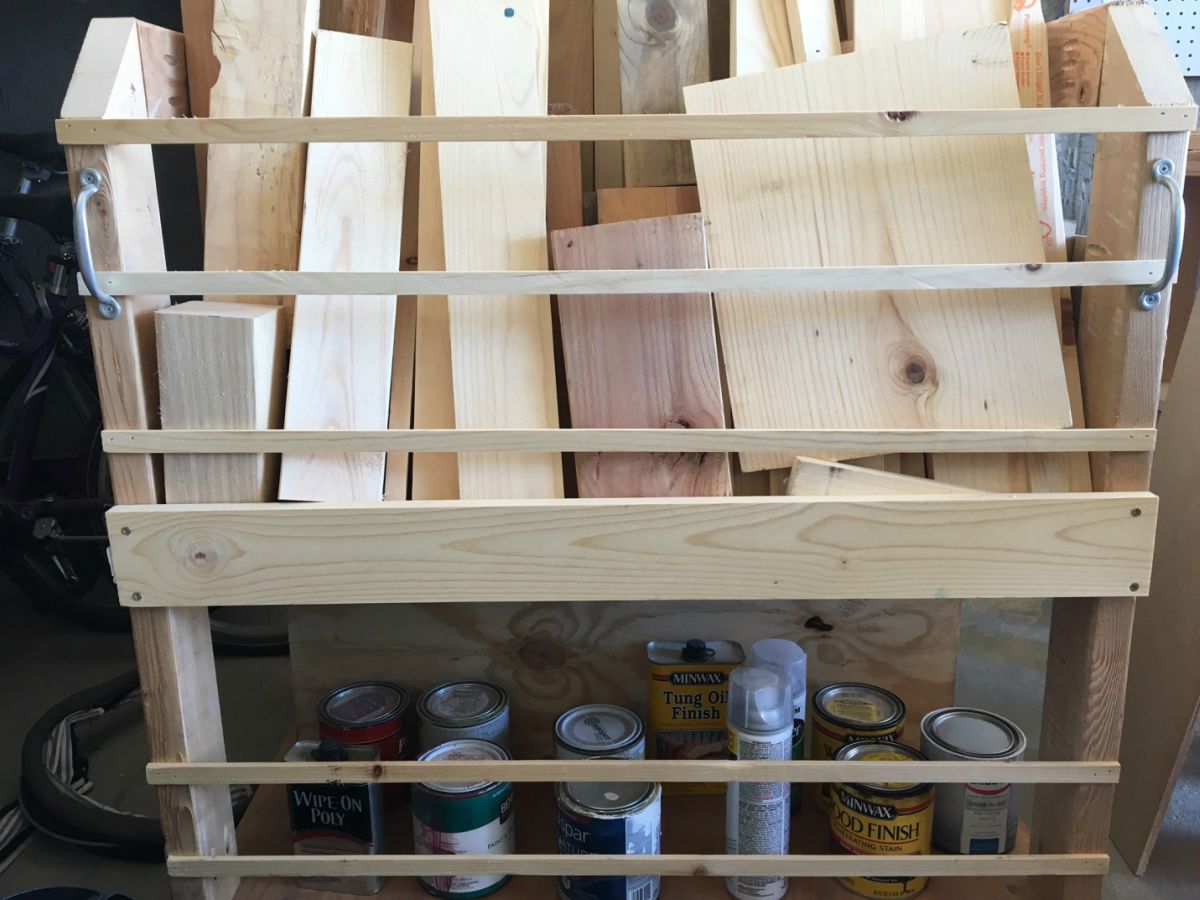
(Optional) Flip back over onto the wheels and lock them so it doesn’t go sliding around on you. Take your ½ strips and nail them across the front however you would like. Here’s how I did mine:

I left a little bit of a gap on the bottom so it would be easy to reach in and grab paint/stain cans.
After this step I realized I needed another piece across my middle shelf to keep the smaller boards from sliding out. This is where your last 1×4 comes in.
Step 13:
Take your final 1×4 and your wood screws and attach it at the bottom of the middle shelf.
Step 14:
Attach your pull handles directly below the angles on the front.
Step 15:
This is the BEST part! Fill that baby with ALL of your mangled mess of a scrap wood pile and enjoy the organized mobility of this lumber storage cart!
Thanks for following along! Don’t forget to share your photos, PIN this project, and tell your friends!